Crochet Comfortable Slippers – A Step-by-Step Guide
Nothing beats the feeling of slipping your feet into a cosy, handmade pair of crochet slippers. Whether you’re making them for yourself or as a thoughtful gift, these comfortable yellow crochet slippers will add warmth and cheer to your home life. This pattern is beginner-friendly but also offers room for customisation for more experienced crocheters.
Materials You’ll Need
Before you begin, gather the following supplies:
- Yarn: Worsted weight (Size 4) yarn in yellow (or any colour of your choice). A soft, durable yarn such as acrylic or cotton blend works well for everyday use.
- Crochet Hook: 5mm (H-8) hook (adjust hook size based on tension).
- Scissors: For cutting yarn.
- Yarn Needle: For weaving in ends and sewing parts together.
- Stitch Markers (Optional): To help keep track of rounds and stitch counts.
- Non-Slip Sole Fabric (Optional): If you want to add extra durability and grip.

Crochet Stitches & Techniques (US Terms)
If you’re new to crochet, here are the basic stitches used in this pattern:
- Chain (Ch): Yarn over, and pull through the loop.
- Single Crochet (Sc): Insert hook, yarn over, pull through, yarn over again, pull through both loops.
- Half Double Crochet (Hdc): Yarn over, insert hook, yarn over, pull through, yarn over again, pull through all loops on hook.
- Slip Stitch (Sl st): Insert hook, yarn over, and pull through both loops.
- Increase (Inc): Work two stitches into the same stitch.
- Decrease (Hdc2tog – Half Double Crochet Two Together): Yarn over, insert hook, yarn over, pull through, insert hook into next stitch, yarn over, pull through, yarn over again, pull through all loops.
Step-by-Step Pattern
This slipper is made in three main parts: the sole, the upper body, and the ankle cuff.
Step 1: Crochet the Sole
The sole provides the foundation for the slipper. You will make two soles for each foot—one for the bottom and another for reinforcement.
-
Start with a foundation chain:
- Ch 11 (or adjust based on foot size).
- If making a larger slipper, increase the starting chain length.
-
Row 1:
- Hdc in the second chain from the hook and in each chain across. (10 hdc)
- Ch 1, turn.
-
Rows 2-6 (or until the desired length is reached):
- Hdc in each stitch across.
- Ch 1, turn.
-
Border Round:
- Work evenly around the edges of the sole with hdc stitches.
- Place 3 hdc in each corner to round the edges.
- Join with a slip stitch and fasten off.
Tip: Make a second identical sole but do NOT fasten off the second one, as it will serve as the working base for the slipper’s upper body.
Step 2: Crochet the Upper Part of the Slipper
Now that the sole is ready, it’s time to build the sides and top of the slipper.
-
Attach yarn to the back of the sole and work sc stitches evenly around the edge. This forms the base for the slipper’s upper body.
-
Rounds 1-4:
- Work hdc in each stitch around, joining with a sl st at the end of each round.
- This creates the sides of the slipper.
-
Shaping the Toe Area:
- Begin decreasing at the front of the slipper.
- For the next 2-3 rounds, work hdc2tog over the toe stitches to gradually close the front.
- Continue decreasing until the top of the foot is snug and well-shaped.
-
Final Round:
- Work sc around for a neat, finished edge.
- Fasten off and weave in any loose ends.
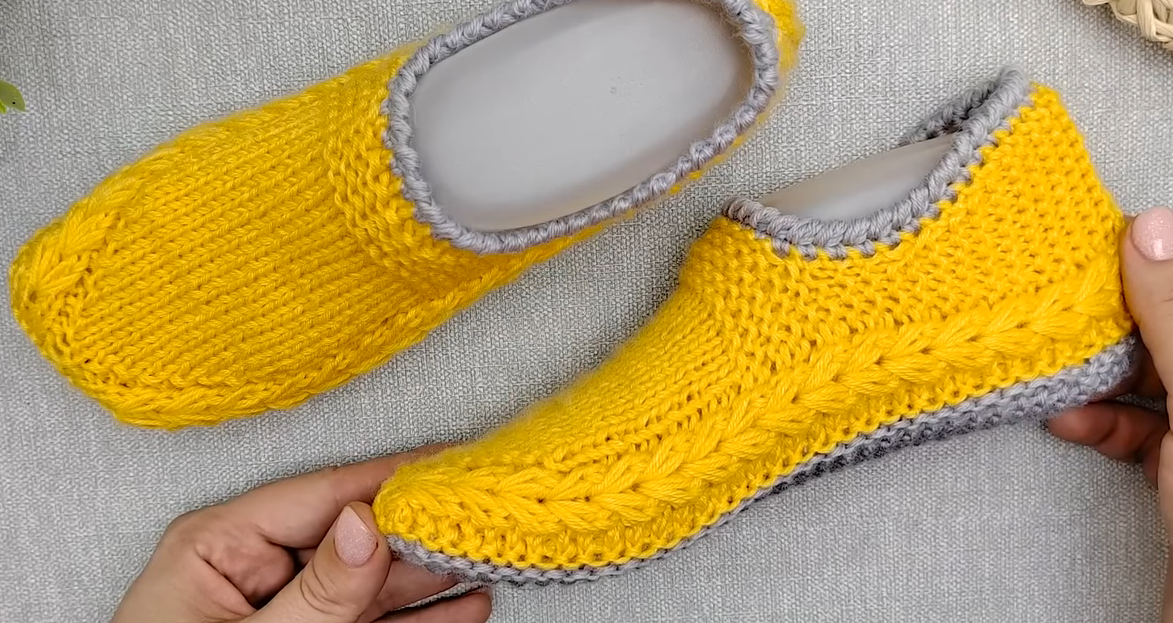
Step 3: Crochet the Ankle Cuff (Optional for Extra Comfort)
For a snug, sock-like fit, you can add a ribbed ankle cuff.
- Join yarn at the ankle area.
- Work 1-2 rounds of ribbing using front post and back post double crochet stitches to create the stretch.
- Fasten off and weave in all loose ends.
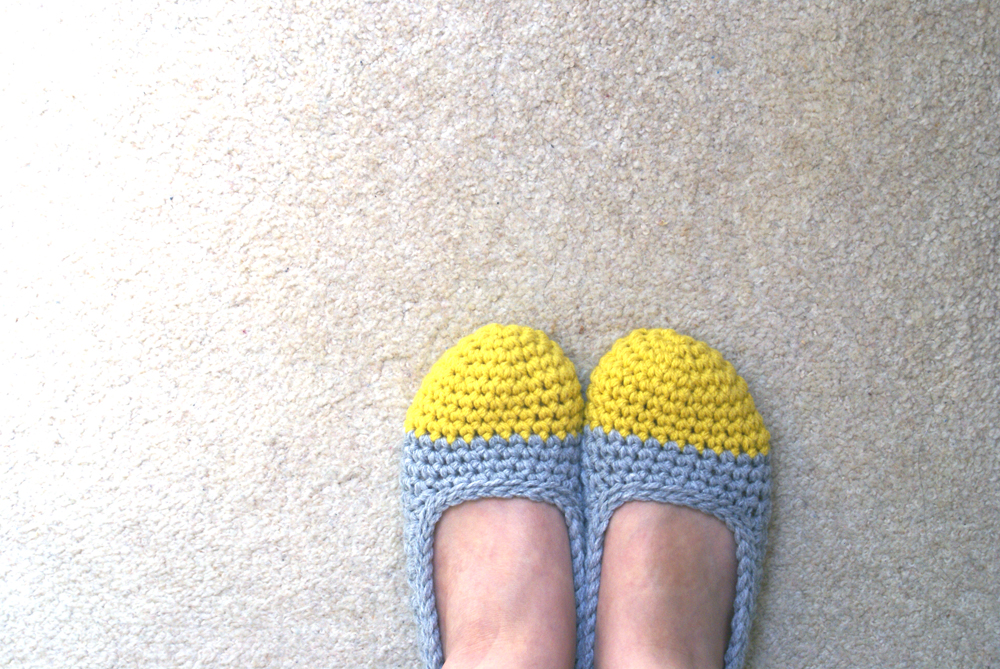
Finishing Touches
To enhance the look and durability of your slippers, consider the following finishing touches:
- Non-Slip Sole: If you want extra grip, sew a piece of felt, rubber, or a non-slip sole to the bottom.
- Decoration: Add buttons, bows, pompoms, or flowers for a personal touch.
- Adjusting Fit: If the slipper is too tight or loose, modify the stitch count accordingly.
Customisation Tips
- For Larger Sizes: Increase the number of chains in the foundation row and add extra rows to the sole.
- For Smaller Sizes: Reduce the number of stitches in the sole and upper body.
- For a Cosier Feel: Use a fluffy yarn like chenille or velvet for extra warmth.
- For a Sturdier Slipper: Hold two strands of yarn together while crocheting for a thicker sole.
Care Instructions
To keep your handmade slippers in the best condition:
- Hand wash with mild detergent and lay flat to dry.
- Avoid excessive stretching to maintain the shape.
- If using machine wash, choose a gentle cycle and use a laundry bag to prevent wear.
Video Tutorial:
Conclusion
These cosy crochet yellow slippers are easy to make and customisable for any foot size. Whether you make them as a gift or for yourself, they bring comfort and style to your home. Try experimenting with different colours and embellishments to make them truly unique!