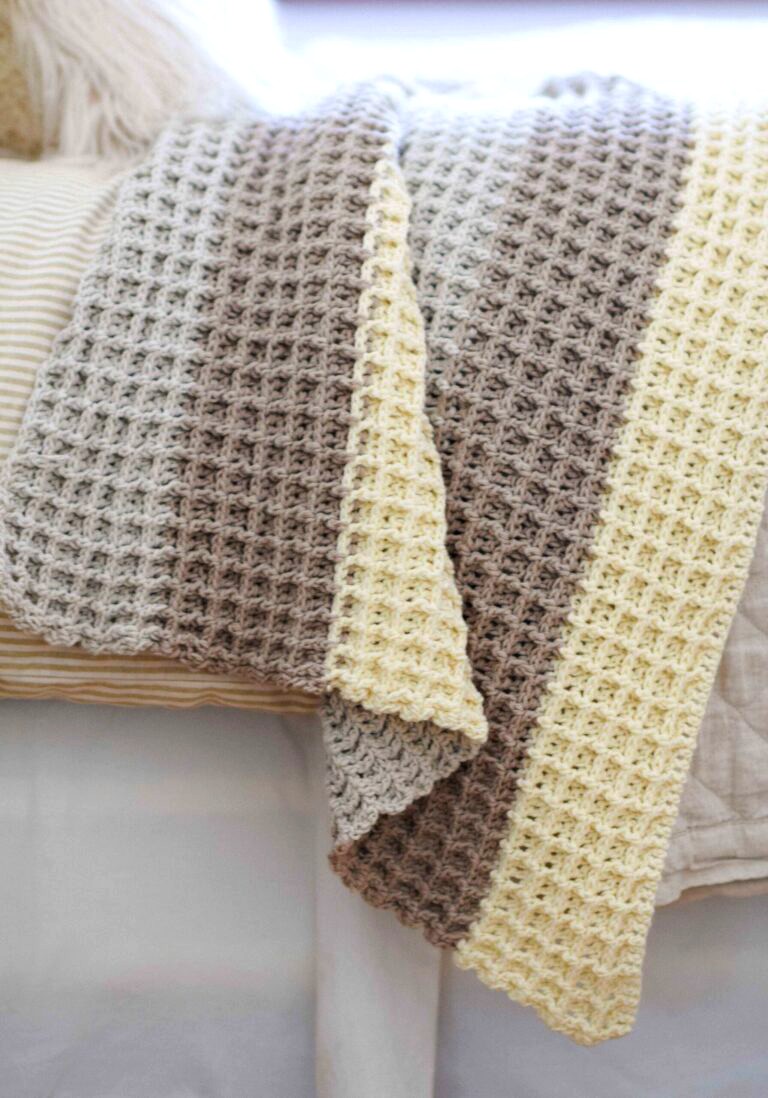
The waffle stitch is a beautifully textured crochet stitch that creates a thick, cozy fabric with a grid-like, raised square pattern, resembling a waffle. It is commonly used for blankets, scarves, dishcloths, sweaters, and even pillows.
In this guide, you will learn:
✅ How to crochet the waffle stitch step by step.
✅ Tips to make your project look professional.
✅ How to modify the pattern for different projects.

Materials Needed
To crochet the waffle stitch, you will need:
-
Yarn – Any weight works, but medium-weight yarn (such as worsted) is recommended for beginners.
-
Crochet hook – Use a hook size that matches your yarn weight (check the yarn label for recommendations).
-
Scissors – For cutting the yarn.
-
Tapestry needle – For weaving in the ends.
💡 Tip: If you are new to this stitch, start with light-colored yarn so you can easily see your stitches.
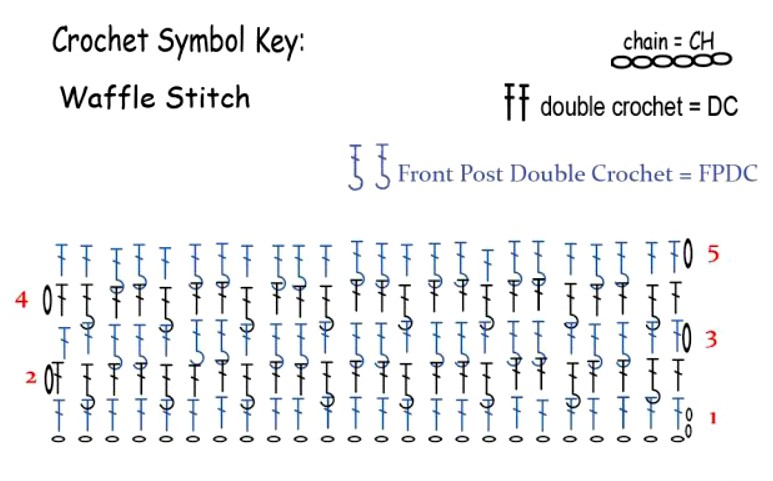
Understanding the Waffle Stitch Structure
The waffle stitch is created using double crochet (dc) stitches and front post double crochet (fpdc) stitches.
-
Double crochet (dc): A standard tall stitch that gives height to the pattern.
-
Front post double crochet (fpdc): A variation of the double crochet that wraps around the post of the stitch below, creating the raised texture.
By alternating these stitches in a specific pattern, we get the deep ridges and squares that resemble a waffle.

Abbreviations (US Terminology)
Before starting, familiarize yourself with these abbreviations:
-
ch – chain
-
dc – double crochet
-
fpdc – front post double crochet
-
st(s) – stitch(es)
-
rep – repeat
-
turn – turn your work to start the next row
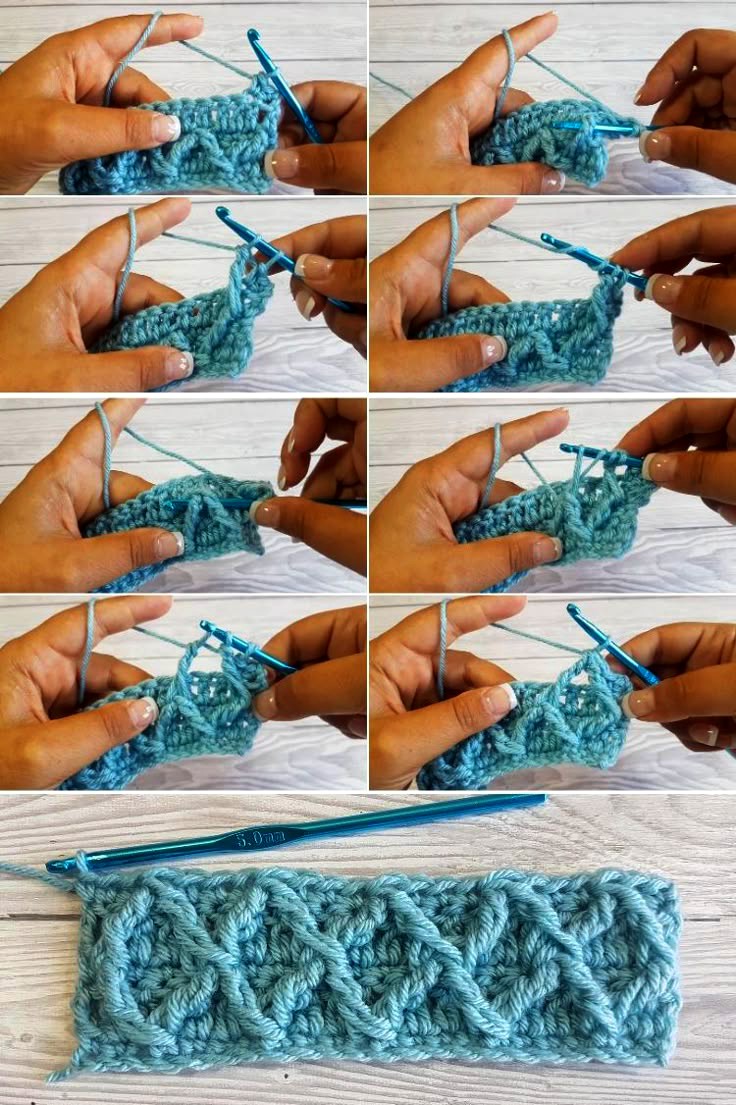
Step-by-Step Instructions
Step 1: Foundation Chain
Start by making a foundation chain that is a multiple of 3 + 2 extra chains.
👉 Example: If you want a medium-sized swatch, chain 32 (30 + 2 extra chains).
💡 Tip: Keep your chains loose so they don’t tighten the base of your work.
Step 2: Row 1 – Base Row
-
Double crochet in the third chain from the hook (the skipped chains count as the first dc).
-
Continue making double crochets across the row.
-
At the end of the row, chain 2 and turn your work.
This row sets up a foundation for the waffle pattern.
Step 3: Row 2 – Pattern Setup
-
Ch 2 (counts as first dc), turn.
-
Dc in the next stitch.
-
Fpdc around the next stitch (inserting hook around the post of the dc from the row below, instead of the top loops).
-
Repeat (1 dc, 1 fpdc) across the row.
-
End with a dc in the last stitch (top of the turning chain).
Step 4: Row 3 – Creating the Waffle Texture
-
Ch 2 (counts as first dc), turn.
-
FPDC around the first stitch.
-
Dc in the next stitch.
-
Repeat (1 fpdc, 1 dc) across the row.
-
End with an fpdc in the last stitch.
Step 5: Repeating the Pattern
Now that the pattern is set, continue alternating Row 2 and Row 3 to create the waffle texture.
Your pattern will look like this:
-
Row 2: (1 dc, 1 fpdc) across
-
Row 3: (1 fpdc, 1 dc) across
-
Repeat until you reach your desired length.
💡 Tip: If you are making a blanket or a large project, use stitch markers at the beginning of rows to keep track of where you are.
How to Finish Your Project
-
Once you have reached your desired length, end with a regular double crochet row to make the edges even.
-
Fasten off by cutting the yarn and pulling the tail through the last loop.
-
Weave in loose ends using a tapestry needle.
Tips for a Neat Waffle Stitch
✔️ Use a slightly larger hook if your stitches feel too tight.
✔️ Count your stitches to avoid mistakes—each row should have the same number of stitches.
✔️ Block your work (especially for blankets) to help the texture settle.
✔️ Choose a yarn with good stitch definition for the best texture effect.
Waffle Stitch Variations
Once you’ve mastered the basic waffle stitch, you can try these variations:
1. Color Changes
-
Change colors every few rows to create a striped effect.
2. Border Addition
-
Add a single crochet border for a clean finish, or a shell stitch border for a decorative touch.
3. Use in Different Projects
-
Try making a waffle stitch dishcloth, scarf, sweater, or even a baby blanket!
Common Mistakes and How to Fix Them
❌ Edges looking uneven?
✔️ Make sure to always crochet into the top of the turning chain at the end of the row.
❌ Forgetting a stitch?
✔️ Count your stitches regularly—each row should have the same stitch count.
❌ Too tight or loose?
✔️ Adjust your hook size to match your tension.
Video Tutorial:
Certainly! If you’re seeking a YouTube video tutorial on the waffle stitch crochet pattern, here are some excellent options to guide you:
“How to crochet the Waffle stitch” by Bella Coco
This tutorial provides a clear, step-by-step demonstration of the waffle stitch, making it suitable for both beginners and experienced crocheters.
Final Thoughts
The waffle stitch is an easy but stunning crochet pattern that works well for various projects. Once you get the hang of alternating dc and FPDC, it becomes a relaxing and rewarding stitch to use.