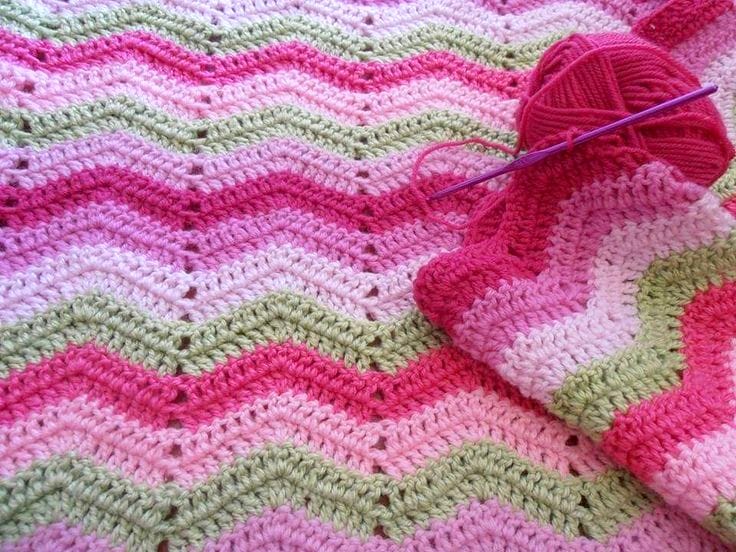
The ripple pattern, also known as chevron or wave stitch, is a timeless crochet design. This cozy afghan is perfect for snuggling on chilly evenings, gifting, or adding a touch of handmade charm to your home.
Materials Needed:
Yarn Selection:
-
Worsted weight yarn (Size 4) – Choose multiple colors for a striped effect or a single shade for a classic look.
-
Approximately 2000–3000 yards, depending on the desired size.
Recommended Hook Size:
-
Size H/5.0mm crochet hook (adjust as needed to achieve desired tension).
Additional Supplies:
-
Scissors
-
Tapestry needle (for weaving in ends)
-
Stitch markers (optional)
Size Chart (Approximate)
| Blanket Size | Width (inches) | Length (inches) | Starting Chain Count (Multiple of 14 + 3) |
|---|---|---|---|
| Baby Blanket | 30–36 | 36–40 | 99–127 |
| Throw | 50–60 | 60–72 | 155–183 |
| Twin Bed | 66–70 | 88–90 | 197–211 |
| Queen Bed | 90 | 90–100 | 253–281 |
Abbreviations (US Terms)
-
ch – chain
-
sc – single crochet
-
dc – double crochet
-
tr – treble crochet
-
sl st – slip stitch
-
st(s) – stitch(es)
-
rep – repeat
Pattern Instructions
Step 1: Foundation Chain
-
Start by making a foundation chain in a multiple of 14 + 3 extra chains (e.g., 143, 183, 211, etc.).
-
This extra +3 helps maintain the ripple effect while keeping the edges straight.
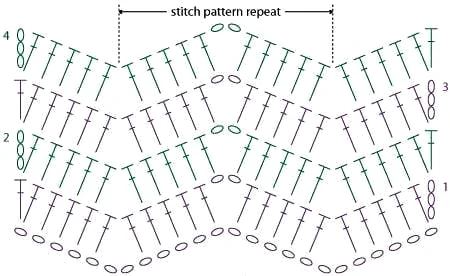
Step 2: Row 1 (Foundation Row – Setting Up the Ripple Pattern)
-
Dc in 4th chain from the hook (this counts as your first two dc stitches).
-
Dc in the next 4 chains (5 dc total).
-
Skip 2 chains (this forms the valley of the ripple).
-
DC in the next 5 chains.
-
Ch 2, then dc in the next 5 chains (this forms the peak of the ripple).
-
Repeat Steps 3–5 across the row until the end.
-
Turn.
Step 3: Row 2 and Beyond (Creating the Ripple Pattern)
-
Ch 3 (counts as first dc).
-
DC in the next 4 steps.
-
-
Skip 2 sts, dc in next 5 sts, ch 2, dc in next 5 sts.
-
Repeat from * to * across.
-
Turn.
Step 4: Continue Working in a Ripple Pattern
-
Repeat Row 2 for the entire length of the afghan.
-
Change colors as desired (every 2–6 rows for stripes).
Customizing Your Ripple Afghan
1. Color Combinations & Striping
-
Classic Stripes: Change colors every 2–6 rows for a striped look.
-
Ombre Effect: Use different shades of the same color (e.g., light blue → medium blue → dark blue).
-
Rainbow Ripple: Use bright colors for a cheerful, vibrant look.
2. Border Options
-
Simple Single Crochet Border: Work sc stitches evenly around the edges.
-
Scallop Edge: Work (5 dc in one st, skip 2, sc, skip 2, 5 dc in one st) along the edge for a decorative touch.
3. Adding Tassels or Fringe
-
Cut 6-inch yarn strands and attach to the ends for a boho look.
-
Tie and trim evenly.
Finishing Touches
-
Fasten off and weave in ends using a tapestry needle.
-
Block your afghan for a neater finish by wetting it lightly and laying it flat to dry.
Helpful Tips
✔ Use stitch markers to mark pattern repeats, making counting easier.
✔ Check your stitch count every few rows to maintain the ripple effect.
✔ Keep your tension even—tight stitches may cause curling.
✔ If your edges are uneven, try adding a border to neaten them.
Video Tutorial:
If you’re someone who prefers learning through videos, we’ve got you covered! I highly recommend this in-depth tutorial from the Bella Coco channel—perfect for visual learners who enjoy step-by-step video guidance. You can check out the tutorial here.
The ripple afghan is more than just a crochet project—it’s a timeless symbol of warmth, creativity, and the beauty of handmade craftsmanship. With its classic design, endless possibilities for personalization, and the growing love for DIY projects, this cherished blanket remains a favorite among crafters of all skill levels. So, pick up your yarn, grab your crochet hook, and let your imagination bring your very own ripple afghan to life!
Conclusion
This Ripple Afghan Blanket is a beginner-friendly project that creates a beautiful, wavy design. You can easily customize the size and colors to fit your style!