Materials:
-
Yarn: Worsted weight cotton yarn (e.g., Lily Sugar’n Cream or Paintbox Yarns Cotton Aran) – approx. 200–250g
-
Hook: 5.0 mm (H/8) crochet hook
-
Notions:
-
Yarn needle
-
Scissors
-
Stitch markers (helpful for rounds)
-
Optional: fabric for lining, magnetic snap or button, leather straps, or wooden handles
-
🧵 Skill Level:
-
Beginner to Intermediate: Familiarity with basic stitches and working in the round is helpful.
📏 Finished Measurements (Adjustable):
-
Width: ~11 inches (28 cm)
-
Height (without handles): ~9 inches (23 cm)
-
Strap length: ~20 inches (51 cm) or adjustable

🔤 Abbreviations (US Terms):
-
ch – chain
-
sc – single crochet
-
dc – double crochet
-
sl st – slip stitch
-
st(s) – stitch(es)
-
shell – 5 dc in same stitch
-
rep – repeat
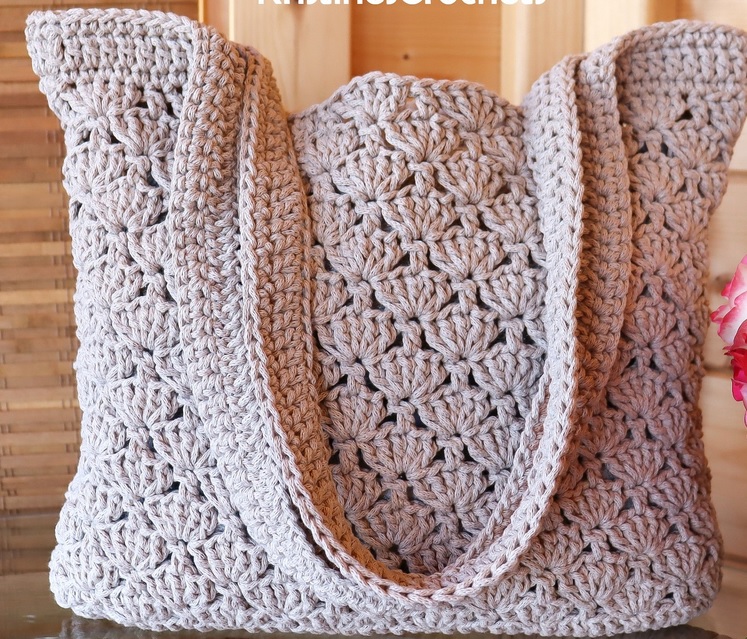
📘 Pattern Overview:
The bag consists of:
-
A flat rectangular base worked in rows
-
A body worked in a seamless shell stitch pattern in the round
-
A stabilized top edge with single crochet
-
Optional handles, lining, and closure
🔹 PART 1: Crocheting the Flat Base
Instructions:
-
Ch 31 (for approx. 10″ base width – must be multiple of 6 + 1 for shell pattern).
-
Row 1: Sc in 2nd ch from hook and in each ch across. (30 sc)
-
Rows 2–6: Ch 1, turn, sc in each st across.
(After 6 rows, your rectangle should measure approximately. 10″ x 1.5″)
You can increase the row count for a deeper or more rectangular bag base.
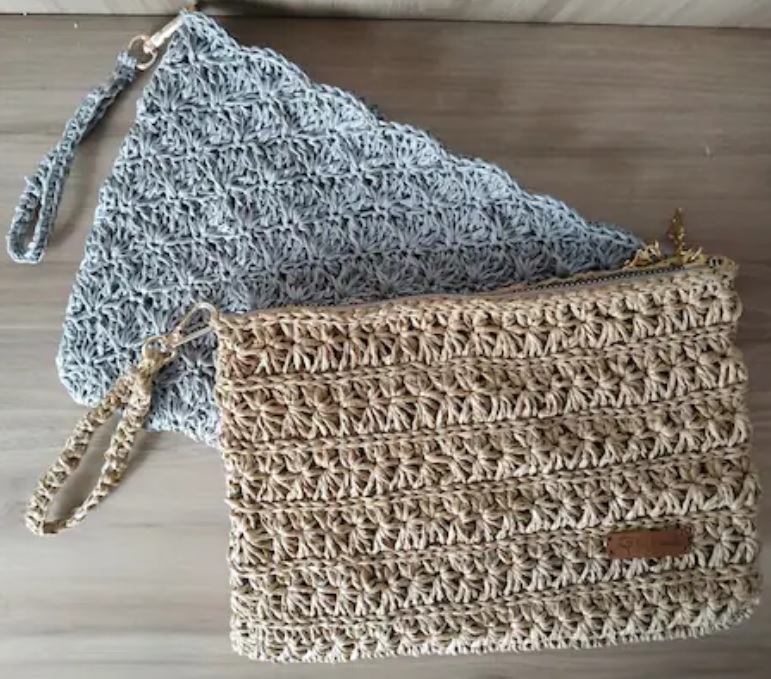
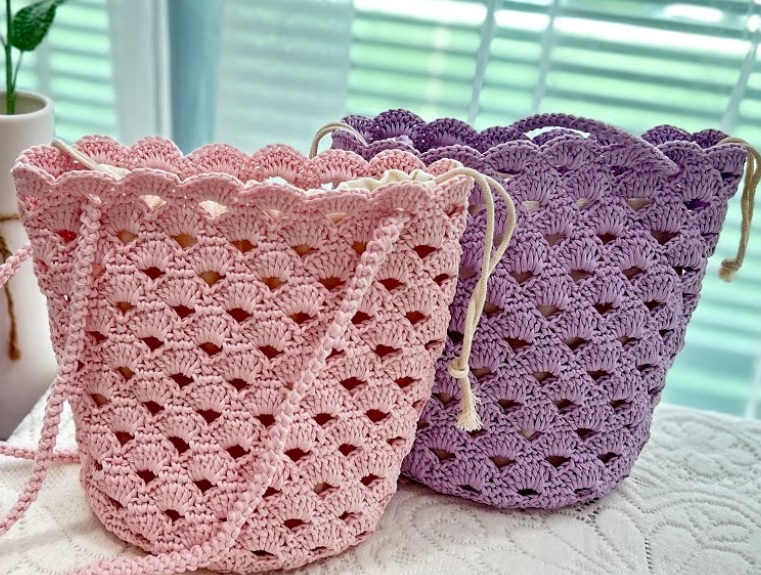
🔹 PART 2: Working the Shell Stitch in Rounds
Now, begin working around the entire base:
Round 1 – Sc Foundation Round:
-
Ch 1, then sc around all 4 sides of the rectangle:
-
1 sc in each st along the long edges
-
1 sc in the side of each row along the short edges
-
Place 3 sc in each corner
-
-
Join with sl st to the first sc.
Count your stitches and make sure the total is a multiple of 6.
Example:
If your base has 30 stitches along the long sides and 6 rows on each short end, you will have:
30 (long) × 2 = 60
6 (short rows) × 2 = 12
+12 corner increases = ~84 sts (adjust as needed to make it divisible by 6)
Round 2 – First Shell Row:
-
Ch 3 (counts as dc), 2 dc in the same st (beginning half shell)
-
Skip 2 sts, sc in next st, skip 2 sts, shell (5 dc in next st)
-
Continue from * around.
-
End with 3 dc in last st (to complete shell).
-
Join with sl st to top of beginning ch-3.
Round 3 – Establishing Shell Pattern:
-
Sl st into the 3rd dc of the previous shell to reach the center.
-
Ch 1, sc in shell center.
-
Shell in next sc, sc in next shell center – repeat around.
-
Join with sl st to first sc.
Rounds 4 to 25 – Continue Shell Pattern:
-
Repeat Round 3.
-
You may increase or decrease the total rounds depending on how tall you want the bag.
💡 TIP: For a larger tote, go up to 30+ rounds. For a clutch-style bag, 15–18 may suffice.
🔹 PART 3: Creating the Top Edge
Stabilize the bag opening with a few rounds of single crochet:
-
Round 1: Ch 1, sc in each st around, including each dc and sc from the shells.
-
Join with SL St.
-
Repeat for 2–3 rounds to strengthen the top edge.
🔹 PART 4: Creating the Straps
You can crochet your handles or use pre-made leather/wooden ones.
Crocheted Strap (Make 2):
-
Ch 70 (or more for a longer strap).
-
Row 1: Sc in 2nd ch from hook and across.
-
Row 2: Ch 1, turn, sc in each st across.
-
Fasten off, leaving a long tail.
Attach straps:
-
Use a yarn needle to sew each end of the strap inside the top edge of the bag.
-
Place straps about 2 inches in from each side seam.
🔹 PART 5: Lining the Bag (Optional but Recommended)
Why line? The shell stitch has gaps; a lining adds structure and stops small items from poking through.
Simple Lining Instructions:
-
Measure the width and height of your bag.
-
Cut a fabric rectangle slightly larger than the measurement (~½ inch seam allowance).
-
Fold the fabric in half (right sides facing), and sew the side seams.
-
Fold over the top edge and iron it down.
-
Place lining inside the bag and hand-sew around the top edge using a whip stitch or slip stitch.
🔹 PART 6: Adding a Closure (Optional)
Options:
-
Magnetic Snap: Sew snap pieces onto the lining before inserting.
-
Zipper: Hand-stitch to top edge between outer crochet and lining.
-
Button Loop: Crochet a loop on one side and sew a button to the other.
🌟 Customization Ideas:
-
🎨 Color Blocking: Change colors every few rounds for stripes.
-
🧶 Textured Yarn: Use tweed or variegated yarns for added interest.
-
👜 Tote Style: Make the base longer and do more rounds for height.
-
🧵 Decor: Add tassels, fringe, or embroidery.
✅ Finishing:
-
Weave in all yarn ends with a yarn needle.
-
Lightly block the bag to shape it.
-
If adding a lining or closure, complete those steps last.
-
Add any decorative elements.
📸 Would you like:
-
A PDF version of this pattern?
-
A photo tutorial or diagram for the shell stitch?
-
Printable checklist for each step?