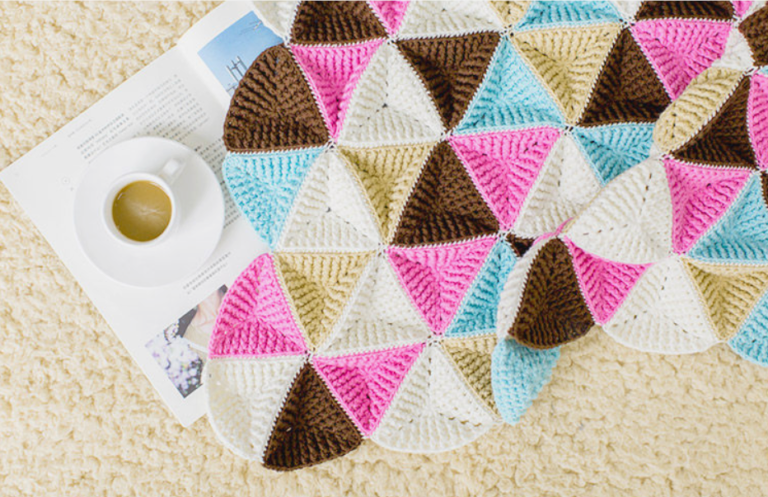
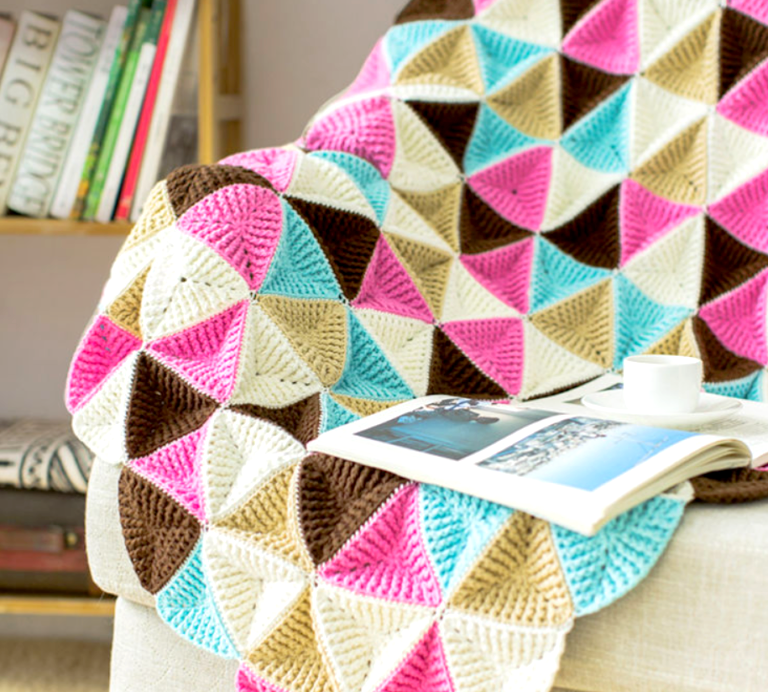
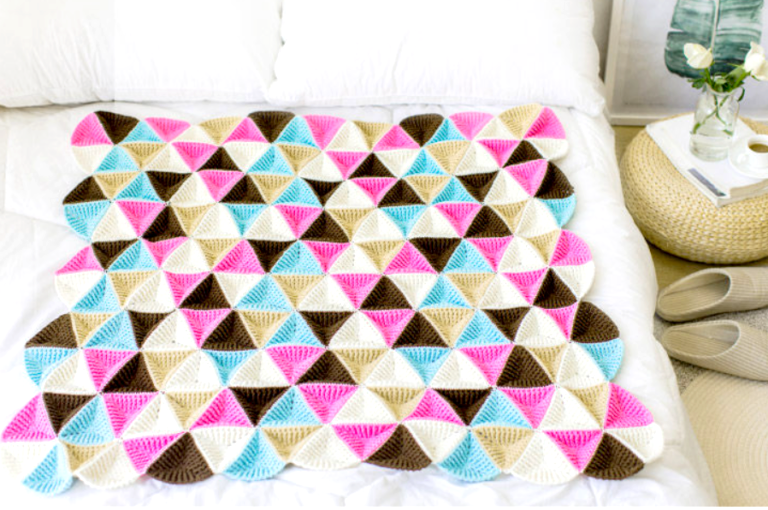
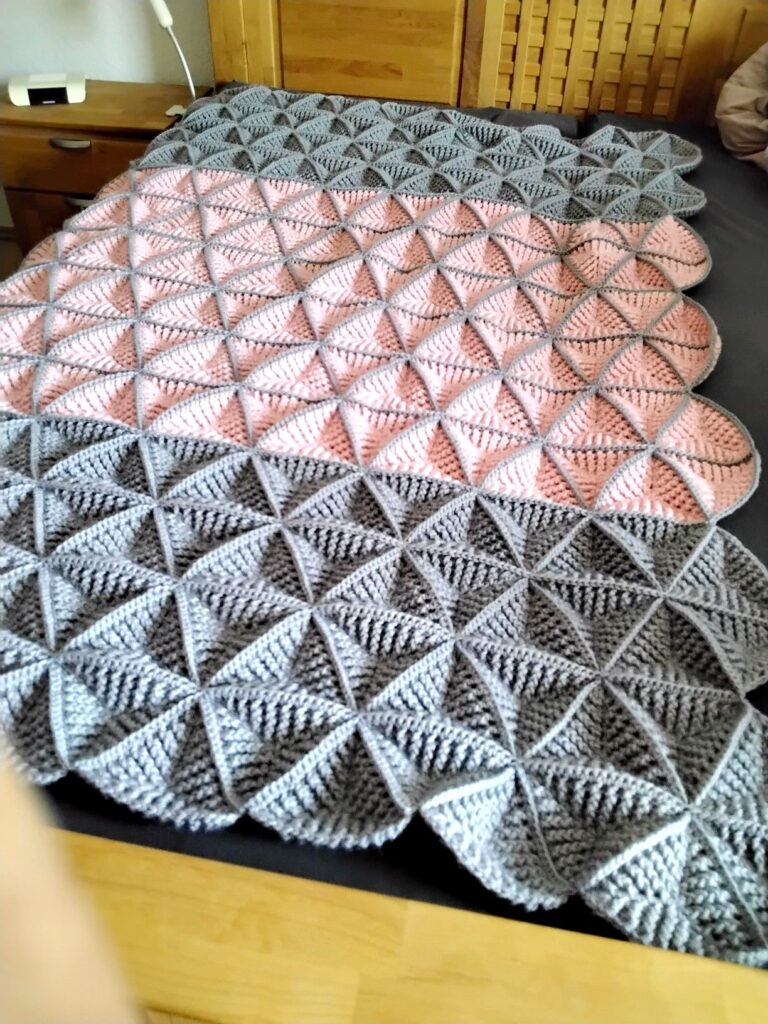
A crochet 3D triangle motif blanket is a fantastic way to create a textured, geometric design that stands out. Unlike traditional granny squares, this project uses triangular motifs with depth, giving your blanket a visually striking effect. Whether you prefer bold color contrasts, a subtle ombré, or a mix of textures, this pattern is highly customizable.
This guide will walk you through everything you need to know, from materials to step-by-step instructions and joining techniques.
Materials Needed
Yarn Choice
Selecting the right yarn is crucial, as it affects the final drape and texture. Consider these options:
- Worsted weight (Aran) or DK yarn – Ideal for a balanced texture and warmth.
- Cotton yarn – Best for a structured look, especially if you want a lightweight throw.
- Acrylic or wool blends – Great for a cozy, soft finish.
You can mix colors for a vibrant, eye-catching effect or stick to a gradient for a more elegant aesthetic.
Hook Size
- Use the recommended hook size for your chosen yarn.
- Generally, a 4mm–6mm hook works well for medium-weight yarns.
- If you want looser stitches, go up a hook size; for a tighter weave, go down a size.
Other Supplies
- Scissors – To cut yarn neatly.
- Tapestry needle – For weaving in ends and joining motifs.
- Stitch markers – Useful to track increases or hold pieces together.
Making a 3D Triangle Motif
A 3D crochet triangle is typically worked in the round, with stitches like puff, bobble, or front-post double crochet to create texture.
Step-by-Step Triangle Motif Pattern
1. Start with a Magic Ring
This technique allows for a tight, adjustable center:
- Wrap the yarn around your fingers and pull through a loop with your hook.
- Chain 3 (counts as the first double crochet in US terms).
2. Round 1: Establish the Triangle Base
- Work 3 double crochet clusters, each separated by chain 2 to form corners.
- Example: (3 dc, ch 2, 3 dc, ch 2, 3 dc, ch 2) into the magic ring.
- Join with a slip stitch to the first dc.
3. Round 2: Building the 3D Texture
- Use front post double crochet (fpdc) or puff stitches to make the triangle pop.
- Increase at the corners by placing (dc, ch 2, dc) into each chain space.
4. Rounds 3 and Beyond: Expanding the Triangle
- Continue increasing at the corners while adding textured stitches between.
- The triangle will gradually grow in size, maintaining its three-dimensional effect.
5. Finishing Off
- Once your triangle reaches the desired size, fasten off and weave in the ends.
Tip: If you want uniform motifs, count your stitches carefully, especially at the corners.
Joining the Triangles
Once you have enough motifs, it’s time to connect them. There are different ways to join motifs, depending on your desired effect.
1. Join-as-You-Go Method
- On the final round of each triangle, replace slip stitches with slip joins to attach to the adjacent triangle.
- This method is seamless and works best when using a single color or subtle color changes.
2. Whipstitch or Mattress Stitch Join
- Use a tapestry needle and sew the edges together with an invisible seam.
- Works well if you want a structured, defined join.
3. Crochet Slip Stitch or Single Crochet Join
- Place motifs wrong sides together and slip stitch through the back loops.
- This creates a raised ridge between motifs, adding an extra design element.
Layout Ideas:
- Hexagonal Arrangement: When triangles are joined in groups of six, they form hexagons.
- Striped Layout: Rows of alternating colors for a striped effect.
- Asymmetrical Design: Mix different-sized triangles for a modern look.
Border and Finishing Touches
A border ties everything together and gives the blanket a polished look. Some great options include:
1. Simple Single Crochet Border
- Work a round of sc stitches evenly around the edge.
- This tidies up the joints and creates a neat finish.
2. Shell Stitch Border
- Adds a delicate, lacy edge.
- Work (5 dc in one stitch, skip 2 stitches, sc in next stitch) around the edge.
3. Ribbed or Raised Border
- Use front post double crochet (fpdc) and back post double crochet (bpdc) alternately for a ribbed effect.

Customisation Ideas
- Multicolour Effect: Alternate colors for a stained-glass look.
- Gradient Design: Use a long color-change yarn for a smooth transition.
- Different Stitch Heights: Mix half-double crochets, trebles, and puff stitches for variation.
This blanket is a great beginner-friendly project with room for creativity. Would you like help with a specific stitch technique?