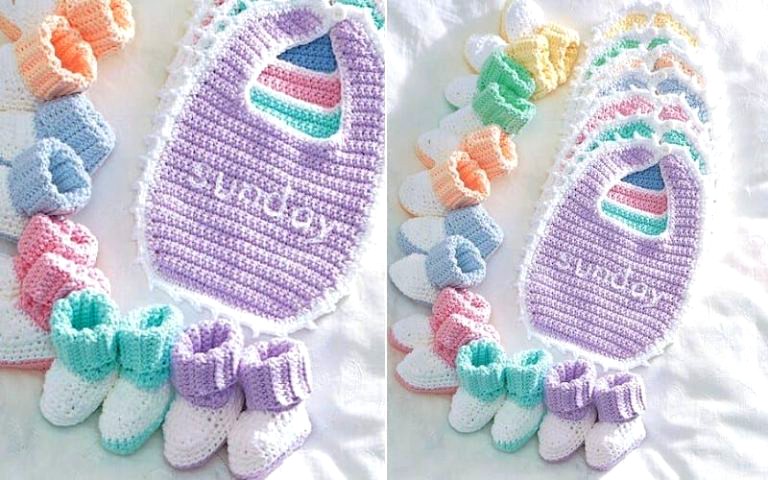
Crochet Baby Bib and Booties Free Pattern
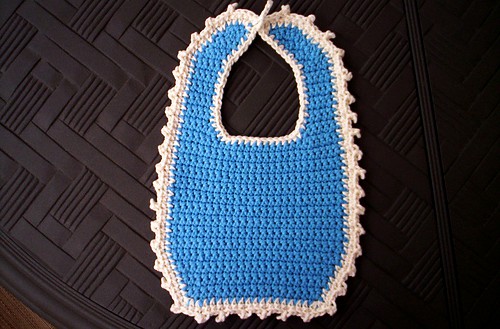
Baby Bib
This simple baby bib pattern features a classic shape and a comfortable fit for your little one. It’s worked in a rectangle and then shaped to form a bib. You can add embellishments like buttons, flowers, or other decorations.
Materials:
- Yarn: Worsted weight yarn (approximately 100 grams)
- Crochet Hook: Size G/6 (4mm)
- Button: 1 small button for closure
- Yarn Needle: For weaving in ends
- Scissors
Abbreviations:
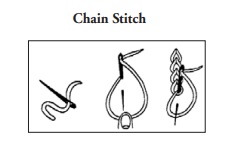
- ch = chain
- sc = single crochet
- dc = double crochet
- sl st = slip stitch
- st = stitch
- sp = space
- hdc = half double crochet
Instructions:
Starting with the Neck Opening:
- Ch 30 (or more, depending on the size you want for the neck opening).
- Row 1: Hdc in the 3rd ch from the hook and in each chain across. Turn.
(You should have 28 hdc stitches). - Row 2: Ch 2, hdc in each stitch across (28 hdc). Turn.
- Repeat Row 2 until the bib reaches the desired length (about 8 inches long for a small baby bib).
Shaping the Bib:
- At the end of the last row, ch 1 and turn.
- Sc in each stitch along the bottom edge for 2 rows (28 sc).
- Once you reach the other side, make sure to leave a small hole at the top for the buttonhole. Ch 3 and skip 3 stitches to leave room for the button to fasten the bib.
- Sc in the remaining stitches, then sl st to join at the top.
Adding the Button:
- Sew a small button onto the side of the bib where the ch 3 is.
- This will allow you to fasten the bib around the baby’s neck.
Optional Embellishments:
- Button Flower: Add a crochet flower to the center or corner of the bib for decoration.
- Stripes: Use different colored yarn to create stripes by changing yarn colors every few rows.
- Trim: Add a picot or shell stitch trim along the edges for a fancier look.
Crochet Baby Booties
These cute baby booties are designed to be soft, comfy, and stylish, with an easy-to-follow pattern that works up quickly.
Materials:
- Yarn: Worsted weight yarn (about 50-60 grams)
- Crochet Hook: Size G/6 (4mm)
- Yarn Needle: For weaving in ends
- Scissors
- Button or Decoration: Optional, for embellishment
Abbreviations:
- ch = chain
- sc = single crochet
- dc = double crochet
- sl st = slip stitch
- st = stitch
- sp = space
- inc = increase (2 stitches in the same stitch)
Instructions:
Sole (Make 2):
-
Ch 11.
-
Row 1: Sc in the 2nd ch from the hook and in each ch across (10 sc). Turn.
-
Row 2: Ch 1, sc in each st across (10 sc). Turn.
-
Row 3: Ch 1, sc in the first st, inc (2 sc in the same stitch) in the next st, sc in the next 8 sts, inc in the last st. Turn.
(You now have 12 sc). -
Row 4: Ch 1, sc in each st across (12 sc). Turn.
-
Row 5: Ch 1, sc in the first st, inc in the next st, sc in the next 10 sts, inc in the last st. Turn.
(You now have 14 sc). -
Row 6: Ch 1, sc in each st across (14 sc). Turn.
-
Row 7: Ch 1, sc in the first st, inc in the next st, sc in the next 12 sts, inc in the last st. Turn.
(You now have 16 sc). -
Row 8: Ch 1, sc in each st across (16 sc). Turn.
-
Fasten off.
Sides (Make 2):
- Attach yarn at the end of the sole.
- Round 1: Ch 1, sc in each stitch around (16 sc). Join with a sl st to the first sc to close the round.
- Round 2: Ch 1, sc in each stitch around (16 sc). Join with a sl st.
- Repeat Round 2 (16 sc) for a total of 3 rounds.
- Fasten off. Leave a long tail for sewing.
Top of Bootie (Cuff):
- Attach yarn at the back of the bootie (opposite the fasten-off side).
- Round 1: Ch 1, sc in each of the next 8 stitches, ch 4 (this will be the lace tie), sc in the next 8 stitches. Turn to work in rows.
- Round 2: Ch 1, sc in each stitch across, and sc in the 4-ch space. Fasten off.
- Use yarn to create a small tie or bow in the 4-ch space.
Finishing:
- Weave in all ends with a yarn needle.
- Optional: Add a small button or flower to the top of the bootie for a decorative touch.
- Attach a button to the top of the bootie opposite the tie, allowing it to fasten or stay in place.
Optional Customizations:
- Stripes: Use multiple colors of yarn to create stripes across the bib or booties.
- Decorations: You can add tiny crochet flowers or other decorations to personalize the bibs and booties further.
Notes:
• enlarge these words 250%
• Trace onto the bib with carbon paper for embroidery
Isn’t this pattern just beautiful? It’s truly amazing, right? That’s exactly why you should share it with your closest friends so they can create this lovely project for their children, nieces, or grandchildren too! If you have any questions, or suggestions, or just want to share your thoughts, feel free to leave a comment. We’re always here to help and answer anything you’d like to say. This stunning pattern is completely free, and we’ve included the PDF with the instructions from Yarnspirations, so you can easily access it through the link we’ve provided for you.
Get your hands on the free pattern here! 👉 Baby Bib and Booties
VIDEO TUTORIAL:
Esteemed reader, we implore you to allocate a moment to immerse yourself in the instructional video. This visual guide serves as an invaluable compass, meticulously elucidating each step with clarity, ensuring a seamless crafting experience. Below, we provide access to two distinct methodologies, allowing you to peruse them at your leisure. Absorb the nuances, replicate the gestures in synchrony with the demonstration, and fortify your comprehension before embarking on the actual creation.
The tutorial showcasing the intricacies of crochet bibs originates from the esteemed Yarnspirations YouTube channel, and you may indulge in its wisdom through the link provided below:
Here, we shall bestow upon you an exquisite pattern for crafting delicate crochet booties—an intricate design for you to meticulously follow, ensuring both elegance and warmth in every stitch.
Conclusion:
This free crochet pattern for baby bibs and booties is perfect for beginners and makes a thoughtful, handmade gift for new parents. You can easily customize it by choosing different colors or adding embellishments to make each set unique. Enjoy your crochet project, and have fun creating these adorable baby essentials!