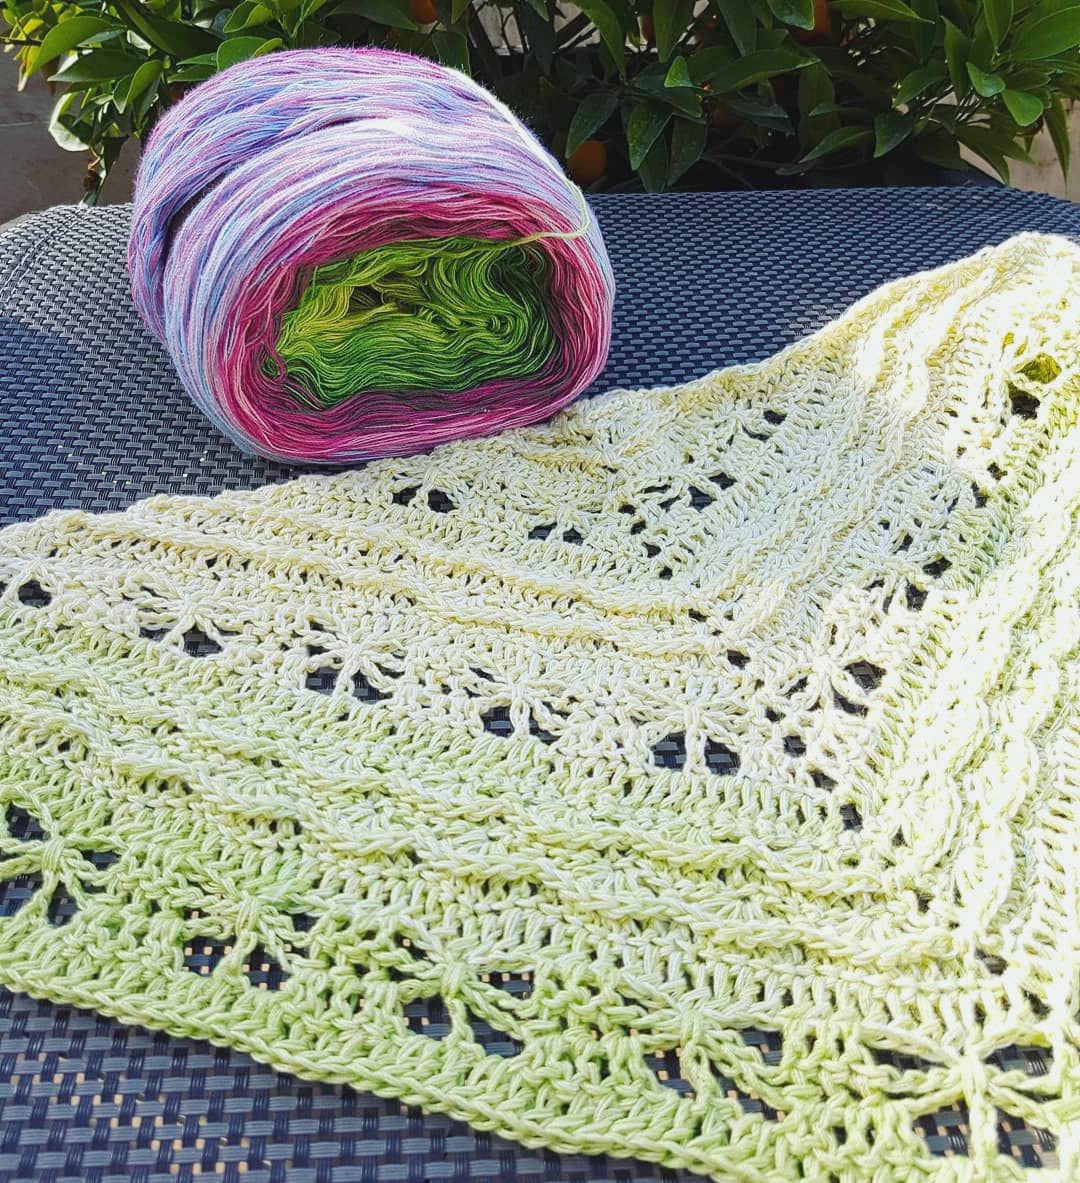
✨ Overview
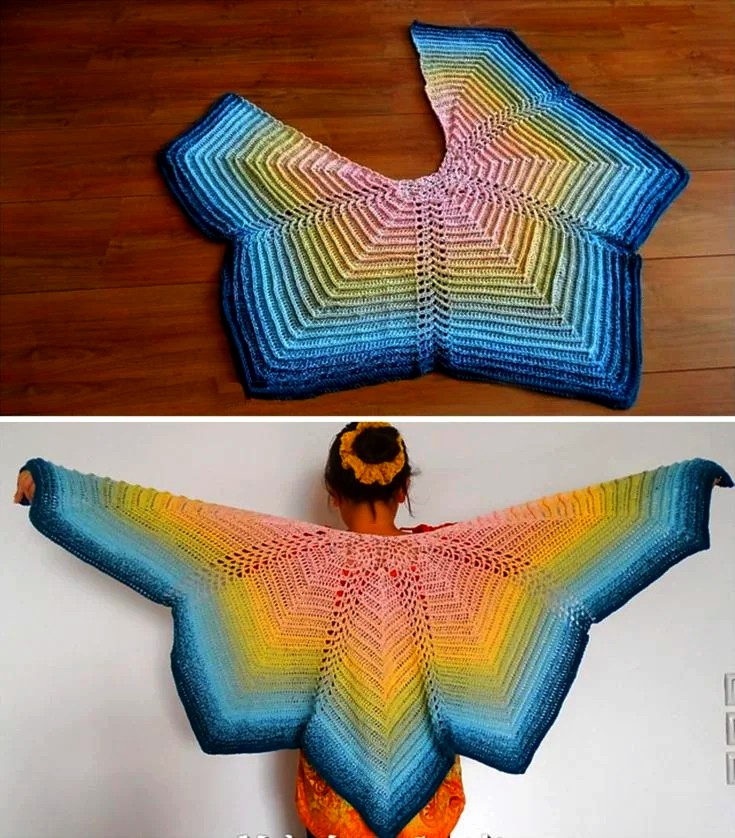
The Butterfly Shawl is a graceful, lightweight triangular shawl inspired by the delicate symmetry of butterfly wings. It features open lacework and flowing lines that mimic wing segments. This shawl works beautifully in solid, gradient, or variegated yarns, perfect for spring and summer.
🧶 Materials
-
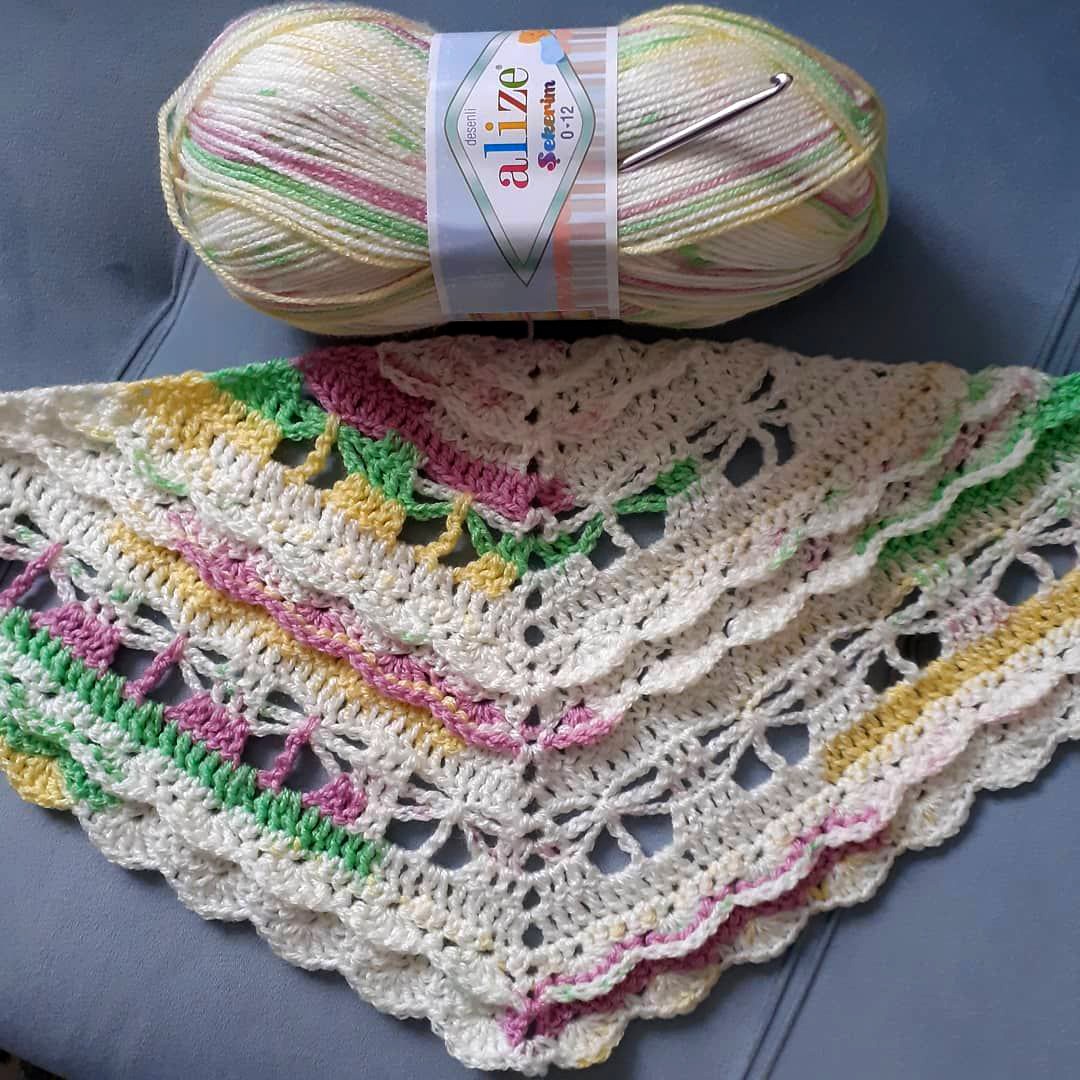
Yarn: Fingering or light DK weight (1000–1200 yards recommended)
-
Cotton blends, bamboo, or merino wool work well.
-
Suggested: Scheepjes Whirl, Hobbii Sultan, or Malabrigo Sock.
-
-
Hook: 4.0 mm (G/6) crochet hook or size needed for desired drape
-
Notions:
-
Tapestry needle
-
Stitch markers (optional)
-
Blocking pins and a mat
-
📐 Finished Measurements
-
Width: Approx. 60 inches (152 cm)
-
Height (center back to tip): Approx. 28 inches (71 cm)
-
Adjustable by adding or subtracting repeats
✍️ Abbreviations (US Terminology)
| Abbreviation | Meaning |
|---|---|
| ch | chain |
| sc | single crochet |
| dc | double crochet |
| tr | treble crochet |
| sl st | slip stitch |
| sk | skip |
| sp | space |
| st(s) | stitch(es) |
| V-stitch | (dc, ch 1, dc) In the same stitch |
🧵 Notes
-
The shawl is worked from the top center outward in rows.
-
Increases are placed at both edges and at the center spine to shape the triangle.
-
You can create butterfly effects by alternating lace and solid segments.
-
Blocking is crucial to open the lace and create a winged shape.
🔰 Getting Started
🪄 Foundation Ring
-
Ch 4, sl st into first ch to form a ring.
-
OR use a magic ring if preferred.
🪡 Section 1: Triangular Base (Solid Double Crochet Foundation)
This section creates the triangular shape and builds a base for the lace.
Row 1:
Ch 3 (counts as dc), 2 dc into ring, ch 2 (center), 3 dc into ring. Turn.
[Total: 6 dc + 1 ch-2 sp]
Row 2:
Ch 3, dc in next 2 dc, (2 dc, ch 2, 2 dc) in ch-2 sp, dc in remaining 3 sts. Turn.
[10 DC total]
Row 3:
Ch 3, dc in each st to center ch-2 sp, (2 dc, ch 2, 2 dc) in sp, dc to end. Turn.
[Increases by 4 sts each row]
Rows 4–10:
Repeat Row 3.
👉 At the end of Row 10, you should have:
-
3 dc on each side of the center on Row 1, increasing by 2 on each side per row.
-
3 (Row 1) → 5 (Row 2) → 7 (Row 3) … up to 21 dc each side + 4 center dc = 46 dc total.
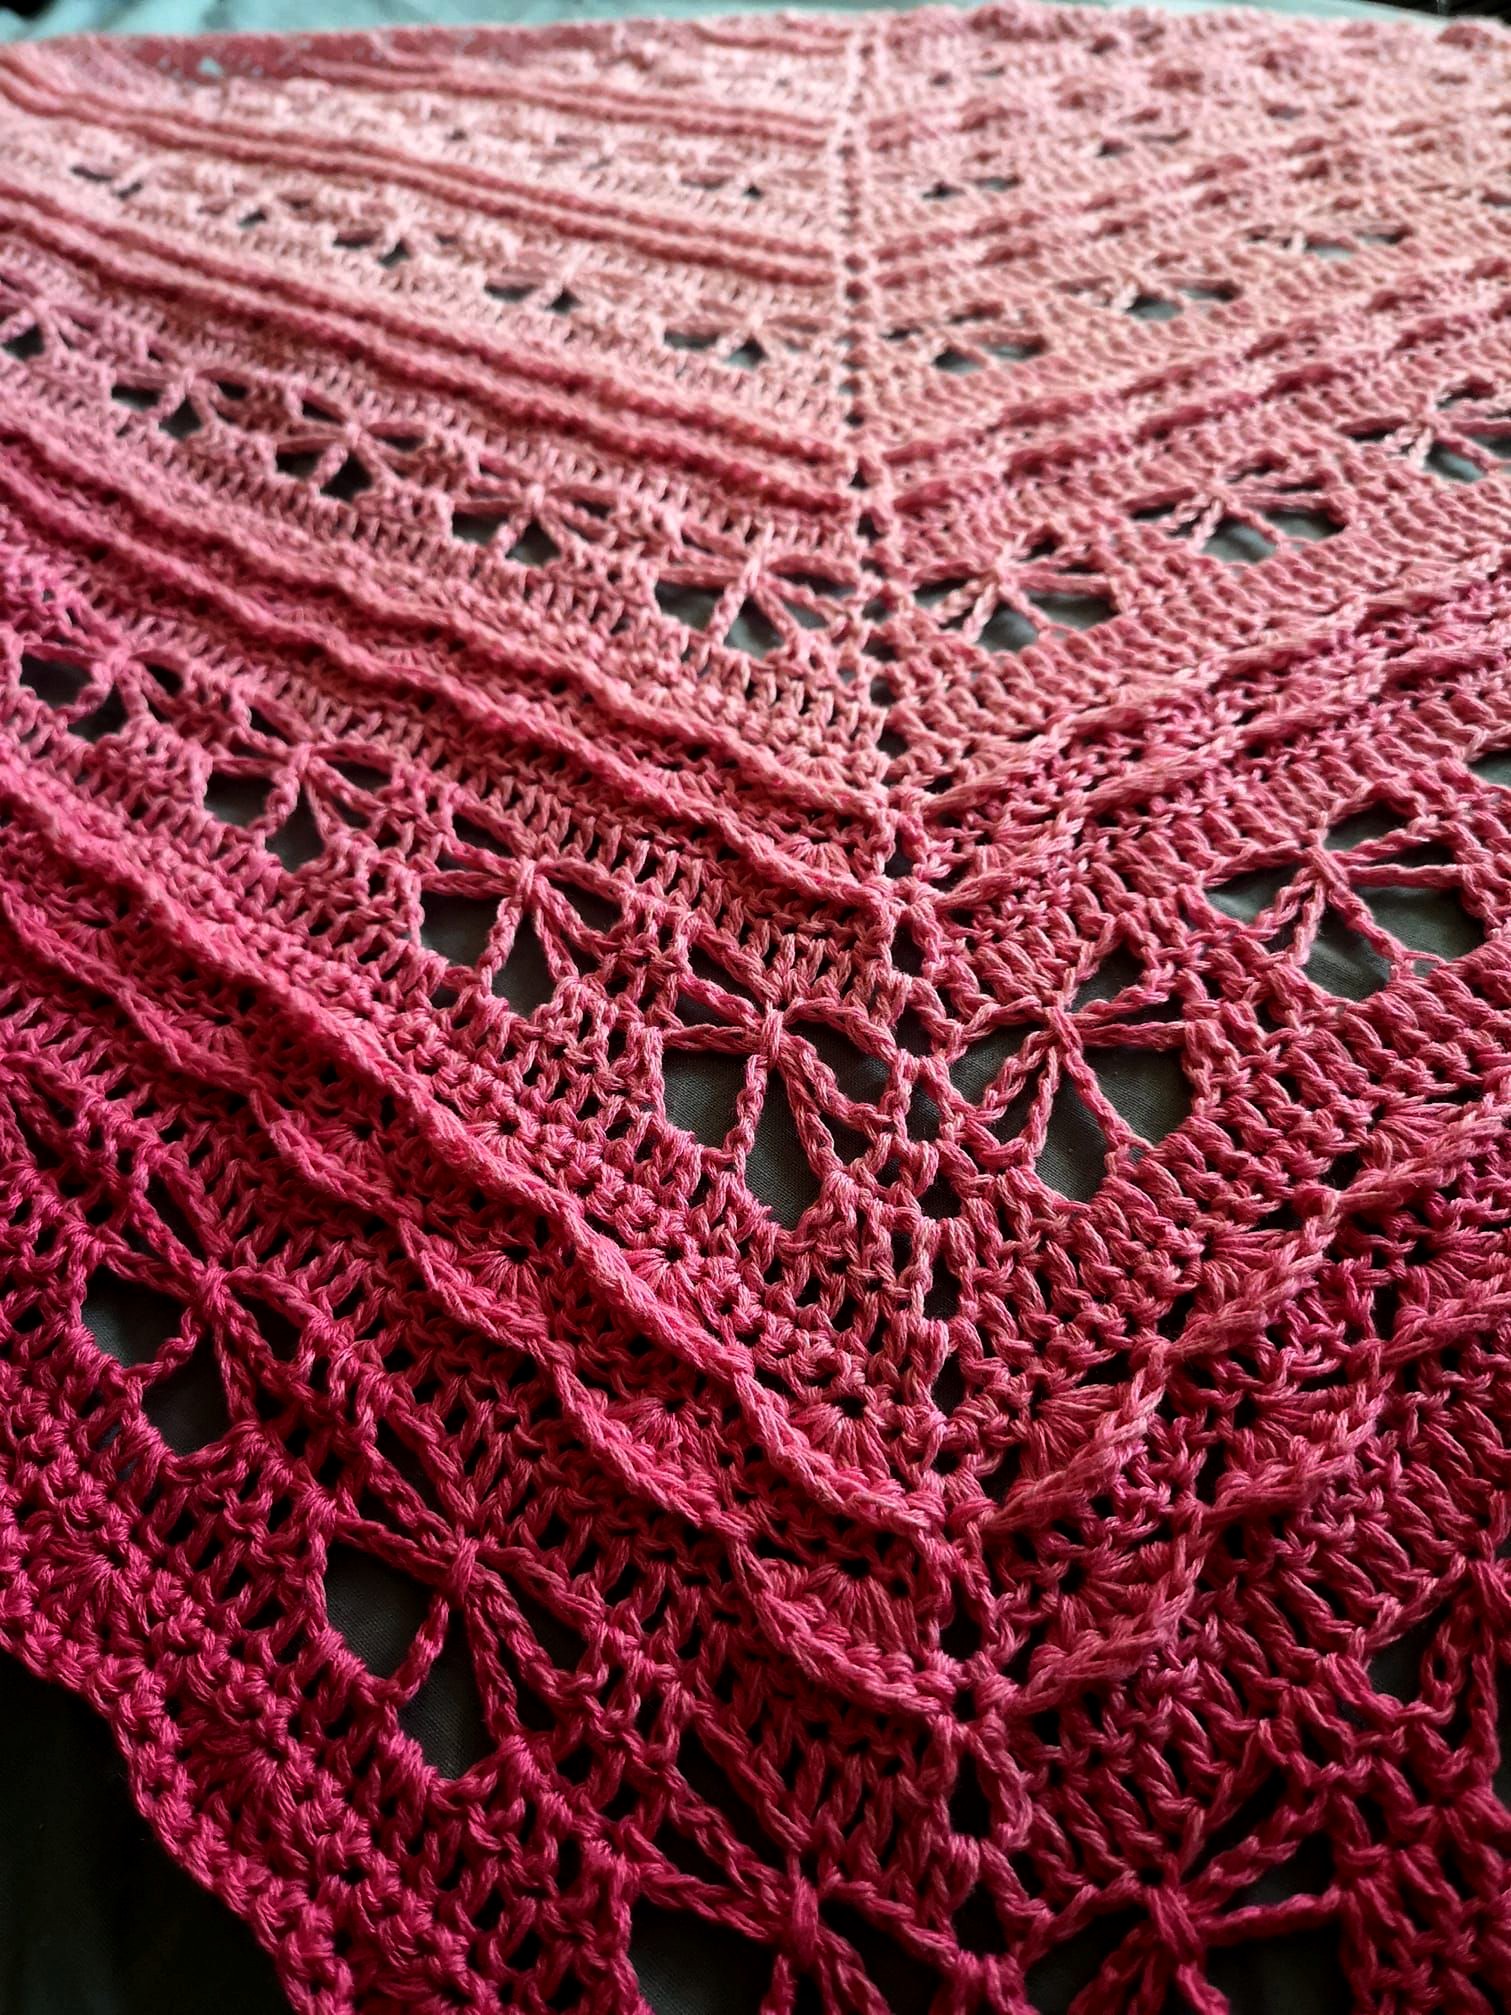
🦋 Section 2: Butterfly Wing Lace Pattern
Here’s where the shawl starts to take flight—literally! The lacework will give your shawl a beautiful, airy texture like butterfly wings.
Row 11 (Lace Setup – Treble Eyelets):
Ch 4 (counts as tr), tr in next st, ch 1, sk 1, tr in next st, repeat to center.
In ch-2 sp: (2 dc, ch 2, 2 dc).
Repeat tr, ch 1, sk 1 across to end. Turn.
Row 12 (Solid Row):
Ch 3, dc in each tr and ch-1 sp across. Work (2 dc, ch 2, 2 dc) in ch-2 sp. Turn.
🪶 Repeat Rows 11 & 12 three more times (total of 8 rows) to create your first lace panel.
🎀 Section 3: V-Stitch Panel (Optional)
This section adds more airy lace and keeps the wing motif flowing.
Row 19:
Ch 3, V-stitch (dc, ch 1, dc) in every 2nd stitch across to center,
In ch-2 sp: (2 dc, ch 2, 2 dc),
Continue V-stitch across, turn.
Row 20:
Ch 3, V-stitch in ch-1 spaces of previous V-stitch rows,
A work center is as before. Turn.
🔁 Repeat for 4–6 rows for a long lace section.
🧚 Section 4: Repeat Lace and Solid Rows
You can now alternate between sections to resemble the segments of butterfly wings:
-
4–6 rows treble lace (Rows 11–12 repeat)
-
2 rows solid dc
-
4 rows V-stitch
-
2 rows solid dc
🔁 Repeat as desired until the desired size is reached.
🌸 Final Edging: Flutter Shell Border
When the shawl is at the desired length (around 28” height), finish with this soft, scalloped edge.
Final Row:
-
Ch 1, sc in first st, sk 2, (sc, ch 2, 3 dc, ch 2, sc) in next st, sk 2, repeat across.
-
At center ch-2 sp: place (sc, ch 2, 3 dc, ch 2, sc) as well.
-
Continue to end, sl st, and fasten off.
🧼 Finishing & Blocking
Wet Block:
-
Soak the shawl in lukewarm water with wool wash.
-
Gently squeeze (don’t wring).
-
Pin the top edge straight, and stretch the wingspan wide.
-
Pin the bottom into soft, gentle curves like a butterfly wing.
Let it dry completely.
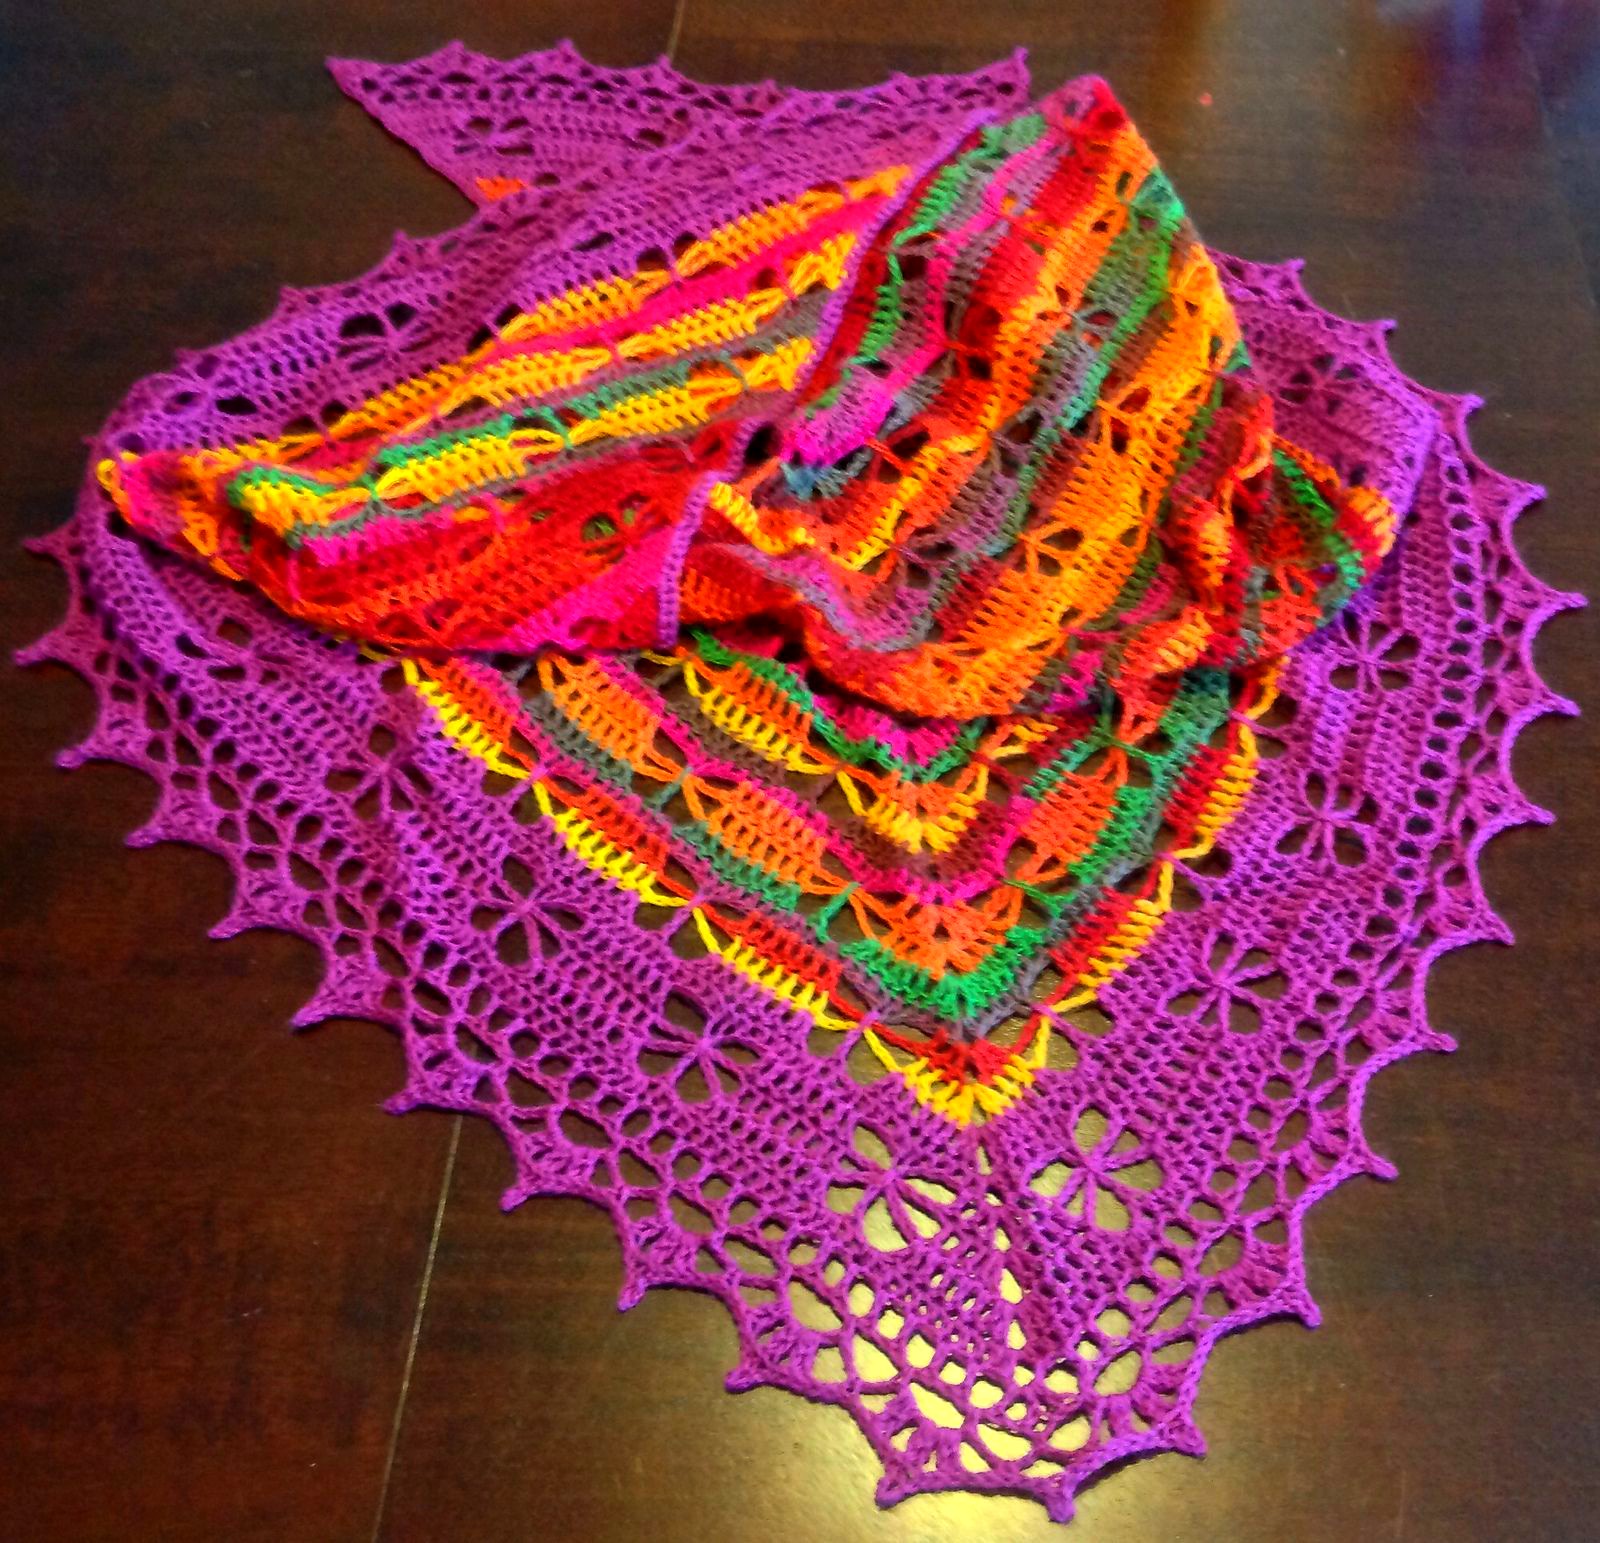
🎨 Customization Ideas
-
Gradient yarn: mimic monarch wings with oranges, reds, and blacks.
-
Beaded edge: add beads to the scallops for sparkle.
-
Butterfly motifs: embroider or appliqué butterflies on the corners.
-
Make it larger: continue lace repeats for a dramatic drape.
Video Tutorial
Certainly! To assist you in crocheting a butterfly shawl, here are some YouTube video tutorials that provide step-by-step guidance:
-
Jaycee Butterfly Shawl Tutorial by Wilmade
This tutorial offers detailed instructions on creating the Jaycee Butterfly Shawl, a beautiful design perfect for various skill levels.
2. Feather Butterfly Shawl Tutorial by Meladora’s Creations for Crochet
This tutorial guides you through the Feather Butterfly Shawl pattern, known for its delicate and intricate design.
3. Butterfly Stitch Prayer Shawl Tutorial by Fiber Spider
A two-part series that teaches the Butterfly Stitch Prayer Shawl, incorporating a unique butterfly stitch pattern.
-
Part 1:
-
Part 1:
These tutorials should provide comprehensive visual guidance to help you create a stunning butterfly shawl. Happy crocheting!
📸 Share Your Work!
Tag your finished shawl on social media with #ButterflyShawl or #CrochetWings. Your project could inspire others to try it, too!