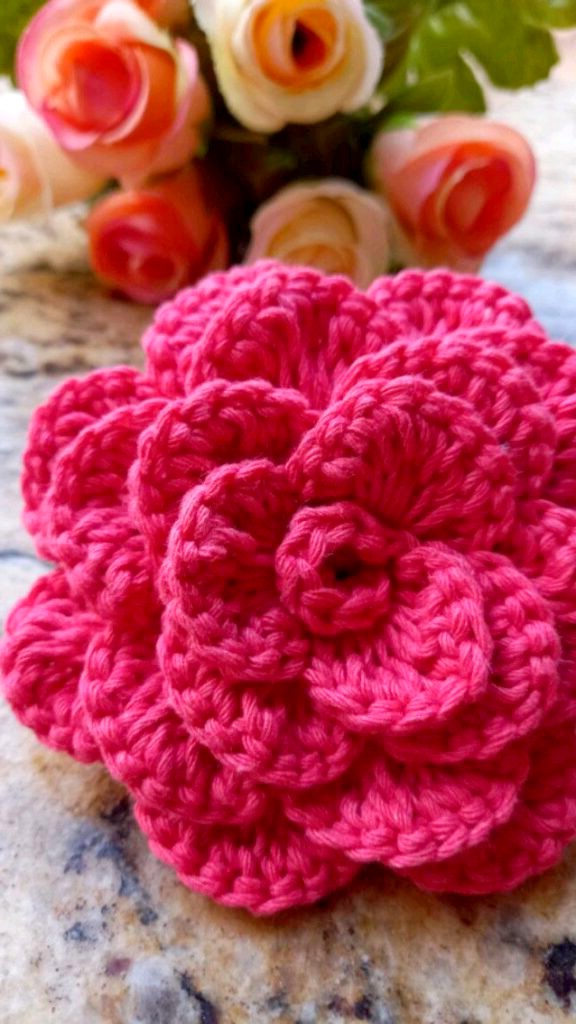
A camellia flower symbolizes love, admiration, and perfection. Its layered, rounded petals make it a beautiful choice for embellishing hats, bags, shawls, or wearing as a brooch. This pattern creates a lifelike, layered crochet camellia that’s as elegant as the real thing.
✂️ Materials Needed
-
Worsted weight yarn in your choice of flower color (pink, red, white, yellow, etc.)
-
Worsted weight yarn in green (for leaves – optional)
-
Crochet hook: Size G (4.0 mm) or size suitable for your yarn
-
Tapestry needle for sewing
-
Scissors
-
Stitch marker (optional)
📚 Skill Level
Beginner to Intermediate. You should be comfortable with basic stitches such as single crochet, half double crochet, double crochet, and working in rows.
📖 Abbreviations (US Terms)
| Abbreviation | Meaning |
|---|---|
| ch | chain |
| sl st | slip stitch |
| sc | single crochet |
| hdc | half double crochet |
| dc | double crochet |
| tr | treble crochet |
| st(s) | stitch(es) |
| FO | fasten off |
🌼 Camellia Flower Instructions
The flower is made from a long, scalloped strip of petals that is rolled and sewn together to form a blooming camellia.
🔸 Step 1: Foundation Chain
-
Ch 51 (This creates a base for approximately 10–12 petals. You can adjust the length by increasing or decreasing in multiples of 5.)
🔸 Step 2: First Row – Creating Petals
Work into the back bump of the chain (this creates a cleaner edge, though you can work into the regular loops if preferred).
-
In 3rd ch from the hook, work:
-
(1 sc, 1 hdc, 3 dc, 1 hdc, 1 sc) — This forms your first petal
-
-
Skip 1 chain
-
In the next chain, repeat the petal: (1 sc, 1 hdc, 3 dc, 1 hdc, 1 sc)
-
Skip 1 chain, then repeat the petal pattern across the entire row
You should have a series of closely spaced petals forming a gently curling strip. The petals will naturally begin to curve, which helps form the rose shape later.
👉 Tip: If your petals start to curl tightly or overlap too much, try spacing them by skipping 2 chains instead of 1 between petals. Alternatively, reduce the number of dc stitches inside each petal.
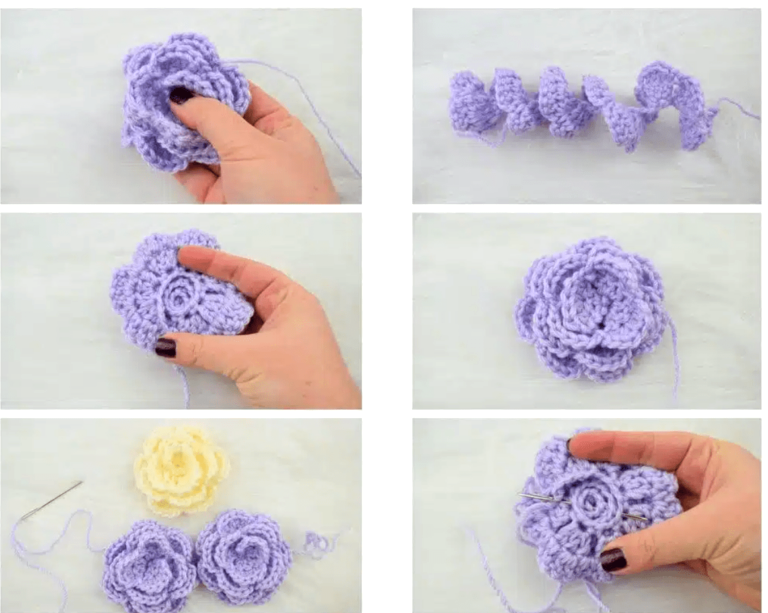
🔸 Step 3: Shaping the Flower
Now that you’ve completed your petal strip:
-
Lay the strip flat, with the first petal on the left and the last on the right.
-
Begin rolling the strip into a spiral starting from the first petal.
-
As you roll, push the base of each petal slightly outward to give the flower a blooming, layered look.
-
Once fully rolled, secure the base by stitching through all the layers using your yarn needle and yarn tail.
👉 Tip: Don’t pull your roll too tight. You want the petals to layer gently and not stack on top of each other like a cone.
🌿 Optional: Crochet Leaf Pattern
Make one or two leaves to attach behind the flower for a more natural look.
Leaf Instructions:
-
Ch 10
-
In the second chain from the hook, work:
-
1 sc, 1 hdc in next ch, 1 dc in each of next 3 ch, 1 hdc, 1 sc, 1 sl st in the last ch.
-
-
Rotate your work to crochet down the other side of the chain:
-
1 sl st, 1 sc, 1 hdc, 1 dc in each of the next 3 sts, 1 hdc, 1 sc
-
-
Sl st to the base of the first sc to close the leaf. FO and weave in ends.
Make 2–3 of these if you’d like a fuller leafy base. You can also vary the size by adjusting the number of starting chains (e.g., ch 12 for a longer leaf).
🧵 Finishing and Assembly
-
Use your yarn needle to stitch the bottom of the flower to hold it in shape.
-
Sew or glue the leaves to the back of the flower base.
-
Attach the camellia to your chosen item: sew it onto a hat, headband, scarf, or use it as a brooch by gluing a pin back.
🪡 Customization Ideas
-
Make two petal strips of different lengths and stack them for a double-layered flower.
-
Use finer yarn and a smaller hook for delicate camellias.
-
Add a small pearl or bead in the center for embellishment.
-
Use different shades of the same color yarn for a subtle ombre effect.
🧺 Care Instructions
-
Hand wash only with cold water if needed.
-
Lay flat to dry.
-
Avoid stretching or wringing.
💡 Troubleshooting Tips
| Issue | Solution |
|---|---|
| The flower is too tight or dense | Try using fewer petals or spacing them out more |
| Petals not curling nicely | Increase the number of dc stitches per petal or use a looser tension |
| The base looks messy | Stitch all layers tightly from underneath, making sure they are aligned |
Video Tutorial
Consider yourself aptly catered to should your intellect lean toward the visual sphere, where motion and imagery triumph over static prose. There exists a meticulously assembled visual walkthrough, curated with scrupulous attention for those who absorb knowledge more fluently through sight than script. This immersive guide—an offering from the Passionate Crafter channel—delivers not just instruction, but an experience tailored to the visually inclined. You can find the video tutorial here.
❤️ You Did It!
You’ve created a beautiful crochet camellia flower! Whether you make just one or a whole bouquet, these flowers add charm and elegance to your projects. They also make lovely handmade gifts.