Introduction
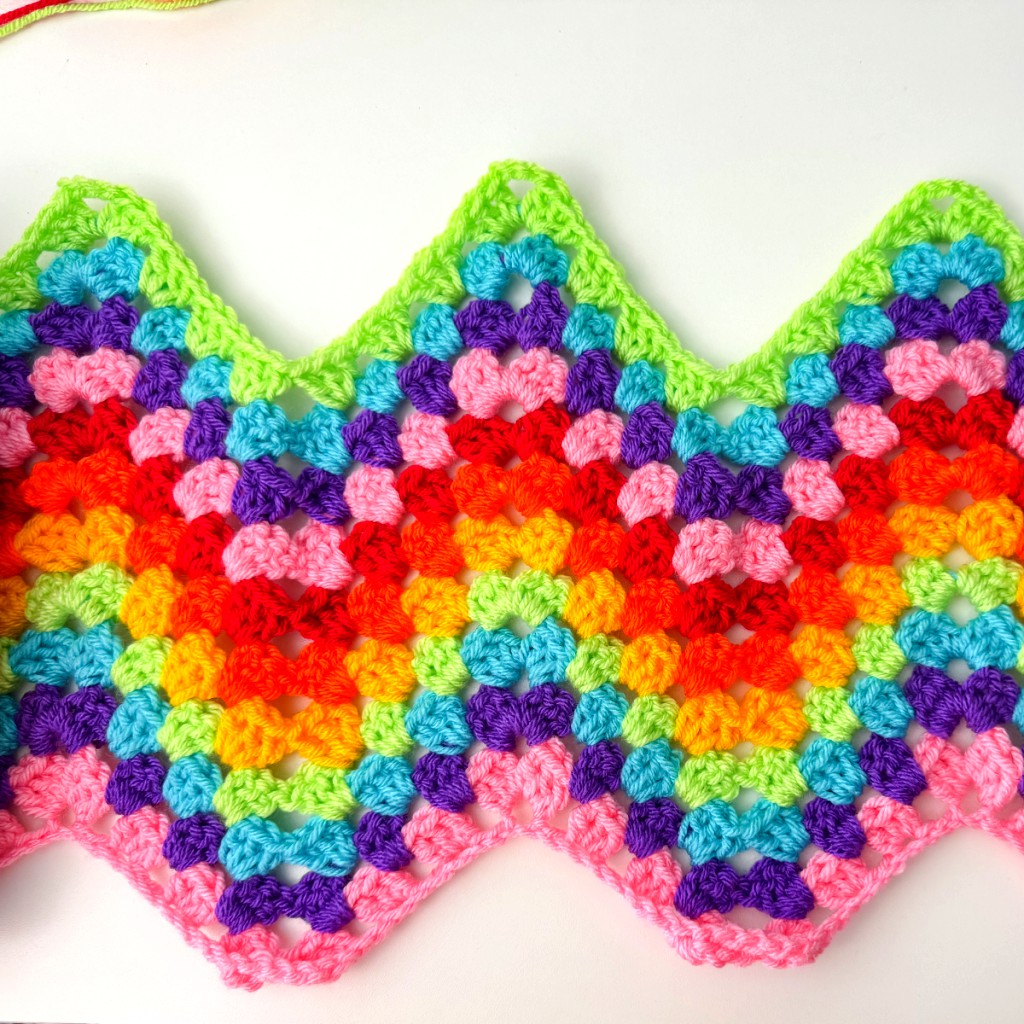
The Granny Ripple Stitch is a stunning crochet pattern that combines the timeless beauty of granny clusters with the flowing, dynamic motion of ripples or chevrons. It’s the perfect choice for blankets, shawls, or any project where you want a bit of texture and movement. In this guide, we’ll go through everything you need to know to crochet this beautiful stitch, from foundation chains to finishing.
Materials Needed
-
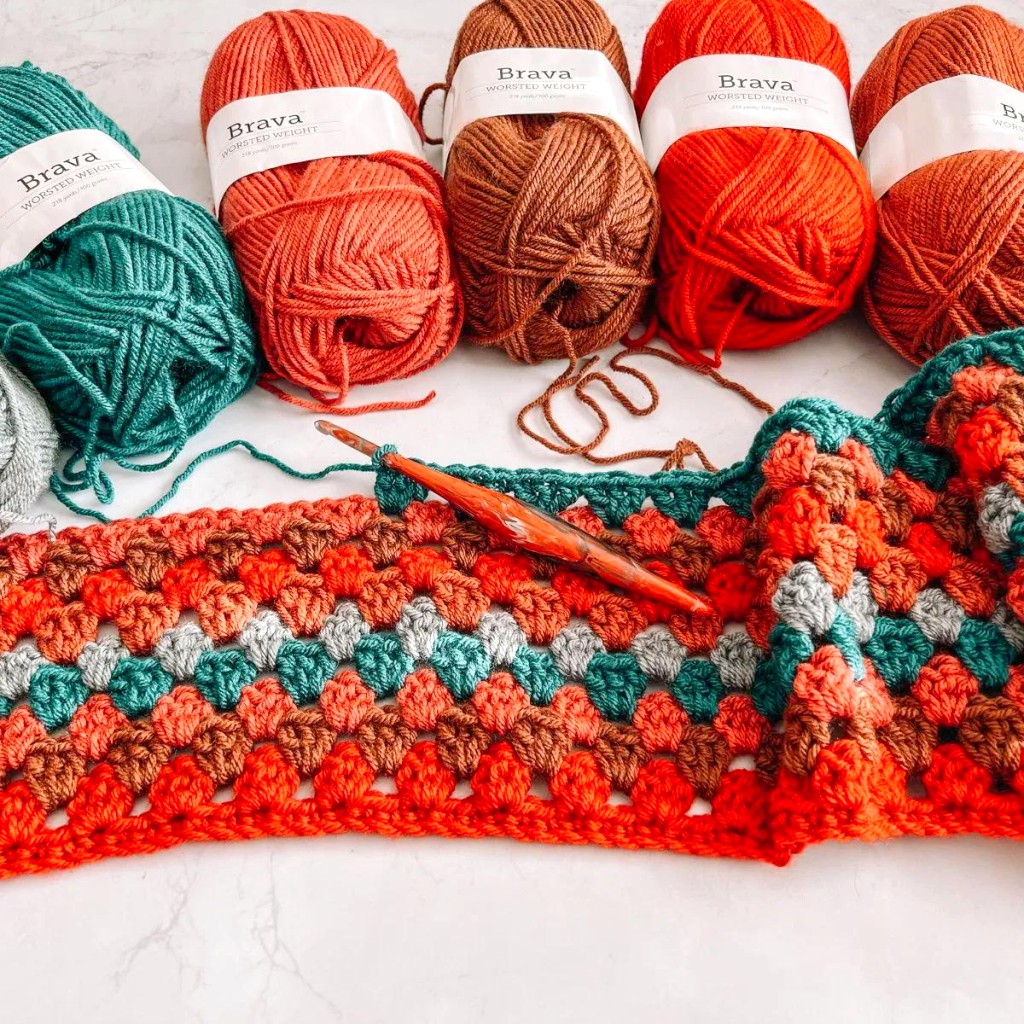
Yarn: You can use any yarn type, but a worsted weight (#4) is most common for this pattern. If you use thinner or thicker yarn, just make sure to adjust your hook size accordingly.
-
Example: Red Heart Super Saver or Caron Simply Soft (both are worsted weight).
-
-
Crochet Hook: Choose the recommended hook size for your yarn. For worsted weight yarn, a 5.0mm (H) hook works well.
-
Scissors: To cut your yarn when you finish or change colors.
-
Tapestry Needle: For weaving in the ends after finishing your project.
-
Stitch Markers (optional): These can help you keep track of your first and last stitches of each row to avoid confusion.
Abbreviations (US Terms)
-
ch = chain
-
dc = double crochet
-
sl st = slip stitch
-
st = stitch
-
sp = space
-
sk = skip
Understanding the Granny Ripple Stitch Pattern
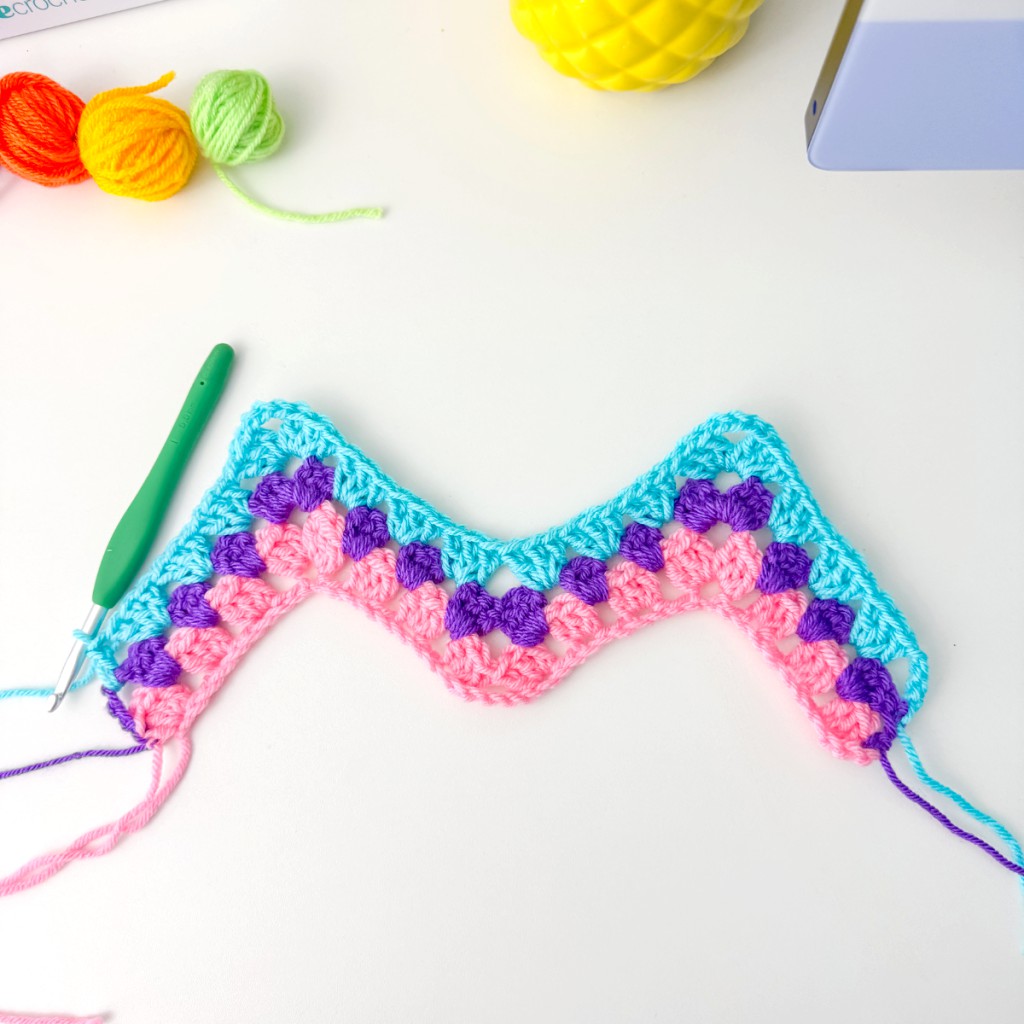
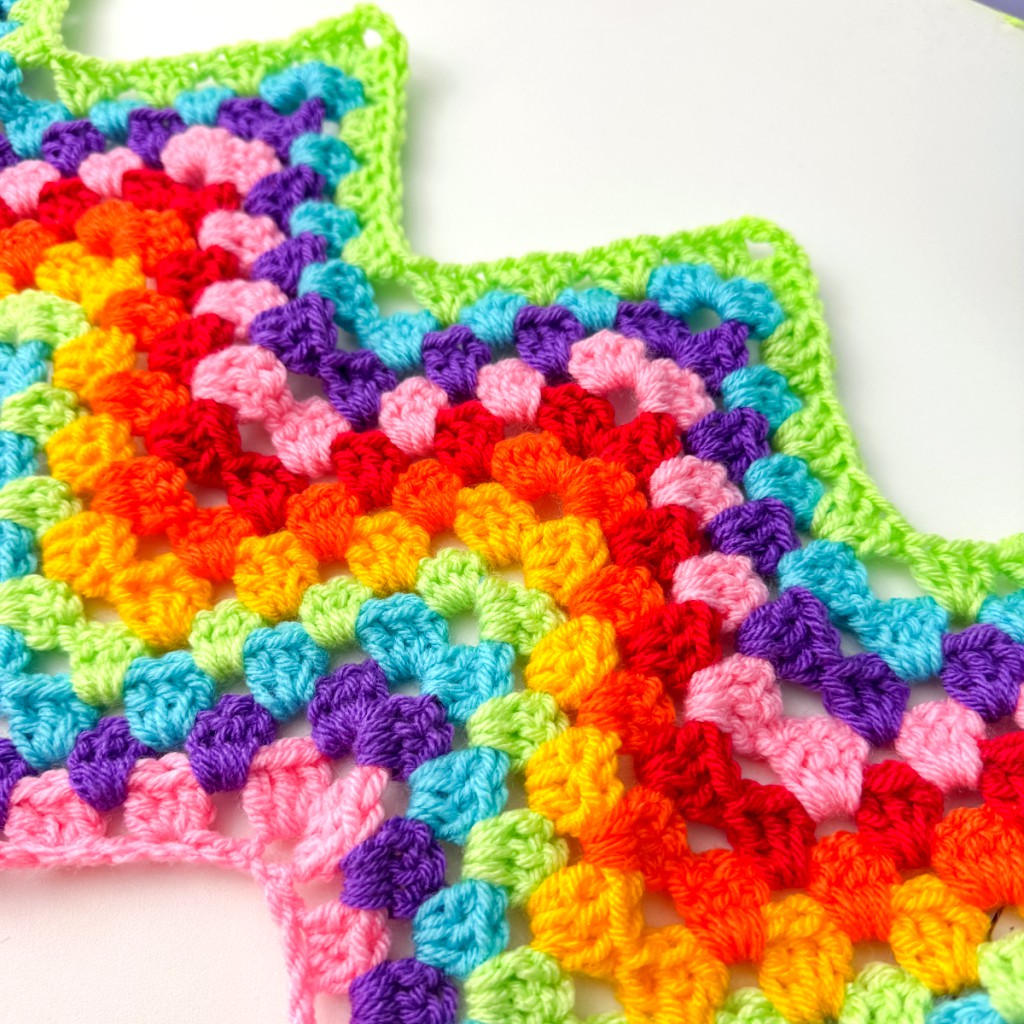
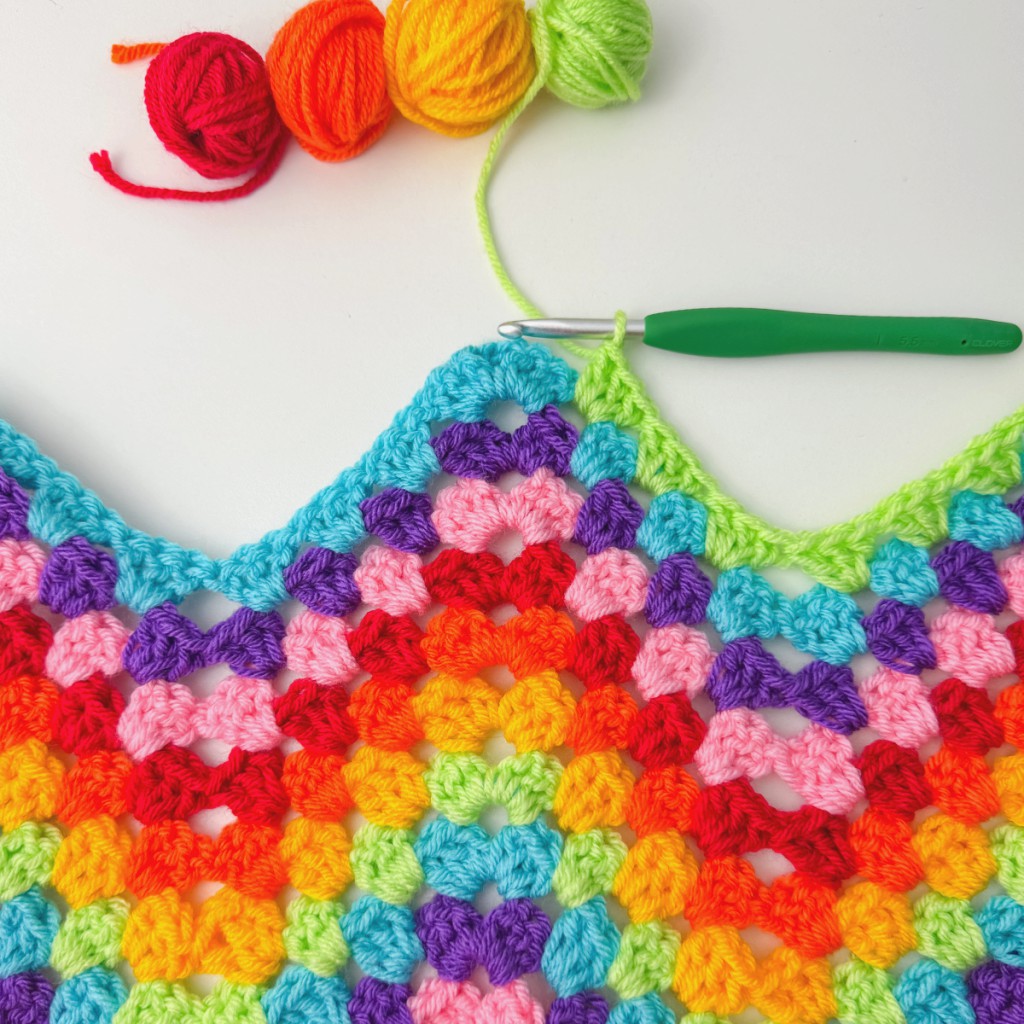
The Granny Ripple Stitch is a combination of granny clusters (groups of 3 double crochets) and a zigzag or chevron pattern. This creates a gorgeous ripple effect that flows through your project. Each row of this stitch has peaks and valleys, which gives it a lot of depth and texture.
Step-by-Step Instructions
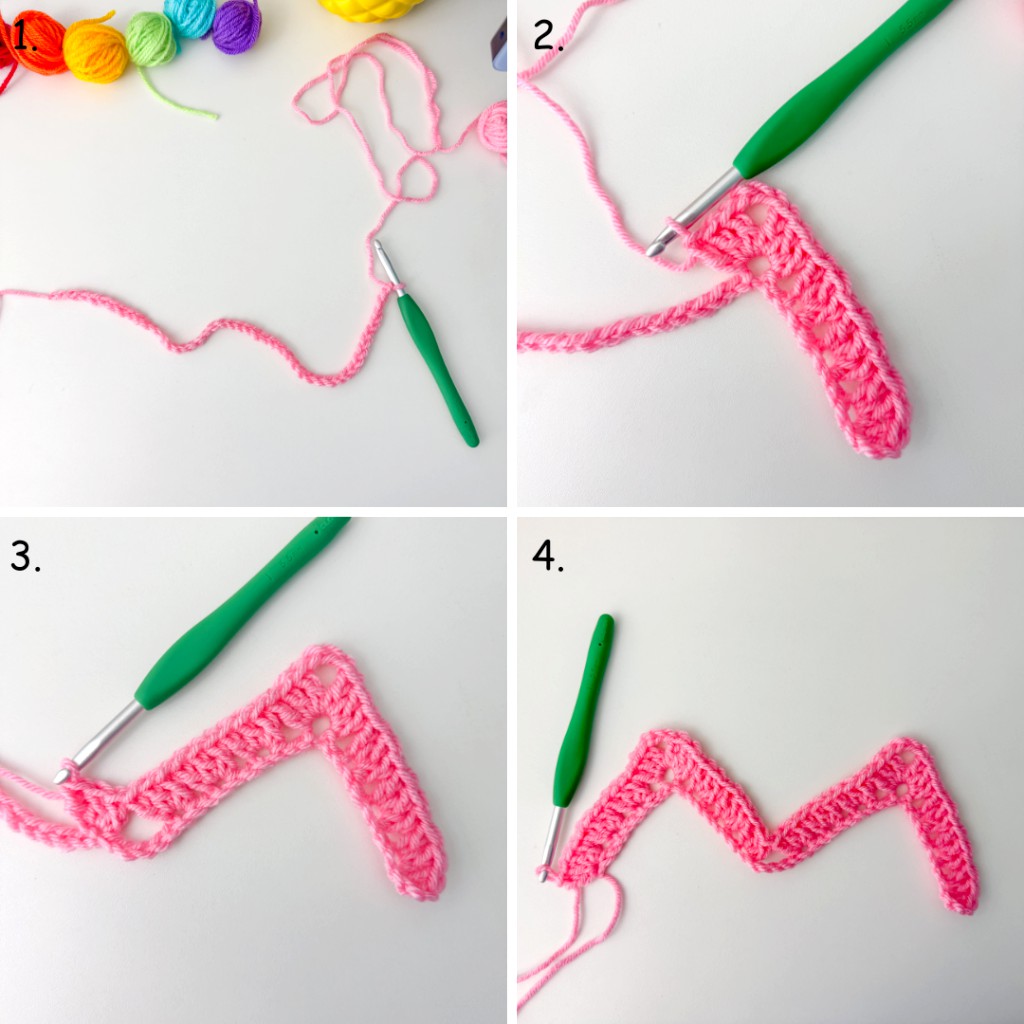
Step 1: Foundation Chain
To start the Granny Ripple Stitch, you’ll need to create a foundation chain. This chain should be a multiple of 18 + 6.
Why 18? The ripple pattern works in multiples of 18 stitches (for each complete zigzag), with 6 extra stitches added for turning and shaping the project.
Example:
-
If you want to make a small swatch, you can chain 42 (18 × 2 + 6).
-
If you want to make a larger project like a blanket, use a longer foundation chain (e.g., 78, 96, or 186, depending on the size).
To summarize:
-
Multiple of 18 + 6 = Foundation chain.
-
For example, if you want 2 peaks and 2 valleys: (18 × 2) + 6 = 42 chains.
-
Step 2: Row 1 – First Granny Clusters
-
Count to the 6th chain from the hook. In the 6th chain, make 3 double crochets (dc). This counts as your first “granny cluster.”
-
The 3 dc are what form the first “peak” of the ripple.
-
-
Skip 2 chains and make another 3 dc in the next chain.
-
Repeat this 4 times, so you will have 5 granny clusters in total.
-
-
Skip 5 chains (this forms the “valley” between the peaks of the ripple).
-
Make 3 dc in the next chain and skip 2 chains.
-
Repeat this 4 times, creating the second half of the ripple, the downhill side.
-
-
Skip the last 2 chains, and in the final chain (the last stitch of your foundation chain), make 3 dc.
-
Turn your work to begin the next row.
At the end of Row 1, you should have 5 granny clusters followed by the “valley” (which is created by skipping 5 chains).
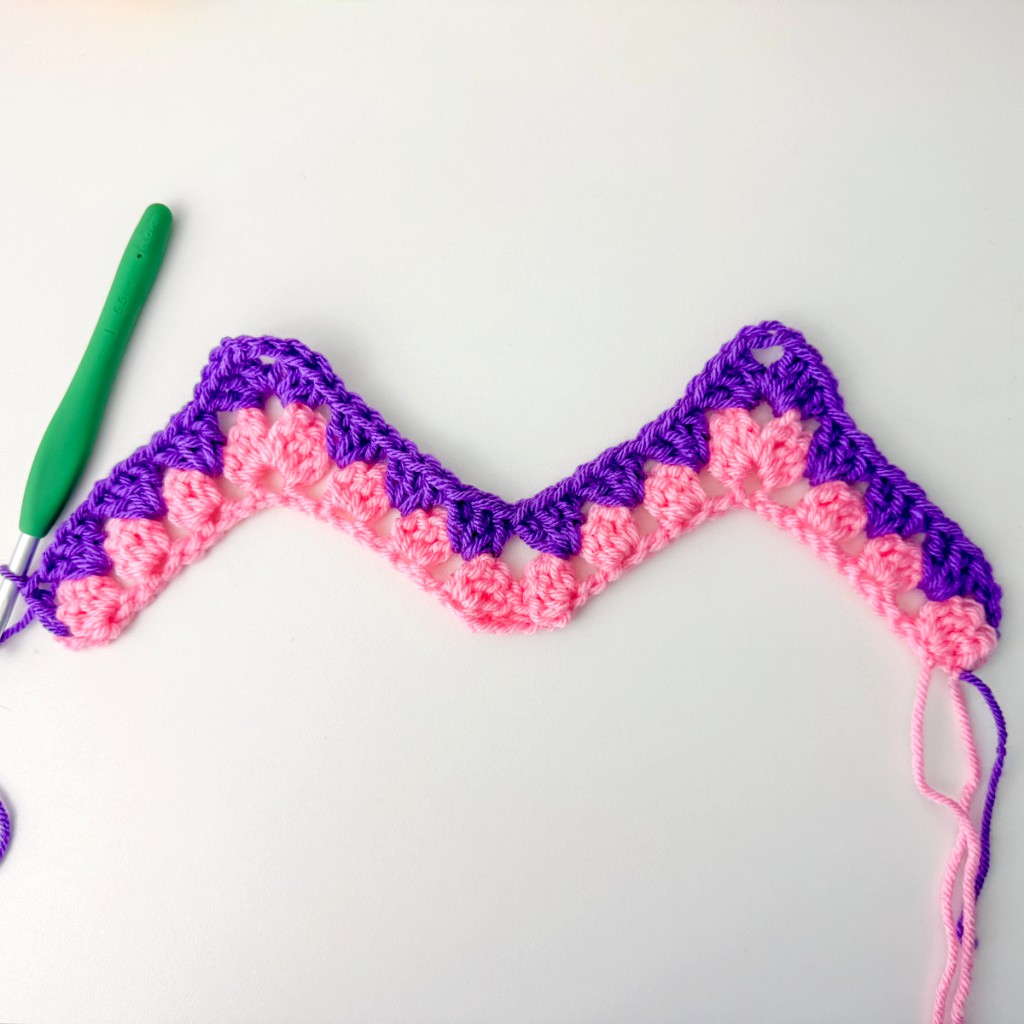
Step 3: Row 2 – Building the Ripple
-
Ch 3 (counts as the first dc of your first granny cluster), then make 2 more dc in the same stitch (making a total of 3 dc in the same space).
-
This is your first “peak” of the second row, directly aligned with the first peak from the previous row.
-
-
Skip 2 stitches (skip the next two dc stitches), and then make 3 dc in the next space (this starts the second peak).
-
Repeat this step 4 times until you have 5 granny clusters for this row.
-
-
After you finish the peaks, skip the center granny cluster entirely (this creates the “valley” between the peaks).
-
Make 3 dc in the next stitch and skip 2 stitches. Repeat this process for the second half of the ripple pattern.
-
End with 3 dc in the final stitch of the row, aligning with the last peak of the previous row.
-
Turn your work again.
Step 4: Repeat Row 2
-
Repeat Row 2 as many times as needed to reach your desired length.
-
The zigzag pattern should begin to emerge as you continue the pattern. Each row will build upon the previous one, creating a flowing, rippling effect.
Tips for Success
1. Keep Your Tension Even
-
When working a stitch like double crochet, consistency in tension is key. If your tension is too tight, the ripples might look scrunched up. If it’s too loose, the ripples will become too wide and floppy.
2. Count Your Stitches
-
It’s important to make sure that each row of your project has the same number of granny clusters, which ensures that the ripple pattern remains uniform.
-
If you’re not sure, use a stitch marker to mark the first and last stitches of each row. This will help you keep track as you go.
3. Color Changes
-
Changing colors with this stitch can create a stunning effect! If you want to change colors, do it at the end of the row, just before you finish the last stitch. Yarn over with the new color and pull it through to complete the stitch.
-
You can also use self-striping yarn for a more automatic, colorful effect.
4. Make It Bigger or Smaller
-
To make a larger project (like a blanket), you simply need to add multiples of 18 stitches to your foundation chain.
-
For a smaller swatch, decrease the number of stitches in your foundation chain, remembering to keep the same multiple of 18 + 6.
Project Ideas for Granny Ripple Stitch
-
Blankets
-
The Granny Ripple Stitch is perfect for making large, cozy blankets. The texture adds interest, and the zigzag pattern is visually appealing. Try using a solid color or alternating between different colors for added variety.
-
-
Shawls and Scarves
-
This stitch works beautifully for lightweight shawls or scarves. The chevron pattern drapes nicely and adds a flowy feel to your wearable project.
-
-
Baby Blankets
-
With soft, pastel colors and the Granny Ripple Stitch, you can create a beautiful baby blanket. The repetitive pattern works well for beginners and gives an intricate look without being too complex.
-
-
Table Runners
-
For home décor, crochet a ripple-patterned table runner in vibrant or neutral colors. This is an elegant way to showcase your skills.
-
Conclusion
The Granny Ripple Stitch is a stunning way to create beautiful, textured designs. With its combination of granny clusters and chevron shapes, it’s perfect for a wide range of crochet projects. Whether you’re making a cozy blanket, a stylish scarf, or even a cute baby blanket, this stitch will add movement and charm to your work. With practice, you’ll become more comfortable with the stitch, and you can experiment with different colors and yarn types to make your project truly unique!
Video Tutorial
How to Crochet the Granny Ripple Stitch
This video provides a simple walkthrough of the Granny Ripple Stitch, including tips on straightening the edges if you prefer a non-pointed finish. By Just Be Crafty
These tutorials should provide you with a solid understanding of the Granny Ripple Stitch and help you get started on your crochet projects. Happy crocheting! 😊