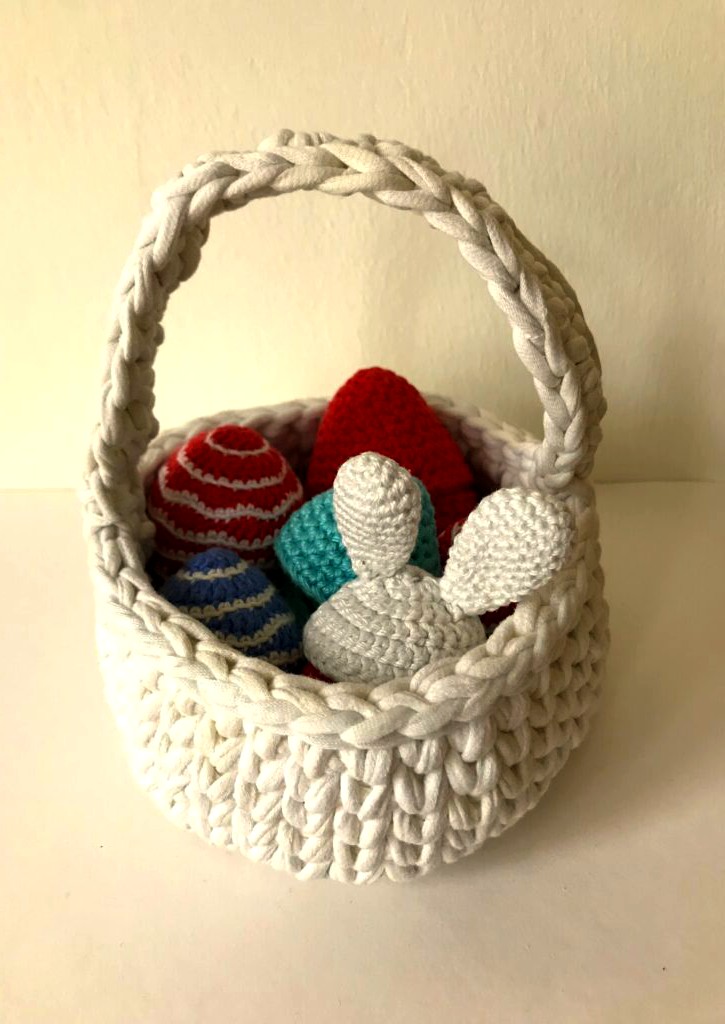
Creating an Easter basket from T-shirt yarn is a wonderful way to celebrate sustainably while giving new life to old clothes. Instead of buying plastic baskets that may end up in landfills, this project allows you to repurpose old T-shirts into a functional, reusable, and eco-friendly Easter basket.
This tutorial will guide you step by step through making a handmade, zero-waste Easter basket using T-shirt yarn. Whether you crochet, weave, or handcraft the basket, this DIY project is a creative and sustainable way to celebrate Easter.
Why Use T-Shirt Yarn?
T-shirt yarn is an excellent alternative to traditional yarns because it’s upcycled from old clothing, making it cost-effective and environmentally friendly. By transforming fabric into yarn, we can reduce textile waste while creating something beautiful and functional.
Benefits of T-Shirt Yarn:
✅ Eco-Friendly – Repurposes old fabric instead of sending it to landfills
✅ Durable – Thicker and sturdier than traditional yarn, making it great for baskets
✅ Cost-Effective – No need to buy expensive materials; just use old T-shirts
✅ Customizable – You can use any color, texture, or pattern to match your Easter decor
Materials Needed
Before you begin, gather the following materials:
-
Old T-shirts (any color; the more colorful, the better!)
-
Scissors (sharp fabric scissors work best)
-
Crochet hook (size 8 mm- 12 mm, depending on yarn thickness)
-
Needle and thread (optional, for reinforcement)
-
Fabric glue or hot glue (optional, for additional stability)
Step 1: Making T-Shirt Yarn
If you don’t already have T-shirt yarn, you’ll need to make your own from old T-shirts.
How to Make T-Shirt Yarn:
-
Choose a T-shirt – Use a cotton T-shirt without side seams for the best results.
-
Cut off the top and bottom – Remove the sleeves and neckline, leaving just the main body.
-
Create a Continuous Strip:
-
Lay the T-shirt flat and fold it in half, leaving a 2-inch gap at the top.
-
Cut the fabric into strips, stopping before the top edge so it remains connected.
-
Unfold the T-shirt and cut diagonally across the strips to create one long strand.
-
-
Stretch the Yarn – Pull the strip gently to make it curl into a rope-like texture.
-
Roll it into a Ball – Keep the yarn neat for easy crocheting.
Step 2: Crocheting the Basket Base
-
Start with a Magic Ring – This technique creates a tight center for the basket.
-
Single Crochet (SC) in the Round:
-
Crochet 6 SC into the magic ring.
-
Pull the ring tight and join with a slip stitch.
-
-
Increase the Rounds:
-
Round 2: Work 2 SC into each stitch (12 stitches).
-
Round 3: Work SC, increase pattern around (18 stitches).
-
Continue increasing until the base reaches your desired size.
-
Step 3: Building the Basket’s Sides
Once the base is complete, stop increasing and crochet in continuous rounds to build the sides.
-
Crochet the First Side Row:
-
Work one SC into the back loop only of each stitch to create a structured edge.
-
-
Continue Upwards:
-
Keep working SC rounds until the basket is tall enough to hold Easter treats.
-
-
Reinforce the Structure:
-
If the basket feels too soft, crochet a tighter stitch or double up on the yarn.
-
Step 4: Adding a Handle (Optional)
A handle makes the basket easier to carry and adds a decorative touch.
-
Decide on Handle Length:
-
Chain 20-30 stitches, depending on how long you want the handle.
-
-
Attach the Handle:
-
Secure each end to the opposite sides of the basket with a few strong stitches.
-
-
Reinforce for Strength:
-
Add a few extra rows of SC over the handle to make it sturdier.
-
Step 5: Decorating Your Easter Basket
Now that your basket is complete, you can add creative and festive touches:
🎀 Ribbon or Fabric Scraps – Weave colorful ribbons through the basket’s edge.
🌸 Crochet Flowers – Attach small crochet flowers or embellishments for extra charm.
🐰 Easter-Themed Accents – Add felt bunny ears or a pompom tail for a cute Easter vibe.
🌿 Eco-Friendly Paint – Use non-toxic paint to decorate the basket with patterns or names.
Ways to Use Your Zero-Waste Easter Basket
Your DIY basket isn’t just for Easter! Here are some ways you can reuse it throughout the year:
🌱 Storage Basket – Use it to store yarn, small toys, or bathroom essentials.
🧺 Gift Basket – Fill it with handmade treats for birthdays or special occasions.
🍎 Fruit or Bread Basket – Line it with a napkin and use it to hold snacks in the kitchen.
🎁 Holiday Decor – Reuse it for other holidays by changing the decorations.
Sustainability & Zero Waste Benefits
This project helps reduce waste and promotes mindful consumption. By upcycling fabric, you contribute to a circular economy where materials are reused instead of discarded. Plus, since the basket is reusable, you avoid plastic waste from store-bought alternatives.
Eco-Friendly Tips:
♻️ Use old clothes instead of buying new ones.
🌿 Choose biodegradable embellishments (wood, fabric, or paper decorations).
🧵 Hand-sew instead of using glue for a fully compostable design.
Final Thoughts
Making a zero-waste Easter basket from T-shirt yarn is a fun, sustainable, and meaningful craft. Whether you’re making one for yourself, your kids, or as a gift, this basket is a beautiful way to celebrate Easter while reducing waste.
By choosing handmade over store-bought, you’re not just making a basket—you’re making a statement about sustainability and creativity.
Happy Easter and happy crafting! 🌸🐣♻️