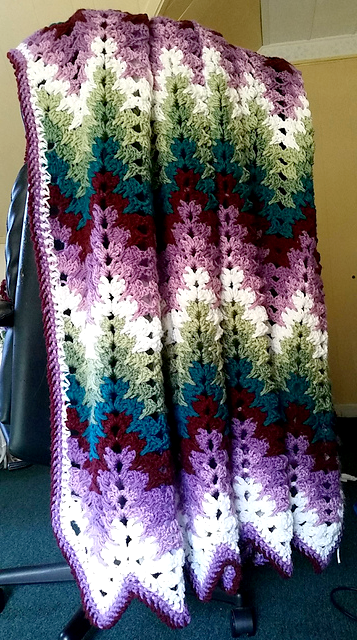
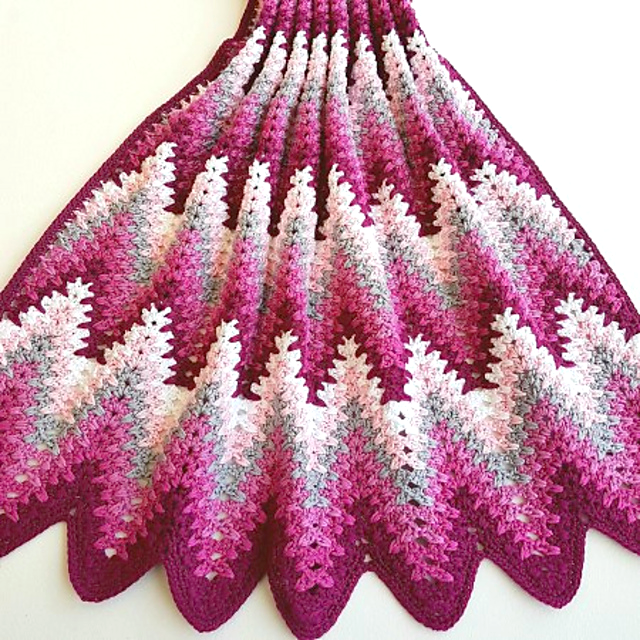
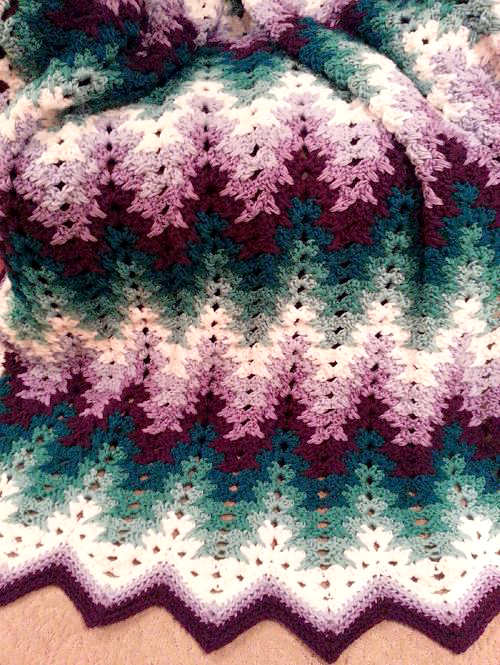
The Grandma Spiked Ripple Blanket is a beautiful and textured crochet pattern that combines the classic ripple or chevron design with elongated “spike” stitches. These spike stitches extend into previous rows, creating a striking, interwoven effect that adds both depth and visual interest. This pattern is ideal for making blankets that are both warm and aesthetically unique, whether for personal use, gifts, or heirloom pieces.
Many crocheters love ripple blankets for their timeless appeal, and the addition of spike stitches enhances this classic design by introducing a sense of movement and dimension. The best part is that, while the pattern looks intricate, it is quite manageable with some basic crochet skills.
Why the Grandma Spiked Ripple Blanket Stands Out
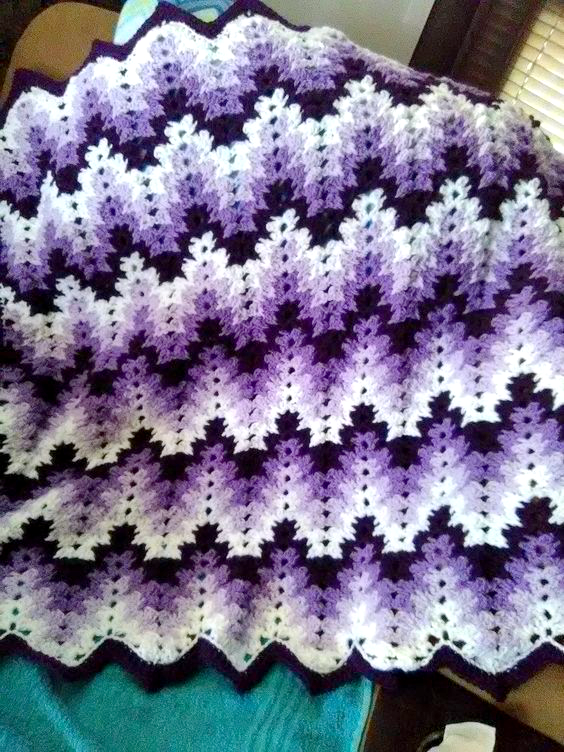
Unlike traditional ripple blankets, which rely solely on increases and decreases to create a zigzag shape, this design incorporates spike stitches that dip into lower rows. This creates a woven or almost stair-step effect that makes the colors blend beautifully.
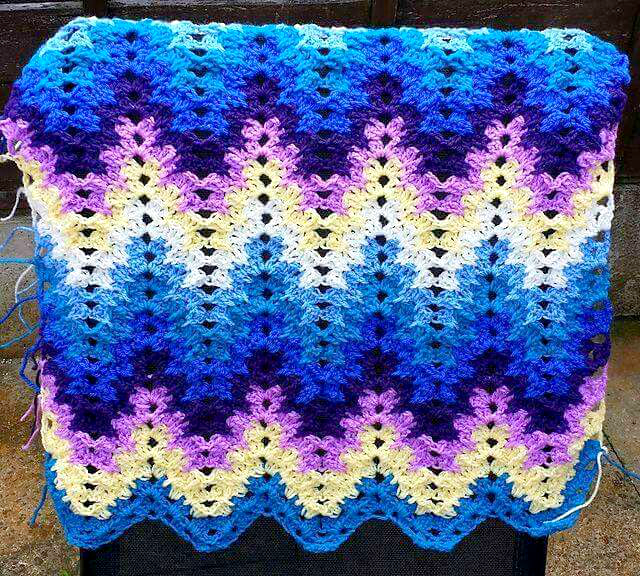
This pattern is especially stunning when worked in multiple colors, as the spikes help transition hues in an organic, flowing manner. Whether you prefer bold and vibrant tones or a more subtle, monochromatic palette, this design allows you to play with colors uniquely.
It is an excellent choice for baby blankets, throws, or even larger afghans. The pattern’s versatility means it can be adapted for different sizes and yarn weights, making it a fantastic go-to project for any crocheter.
Skill Level and Stitch Requirements
The Grandma Spiked Ripple Blanket is ideal for advanced beginners to intermediate crocheters. If you are comfortable with basic crochet stitches but want to try something new and slightly more textured, this pattern is a great learning experience.
Stitches You Need to Know:
✔ Chain stitch (ch) – Forms the foundation of the blanket.
✔ Single crochet (sc) – Used to create tighter, more compact rows.
✔ Double crochet (dc) – The main stitch used in ripple patterns.
✔ Spike stitches – The key feature of this pattern. These elongated stitches are worked into stitches from previous rows rather than the current row, creating the spiked look.
✔ Increases and decreases – Essential for shaping the peaks and valleys of the ripple design.
The spike stitch is what gives this blanket its unique personality. If you have never used it before, don’t worry—it is simply a variation of a basic stitch, worked into a lower row rather than the row you are currently working on. The length of the spike can vary, depending on the design and desired effect.
Materials You Will Need
One of the best things about this pattern is that it can be made with a variety of yarn weights and fiber types. However, for the best results, a medium-weight yarn is usually preferred.
Recommended Supplies:
🧶 Yarn: Medium-weight (Worsted Weight #4) or DK (#3) is commonly used. Cotton or acrylic blends work well, depending on your preference.
🧵 Crochet Hook: A size 5mm (H-8) or 6mm (J-10) hook is typically recommended, but the size can be adjusted based on the yarn you choose.
✂ Scissors: A sharp pair for cutting yarn cleanly.
📏 Measuring Tape: Useful for ensuring consistency in sizing.
🪡 Tapestry Needle: For weaving in loose ends and finishing touches.
Step-by-Step Guide to the Grandma Spiked Ripple Blanket
Step 1: Creating the Foundation Chain
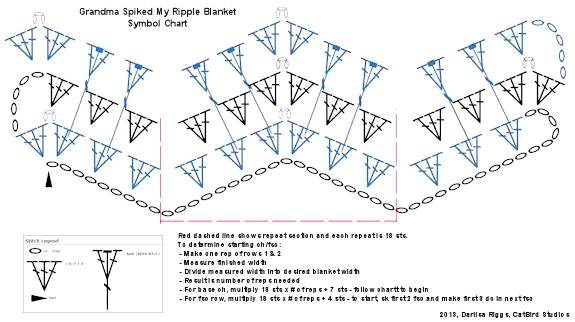
Begin by making a foundation chain in a multiple of 14 stitches, plus 3 extra chains for turning. This ensures that the peaks and valleys of the ripple pattern align correctly.
For example: If you want a medium-sized blanket, you might start with 140 chains + 3 chains (total: 143).
Step 2: Establishing the Ripple Pattern
The first row consists of double crochet stitches, worked in a structured way to create the ripple shape.
Typical structure:
- Work 2 double crochet (dc) into the same stitch at the peak (increase).
- Work double crochet decreases (dc2tog) at the valleys to create the downward dips.
This creates the wave-like shape that will be carried through the rest of the blanket.
Step 3: Incorporating the Spike Stitches
Once the ripple foundation is established, the spike stitches are introduced in the second or third row.
To create a spike stitch:
- Instead of inserting your hook into the current row, insert it one or two rows below and pull up a loop.
- Complete the stitch as a double crochet (dc) or single crochet (sc), depending on the pattern’s instructions.
Spike stitches break the usual horizontal flow of crochet fabric, drawing stitches from previous rows into the current design, which results in the characteristic spiked effect.
Step 4: Maintaining the Pattern and Changing Colours
Continue working on the ripple pattern, incorporating spike stitches at specific intervals. Color changes can be made every few rows to highlight the spikes and add contrast.
- For a bold effect, change colors every 2–4 rows.
- For a subtle gradient, choose colors that blend well together and space out the changes.
When switching colors, carry the yarn neatly up the side of the blanket or fasten it off and weave in the ends for a cleaner finish.
Step 5: Finishing with a Border (Optional)
Once the blanket reaches the desired length, you can add a border to give it a polished look. A single crochet border is a simple but effective option that complements the structured ripple design.
- A scalloped border can also add a decorative touch, enhancing the waves of the ripple.
- If you prefer a minimalist approach, a simple row of slip stitches along the edges will provide a neat and finished look.
Tips for a Perfect Grandma Spiked Ripple Blanket
✔ Use stitch markers. The peaks and valleys can be tricky to keep track of, so place markers at the increase points to stay on track.
✔ Maintain even tension. Spike stitches should not be too tight (which can cause puckering) or too loose (which can make the blanket look messy).
✔ Block the blanket. Once finished, lightly blocking the blanket can help smooth out the ripples and enhance the stitch definition.
✔ Plan color changes. Choosing a cohesive color palette will ensure that the spiked stitches stand out beautifully.
Why Should You Make This Blanket?
The Grandma Spiked Ripple Blanket is more than just a crochet project—it’s a timeless design with a contemporary twist. Whether you are making it for a baby gift, a cosy couch throw, or an heirloom-quality afghan, this blanket is both visually stunning and practical.
It allows for creativity in color choices and stitch placement, making each blanket truly unique. Plus, the rhythmic nature of the ripple pattern makes it a relaxing yet engaging project that is satisfying to complete.
VIDEO TUTORIAL:
If you’re looking for a visual guide to creating the Grandma Spiked Ripple Blanket, here’s a comprehensive tutorial that walks you through the process step by step: On the YouTube channel Creative Grandma
This video provides clear instructions on the stitch pattern, making it accessible for both beginners and experienced crocheters. The accompanying pattern is available at Crochet Uncut for more detailed guidance.
For additional perspectives and techniques, you might also find these tutorials helpful:
-
How to Crochet the Grandma Spiked My Ripple Blanket Stitch: This tutorial offers another approach to the spiked ripple design, providing alternative techniques that might suit your style.
-
SPIKED RIPPLE – The Most Incredible Crochet Blanket!: This video showcases a variation of the spiked ripple pattern, demonstrating how to create a stunning blanket with this unique stitch.
These resources should equip you with the knowledge and inspiration to start your own Grandma Spiked Ripple Blanket project. Happy crocheting! 😊


