✨ Overview
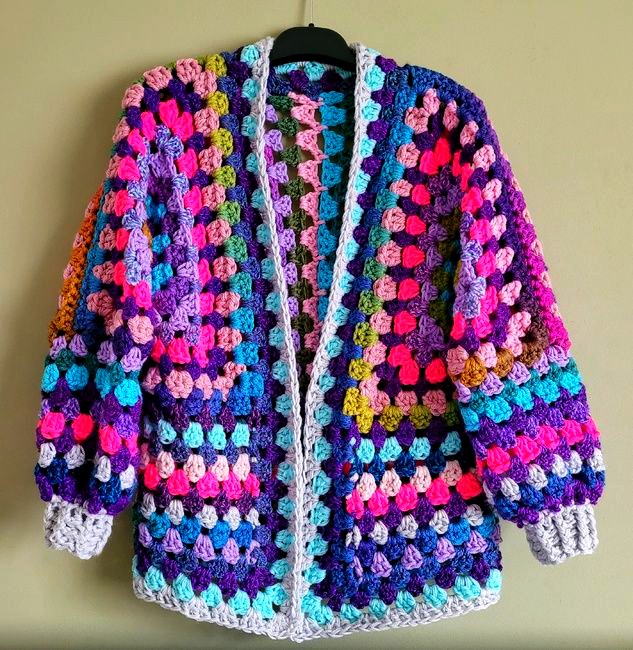
The Granny Hexagon Cardigan is a timeless and cozy project that works up beautifully using basic granny stitch techniques. It’s made by creating two large hexagons, folding them into “L” shapes, and then sewing them together to form the sleeves and body. Perfect for beginners who want to try a wearable project!
📋 Pattern Details
-
Skill Level: Advanced Beginner to Intermediate
-
Construction: Modular (made from 2 granny hexagons)
-
Fit: Relaxed and slightly oversized
-
Available Sizes: Adjustable (S to 3XL+)
-
Customization: Easily modified in length, width, sleeve size, and collar
🧵 Materials
-
Yarn:
-
Type: Medium Weight (#4 – Worsted/Aran)
-
Yardage:
-
Small/Medium: ~1000–1100 yards
-
Large/XL: ~1200–1300 yards
-
2XL/3XL: ~1400+ yards
-
-
Fiber Recommendation: Acrylic, cotton, or wool blends work well for drape and comfort.
-
-
Hook:
-
Size 5.5 mm (I-9), or size needed to meet preferred drape
-
-
Tools:
-
Scissors
-
Yarn needle for weaving in ends
-
Stitch markers (optional but helpful)
-
Measuring tape
-

🧶 Abbreviations (US Terms)
| Abbreviation | Meaning |
|---|---|
| ch | chain |
| sl st | slip stitch |
| dc | double crochet |
| st(s) | stitch(es) |
| sp | space |
| rep | repeat |
📏 Gauge & Sizing Guide
Gauge is not critical for this project, but a rough measurement is:
-
One granny hexagon after 10 rounds should measure about 18-20 inches across flat (from corner to corner).
👉 To make a larger or smaller cardigan, simply add or subtract rounds to each hexagon.
-
For oversized fit: Make hexagons that reach from mid-back to wrist when folded.
-
For a fitted look: Stop when hexagons reach the shoulder to mid-arm.
🧩 Crochet the Granny Hexagons (Make 2 Identical)
✅ Step-by-Step Instructions
Round 1:
Ch 4, join with a sl st to form a ring.
Ch 3 (counts as 1 dc), 2 dc into the ring, ch 2, 3 dc into the ring; repeat from * to * 4 more times.
You should have 6 groups of 3 dc and 6 ch-2 corners.
Join with sl st to top of ch-3.
Round 2:
Sl st into the next 2 dc and the ch-2 corner space.
Ch 3 (counts as 1 dc), 2 dc, ch 2, 3 dc in same ch-2 sp (corner made).
In next ch-2 sp, 3 dc, ch 2, 3 dc; repeat around. Join with SL St.
Round 3 and Beyond:
Sl st into the next 2 dc and the next ch-2 sp.
Ch 3, 2 dc, ch 2, 3 dc in the corner.
In each side space (between clusters), work 3 dc.
In each corner, work 3 dc, ch 2, 3 dc.
Join with sl st and continue working in the round until the hexagon reaches your desired size.
🔁 Repeat the above round to increase the hexagon. The sides will get longer, and the shape will expand.
📌 Tip: Use a stitch marker to mark the beginning of each round if you have trouble keeping track.
🧵 Folding & Assembly Instructions
🪡 Step 1: Folding the Hexagons
-
Lay each finished hexagon flat.
-
Fold each hexagon in half so that one corner touches the opposite corner, forming an “L” or boot shape.
-
Repeat with the second hexagon.
🪡 Step 2: Positioning and Seaming the Body
-
Place the two folded hexagons next to each other with the “boot heels” facing inward.
-
Seam along the center back where the two inner edges meet. This forms the back panel.
-
Use a whip stitch or slip stitch seam for a flat join.
-
-
See the underside of each sleeve (from wrist to underarm).
You now have the basic cardigan shape!
🧥 Adding Length to the Body
To extend the cardigan length (especially if it’s cropped):
-
Attach yarn to the bottom edge of the cardigan, where the two hexagons form a V.
-
Work rows in granny stitch pattern:
-
Ch 3 (counts as dc), work 2 dc in each space between clusters, ch 1 between groups if needed.
-
Repeat until the desired length is reached (usually 3–10 rows).
-
-
Fasten off and weave in ends.
✂️ Optional: Add ribbing (sl st or sc) to create a hemmed edge.
🧶 Sleeves
-
Attach yarn to one of the sleeve openings.
-
Work in rounds using granny stitch or simple double crochet rounds.
-
Continue until the desired sleeve length.
-
Optionally taper the sleeve:
-
Every few rounds, skip one stitch between clusters or dc 2 together.
-
-
Finish with a round of sc or ribbing (fpdc/bpdc) for a cuffed look.
🔁 Repeat on the second sleeve.
🪞 Optional: Front Border
To add structure and polish to the open front:
-
Attach yarn at the bottom corner.
-
Work single crochet (sc) or half-double crochet (hdc) evenly along the front edge, collar, and down the other side.
-
Repeat 1–3 rows for a thicker edge.
-
Optional: Add button loops or ties.
🧺 Finishing Touches
-
Weave in all yarn ends securely using a yarn needle.
-
Gently block the cardigan if using natural fibers for improved drape.
-
Try it on and admire your work!
🧡 Customization Ideas
-
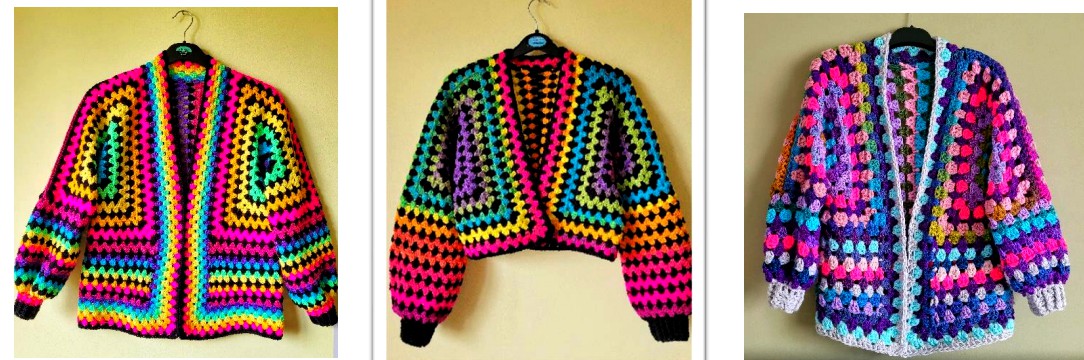
🌈 Use self-striping or variegated yarn for effortless color changes.
-
🧵 Use contrasting yarns for the border, sleeves, or edging.
-
🧣 Add a hood using granny stitch rows shaped to fit.
-
✨ Embroider flowers or shapes on the back panel for detail.
-
🧵 Add buttons or a zipper if desired.
Download the Free Pattern
Want to start your own Granny Hexagon Cardigan? I’ve prepared a FREE downloadable PDF that includes step-by-step instructions, photos, and tips to help you succeed.
👉 Click here to download the FREE Granny Hexagon Cardigan Pattern PDF!
Certainly! Here are some YouTube video tutorials to help you crochet a Granny Hexagon Cardigan:
🎥 Video Tutorials
-
DIY CUSTOM Crochet Hexagon Cardigan | Free Pattern + Step-by-Step Tutorial
-
This tutorial provides a comprehensive guide to creating a customizable granny hexagon cardigan.
-
Watch here: By TL Yarn Crafts
-
-
How To Crochet A Granny Hexagon Cardigan! | Hooks and Heelers
-
A detailed walkthrough suitable for beginners, covering each step of the process.
-
Watch here: By Annie | Hooks and Heelers
-
-
-
How to Crochet a Granny Hexagon Cardigan [CAMPFIRE CARDIGAN TUTORIAL]
-
This playlist offers multiple videos, including customizing fit and seaming techniques.
-
Watch the playlist: By Make & Do Crew
-
Feel free to choose the tutorial that best fits your learning style. If you need further assistance or have specific questions about the pattern, don’t hesitate to ask!