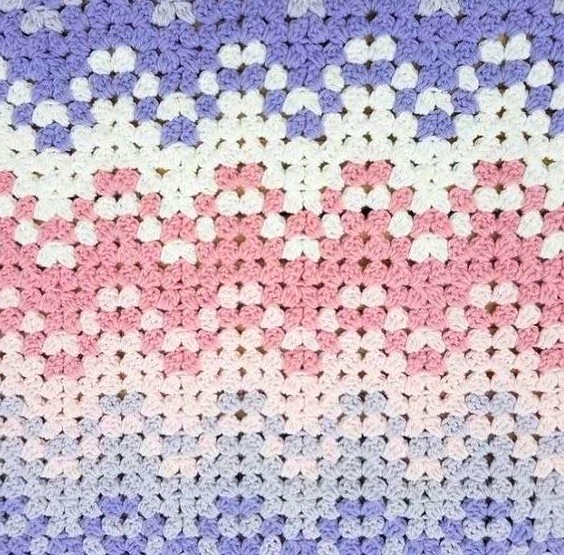
Crocheting a Granny Ripple Blanket is a rewarding project that blends two beloved crochet techniques: the traditional Granny Square and the stunning, wavy Ripple Stitch. The result is a beautifully textured, colorful, and cozy blanket that can become a cherished piece in any home. Whether you are new to crochet or an experienced crafter, this step-by-step guide will help you create a timeless crochet blanket that will keep you warm and proud for years to come.
This guide will cover everything from choosing your materials to joining your granny squares and adding a decorative border, with helpful tips along the way. Let’s dive in!
Materials Needed
Before you begin, make sure you have all the necessary supplies. These materials will help you crochet your Granny Ripple Blanket efficiently and comfortably.
-
Yarn:
-
For a typical Granny Ripple Blanket, worsted-weight yarn is the go-to choice. It provides a soft texture and is durable for blankets.
-
Popular yarn brands like Red Heart Super Saver, Caron Simply Soft, or Lion Brand Vanna’s Choice are great options.
-
You can opt for a solid color, variegated yarn, or mix multiple colors for a vibrant look. For this project, you may want to use 5-10 colors, depending on the size and the look you’re going for.
-
Amount: For a throw-size blanket, you’ll need approximately 10-12 skeins of yarn.
-
-
Crochet Hook:
-
The recommended size for worsted weight yarn is typically a 5mm (H-8) or 6mm (J-10) hook.
-
Check the yarn label to confirm the recommended hook size for the specific yarn you choose.
-
-
Scissors:
-
To trim your yarn after finishing each section or when changing colors.
-
-
Yarn Needle:
-
This tool will be used to weave in loose ends when you finish each square and at the end of the project.
-
-
Stitch Markers (Optional):
-
If you’re working in rows and want to mark where your increases or decreases occur, stitch markers can be helpful.
-
Step 1: Make a Foundation Chain
The foundation chain sets the foundation for your ripple pattern. This chain will determine the width of your blanket.
-
Start by chaining a multiple of 3. For example, 150, 153, 156 chains, etc.
-
You’ll need to have enough chains to fit your desired blanket width. A good starting point for a throw blanket is between 150-200 chains, depending on the size you want to achieve.
Once you’ve completed your foundation chain, you’re ready to move on to the first row of the ripple pattern!
Step 2: Start Crocheting the Ripple Pattern
The ripple stitch creates the signature wavy look of the blanket. The pattern involves alternating increases and decreases to form peaks and valleys.
-
Row 1 (Ripple Setup):
-
Double crochet (DC) into the 4th chain from the hook (this counts as your first DC).
-
Continue double crocheting in each chain across until you reach the end. The first row will be simple double crochet stitches.
-
-
Row 2 (The Ripple Begins):
-
Turn your work, chain 3 (this counts as your first double crochet), and then double crochet in the next stitch.
-
To create the “peak” of the ripple, you will need to increase. In the next stitch, do 3 double crochets (this forms the peak).
-
After the peak, create the valley by decreasing. To do this, double crochet 2 stitches together (dc2tog).
-
Continue alternating between peaks (3 double crochets in one stitch) and valleys (dc2tog) along the row.
-
When you reach the end of the row, remember to finish the row with a DC into the last stitch.
-
-
Continue Rows:
-
Repeat the ripple pattern across each row. As you crochet more rows, the peaks and valleys of the ripple pattern will start to take shape.
-
Be sure to turn your work at the end of each row and continue crocheting in the same way.
-
Adjust your increases and decreases so that the ripples are consistent across the blanket.
-
Step 3: Creating the Granny Squares
To add a bit of traditional charm, we’ll be incorporating granny squares into the Granny Ripple Blanket. These small squares are crocheted individually and then joined together later.
To crochet a basic granny square:
-
Start with a magic ring or chain 4, and join to form a loop.
-
Round 1: Chain 3 (this counts as your first double crochet), then make 2 more double crochets into the loop. Chain 2. Repeat this step 3 more times, so you have 4 sets of 3 double crochets separated by chain-2 spaces. Join with a slip stitch to the top of the beginning chain-3.
-
Round 2: Slip stitch to the first chain-2 space, and then work 3 double crochets, chain 2, 3 double crochets into the same space. Repeat this in each of the chain-2 spaces around.
-
Round 3: Continue increasing by adding 3 double crochets, chain 2, and 3 double crochets in each chain-2 space until your square reaches the desired size (typically 3-4 rounds).
-
Fasten off, leaving enough yarn to weave in the ends.
You’ll need several granny squares to add to the ripple sections. The number will depend on your design, but 20-30 squares are usually a good start for a throw-sized blanket.
Step 4: Joining the Granny Squares
After completing your granny squares and the ripple rows, it’s time to join everything together. There are several methods for joining squares, but one popular method is Join-As-You-Go (JAYG).
-
Arrange your squares in the desired layout.
-
With a yarn needle or hook, join the edges of each square using a whip stitch or single crochet.
-
Alternatively, the Join-As-You-Go technique can be used where you join squares together as you crochet, eliminating the need to sew them together later.
Step 5: Adding the Border
A border will provide a clean, finished edge to your Granny Ripple Blanket. There are endless options for borders, but here’s a simple approach to add a classic touch:
-
Start at any corner of the blanket.
-
Row 1: Single crochet (SC) around the entire perimeter, ensuring you work 3 SC stitches into each corner to keep the edges sharp and square.
-
If you prefer a more decorative border, you can experiment with picot stitches or a scalloped edge.
Continue working in rounds until the border is as wide as you want. The border can be made using the same yarn as your blanket or a contrasting color to highlight the edges.
Granny Ripple Blanket PDF
Esteemed reader, we are delighted to present a meticulously crafted PDF by the talented Delma Myers, which contains a comprehensive written guide for this extraordinary design. You may peruse the step-by-step instructions and effortlessly print them out for your convenience. Simply click the button to gain access!
Access the free PDF here: Granny Ripple Blanket
Step 6: Weaving in the Ends
After completing the blanket, you’ll have several yarn tails left from color changes and square joins. Use a yarn needle to carefully weave in all loose ends, tucking them into the stitches to hide them.
Video Tutorial
We’ve crafted a delightful instructional video from the Cherished Memories Crochet channel just for you. This enlightening guide will immerse you in the nuances of mastering this intriguing new stitch. I trust it will captivate and inspire you! The video tutorial awaits your viewing below:
Conclusion
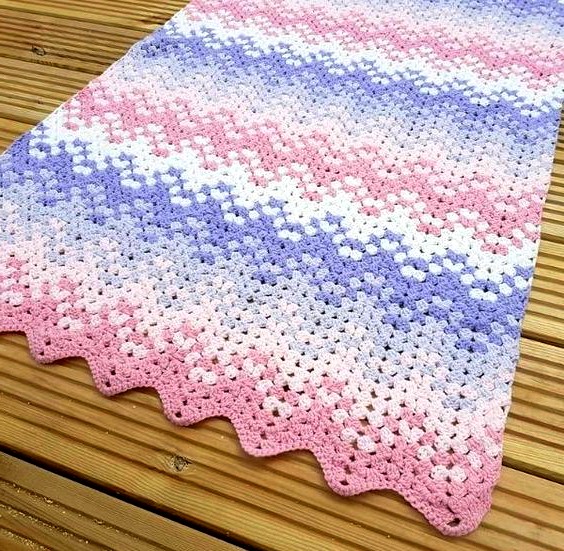
Creating a Granny Ripple Blanket is a wonderfully satisfying crochet project that combines old and new techniques. The result is a beautiful, warm, and vibrant blanket that’s perfect for snuggling up in or displaying as a decoration. Whether you’re gifting it or keeping it for yourself, this blanket will be a treasured creation.
Take your time, enjoy the process, and don’t be afraid to play around with colors and patterns. Happy crocheting!