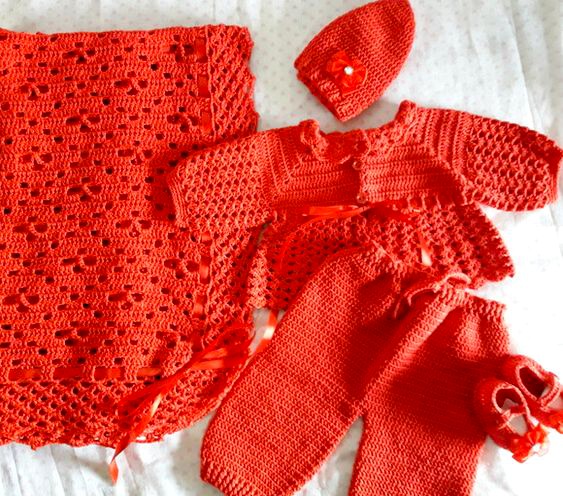
A full gender-neutral baby outfit for the precious early months
(Includes Cardigan, Pants, and Hat)
Whether you’re preparing for your bundle of joy or making a heartfelt gift for someone special, this cozy and adorable baby outfit set is the perfect project. Thoughtfully designed for newborns, this pattern works beautifully for both boys and girls and can be personalized with colors, buttons, or appliqués.
✨ Pattern Overview
-
Skill Level: Advanced Beginner to Intermediate
-
Pattern Includes: Cardigan, Pants, and Beanie Hat
-
Size: Newborn (Adjustable with notes)
-
Gauge: 4″ x 4″ = 14 hdc stitches x 10 rows (adjust hook if needed)
-
Yarn Weight: Light worsted (Category 3) or DK weight
🧶 Materials Required
-
Yarn: 300g of soft DK/light worsted weight yarn
-
Suggested: Cotton blends or baby acrylic yarn (soft and washable)
-
Color A: Main color (approx. 200g)
-
Color B (optional): Contrast trim (approx. 100g)
-
-
Crochet Hook: 4.0 mm (G-6)
-
Stitch Markers
-
Yarn needle
-
Scissors
-
3–5 small buttons (10–15mm) for cardigan closure
🔁 Abbreviations Used (US Crochet Terms)
-
ch – chain
-
sl st – slip stitch
-
sc – single crochet
-
hdc – half double crochet
-
dc – double crochet
-
inc – increase (2 stitches in same st)
-
dec – decrease (crochet 2 together)
-
st(s) – stitch(es)
-
RS/WS – right side / wrong side
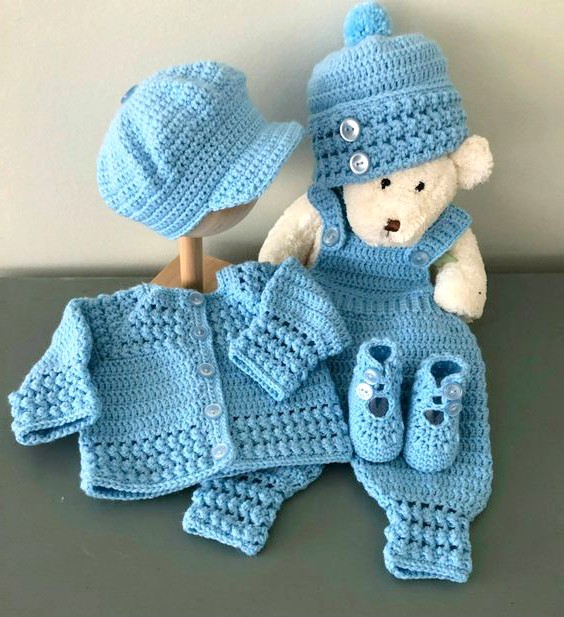
👕 Part 1: The Baby Cardigan (worked flat and seamed)
Back Panel
-
Ch 36 (adjust in multiples of 2 if sizing up).
-
Row 1: Hdc in 2nd ch from hook and across. (35 hdc)
-
Rows 2–22: Ch 1, turn, hdc in each st across.
-
Fasten off, weave in ends.
This creates a rectangular back panel with minimal shaping — ideal for easy assembly.
Front Panels (Make 2)
-
Ch 20.
-
Row 1: Hdc in 2nd ch from hook and across. (19 hdc)
-
Rows 2–15: Ch 1, turn, hdc across.
-
Rows 16–22 (Neck Shaping):
-
Begin to dec 1st at neckline edge (not armhole side), each row.
-
You’ll have a slightly slanted edge.
-
-
Fasten off.
Mirror the second panel by reversing the neck shaping direction.
Sleeves (Make 2)
-
Ch 28.
-
Row 1: Hdc in 2nd ch and across. (27 hdc)
-
Rows 2–18: Ch 1, turn, hdc in each st.
-
To taper slightly, decrease 1st at each edge every 5th row if preferred.
-
Fasten off.
Assembly
-
Lay back and front panels flat, RS facing. Seam shoulders using whip stitch or mattress stitch.
-
Attach sleeves to armholes and sew in place.
-
Fold the cardigan at the shoulders and seam sthe leeves and side panels.
-
Turn the RS out.
Button Band (Optional)
-
Attach yarn at the bottom edge of the front panel.
-
Sc evenly up the front edge, across the neckline, and down the opposite side.
-
On one side, place 3–5 evenly spaced buttonholes (ch 2, skip 2 sts) depending on size.
-
Sew on buttons on the opposite side.
👖 Part 2: Baby Pants
These pants are crocheted top-down in the round, then split for legs.
-
Ch 44. Join with the sl st to form a ring – be careful not to twist.
-
Rounds 1–5: Ch 1, sc in each st around. Join with SL St.
-
Rounds 6–20: Ch 1, hdc in each st around. Join.
-
(Optional: Add a contrasting color at the waistband or cuffs)
-
-
Split for Legs:
-
Fasten off.
-
Rejoin yarn at halfway point (22 sts).
-
First Leg: Hdc in each st around leg opening for 7–8 rounds.
-
Last 2 rounds: sc to taper cuff.
-
-
Fasten off, repeat for the second leg.
-
Optional Waistband Tie
-
Ch 80. Weave through the waistband, sc round as a drawstring.
🧢 Part 3: Baby Hat (worked in rounds)
-
Start with a magic ring.
-
Round 1: Ch 2 (counts as dc), 11 dc in ring. Join. (12 sts)
-
Round 2: 2 dc in each st around. (24 dc)
-
Round 3: (1 dc in next st, 2 dc in next) repeat around. (36)
-
Round 4: (2 dc, inc) around. (48)
-
Rounds 5–11: DC around with no increases.
-
Round 12: Switch to sc, sc in each st for a neat edge.
-
Fasten off, weave in ends.
For a snugger fit, replace dc with hdc or sc on rounds 5–11.
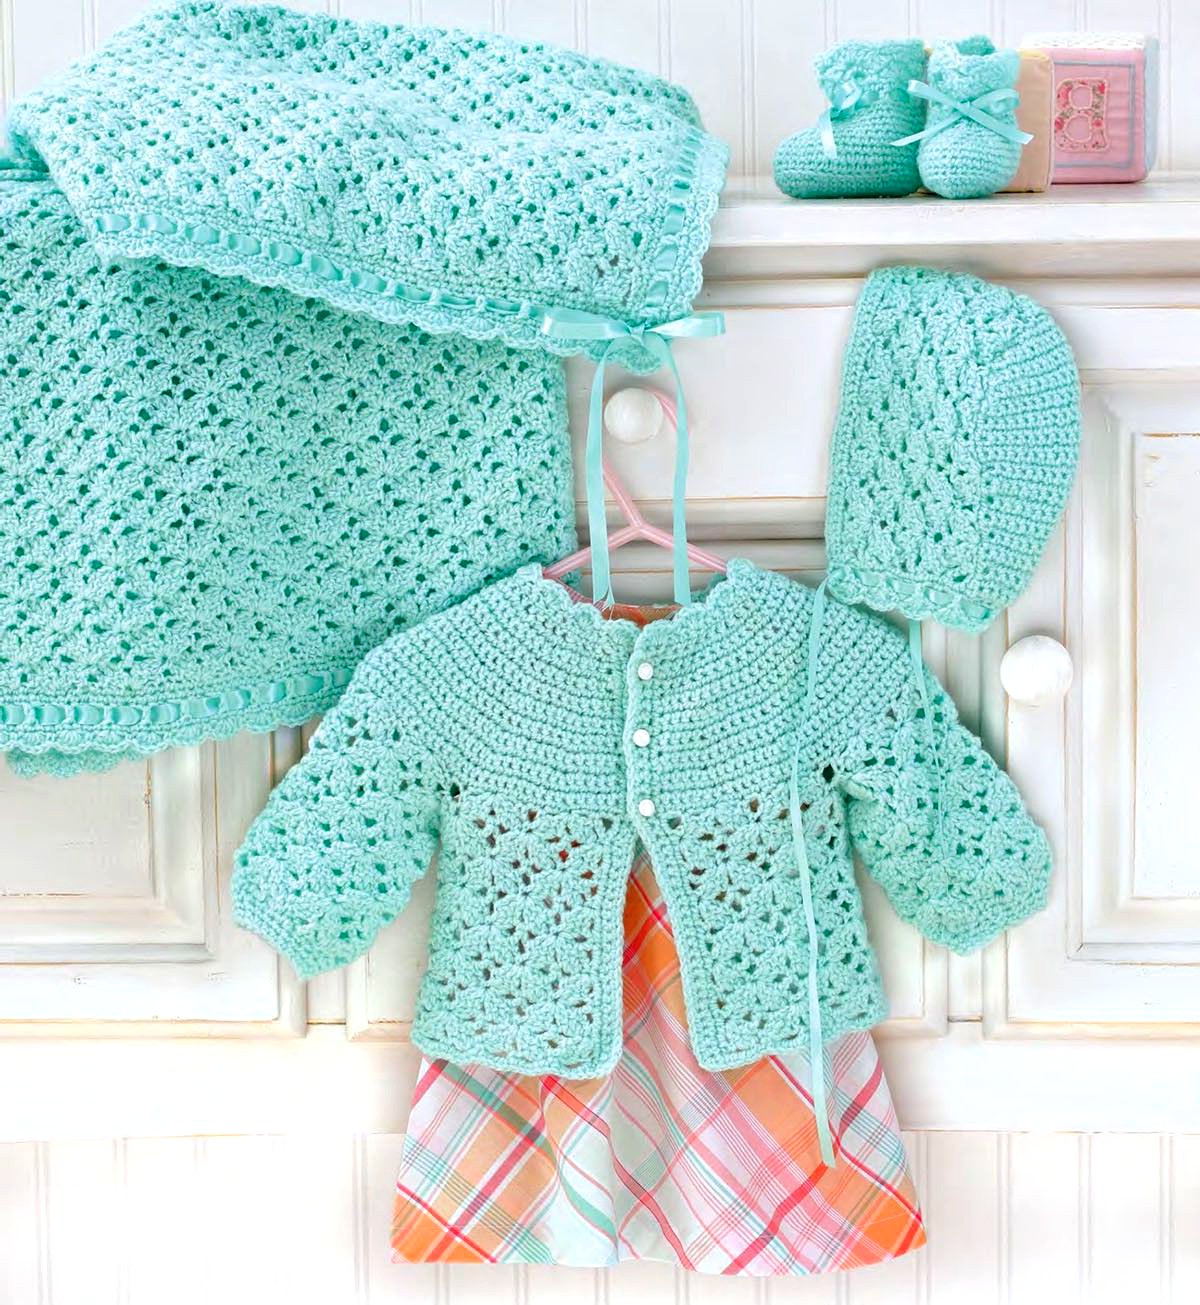
🧸 Finishing Touches and Customizations
-
Add a small crochet flower, appliqué, or embroidered patch to the cardigan.
-
Attach a pompom to the beanie for extra cuteness.
-
Use striped yarns for a playful twist.
-
Add ribbing at cuffs using front post/back post hdc if desired.
📏 Size Adjustments and Notes
-
To adjust size, increase/decrease initial chain counts in multiples of 2.
-
Add more rows for longer sleeves or pant legs.
-
Always check the gauge to ensure proper fit.
-
For sizes 3–6 months, add approx. 2 inches to each panel and 4–6 stitches in width.
❤️ Care Instructions for Gift Giving
Make sure to include care tags with handmade gifts. Suggested tag:
“Machine wash on gentle, tumble dry low, or lay flat to dry. Handmade with love.”
I understand you’re seeking a YouTube video tutorial for the “Maternity Leave for Boys and Girls” crochet pattern. While I couldn’t locate a tutorial specifically by that name, I found several comprehensive video guides that cover similar baby crochet sets, including cardigans, pants, and hats. These tutorials should assist you in creating a beautiful, gender-neutral baby outfit:
-
Thomas Crochet Set for Boys and Girls (6-9 Months)
This tutorial provides step-by-step instructions for crocheting a baby set that includes a cardigan sweater, pants, and a hat. It’s designed for babies aged 6-9 months and offers clear guidance suitable for both boys and girls.
Easy Crochet Cardigan Sweater to Match Hat and Pants
This video demonstrates how to crochet an easy cardigan sweater designed to match with a hat and pants, creating a complete set. It’s suitable for both boys and girls and provides detailed instructions.
-
Super Easy Baby Set – Crochet Leggings or Pants (0-12 Months)
This tutorial focuses on crocheting baby leggings or pants, which can be paired with other handmade items to complete a set. It’s designed for babies aged 0-12 months and is suitable for both boys and girls.
These tutorials offer detailed, step-by-step instructions that can guide you through creating a lovely baby outfit set. I hope these resources help you in your crocheting project!