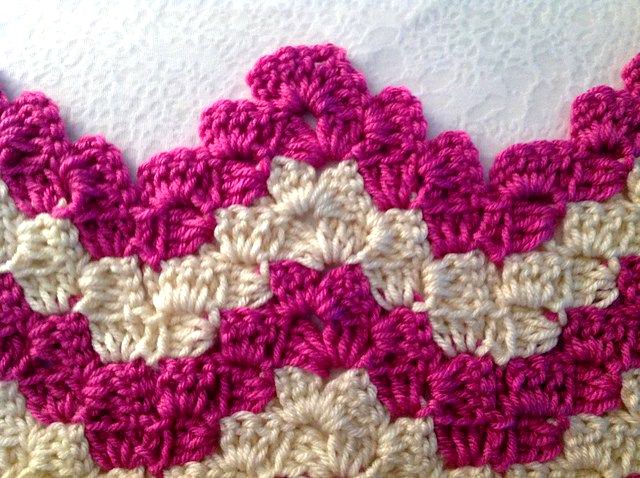
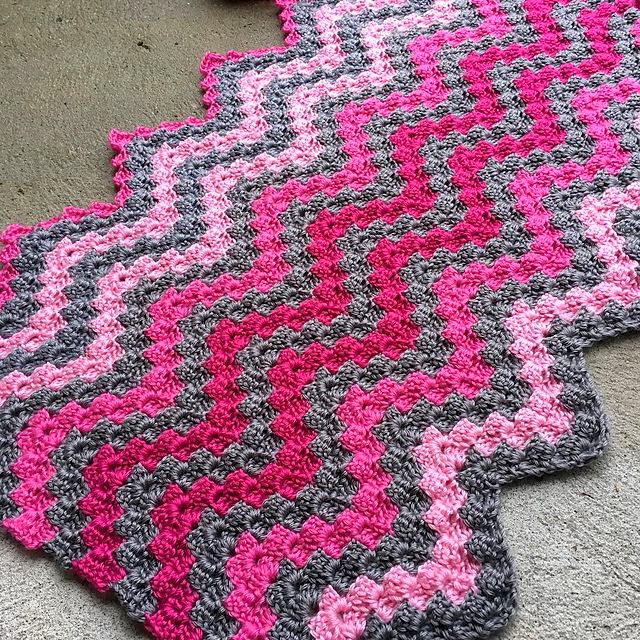
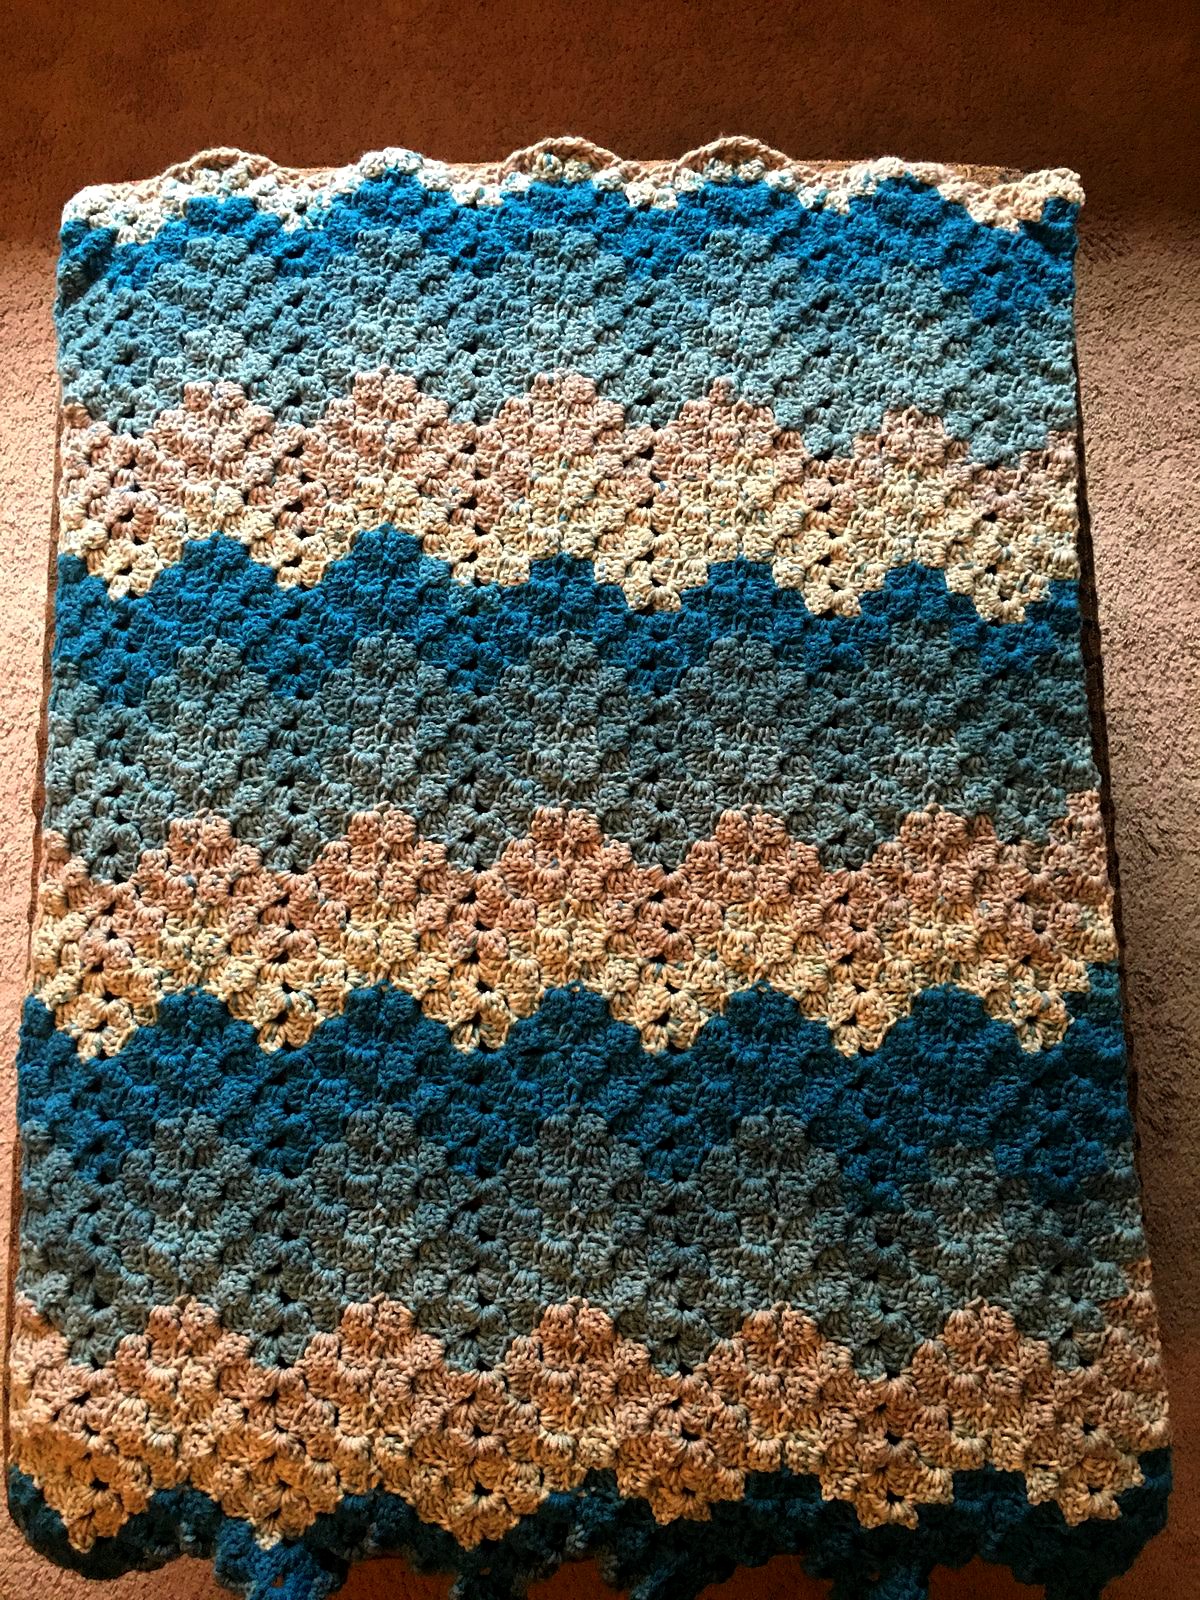
The Vintage Rippling Block is a charming, textured pattern that brings a cozy, nostalgic feel to any handmade piece. It’s made up of wave-like rows that ripple gently across each block, giving it a classic, retro vibe reminiscent of 1960s and 70s home décor. Whether you’re making a throw blanket, cushion cover, or wall hanging, this pattern will give your project that perfect vintage flair.
✨ Pattern Highlights:
-
Works beautifully in two or more contrasting colors.
-
Ideal for modular projects: afghans, pillow covers, scarves.
-
Beginner to intermediate friendly.
-
Offers a relaxing rhythm once the pattern is established.
🧵 Materials You’ll Need:
-
Worsted Weight Yarn (Category 4)
Choose 2–4 colors in soft, vintage-inspired tones. Suggestions:-
Cream or Ivory
-
Mustard Yellow
-
Rust or Brick Red
-
Olive Green
-
Dusty Blue
-
Plum or Burgundy
-
-
Crochet Hook Size H/8 (5.0 mm)
You may adjust the hook size for looser or tighter tension. -
Scissors
-
Yarn Needle for weaving in ends.
📏 Finished Size:
Each completed block measures approximately 12 inches by 12 inches (30 cm by 30 cm). You can adjust the number of stitches and rows to make larger or smaller blocks.
⏱ Gauge:
Gauge is not critical for this pattern. However, for uniform block sizes, aim for consistent tension across blocks. If joining multiple blocks, blocking after each piece is recommended.
📘 Stitch Abbreviations (US Terms):
-
ch – chain
-
sc – single crochet
-
dc – double crochet
-
tr – treble (or triple) crochet
-
sl st – slip stitch
-
st(s) – stitch(es)
-
rep – repeat
🧩 Pattern Notes:
-
You’ll begin with a foundation chain in a multiple of 11 + 1.
-
Each “wave” is made from combinations of single, double, and treble crochet stitches.
-
To achieve the rippling effect, stitch heights vary in a repeated sequence, rising and falling like gentle waves.
-
Changing colors every 2 rows gives a beautiful, striped, vintage finish.
🔁 Pattern Instructions:
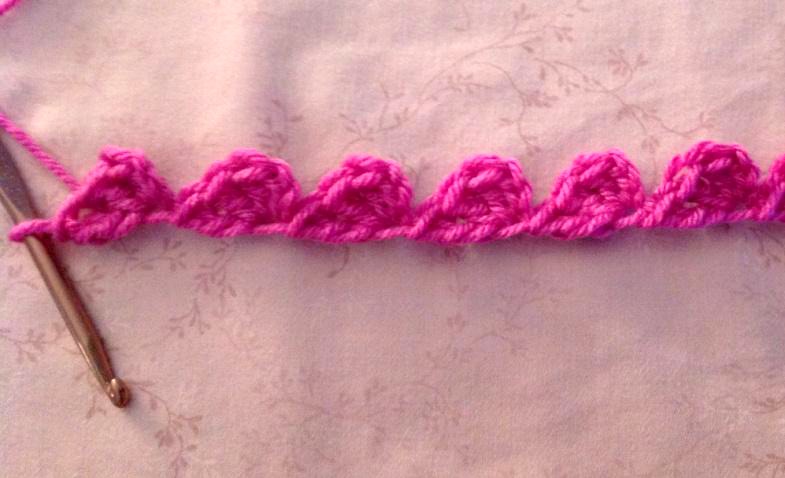
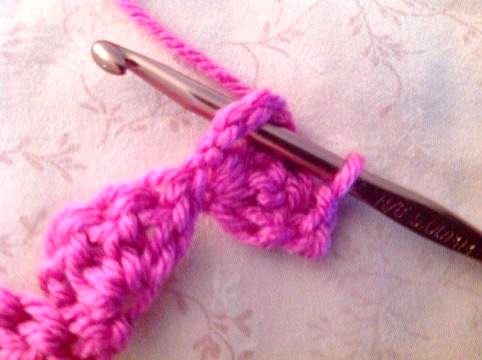
🪡 Step 1: Foundation Chain
With your first color (Color A), chain 33.
(Note: This is a multiple of 11 + 1. Adjust in sets of 11 if you’d like a wider block.)
🪡 Row 1 (Setup Row – Single Crochet):
-
Work 1 sc in the 2nd chain from the hook.
-
Continue working 1 sc in each chain across.
(You will have 32 single crochet stitches.) -
Ch 3 and turn. The chain 3 counts as your first dc of the next row.
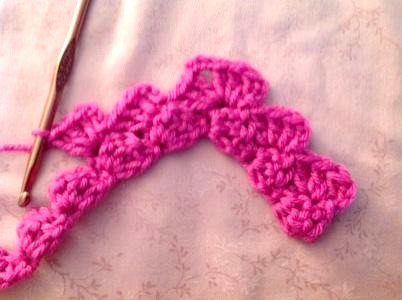
🪡 Row 2 (Begin the Ripple Pattern):
-
Work 1 dc in the next 2 stitches.
-
Work 1 tr in the next 2 stitches.
-
Work 1 dc in the next 2 stitches.
-
Work 1 sc in the next 3 stitches.
-
Repeat the above sequence across the row.
You’ll end the row with a dc in the final stitch.
Ch 1 and turn.
🪡 Row 3 (Single Crochet Across):
-
Work 1 sc in each stitch across. (32 sc total)
-
This row acts as a “reset” row to prepare for the next ripple wave.
-
Ch 3 and turn.
🪡 Row 4 (Mirror Ripple):
This row mirrors Row 2 slightly for balance.
-
Work 1 sc in the next 3 stitches.
-
Work 1 dc in the next 2 stitches.
-
Work 1 tr in the next 2 stitches.
-
Work 1 dc in the next 2 stitches.
-
Repeat the sequence across.
End the row with 1 sc in the final stitch.
Ch 1 and turn.
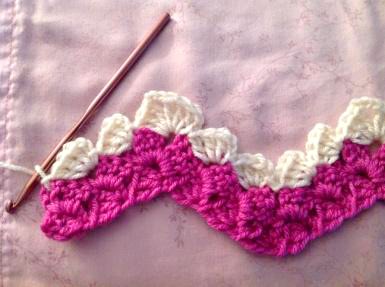
🧵 Repeating the Pattern:
-
Repeat Rows 1–4 until your block reaches the desired height.
-
Change colors every 2 rows (right after each ripple row) to get a classic striped vintage look.
-
Always end on a single crochet row for a clean edge.
🌈 Color Pattern Suggestions:
Try the following color sequence for a retro-inspired block:
-
Mustard Yellow
-
Olive Green
-
Cream
-
Rust Orange
-
Dusty Blue
Repeat as desired!
🧶 Finishing Your Block:
-
Fasten off your yarn after your last row.
-
Weave in all loose ends with a yarn needle.
-
Block your square using a light steam block or wet blocking to help even out the ripple and shape the edges.
-
If you’re joining multiple blocks, line them up and use the whip stitch, slip stitch join, or flat braid join to assemble them into your final project.
💡 Tips & Tricks for Success:
-
Keep track of your stitch count — the ripple relies on precise placement.
-
If you’re using multiple colors, carry the yarn up the side instead of cutting, and cover it later with a border.
-
For a thicker, warmer version, use a chunky yarn and a larger hook.
-
To create a seamless look, use a neutral color (like cream) for every second stripe.
🎯 Project Ideas with the Rippling Block:
-
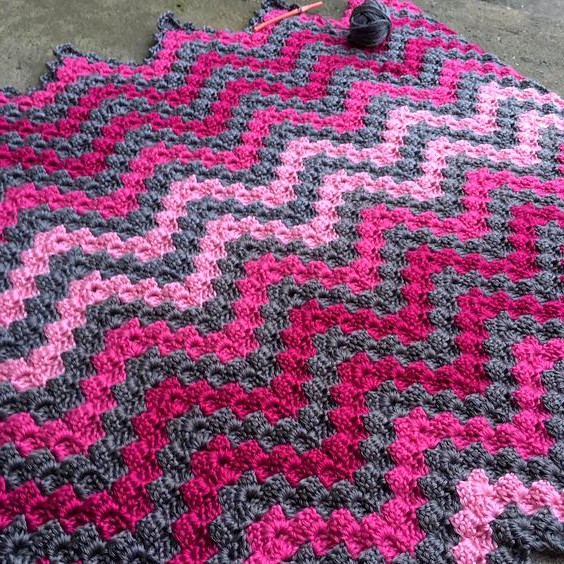
Vintage Ripple Throw Blanket: Create 20–25 blocks, then join them for a classic couch throw.
-
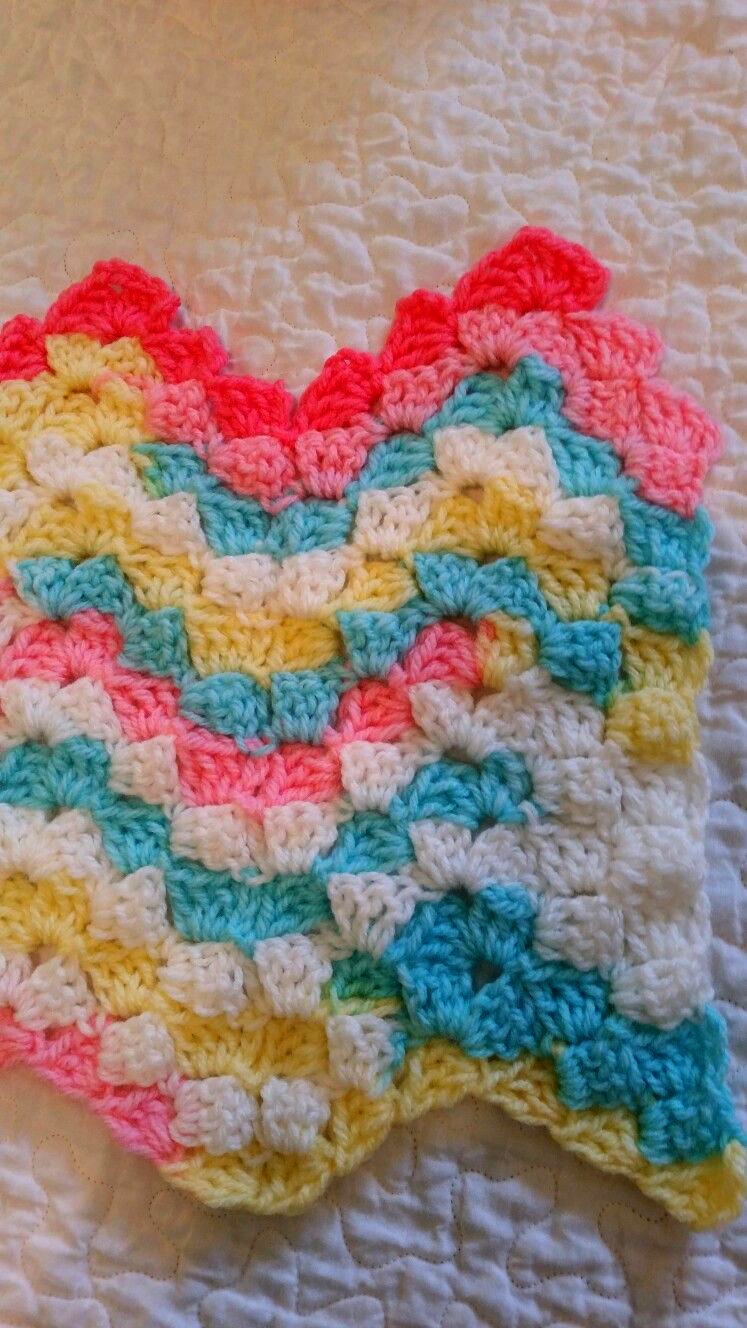
Baby Blanket: Use pastel or faded colors for a soft, gentle look.
-
Cushion Covers: Make two blocks, join on three sides, and insert a pillow form.
-
Table Runner: Use a longer foundation chain and repeat rows for a continuous ripple design.
-
Wall Hanging: Use natural fibers and hang your finished piece from a wooden dowel for rustic home décor.
Video Tutorial:
Certainly! To assist you in mastering the Vintage Rippling Block crochet pattern, I’ve located a detailed video tutorial by WIP and Chain channel that guides you through each step of the process. This visual aid can be especially helpful in understanding the stitch placements and achieving the desired ripple effect.
Here’s a highly recommended tutorial:
This tutorial is designed for beginners and provides clear, step-by-step instructions on creating the Vintage Rippling Block pattern. It covers the necessary stitches, techniques, and tips to help you successfully complete your project.
Additional Tips:
-
Practice Basic Stitches: Ensure you’re comfortable with chain (ch), single crochet (sc), double crochet (dc), and treble crochet (tr) stitches, as these form the foundation of the pattern.
-
Maintain Consistent Tension: Keeping an even tension will help your ripples look uniform and neat.
-
Use Stitch Markers: Placing stitch markers at the beginning of each repeat section can help you keep track of your stitches and pattern progression.
-
Select Appropriate Yarn and Hook: Using the recommended yarn weight and hook size will ensure your project turns out as expected.
By following along with the video tutorial and keeping these tips in mind, you’ll be well on your way to creating a beautiful Vintage Rippling Block crochet piece. Happy crocheting!