
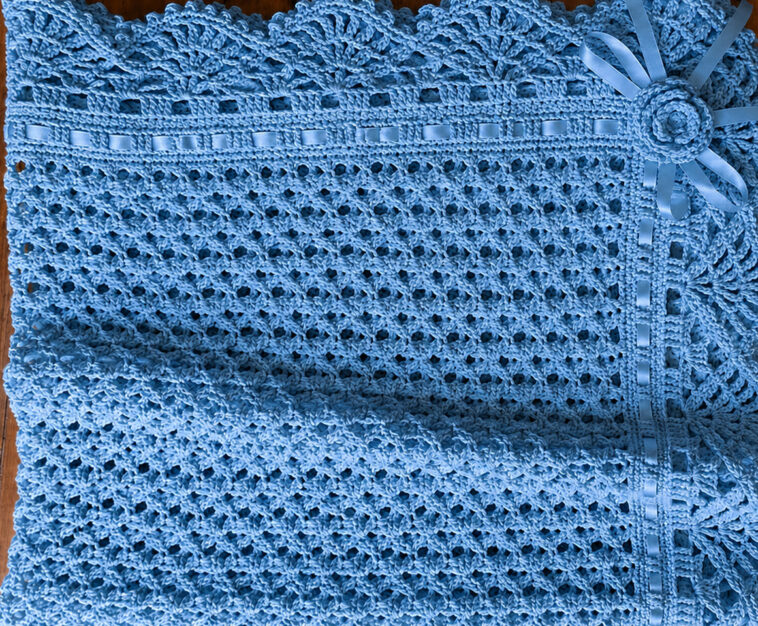
Create a timeless crochet throw that blends rich texture with delicate lacework. This Beautiful Lacy Crochet Stitch with a Scalloped Border combines dimensional post stitches with an airy openwork pattern to produce a blanket that is both luxurious and visually striking.
Using front post and back post double crochet stitches, you’ll build a fabric with exceptional depth and definition, while the graceful scalloped edging provides a soft, elegant finish. If you’re new to textured crochet, it can be helpful to familiarize yourself with crochet stitch diagrams before getting started.
Why Dusty Pink Works So Beautifully
The featured blanket showcases a soft Dusty Pink (Mauve) shade that perfectly enhances the texture of the design. Rather than overpowering the stitch pattern, this muted color highlights the raised ridges and open diamond motifs, allowing every detail to stand out.
The single-color palette creates a refined, heirloom-quality appearance that feels equally at home in modern or traditional décor. As the textured stitches develop, the blanket takes on a sculpted look, with light and shadow emphasizing every ridge and lacy opening.
Maintaining even tension is especially important with post stitches since they naturally create a denser fabric. If your blanket begins to curl or feels stiffer than expected, adjusting your tension can significantly improve the finished drape.
Designed to measure approximately 50 x 60 inches, this throw is ideal for draping across a sofa, favorite chair, or the foot of a bed, where the scalloped border adds an elegant finishing touch.
This guide walks you through every stage—from selecting materials to blocking the completed blanket—helping you create a beautiful handmade piece you’ll treasure for years.
Materials You’ll Need
Disclosure: This post may contain affiliate links. Purchases made through these links help support our crafting community.
- Approximately 12 skeins (about 2,600 yards) of medium-weight (Category 4) matte cotton or wool-blend yarn in Dusty Pink or Mauve. A matte finish beautifully showcases the textured stitches.
- 5.5 mm (I-9) ergonomic crochet hook for comfortable stitching during longer crochet sessions.
- Retractable measuring tape to monitor the blanket’s dimensions as you work.
- Large-eye tapestry needle for weaving in yarn ends securely.
- Locking stitch markers to keep track of pattern repeats and border placement.
- Sharp embroidery or crafting scissors for clean finishing cuts.
Step-by-Step Instructions
1. Create the Foundation
Begin with a foundation chain of 152 stitches.
Work one double crochet (DC) into the fourth chain from your hook, then continue placing one DC in each remaining chain across, giving you 150 stitches.
This foundation row provides a stable base that supports the textured stitch pattern.
2. Build the Ribbed Texture
Chain 2 and turn.
Work:
- 1 Front Post Double Crochet (FPDC) around the next stitch.
- 1 Back Post Double Crochet (BPDC) around the following stitch.
Repeat this sequence across the row.
These alternating post stitches create the distinctive raised ribs that give the blanket its rich, dimensional appearance.
3. Form the Lacy Diamond Pattern
To introduce the lace effect:
- Work 3 FPDC.
- Chain 2.
- Skip the next 2 stitches.
Repeat this pattern across the row.
On the following row, continue working your post stitches into the corresponding stitches below to preserve the vertical alignment and maintain the diamond-shaped openings throughout the blanket.
Keeping your stitch tension consistent will help maintain the intended width of approximately 50 inches.
4. Continue to the Desired Length
Repeat the established stitch pattern until the blanket measures approximately 58 inches long.
Checking your measurements periodically helps ensure consistent sizing throughout the project.
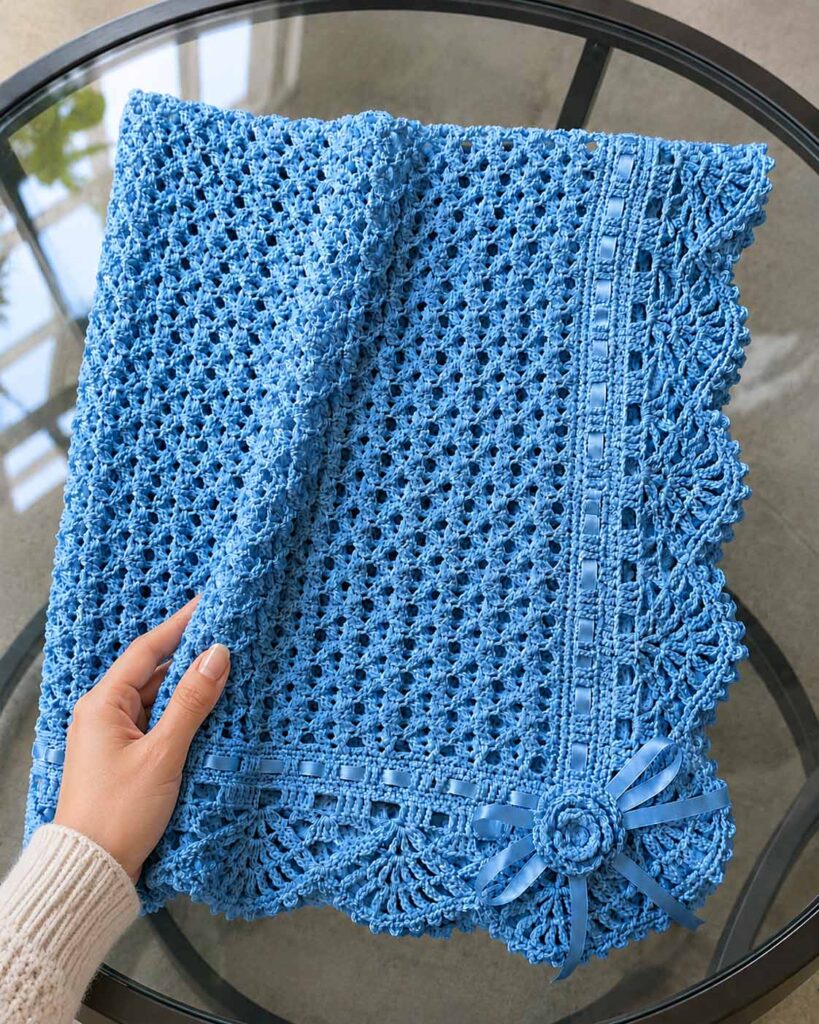
Adding the Scalloped Shell Border
Once the main body is complete, finish the blanket with a decorative shell border.
Border Foundation
Work one complete round of single crochet (SC) around the blanket.
Place 3 single crochet stitches in each corner to help the border lie flat.
Scalloped Edge
Repeat the following sequence:
- Skip 2 stitches.
- Work 7 double crochet stitches into the next stitch.
- Skip 2 stitches.
- Slip stitch into the following stitch.
Continue this pattern around the blanket until the border is complete.
The generous seven-double-crochet shells create soft, flowing waves that beautifully frame the textured center.
Afterward, gently block the finished blanket to open the lacework and shape each scallop evenly.
More Crochet Inspiration
If you enjoyed this project, you may also like exploring:
- Delicate Star Motif Blanket
- Ribbed Baby Blanket
- Beginner-Friendly Crochet Bunny Pair
- Choosing the Best Crochet Hooks for Beginners
Video Tutorials
The accompanying video tutorials demonstrate the primary techniques used throughout this project, including the front post/back post stitch pattern and the scalloped shell border.
Please note that the yarn colors and materials shown in the videos may differ from the Dusty Pink version featured here, but the construction methods and stitch techniques remain the same.
Final Thoughts
This Beautiful Lacy Crochet Stitch with a Scalloped Border is a rewarding project that combines intricate texture with graceful finishing details. The contrast between the raised post stitches and airy lace creates a blanket that is both elegant and cozy.
With careful attention to stitch consistency and finishing techniques, you’ll create a stunning 50 x 60-inch throw that can be enjoyed for years or gifted as a meaningful handmade keepsake.
Whether displayed in your home or presented to someone special, this timeless crochet design showcases both craftsmanship and creativity. Continue practicing textured stitches, experiment with new color palettes, and enjoy the satisfaction of creating beautiful heirloom-quality crochet pieces.