

 soofha
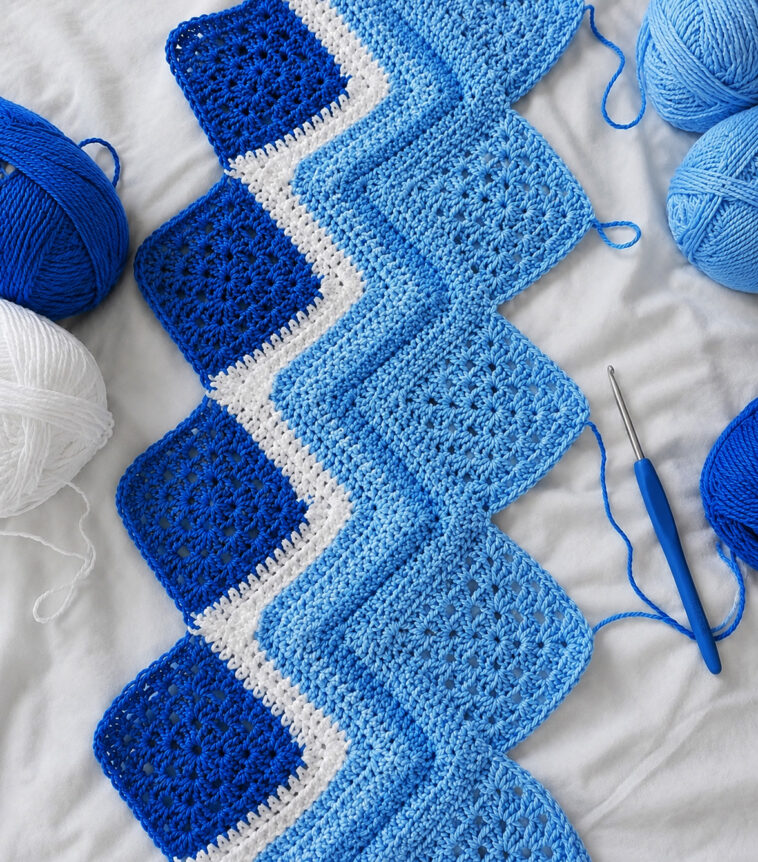
If you enjoy combining traditional crochet with eye-catching texture, the Granny Stripes Blanket is a wonderful project to add to your collection. This charming design brings together classic granny squares and a flowing ripple stitch, creating a blanket filled with color, movement, and cozy handmade character.
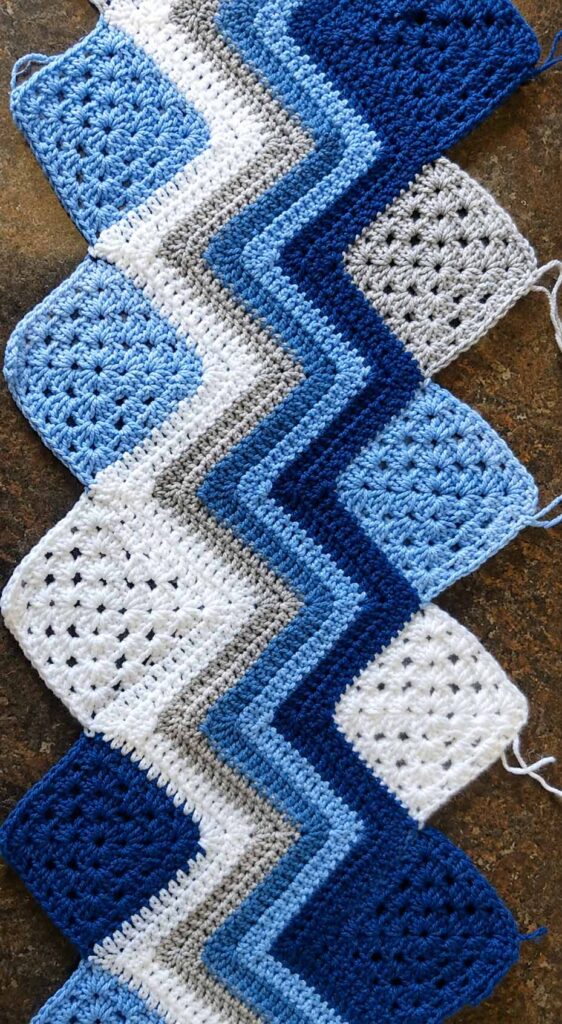
The construction is simple enough to follow while still offering plenty of variety. You’ll create strips made from full granny squares and half granny squares, joining the pieces as you work. Ripple crochet is then added along the edges of the strips, giving the finished blanket its distinctive wavy effect.
One of the best features of this blanket is the colorwork. You can follow the suggested color sequence or customize it with shades that match your personal style. Soft neutrals and pastels would create a delicate baby blanket, while rich or vibrant colors can turn the design into a cheerful statement throw.
This pattern is a great choice for crocheters who are comfortable with basic stitches and are ready to practice joining motifs, working ripple stitches, and finishing a project with a simple decorative border.
Pattern Notes
- Work the granny squares and half granny squares with the right side (RS) facing throughout. Do not turn your work at the end of rounds or rows.
- Each strip consists of five full granny squares and one half granny square, joined using the join-as-you-go technique.
- During Round 4, connect each new granny square to the previous square by slip stitching into the matching corner chain-1 space.
- A ripple section is crocheted along one edge of each completed granny-square strip before the strips are joined together.
- After the strips have been sewn together, another ripple section is worked along the remaining unfinished edge.
Instructions
Granny Square Strip #1 – Make 2
First Granny Square
With Color A:
Round 1 (RS):
Ch 4 and join with a sl st to form a ring.
Ch 3 (counts as dc), 2 dc in ring, ch 1, 3 dc in ring, ch 1, 3 dc in ring, ch 1, 3 dc in ring, ch 1. Join with a sl st to the top of the beginning ch-3.
You should have 12 dc and 4 ch-1 spaces.
Fasten off Color A.
With Color B:
Round 2:
Join with a sl st in any corner ch-1 space. Ch 3, then work (2 dc, ch 1, 3 dc) in the same space.
Ch 1, (3 dc, ch 1, 3 dc) in the next ch-1 space.
Repeat from * two more times. Ch 1 and join with a sl st.
You should now have 4 corners and 1 ch-1 space along each side.
Fasten off Color B.
With Color D:
Round 3:
Join in any corner space. Ch 3, work (2 dc, ch 1, 3 dc) in the same corner space, ch 1, then 3 dc in the next ch-1 space.
(3 dc, ch 1, 3 dc) in the next corner, ch 1, 3 dc in the following ch-1 space.
Repeat around the square two more times. Join with a sl st.
Fasten off Color D.
With Color C:
Round 4:
Join in any corner. Ch 3, work (2 dc, ch 1, 3 dc) in the corner space, then 3 dc in each of the next 2 ch-1 spaces.
(3 dc, ch 1, 3 dc) in the next corner, followed by 3 dc in each of the next 2 ch-1 spaces.
Repeat around the square two more times and join.
Fasten off Color C.
Remaining Granny Squares – Make and Join 4
Make each additional granny square following Rounds 1–3 of the first square.
Round 4 – Joining Round
Begin Round 4 exactly as you did for the first square. Continue until you reach the final corner.
Place the new square beside the previous square with the wrong sides together. At the corresponding corner ch-1 space, make a slip stitch into the matching corner space of the previous square.
Continue working the remaining stitches of Round 4, completing the corner by working 3 dc in the same space. Finish the round and join with a sl st.
Repeat this process until you have a strip containing 5 connected granny squares.
Half Granny Square – Make and Join 1
Row 1
With Color A:
Ch 4 (counts as dc, ch 1), then work (3 dc, ch 1, 3 dc) in the ring. Ch 1, then dc in the ring.
Fasten off Color A.
Row 2
With Color B:
Join in the top of the beginning ch-4. Ch 4, 3 dc in the ch-space, ch 1, then work (3 dc, ch 1, 3 dc) in the next space.
Ch 1, 3 dc in the final space, ch 1, and dc in the last dc.
Fasten off Color B.
Row 3
With Color D:
Join in the top of the beginning ch-4. Ch 4, 3 dc in the ch-space, ch 1, then 3 dc in the next space.
Ch 1, work (3 dc, ch 1, 3 dc) in the following space. Continue across the row, working 3-dc groups and ch-1 spaces as established by the pattern.
Finish with ch 1 and dc in the last dc.
Fasten off Color D.
Row 4 – Joining Row
With Color C:
Join in the top of the beginning ch-4. Ch 3, then work 3 dc in each ch-space until you reach the corner.
In the corner space, work 3 dc, then slip stitch into the corresponding corner of the last full granny square.
Ch 1 and work another 3 dc in the same corner space.
Continue across the half square, working 3 dc in each remaining ch-space and finishing with dc in the last dc.
Fasten off Color C.
Ripple Pattern #1
Worked Across One Edge of Granny Square Strip #1
With the right side facing, join Color A in the corner ch-1 space of the first full granny square.
Row 1 (RS)
Ch 3, dc2tog over the next 2 dc.
Dc in the next 10 dc, 5 dc in the next ch-1 space to create the peak, dc in the next 10 dc, then dc5tog over the next 5 stitches to create the valley.
Repeat the pattern across the strip.
Finish with dc in the final 10 dc and turn.
Row 2
Ch 3, work 3 dc in the first dc, then dc in the next 7 dc.
Dc5tog, dc in the next 10 dc, 5 dc in the next dc, dc in the next 10 dc.
Repeat across the row.
Finish with dc3tog and dc in the turning chain. Turn.
Fasten off Color A.
Rows 3–8
Continue following the established ripple pattern, changing colors according to the pattern sequence.
Work Rows 2–3 repeatedly using Colors B, D, and C as indicated.
Granny Square Strip #2 – Make 2
Create two additional strips using the same construction as Granny Square Strip #1.
For these strips, use the following color order:
C → D → B → A
Join the granny squares and half granny square using the same join-as-you-go method described above.
Ripple Pattern #2
Work the ripple pattern across one edge of Granny Square Strip #2.
Follow the same general ripple construction used for Ripple Pattern #1, but begin at the half-granny-square end of the strip.
Continue working the specified ripple rows while maintaining the color sequence for Strip #2.
Joining the Blanket
Once all four strips are complete, arrange them in the following order:
Strip #2 → Strip #1 → Strip #2 → Strip #1
Take care to line up the granny squares and ripple sections neatly.
Sew the strips together securely, taking care to keep the seams even and flat.
Final Ripple Section
Work Ripple Pattern #1 along the remaining unfinished edge of the first Strip #2.
Work 10 rows, following this color sequence:
C → D → B → A → C
Maintain the same ripple stitch pattern used previously so that the design flows naturally across the blanket.
Edging
With the right side facing, join Color C with a single crochet at one long edge of the blanket.
Work single crochet stitches evenly along the edge, placing approximately 2 sc at the end of each ripple row.
Turn.
Row 2
Ch 1, then work sc in each sc across.
Fasten off.
Repeat the same edging process along the opposite long edge of the blanket.
Finally, weave in all remaining yarn ends and gently straighten the blanket so the stitches and edges sit evenly.
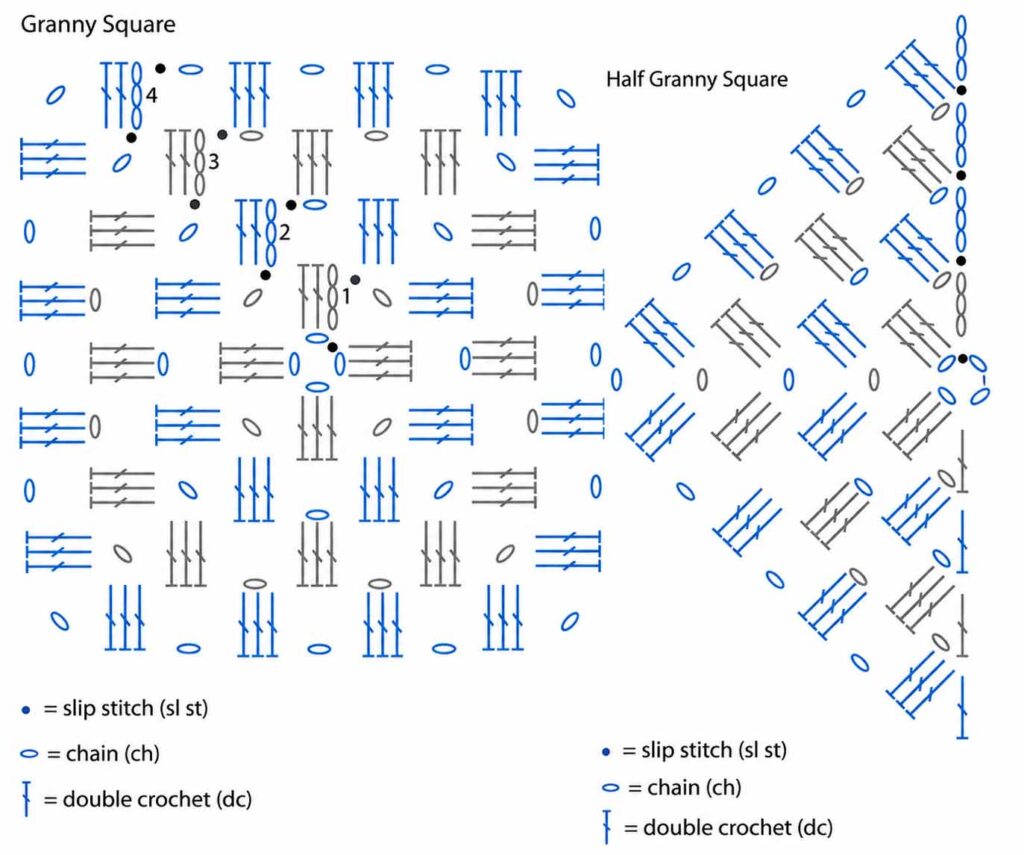
Diagram
Finishing Your Granny Stripes Blanket
Your Granny Stripes Blanket combines two beloved crochet techniques—the traditional granny square and the classic ripple stitch—to create a project full of texture and personality.
The repeating granny-square strips give the blanket a timeless handmade feel, while the waves of the ripple sections add movement and visual interest. The multiple color changes also make this pattern especially fun to customize.
Choose gentle pastel shades for a sweet nursery blanket, earthy tones for a cozy farmhouse look, or bright contrasting colors when you want something cheerful and bold.
Whether you’re making it as a thoughtful handmade gift or creating a cozy piece for your own home, this blanket is a satisfying project that combines traditional crochet charm with playful texture.

