

 soofha
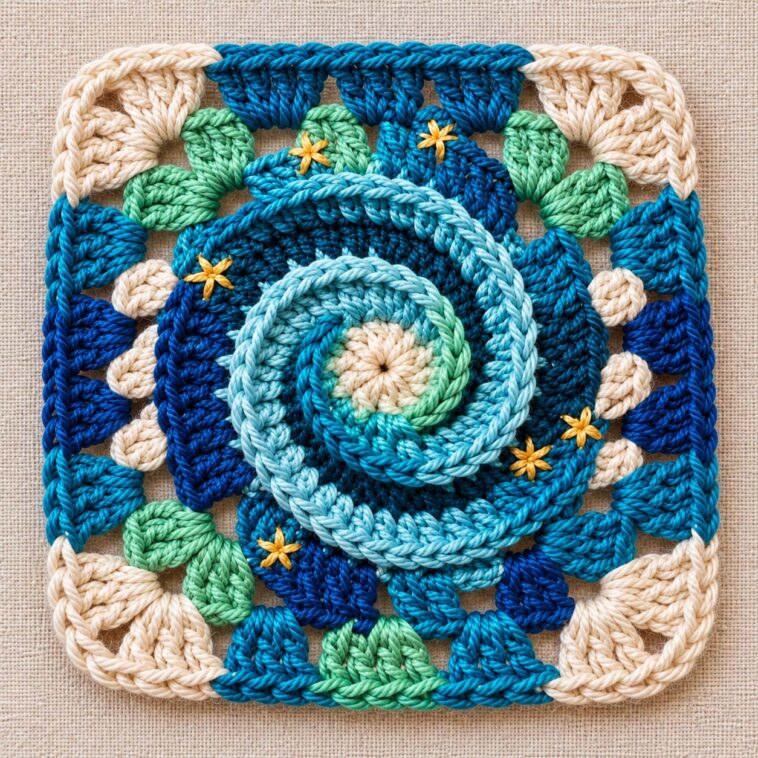
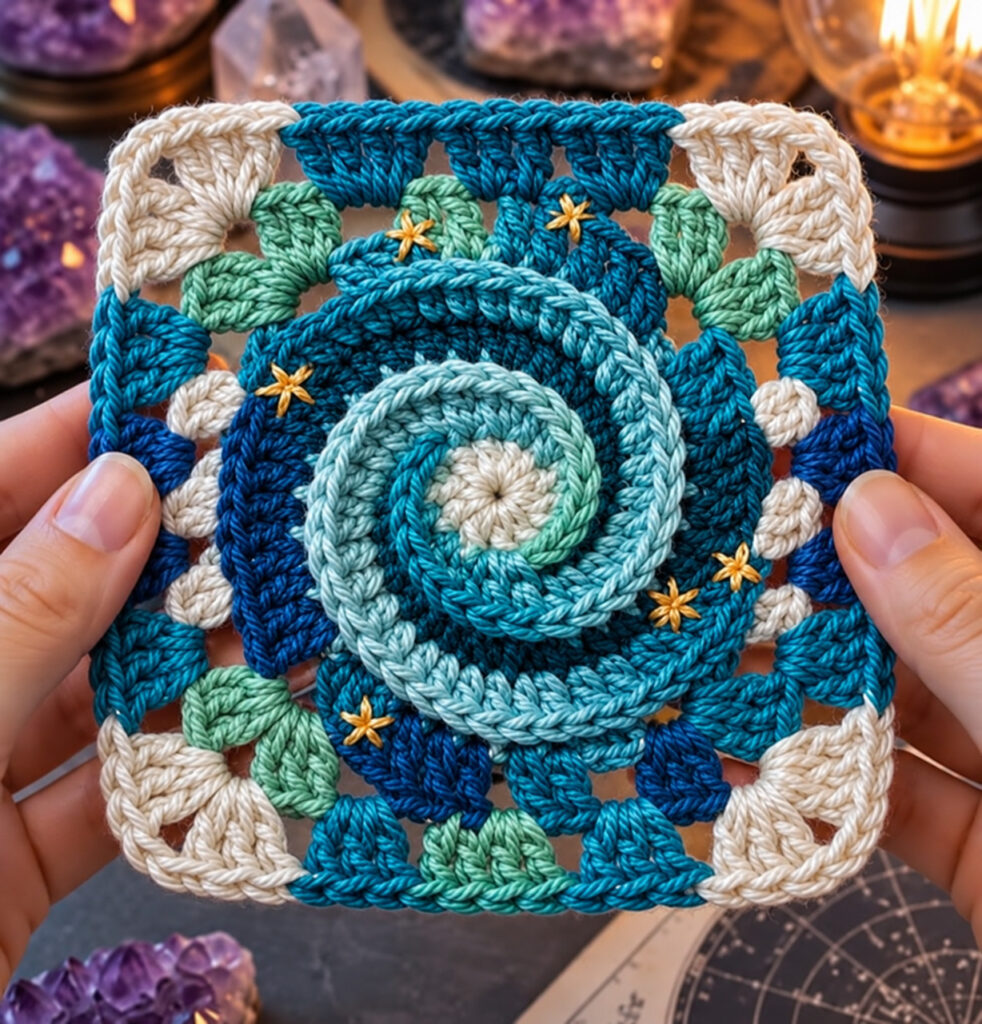
Create a beautiful celestial-inspired crochet square featuring a swirling circular center that gradually develops into an open geometric square. The combination of rich plum, deep blue, lavender, soft gray, and touches of gold gives this motif a magical galaxy-inspired appearance.
The small gold star details are optional, but they add a lovely finishing touch and help create the look of a miniature night sky.
Skill Level
Intermediate
Finished Size
Approximately 6–7 inches (15–18 cm) square, although the finished dimensions may vary depending on your yarn, hook size, and personal tension.
Materials
- DK or light worsted-weight yarn
- Deep plum or burgundy yarn
- Dark blue or navy yarn
- Lavender yarn
- Light gray yarn
- Small amount of gold yarn for optional stars
- 4.0 mm crochet hook
- Yarn needle
- Scissors
- Stitch markers
Feel free to substitute your favorite colors. This design works beautifully with both bright and muted color combinations.
US Crochet Abbreviations
- MR – Magic Ring
- ch – Chain
- sl st – Slip Stitch
- sc – Single Crochet
- hdc – Half Double Crochet
- dc – Double Crochet
- tr – Treble Crochet
- st/sts – Stitch/Stitches
- sp – Space
- sk – Skip
- rep – Repeat
Special Stitches
V-Shell
Work (2 dc, ch 1, 2 dc) into the same space.
Corner Fan
Work (4 tr, ch 3, 4 tr) into the same space.
Crochet Instructions
Round 1 – Create the Center
Begin with your chosen center color and make a magic ring.
- Ch 1.
- Work 12 sc into the magic ring.
- Pull the magic ring closed.
- Join with a sl st to the first sc.
Stitch count: 12 sc
Fasten off if you are changing colors for the next round.
Round 2 – Begin the Circular Design
Attach your second color to any stitch.
- Ch 3, which counts as the first dc.
- Work 1 additional dc into the same stitch.
- Ch 1.
- In the next stitch, work 2 dc, ch 1.
- Continue this pattern around the entire circle.
Join with a sl st to the top of the beginning ch-3.
You should have 12 pairs of dc, with a ch-1 space separating each pair.
Round 3 – Add Small Chain Arches
Join your next color in any ch-1 space.
- Ch 1.
- In the same space, work sc, ch 2, sc.
- Repeat (sc, ch 2, sc) in every ch-1 space around.
Join with a sl st to the first sc.
You will now have 12 small chain arches around the motif.
Round 4 – Build the Spiral Texture
Attach your contrasting color to any ch-2 space.
- Ch 3.
- Work 2 dc into the same ch-2 space.
- Ch 1.
- In every remaining ch-2 space, work 3 dc, ch 1.
Continue all the way around and join with a sl st to the beginning ch-3.
You should now have 12 groups of 3 dc.
These clustered groups begin to give the center its distinctive swirling, circular appearance.
Round 5 – V-Shell Round
Join the next color in any ch-1 space.
- Ch 3.
- In the same space, work 1 dc, ch 1, 2 dc.
This creates your first V-shell.
Continue around the motif, working:
(2 dc, ch 1, 2 dc)
into every remaining ch-1 space.
Join with a sl st to complete the round.
You should have 12 V-shells.
At this point, the motif should still have a predominantly round shape.
Round 6 – Decorative Transition
Attach the lighter contrast color to any ch-1 space within a V-shell.
- Ch 3.
- Work 2 dc, ch 1 into the same space.
- In every remaining ch-1 space, work 3 dc, ch 1.
Repeat around the entire motif and join with a sl st to the beginning ch-3.
There should be 12 groups around the circle.
These sections are important because they will later be arranged into four groups of three to transform the circular motif into a square.
Round 7 – Transform the Circle Into a Square
This is the key shaping round where the circular center begins taking on a square form.
Before starting, it can be helpful to place four stitch markers evenly around the motif. These markers will help you identify where the four corners should be positioned.
Choose one ch-1 space to serve as your first corner and attach your darker yarn.
First Corner
Into the selected ch-1 space, work:
ch 4, 3 tr, ch 3, 4 tr
This creates the first large corner.
First Side
In the next ch-1 space, work:
3 dc
In the following ch-1 space, work:
3 dc
Second Corner
In the next ch-1 space, work:
4 tr, ch 3, 4 tr
Continue using the same sequence around the motif:
- 3 dc in the next space
- 3 dc in the following space
- 4 tr, ch 3, 4 tr in the next space
Repeat this arrangement until you have created all four corners.
Join with a sl st.
The motif should now visibly resemble a square rather than a circle.
Round 8 – Finish the Square Border
Join your light gray yarn in any corner ch-3 space.
Work the following into the corner:
ch 3, 2 dc, ch 2, 3 dc
Next, work 1 dc in each stitch across the side.
When you reach the following corner space, work:
3 dc, ch 2, 3 dc
Continue around the remaining three sides, maintaining the same corner construction.
Join with a sl st to the beginning ch-3.
Fasten off and weave in your ends.
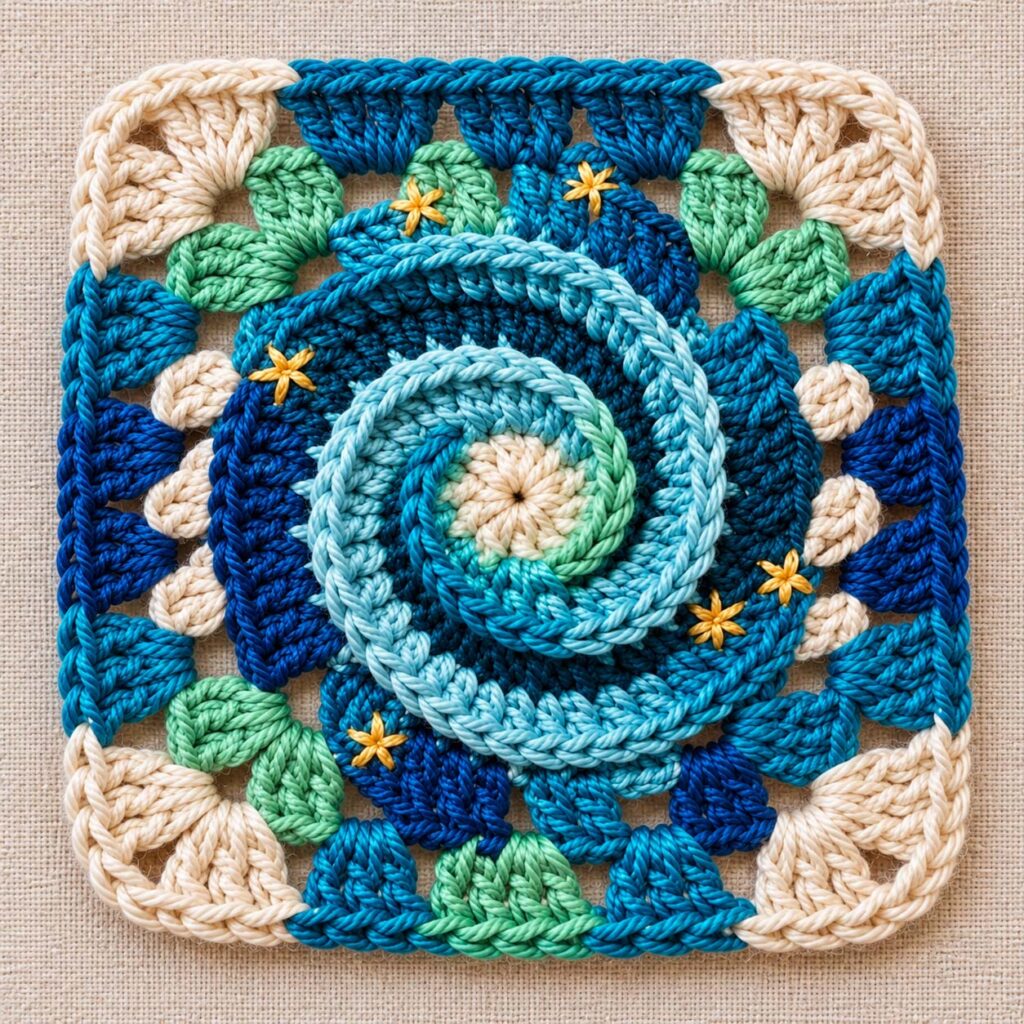
Spiral Galaxy Crochet Square
Optional Openwork Border
For a lighter, more delicate outer edge, you can introduce additional chain spaces instead of working every stitch solidly.
For selected sections along each side, try:
ch 1, sk 1, dc in next st
Alternate solid sections with these open spaces to create a more airy, geometric frame.
Keep the corners substantial by continuing to use:
3 dc, ch 2, 3 dc
This helps preserve the crisp square shape.
Creating the Raised Spiral Detail
The center of the inspiration design has a dimensional spiral effect. You can recreate a similar look using surface crochet after completing the main square.
Choose a contrasting shade such as lavender, plum, or gray.
- Insert your hook into a center stitch.
- Pull a loop of yarn through to the front.
- Begin making loose surface slip stitches.
- Follow the circular shape of the center.
- Continue working outward, following the existing rounds toward Round 5.
- Keep the surface stitches relaxed rather than pulling them tightly.
The raised stitches will sit on top of the crochet fabric and emphasize the spiral pattern.
For additional dimension, change colors as the spiral moves outward.
Adding Optional Gold Stars
Small gold stars give this crochet square its celestial finishing touch.
Using gold yarn and a yarn needle, embroider several tiny stars across the blue sections.
A simple star can be created by stitching through a single central point:
- One vertical stitch
- One horizontal stitch
- Two diagonal stitches
Place approximately 5–8 stars around the design.
For a more natural night-sky effect, avoid placing the stars in perfectly even rows. A slightly random arrangement will make the motif look more organic and whimsical.
Blocking the Finished Square
Blocking is particularly useful for this design because the motif begins as a circle and gradually changes into a square.
To block your finished piece:
- Lightly dampen the crochet square.
- Gently shape the motif with your hands.
- Pin each of the four corners into position.
- Straighten the four sides.
- Make sure the center lies flat.
- Allow the piece to dry completely.
- Remove the pins once it is fully dry.
Proper blocking can greatly improve the definition of the corners and give the finished square a more polished appearance.
Suggested Color Combination
For a galaxy-inspired version, try the following palette:
- Center: Light gray
- Inner spiral: Deep plum
- Second spiral: Lavender
- Main background: Deep teal or navy
- Outer accents: Plum
- Corners: Silver or soft gray
- Stars: Metallic gold or mustard
The combination of cool blues and purples with warm gold details creates a beautiful celestial effect.
Of course, you can customize the palette to match your home décor, favorite colors, or a larger crochet project.
Construction Tip
Round 7 is the most important shaping stage, so take a moment to identify the four corner positions before beginning.
Placing four stitch markers evenly around the circular motif makes it much easier to keep the finished square balanced and symmetrical.
The overall construction follows this simple progression:
Circular Center → Textured Spiral Rounds → 12 Sections → Four Corners → Square Border
Once you understand this structure, you can experiment with different yarn weights, color combinations, and border styles to create your own unique version.
Spiral Galaxy Crochet Square PDF
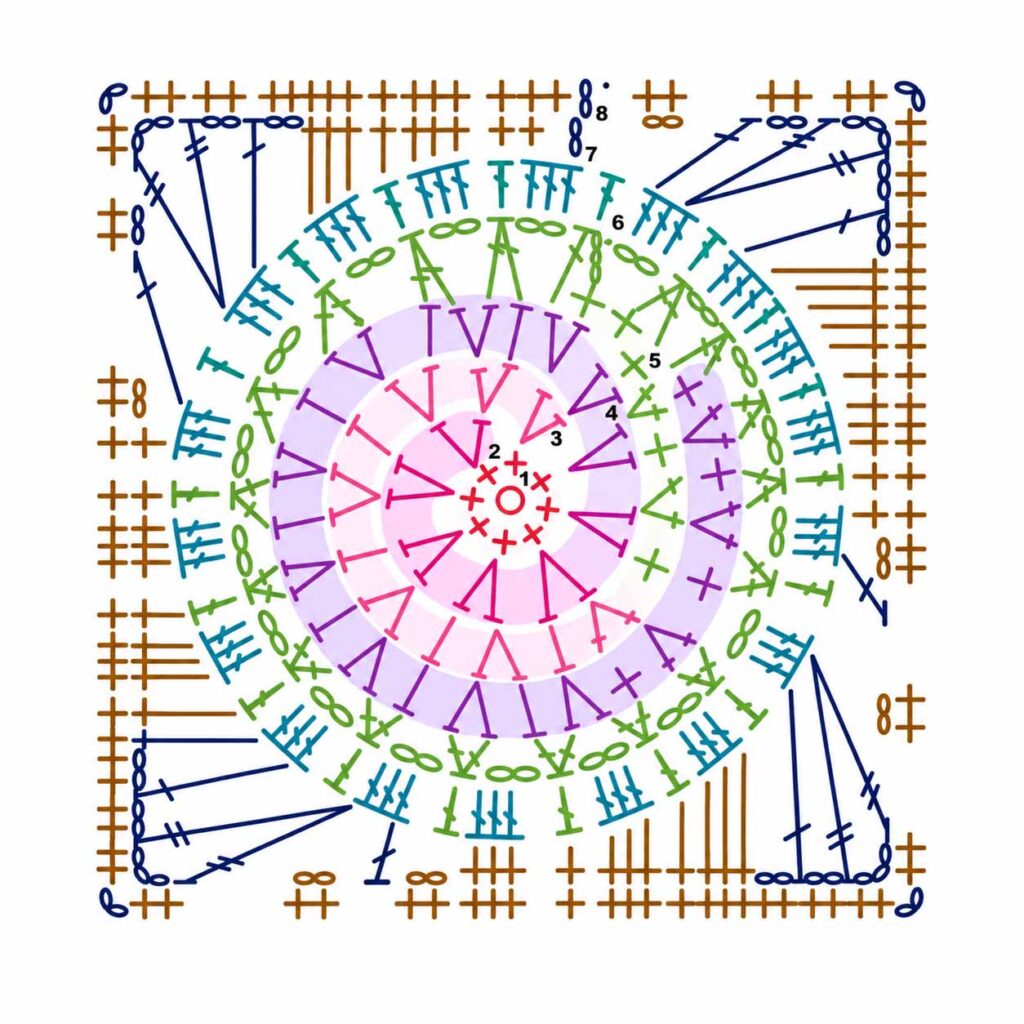
This pattern can be formatted as a convenient printable PDF, making it easier to keep beside you while crocheting. A color chart or round-by-round stitch diagram can also be added for visual guidance.


Thank you for sharing . You are very talented ❤️
Can you provide the name(s) of the variegated yarn use above? Shades of blue and green
Instructions do not match the picture.