

 soofha
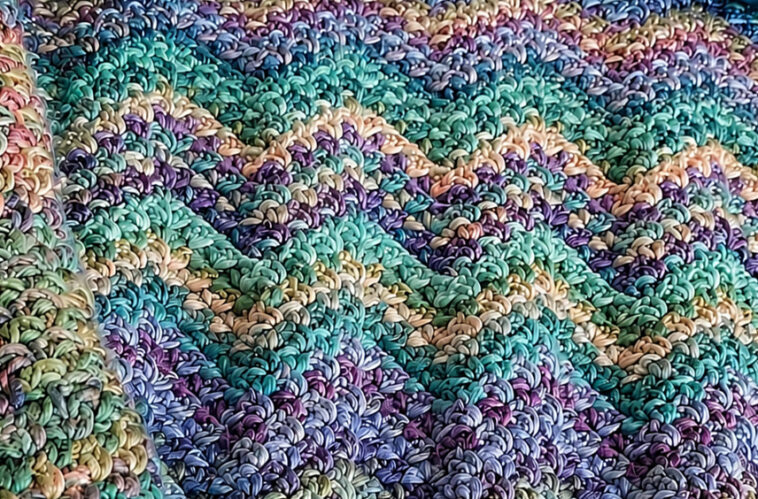
If you love colorful crochet blankets with plenty of texture, this Moss Stitch Ripple Crochet Blanket is a beautiful project to add to your handmade collection. The combination of the classic moss stitch and a gentle ripple creates a richly textured fabric with a soft, flowing appearance.
The blanket shown above has a gorgeous mix of turquoise, teal, lavender, blue, peach, cream, and sage tones. A similar effect can be achieved with a variegated yarn, planned color changes, or leftover yarn from your stash.
The moss stitch is sometimes called linen stitch or granite stitch, and traditional versions use simple single crochet and chain stitches. Ripple variations introduce increases and decreases to create the gentle wave effect.
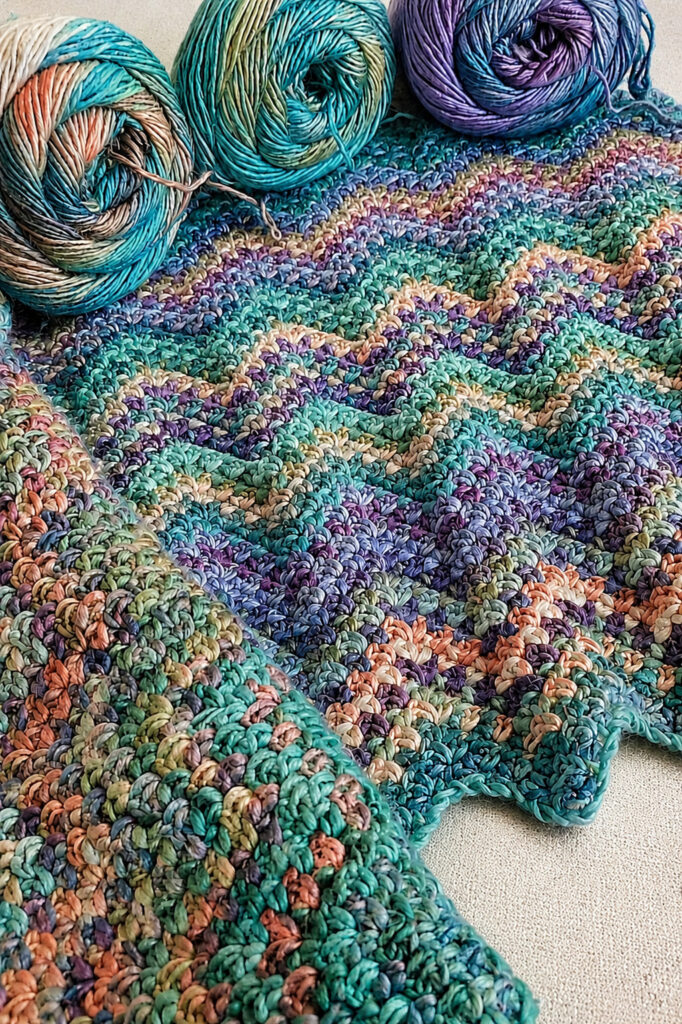
🧶 Moss Stitch Ripple Crochet Blanket
Skill Level: Easy to Intermediate
Crochet Terms: US
Project Type: Blanket / Throw
Stitch: Ripple Moss Stitch
Construction: Worked in rows
Pattern Repeat: 1 row
Best For: Throws, lap blankets, baby blankets, gifts, home décor
Why You’ll Love This Pattern
- Beautiful textured surface
- Gentle ripple effect
- Easy one-row repeat after the foundation
- Excellent for multicolored yarn
- Great stash-buster project
- Works beautifully with solid or variegated yarn
- Can easily be made wider or narrower
- The fabric has a comfortable drape
Materials You’ll Need
Yarn
For a medium-size throw, approximately:
- 1,800–2,500 yards worsted-weight yarn
- Weight 4 medium yarn
- 5–8 coordinating colors, or one self-striping/variegated yarn
For the colorful look in the inspiration photo, consider shades such as:
- Turquoise
- Teal
- Aqua
- Lavender
- Periwinkle
- Dusty Blue
- Sage Green
- Cream
- Peach
- Soft Coral
You don’t need to use these exact colors. One of the best features of this pattern is how different yarn combinations completely change its personality.
Crochet Hook
5.0 mm (H-8) or 5.5 mm (I-9) crochet hook.
Choose the hook that gives you a soft fabric without making the stitches too loose.
Other Supplies
- Yarn needle
- Scissors
- Measuring tape
- Stitch markers
- Blocking mat and pins, optional
Moss Stitch Ripple Crochet Blanket Pattern
This is an original, customizable ripple moss-stitch variation designed for a blanket. If you are publishing the pattern, you can adjust the width and length to suit your project.
Abbreviations
| Abbreviation | Meaning |
|---|---|
| ch | Chain |
| sc | Single crochet |
| sc2tog | Single crochet 2 together |
| sk | Skip |
| st | Stitch |
| sp | Space |
| rep | Repeat |
| sl st | Slip stitch |
Foundation Chain
Chain a multiple of 18 + 1.
For example:
- Small baby blanket: chain 109
- Lap blanket: chain 127
- Throw blanket: chain 145
- Larger throw: chain 163
Tip: Make a small swatch first. Ripple moss stitch requires consistent tension, especially around the peaks and valleys.
Row 1 – Foundation
Sc in the 2nd chain from the hook.
Ch 1, skip the next chain, sc in the next chain.
Repeat across the row until you reach the final chain.
Sc in the final chain.
Turn.
This creates the basic moss-stitch structure that the ripple pattern will build upon.
Row 2 – Begin the Ripple
Chain 1.
Work a single crochet in the first chain-1 space.
Ripple section:
Repeat the following sequence across the row:
Sc in next ch-1 space, ch 1, skip next sc.
When you reach a designated peak, work:
(sc, ch 1, sc) in the same chain-1 space.
Continue the moss-stitch sequence toward the valley.
At each valley, work:
sc2tog over the appropriate two chain-1 spaces.
Continue alternating increases at the peaks and decreases at the valleys.
Finish the row with a single crochet in the final space.
Turn.
Row 3 – Main Repeat
Chain 1.
Work the moss stitch into the spaces created by the previous row.
At each peak, work:
(sc, ch 1, sc) in the peak space.
At each valley, work:
sc2tog across the two designated spaces.
Between the peaks and valleys, continue:
sc, ch 1, skip next stitch/space
Repeat across the blanket.
Finish with a single crochet at the edge.
Turn.
Rows 4 and Beyond
Repeat Row 3 until your blanket reaches the desired length.
The ripple pattern becomes much easier to recognize after several rows. You should see gentle waves traveling horizontally across the blanket.
Important Tip
Don’t worry if the ripple looks slightly uneven during the first few rows. Once several rows have been completed, the peaks and valleys become much more defined.
How to Change Colors
Color is where this blanket becomes especially fun.
For a look similar to the colorful inspiration image, you can change colors every 1–4 rows.
Option 1 – Every Row
Change color after every row for a highly colorful striped blanket.
Option 2 – Every 2 Rows
This is my favorite option because it creates wider color bands while maintaining visual movement.
Option 3 – Random Color Changes
Choose colors randomly from your yarn basket.
This creates a beautiful scrappy, handmade appearance and is perfect for using leftover yarn.
Option 4 – Self-Striping Yarn
Use a long-color-change or self-striping yarn and let the yarn create the color transitions for you.
How to Change Yarn Without a Bulky Join
When you reach the final stitch of a row, begin your last single crochet as usual.
When two loops remain on your hook:
- Drop the old color.
- Pick up the new color.
- Yarn over with the new color.
- Pull through the remaining loops.
- Continue the next row.
Gently tighten the new yarn.
This creates a much cleaner transition than tying a knot at every color change.
Creating a Beautiful Border
A moss stitch ripple blanket looks beautiful with a simple border.
After completing the final row, don’t immediately add a complicated decorative edge. A clean moss-stitch border allows the ripple pattern to remain the star of the project.
Round 1
Join your border color in a corner.
Chain 1.
Work single crochet around the blanket.
Along straight edges, alternate:
sc, ch 1, skip approximately one stitch
At each corner, work:
sc, ch 2, sc
Continue around the entire blanket.
Slip stitch to the first single crochet.
Round 2
Slip stitch into the next chain-1 space.
Chain 1.
Work:
sc, ch 1
in each chain-1 space around the blanket.
At each corner:
sc, ch 2, sc
Join with a slip stitch.
Repeat for additional rounds if desired.
This style of moss-stitch border is commonly used to complement the main moss-stitch fabric. daisy cottage designs
Finishing Your Blanket
Once you’ve completed the border:
- Cut the yarn.
- Leave a 6–8 inch tail.
- Pull the yarn through the final loop.
- Thread the tail onto a yarn needle.
- Weave it securely through the back of the stitches.
- Trim the excess yarn.
If you’ve used many colors, take extra time to weave in the ends securely.
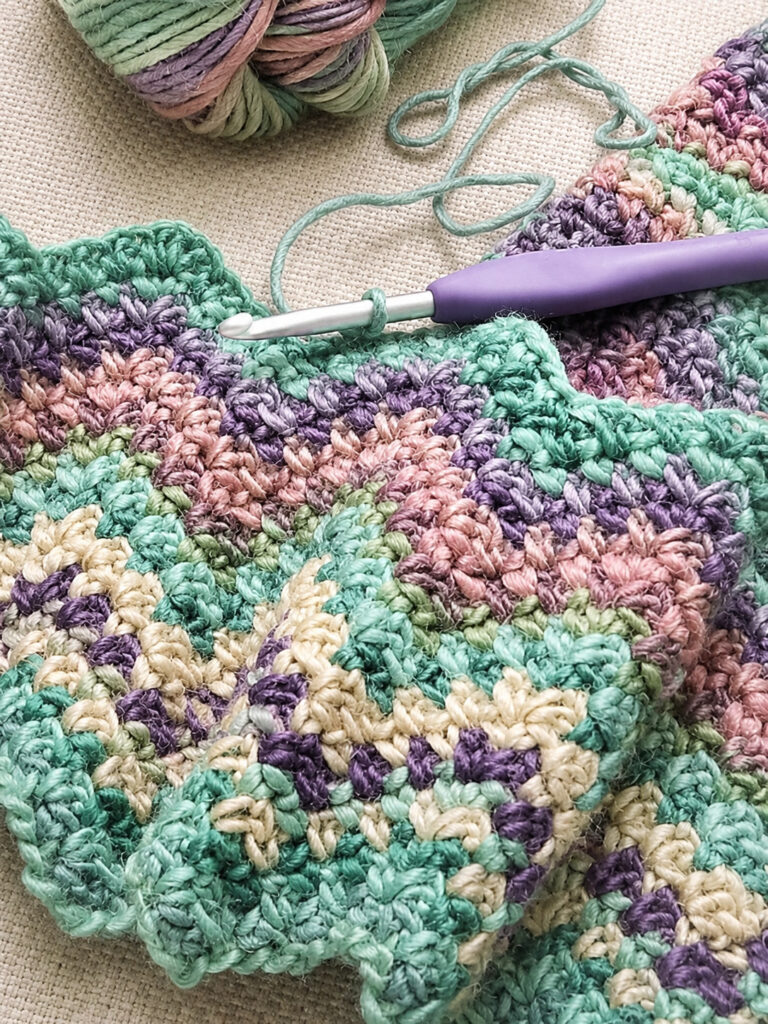
Moss Stitch Ripple Crochet Blanket
Blocking the Blanket
Blocking isn’t absolutely necessary, but it can make a significant difference.
Gently wash the finished blanket according to the yarn manufacturer’s instructions.
Lay it flat on a clean blocking surface.
Smooth the edges and gently stretch the blanket into shape.
Pin the corners and sides if necessary.
Allow it to dry completely before removing the pins.
Blocking can help straighten the edges and make the ripple pattern look more polished.
Choosing Colors for Your Moss Stitch Ripple
The inspiration image demonstrates how beautifully this stitch works with multiple colors.
Coastal Palette
Try:
- Aqua
- Turquoise
- Seafoam
- Cream
- Sky blue
- Lavender
Garden Palette
Try:
- Sage
- Mint
- Peach
- Cream
- Dusty rose
- Soft blue
Jewel Palette
Try:
- Emerald
- Sapphire
- Amethyst
- Teal
- Plum
- Cream
Neutral Version
For a modern farmhouse look:
- Ivory
- Beige
- Taupe
- Soft gray
- Charcoal
The same pattern can look completely different simply by changing the yarn palette.
Video Tutorial
If you’re a visual learner, a video can make the ripple section much easier to understand.
Another useful tutorial demonstrates a ripple moss-stitch blanket with color changes and a border:
The ripple moss stitch can require careful counting because of the skipped stitches and decreases, so making a small practice swatch before starting the full blanket is a good idea.
Tips for Perfect Ripple Moss Stitch
1. Count your stitches
The most common problem with ripple patterns is accidentally gaining or losing stitches.
2. Mark the peaks and valleys
Place stitch markers at important increase and decrease points while learning the pattern.
3. Don’t crochet too tightly
A tight tension can make the blanket stiff and can make the ripple difficult to see.
4. Use consistent tension
Try to maintain the same tension throughout each row.
5. Make a swatch
A small swatch will help you understand where the peaks and valleys occur before committing to a full blanket.
6. Check your edges
Every few rows, lay the blanket flat and check that both edges remain straight.
How to Customize the Size
The beauty of this blanket is that you don’t have to follow one fixed size.
Simply begin with a foundation chain that follows your chosen pattern repeat, then continue repeating the rows until you reach the desired length.
Suggested Sizes
| Blanket | Approx. Size |
|---|---|
| Lovey | 18 × 18 in |
| Baby | 30 × 36 in |
| Lap | 36 × 48 in |
| Throw | 50 × 60 in |
| Large Throw | 60 × 72 in |
Your final size will depend on yarn weight, hook size, and personal tension.
Frequently Asked Questions
Is moss stitch good for blankets?
Yes. Moss stitch creates a dense but flexible fabric with attractive texture, making it particularly suitable for blankets, throws, scarves, and home décor.
Is ripple moss stitch difficult?
The basic moss stitch is beginner-friendly, but the ripple version requires more attention because increases, decreases, and skipped stitches need to be placed correctly.
Can I use scrap yarn?
Absolutely. This pattern is particularly attractive when made with leftover yarn in coordinating colors.
Can I make this blanket with one color?
Yes. A single-color version will emphasize the texture and ripple shape rather than the color changes.
What yarn is best?
Worsted-weight acrylic, acrylic blends, cotton blends, or other medium-weight yarns can work well. Choose a yarn that produces a soft fabric with your chosen hook.
Can I make it larger?
Yes. Start with the appropriate foundation-chain multiple for the repeat and continue adding rows until the blanket reaches your preferred dimensions.
Final Thoughts
The Moss Stitch Ripple Crochet Blanket combines two wonderful crochet characteristics: the understated texture of moss stitch and the flowing movement of a ripple design.
It’s an excellent project for experimenting with color. Use a carefully selected palette for a sophisticated modern throw, or combine leftover yarns for a cheerful, one-of-a-kind blanket.
The stitch also has a pleasant rhythm once the repeat becomes familiar, making this a relaxing project for evenings, weekends, or your next crochet-along.
Save this pattern, choose your favorite colors, grab your hook, and start crocheting your own colorful Moss Stitch Ripple Blanket! 🧶💜

