

 soofha
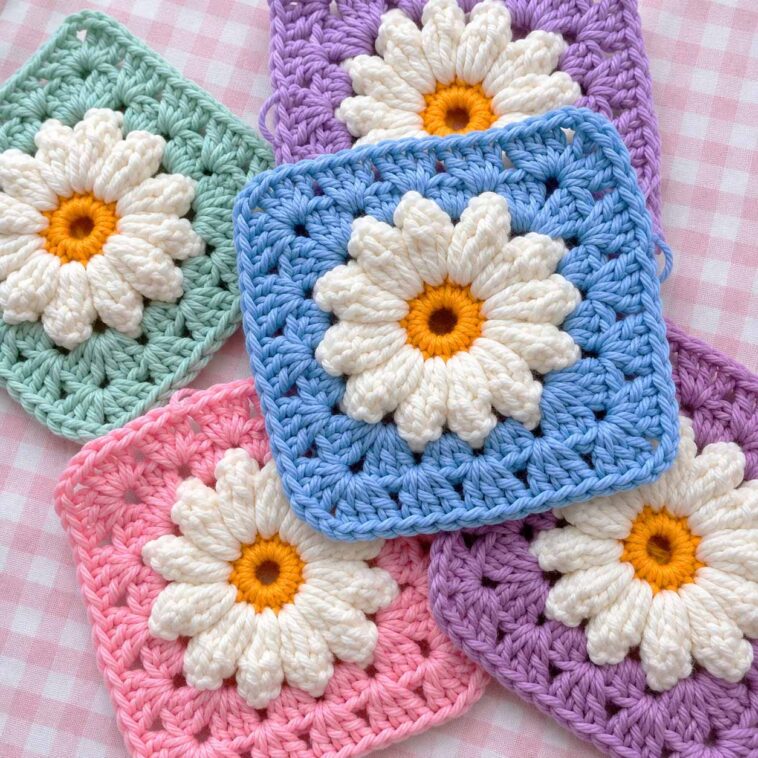
There’s something so cheerful about a crochet daisy. Maybe it’s the little flower in the center, the pretty petals, or simply the way a few colorful squares can come together to create something completely unique. Whatever the reason, the Daisy Square is one of those crochet motifs that never seems to go out of style.
If you love making granny squares and floral crochet patterns, this is definitely one to add to your project list. Once you make the first square, you may find yourself thinking about all the things you could use it for!
The Daisy Square, sometimes called a Daisy Flower in a Square, begins with a sweet little flower and can then be worked into a traditional square shape. You can keep the colors soft and delicate for a baby blanket, choose bright shades for a cheerful throw, or use neutral colors for something a little more modern.
And the best part? You can make as many squares as you need and join them together later.
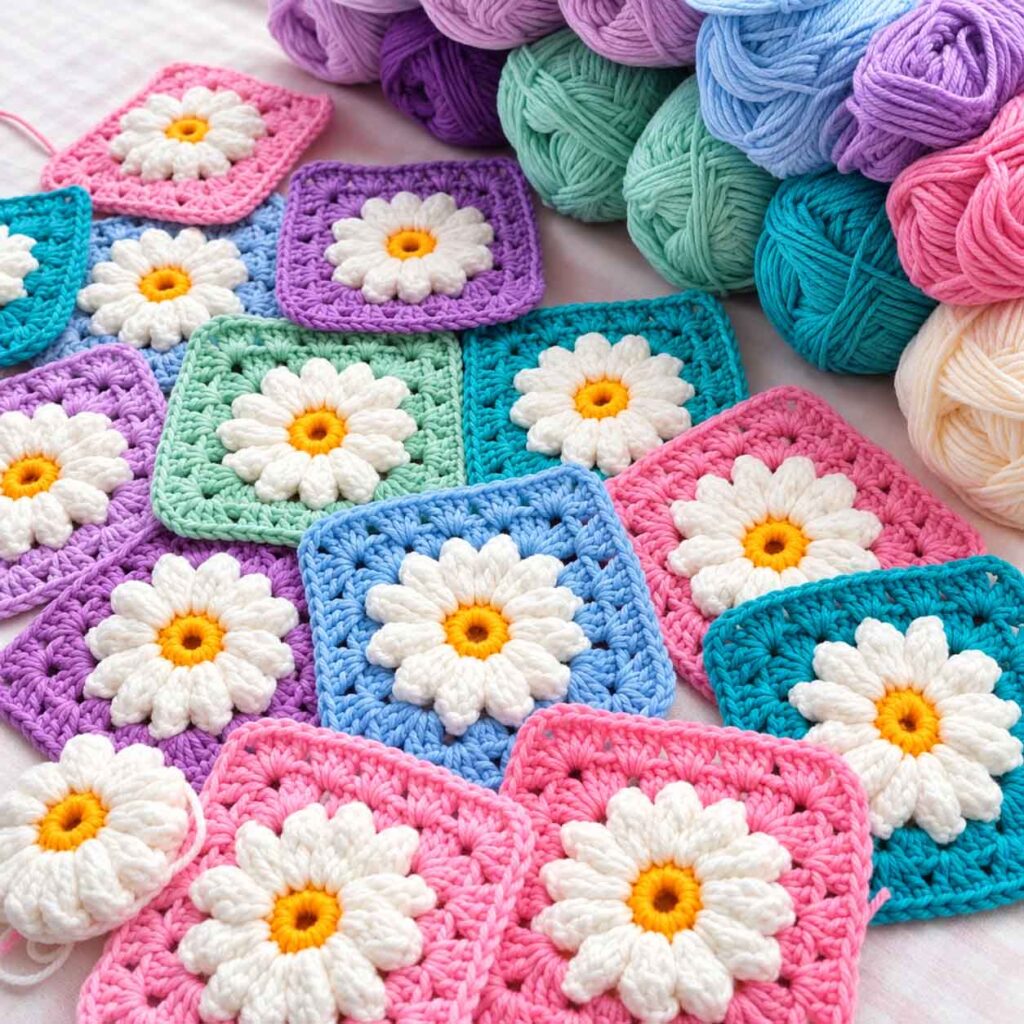
What Can You Make With Daisy Squares?
This little motif is surprisingly versatile. Of course, a blanket is a classic choice, but there are plenty of other possibilities too.
Try using your Daisy Squares to make:
- Baby blankets
- Lap blankets
- Throw pillows
- Cushion covers
- Bags and totes
- Table runners
- Placemats
- Scarves
- Crochet clothing
- Wall hangings
- Home décor pieces
You can also experiment with different color combinations to give the same pattern a completely different look.
Materials
Before you begin, gather everything you need:
- Worsted weight yarn in your choice of colors
- Crochet hook suitable for your yarn — a 5.5 mm or 6 mm hook works well with worsted weight yarn
- Scissors
- Yarn needle for weaving in the ends
You don’t need a huge amount of yarn for one square, which makes this pattern a great way to use up some of those leftover colors hiding in your yarn basket.
Crochet Abbreviations
Here are the abbreviations used in the pattern:
- ch – chain
- sc – single crochet
- dc – double crochet
- sl st – slip stitch
- sp – space
- rep – repeat
- tc – treble crochet
How to Crochet the Daisy Square
Round 1 – The Center of the Flower
Start by chaining 2 stitches.
Work 11 double crochets (dc) into the central ring.
You should now have a small circle made up of your double crochet stitches. This will become the center of your daisy.
If you prefer working with a magic ring, you can use one instead of the beginning chain, especially if you want a tighter center.
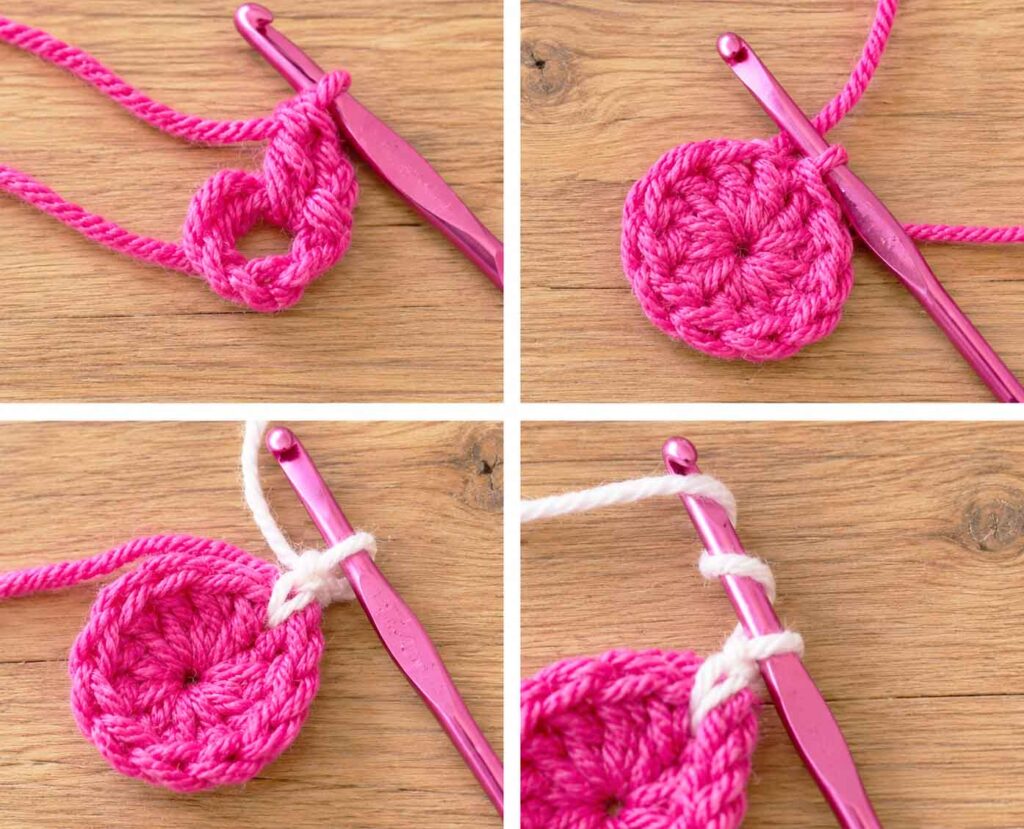
Round 1 daisy
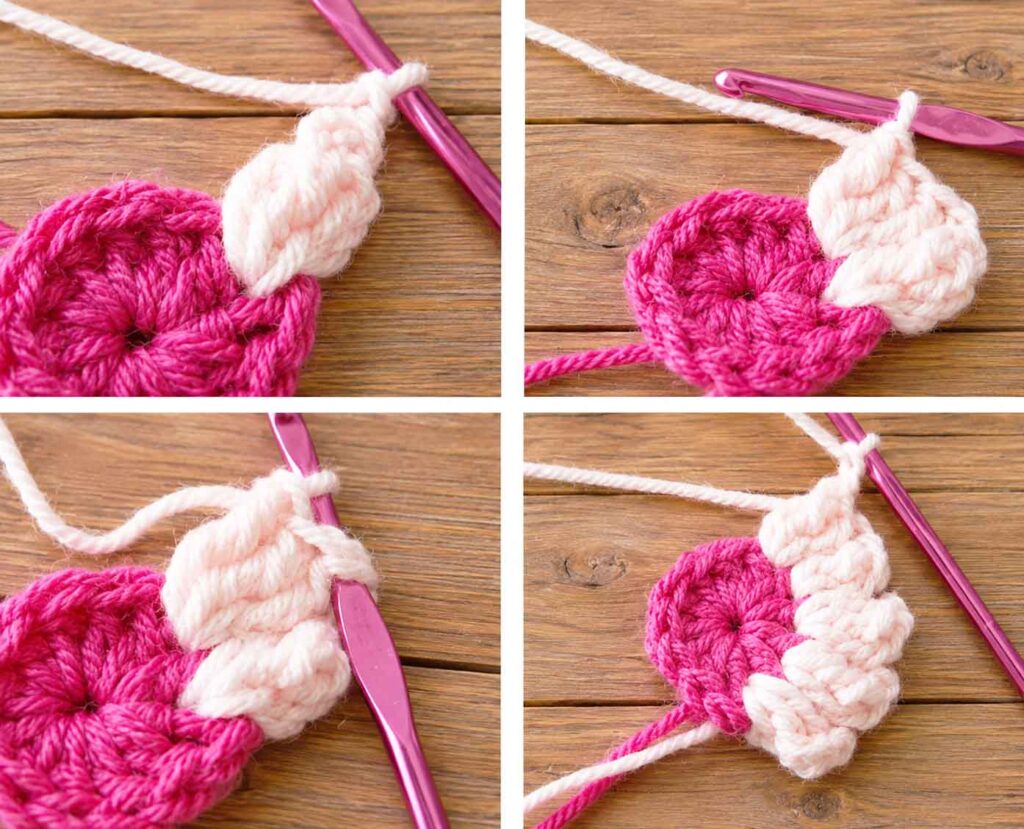
Round 2 – Creating the Daisy Petals
Now it’s time to turn that little circle into a flower.
Join your new color with a slip stitch into any space between the double crochet stitches.
Chain 2, then work 3 treble crochets (tc) into the same space.
To create the petal shape, insert your hook into the top of the first treble crochet. Remove the hook, then pull the last treble crochet through the first loop. Chain 2 to finish the petal.
Repeat this around the entire circle.
You should end up with 12 petals, with a chain-2 space separating each petal.
Take a moment to look at your work here. You should now clearly see the daisy taking shape in the center.
Turning the Flower Into a Square
The flower looks lovely on its own, but the next step is what transforms it into a useful square motif.
Choose your next yarn color and join it with a slip stitch into any ch-2 space between the petals.
Square Round 1
Chain 2. This counts as your first double crochet.
In the same corner space, work:
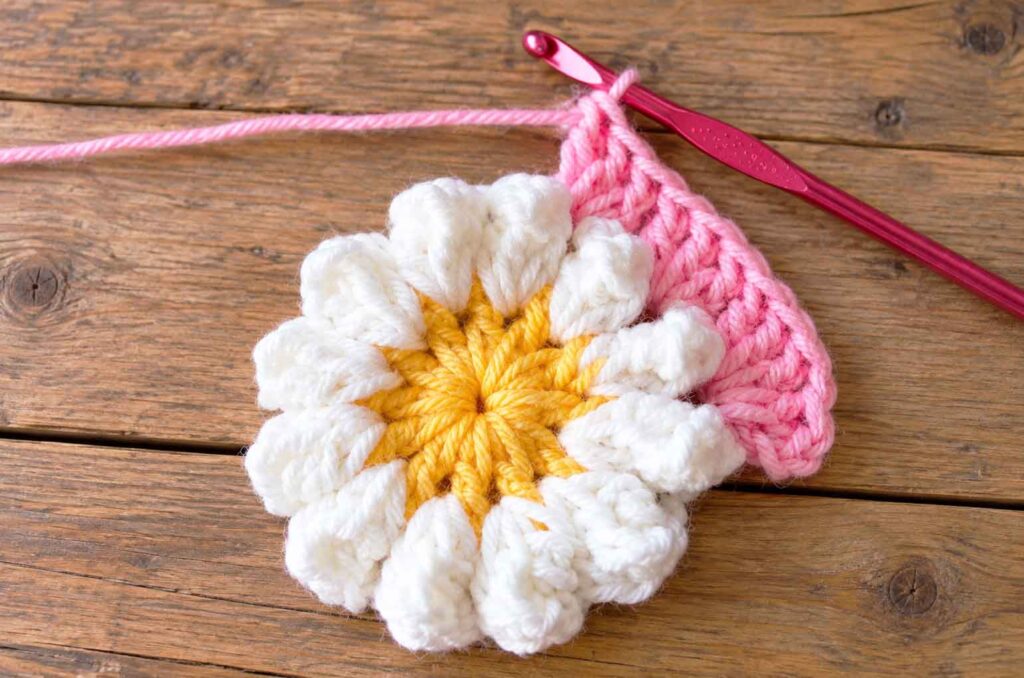
2 dc, ch 1, 3 dc
This creates your first corner.
Move to the next space and work 3 dc.
Work another 3 dc in the following space.
In the next space, create another corner by working:
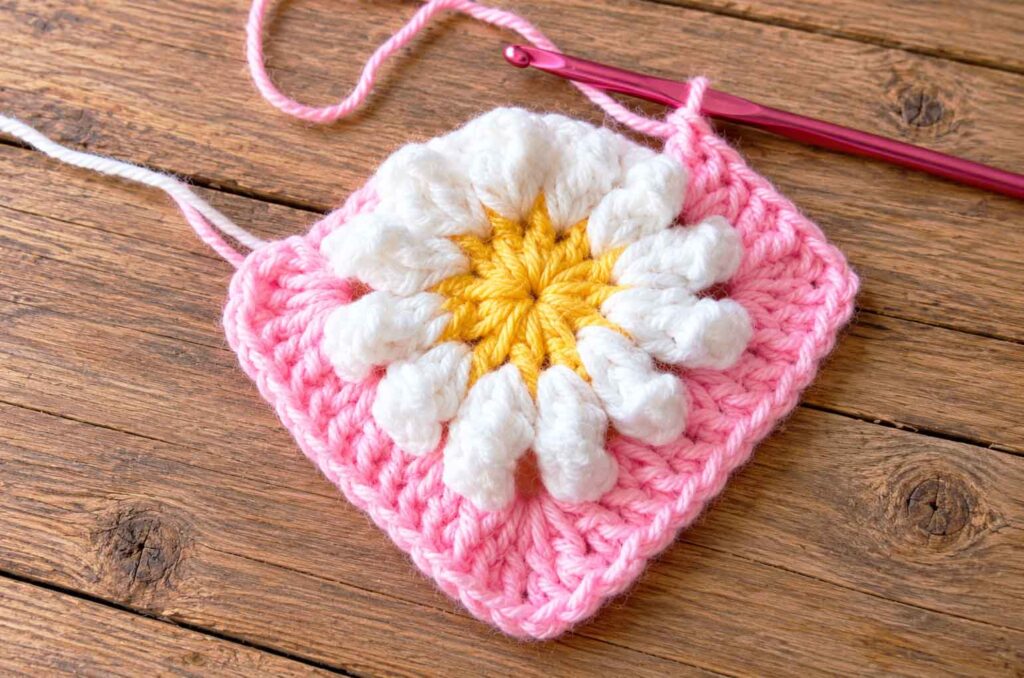
3 dc, ch 1, 3 dc
Continue working around the flower in the same way, making 3 double crochets in the appropriate spaces and forming a corner whenever you reach a corner section.
When you come back around to the beginning, join with a slip stitch to the top of the beginning chain-2.
Your round should now have the basic square shape.
Square Round 2
For the next round, slip stitch over to the corner space.
Chain 2.
In the same corner space, work:
2 dc, ch 1, 3 dc
Now work 3 dc in each of the next 3 spaces.
When you reach the next corner, work:
3 dc, ch 1, 3 dc
Continue repeating this sequence around the square.
At each corner, remember to work 3 dc, ch 1, 3 dc, while the spaces along the sides receive groups of 3 double crochets.
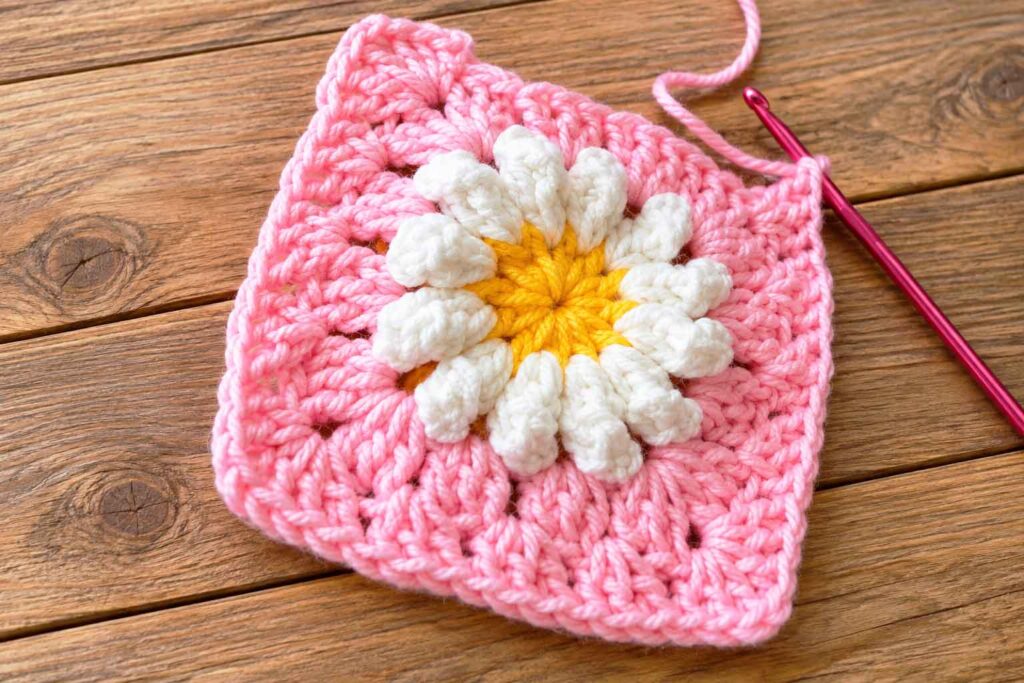
Once you’ve worked all the way around, join the round with a slip stitch.
And that’s it! Your Daisy Square is ready.
A Few Tips for Making Your Daisy Squares
Don’t be afraid to play around with the colors. That’s one of the things that makes this pattern so much fun.
For a traditional daisy look, you could use a yellow center with white petals and a soft green or neutral background. For something brighter, try pink, purple, blue, or coral petals.
If you’re making a whole blanket, you can either keep every square the same or make several different color combinations. Even when the pattern stays exactly the same, changing the colors can make each square look completely different.
It’s also worth keeping your tension as consistent as possible. If you’re making multiple squares for a blanket, squares that are all the same size will make joining them much easier later.
Joining Your Daisy Squares
Once you’ve made enough squares for your project, there are several ways to join them.
You can sew them together with a yarn needle, use slip stitches, or crochet the squares together with a decorative joining method.
A simple join works beautifully when you want the flowers to be the main focus. On the other hand, a contrasting joining color can create a pretty frame around each daisy and make the individual squares stand out.
Before joining everything permanently, lay your squares out on the floor or a large table and experiment with the arrangement. Moving a few colors around can make a surprisingly big difference in the finished blanket.
Don’t Forget to Weave in Your Ends
It may be tempting to leave all those little yarn tails until the very end, especially if you’re making dozens of squares. But weaving them in as you go can save you a lot of work later.
Use your yarn needle to weave each end securely through the stitches on the back of your work. Trim away any excess yarn once the ends are secure.
Trust me, your future self will thank you!
Video Tutorial
If you’re someone who learns crochet more easily by watching each step, a video tutorial can be especially helpful for this pattern.
For a visual walkthrough of the Daisy Square, check out the tutorial from the RadCrochet channel. Watching the flower petals being formed and seeing how the square is built around them can make the written instructions much easier to follow.
Ready to Make Your Own Daisy Square?
The Daisy Square is a simple little motif with so many possibilities. Once you understand the basic pattern, you can use it over and over again to create blankets, pillows, bags, and all kinds of colorful crochet projects.
I especially love patterns like this because you can make a few squares whenever you have some free time and slowly build them into a larger project. There’s no need to finish an entire blanket in one sitting.
So grab your favorite yarn, choose a few colors that make you happy, and give this pretty flower square a try.
Happy crocheting!
If you’d like to keep a printable version of the pattern nearby while you work, you can access the Daisy Square Free Pattern PDF below and get started.
Thank you so much for spending a little time here with us. We hope this pattern inspires your next crochet project, and we’d love to see what beautiful combinations you create with your Daisy Squares.

