

 soofha
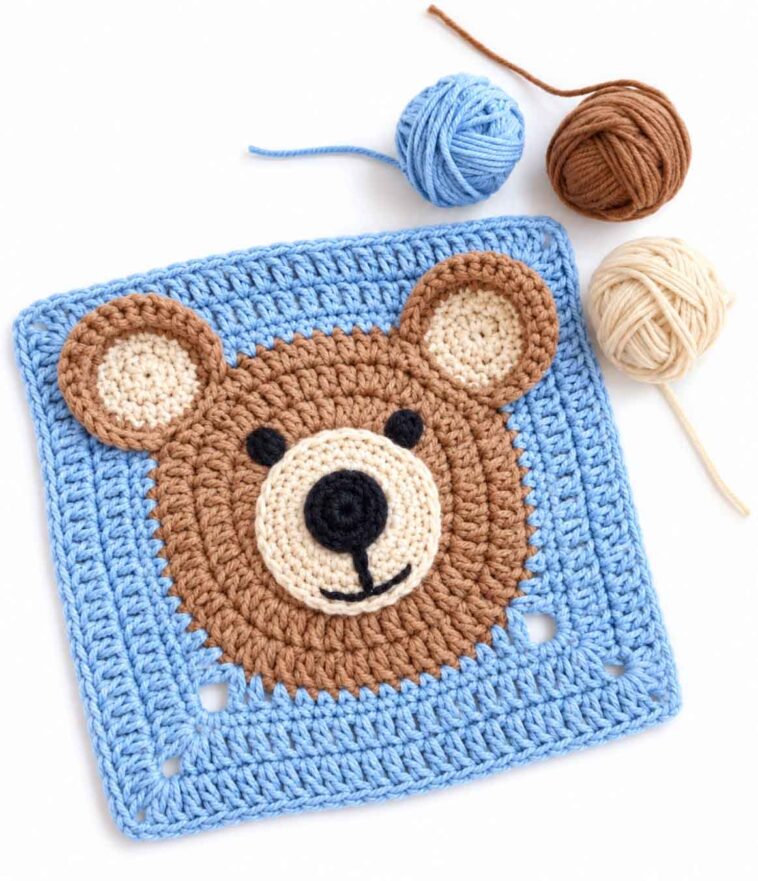
There’s something about a little teddy bear that never seems to go out of style. Maybe that’s why I love this Teddy Bear Granny Square so much. It has that familiar, cozy granny-square feel, but the little bear in the center gives it an extra bit of personality.
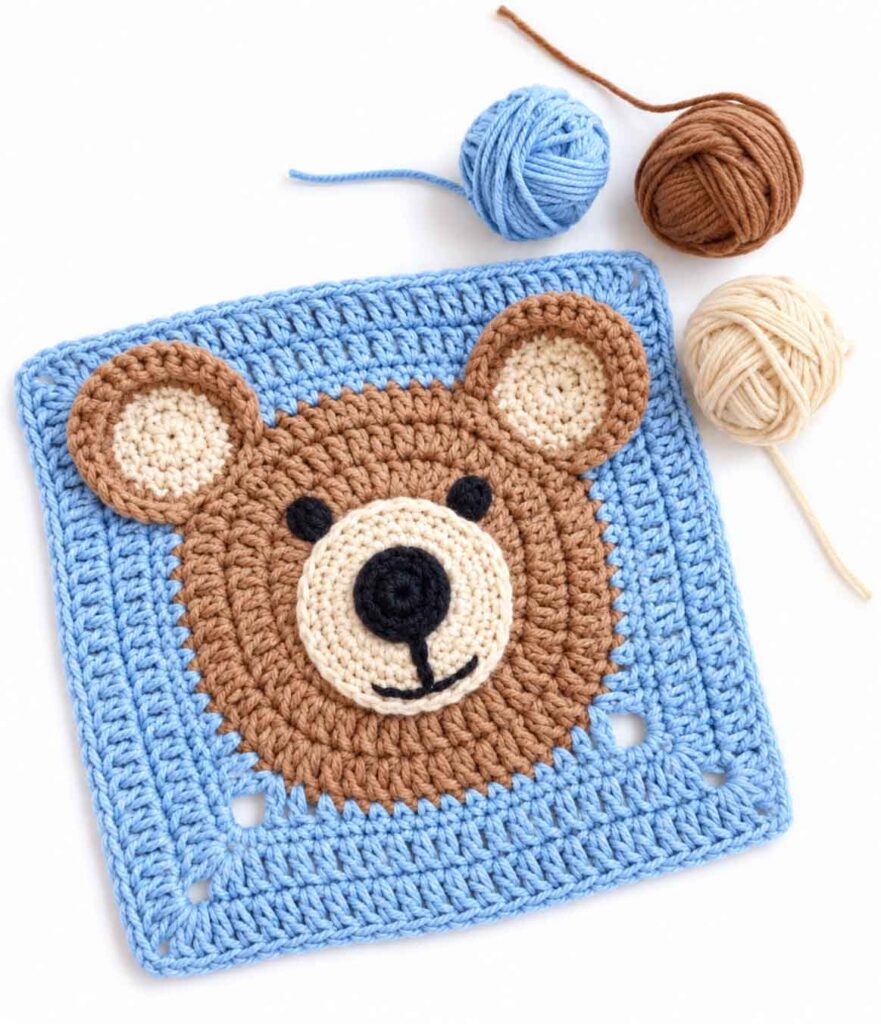
If you enjoy making crochet baby blankets, this is definitely a square worth trying. The bear is made right into the center of the motif, then a few simple details—little ears, a soft muzzle, and an embroidered face—bring it to life.
And once you make one, it’s very easy to imagine all the possibilities.
You could make a whole blanket filled with matching teddy bears, or use different shades for each bear while keeping the background color consistent. I especially like the idea of a soft blue background with bears in cream, peach, lavender, caramel, and dusty pink. The blanket would feel colorful without becoming too busy.
Why You’ll Love This Teddy Bear Granny Square
This pattern combines a textured crochet center with classic granny-square rounds, so the finished piece has plenty of visual interest without being overly complicated.
The bear itself starts with a small circular center. A round of dc3tog clusters creates a textured, almost sunburst-like shape. Once the background color is added, the center quickly starts taking on the familiar shape of a granny square.
The ears are made separately and sewn onto the top of the bear. I like leaving them slightly raised instead of stitching them completely flat. That small detail gives the bear a surprisingly cute expression.
The muzzle is also crocheted separately. Use cream or ivory yarn for a soft contrast against the bear’s face. If you want it to have a little more dimension, you can tuck a tiny amount of fiberfill underneath before sewing it down.
For the face, I recommend embroidery, especially if you’re making this square for a baby blanket. Embroidered eyes and a nose are soft, secure, and just as cute as plastic safety eyes.
Teddy Bear Granny Square Details
Skill Level: Confident Beginner
This project is made using basic crochet stitches, although you’ll want to be comfortable working into a magic ring and making a few increases and clusters.
Materials
- Worsted weight #4 yarn
- 4.0 mm crochet hook
- Bear color
- Background color
- Cream or white yarn for the muzzle
- Small amount of dark brown or black yarn
- Yarn needle
- Scissors
- Small amount of fiberfill, optional
For a baby project, I recommend embroidering the eyes and nose rather than adding plastic safety eyes.
Crochet Abbreviations
- ch = chain
- sc = single crochet
- hdc = half double crochet
- dc = double crochet
- sl st = slip stitch
- st(s) = stitch(es)
- sp = space
- MR = magic ring
- dc3tog = double crochet 3 together
Special Stitch: dc3tog Cluster
The textured center uses a simple double crochet cluster.
To make a dc3tog cluster:
- Yarn over and insert your hook into the indicated stitch or space.
- Pull up a loop.
- Yarn over and pull through 2 loops.
- Repeat the same steps two more times in the same stitch or space.
- You should have 4 loops on your hook.
- Yarn over and pull through all 4 loops.
Your dc3tog cluster is complete.
Teddy Bear Center
Using your Bear Color, begin with a magic ring.
Round 1
Make a MR.
Ch 3. This counts as the first dc.
Work 11 dc into the ring.
Join with a sl st to the top of the beginning ch-3.
12 dc
Pull the center of the magic ring closed.
Round 2
Ch 2.
Work a dc3tog cluster in the same stitch.
Ch 1.
Continue around the circle, working:
dc3tog, ch 1
in each remaining stitch.
Join with a sl st to the top of the first cluster.
Fasten off.
You should have 12 clusters and 12 ch-1 spaces.
At this point, the center has a pretty little textured, sunburst appearance. It may not look much like a teddy bear yet, but don’t worry—the granny-square rounds and facial details will bring everything together.
Turning the Bear Center Into a Granny Square
Join your Background Color in any ch-1 space.
The space you choose will become the first corner.
Round 3
In the first ch-1 space, work:
(3 dc, ch 2, 3 dc)
Then work 3 dc in each of the next 2 ch-1 spaces.
In the next ch-1 space, work:
(3 dc, ch 2, 3 dc)
Continue this sequence around:
3 dc in each of the next 2 ch-1 spaces, (3 dc, ch 2, 3 dc) in the next ch-1 space.
Repeat around the square.
Join with a sl st to the first dc.
You should now have four corners, and the motif should clearly be taking on a square shape.
Round 4
Slip stitch across to the first corner ch-2 space.
Work:
(3 dc, ch 2, 3 dc)
in the corner.
Work 3 dc in each space between the granny groups along the side.
When you reach each corner ch-2 space, work:
(3 dc, ch 2, 3 dc)
Continue all the way around and join with a sl st.
Round 5
Repeat Round 4.
Fasten off.
If you would like to make a larger square, simply continue repeating the granny-style round before adding the bear’s ears and muzzle.
Teddy Bear Ears
Make 2 ears using your Bear Color.
These little semicircles are made separately and sewn onto the square.
Row 1
Make a MR.
Ch 2.
Work 6 hdc into the ring.
Do not join into a complete circle.
Pull the magic ring closed.
Turn.
Row 2
Ch 1.
Work 2 hdc in each of the 6 stitches.
12 hdc
Fasten off, leaving a long tail for sewing.
Your ear should look like a small semicircle.
Make the second ear the same way.
Attaching the Teddy Bear Ears
Lay your square flat and keep it in its normal upright position.
Place one ear near the upper-left side of the bear’s head and the other near the upper-right side.
I like to tuck the bottom edge of each ear slightly behind the textured center. This helps the ears look as though they’re naturally attached to the bear rather than simply sitting on top of the square.
Sew both ears securely into place.
You can adjust their angle slightly before sewing them down. Tilting them outward just a little can give the bear a particularly sweet look.
Crochet Muzzle
For the muzzle, use cream or white yarn.
Round 1
Ch 5.
Work 2 sc in the 2nd ch from the hook.
Sc in each of the next 2 ch.
Work 4 sc in the last ch.
Continue working along the opposite side of the foundation chain.
Sc in each of the next 2 ch.
Work 2 sc in the final remaining loop.
Join with a sl st.
12 sc
Round 2
Work 2 sc in each of the next 2 sts.
Sc in the next 2 sts.
Work 2 sc in each of the next 4 sts.
Sc in the next 2 sts.
Work 2 sc in each of the final 2 sts.
Join.
20 sc
Fasten off, leaving a long tail for sewing.
If you want the muzzle to have a little more dimension, place a very small amount of fiberfill underneath it before sewing it completely to the square.
Adding the Teddy Bear Face
Center the muzzle over the textured bear center.
I like positioning it just a little lower than the exact center of the face. This leaves enough room above it for the eyes and gives the bear a more natural expression.
Sew the muzzle securely around its outer edge.
Now it’s time for the fun part—the face.
Using dark brown or black yarn, embroider a small oval or triangular nose near the upper center of the muzzle.
Bring one straight stitch down from the nose to create the beginning of the mouth.
If you like, add a tiny curved stitch to either side.
For the eyes, use two small French knots or short vertical stitches above the muzzle.
And there you have it—a sweet little teddy bear!
Teddy Bear Granny Square Color Ideas
This is where you can really make the pattern your own.
One of my favorite combinations would be a dusty blue background with teddy bears made in several soft shades. You could alternate between:
- Cream
- Peach
- Lavender
- Caramel
- Dusty pink
Keep the muzzle cream or ivory on every bear, and use the same background color throughout the blanket. The consistent border will tie all those different colors together.
For a more muted palette, you could also try:
- Sage and cream
- Dusty blue and beige
- Blush and ivory
- Chocolate brown and oatmeal
You don’t need much yarn for each bear, either, which makes this project a great way to use up smaller leftovers in your stash.
How to Make a Teddy Bear Granny Square Blanket
Once you’ve made your first square, simply repeat the pattern until you have enough motifs for your desired blanket size.
Here are a few simple layout ideas:
- 3 × 3 = 9 squares
- 4 × 5 = 20 squares
- 5 × 6 = 30 squares
Before joining the squares, spread them all out on the floor or a large table. This is especially helpful if you’re using several different bear colors.
Move the squares around until the colors feel balanced.
For joining, use whichever method you normally prefer. Whip stitch, mattress stitch, and slip-stitch joins can all work beautifully with granny squares.
Once all the squares are joined, finish the blanket with a simple border. A round or two of single crochet or half double crochet would keep the focus on the teddy bears without making the edging too complicated.
Other Projects for These Teddy Bear Squares
A teddy bear blanket is probably the first thing that comes to mind, but you certainly don’t have to stop there.
A few finished squares could be turned into a:
- Baby cushion cover
- Tote bag
- Nursery wall hanging
- Child’s cardigan panel
- Decorative pillow
- Small baby gift
You could even make individual squares and use them as part of a larger sampler-style blanket.
Sometimes that’s the best thing about crochet motifs—you start with one little square and suddenly have a dozen ideas for what to do with it.
Teddy Bear And Friends Blanket Pdf Pattern
Video Tutorial
If you’re a visual learner, a video tutorial can be helpful when you’re first working through the textured center, especially if you’re not familiar with the dc3tog cluster.
Once you’ve made one square, the rest becomes much easier. After that, it’s mostly about choosing your colors and deciding how many bears you want in your finished project.
Teddy Bear and Friends Blanket
If you enjoy animal-themed crochet, you may also want to look at the Teddy Bear and Friends Blanket PDF Pattern from Yarnspirations. It features bears, lions, and tigers and is another fun example of using cute animal motifs in a blanket.
It can be especially fun to look at different animal-square designs when you’re planning a nursery blanket or a gift for a new baby.
Tips for Making Your Teddy Bear Granny Squares
If you’re making a whole blanket, I have a few suggestions that can make the process more enjoyable.
Make one complete square first. Don’t make all the centers, then all the ears, then all the muzzles before you’ve checked the finished size. Making one from beginning to end gives you a chance to see whether you like the proportions and colors.
Keep your tension consistent. Granny squares can grow or shrink depending on tension. If you’re making a large blanket, try to keep your squares as close to the same size as possible.
Lay out your colors before joining. This is one of those small steps that makes a surprisingly big difference. You can move the different teddy bears around until the overall blanket looks balanced.
Don’t overstuff the muzzle. If you decide to add fiberfill, just use a tiny amount. Too much stuffing can make the muzzle look bulky.
Embroider the face carefully. A few simple stitches are all you need. There’s no need to make the features complicated—the little imperfections are part of what gives handmade crochet its charm.
Final Thoughts
I have a feeling this is one of those crochet projects where making the first square is only the beginning.
You might sit down thinking you’ll make one just to test the pattern, and before you know it, there are several little teddy bear faces sitting beside your crochet hook.
That’s part of the fun.
The pattern is simple enough to experiment with, and the color combinations can completely change the personality of the finished blanket. Keep everything soft and neutral for a classic nursery look, or bring in peach, lavender, blue, pink, sage, and caramel for something more playful.
And because the bear details use such small amounts of yarn, this is also a wonderful stash-busting project. Those little leftover balls of cream, brown, pink, beige, and blue yarn that aren’t quite enough for a larger project can have a new purpose here.
Whether you make a full baby blanket, a small pillow, or just a handful of squares for another project, I hope you have fun with these little teddy bears.
Thank you for spending some crochet time with me here at Soofha. Happy crocheting! 🧸

