
 soofha
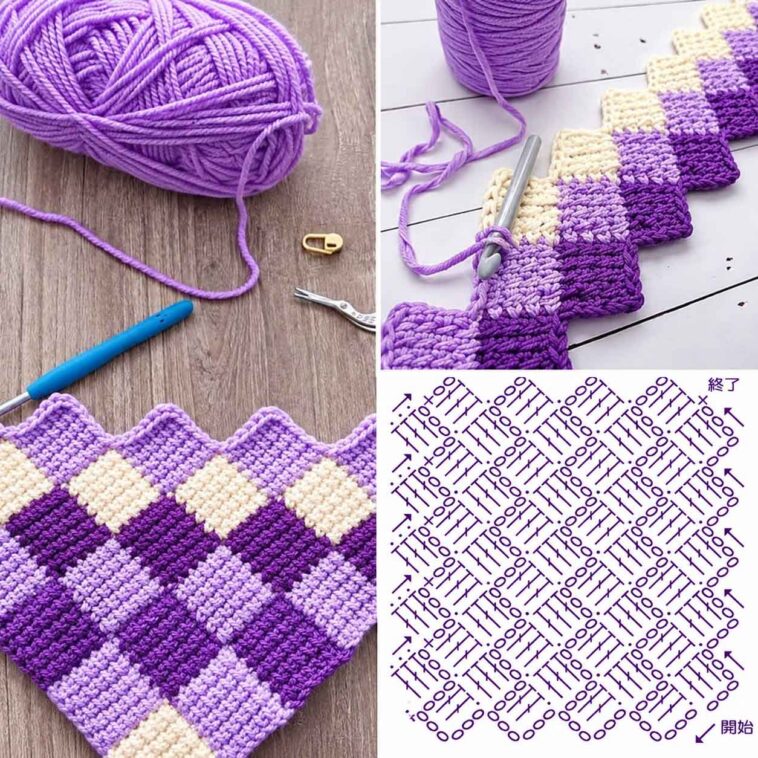
If you’re looking for a crochet stitch that adds something special to your projects, the Entrelac Stitch is definitely worth trying. With its lovely woven appearance and little interlocking blocks, this stitch creates a textured design that looks much more complicated than it actually is.
At first, the technique might seem a little tricky, especially if you’ve never tried Tunisian-style crochet before. But once you understand how the blocks are formed and connected, the pattern becomes much easier to follow.
The Entrelac Stitch is a wonderful choice for blankets, scarves, bags, throws, and many other handmade projects. You can work it in a single color for a subtle textured finish or experiment with different shades to create a beautiful woven effect.
So, grab your favorite yarn and crochet hook, and let’s take a closer look at how this interesting stitch works!
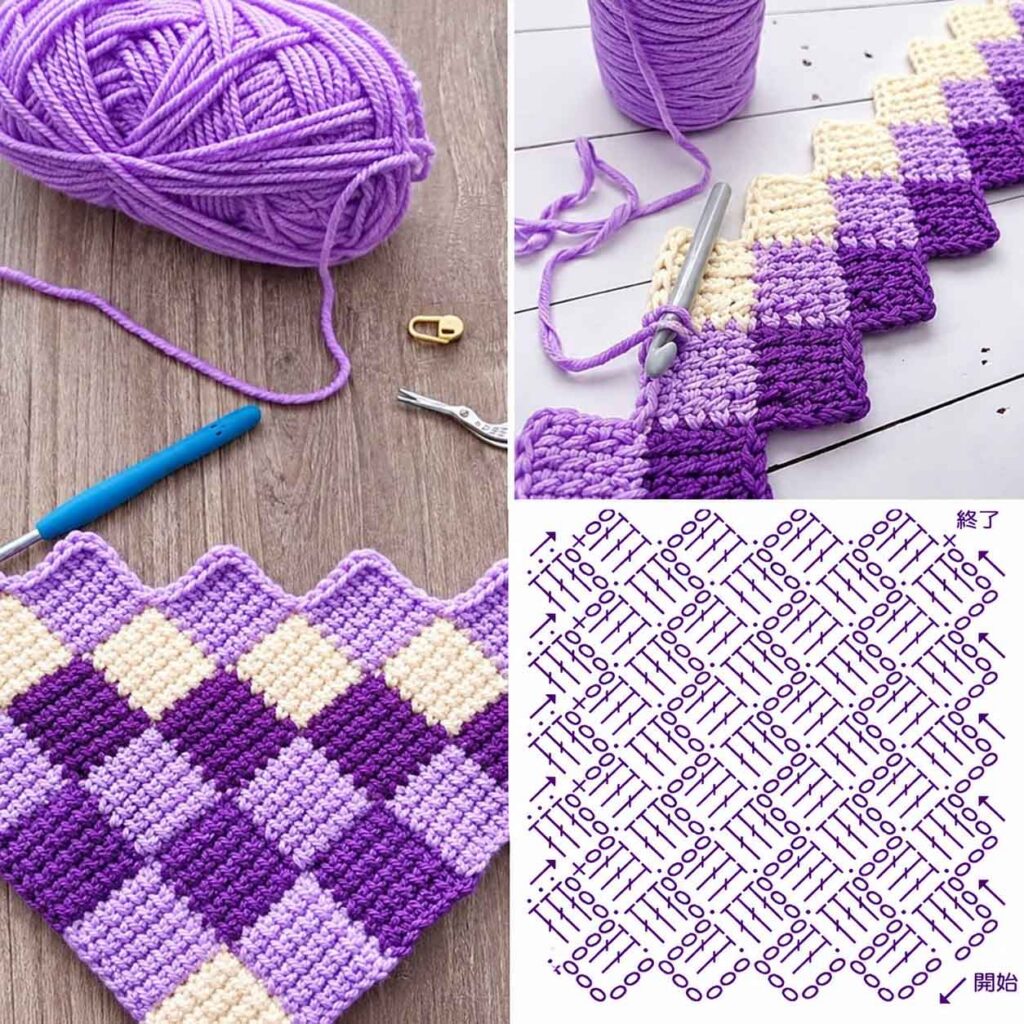
Materials You’ll Need
Before getting started, gather the following supplies:
- Crochet hook: A 2.5 mm Tunisian crochet hook is suggested in the original tutorial for lightweight DK yarn.
- Yarn: DK-weight yarn in your favorite color or a combination of shades.
- Scissors: For cutting the yarn when changing colors or finishing your work.
- Tapestry needle: For weaving in loose ends.
You can choose any color combination you like. Two or three contrasting shades can make the individual blocks stand out beautifully.
How to Crochet the Entrelac Stitch
This version uses a series of small blocks worked in a Tunisian-style technique. Take your time with the first few rows, as understanding how the blocks connect is the key to getting a neat result.
1. Make the Foundation Chain
Begin by making a foundation chain to the desired width of your project.
For practice, you can start with 28 chains. This will give you a small sample to work on while learning the technique.
Insert your hook into the first chain, yarn over, and pull up a loop. Leave that loop on your hook. Continue inserting your hook into the following chains and pulling up loops until you have 7 loops on your hook.
These loops form the foundation of your first Entrelac block.
2. Complete the First Block
Once you have 7 loops on your hook, yarn over and pull through 2 loops.
Continue yarning over and pulling through 2 loops at a time until only one loop remains on your hook.
Your first block is now complete!
3. Begin the Next Block
Now it’s time to build the next block alongside the first one.
Insert your hook vertically into the next stitch and pull up a loop, keeping it on your hook. Continue this process until you have 6 loops.
Then insert your hook into the seventh chain or corresponding stitch of the first block and pull up one more loop. You should now have 7 loops on your hook.
Yarn over and pull through 2 loops at a time until just one loop remains.
You’ve made your second block!
4. Continue Building the Blocks
Repeat the same process to create additional blocks across the row.
Pull up 6 loops along the vertical edge, then pick up the seventh loop from the next stitch of the previous block. Work the return row by pulling through 2 loops at a time.
Continue until you reach the desired width.
As you work, you’ll begin to see the distinctive woven pattern taking shape. It’s always exciting when those little blocks start coming together!
5. Add a New Color (Optional)
One of the nicest things about the Entrelac Stitch is how easily you can play with color.
When you want to introduce another shade, finish the current section and fasten off the yarn if required by your pattern. Attach the new color at the starting point of the next block and continue following the same technique.
You can alternate two colors, use several shades, or even work with leftover yarn from previous projects.
6. Create Half Blocks for Neat Edges
To achieve straighter edges, the pattern also includes instructions for making half blocks.
These smaller sections help fill the spaces along the edges and give the finished piece a more even appearance.
For the first half block, attach the yarn at the top of the previous block. Insert your hook into the next stitch and pull up loops until you have 7 on your hook.
Yarn over and pull through 2 loops at a time until 3 loops remain. Then yarn over and pull through all 3 loops together.
For the next section, skip the first stitch and insert your hook vertically into the following stitch. Pull up loops until you have 5, then pick up the final loop from the appropriate chain or stitch.
Continue working the return row as before. Repeat the process wherever needed to complete the edge.
Finish the last stitches according to the original pattern instructions.
Tip: The half-block sections can take a little practice. Following the accompanying video and graph will help you see exactly where to place your hook.
Video Tutorial
If you’re more comfortable learning by watching someone crochet, the video tutorial below is a helpful resource. Seeing how the hook moves through the stitches makes the Entrelac technique much easier to understand.
Crochet Graph
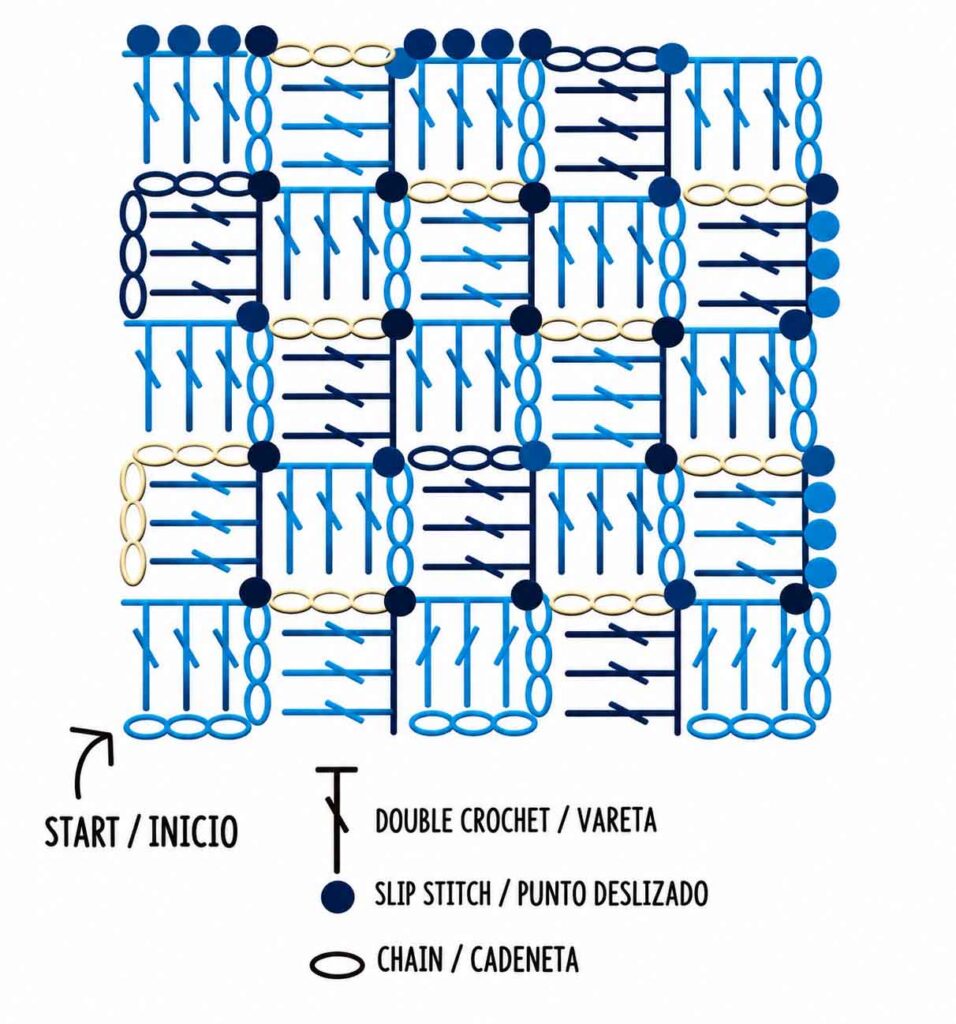
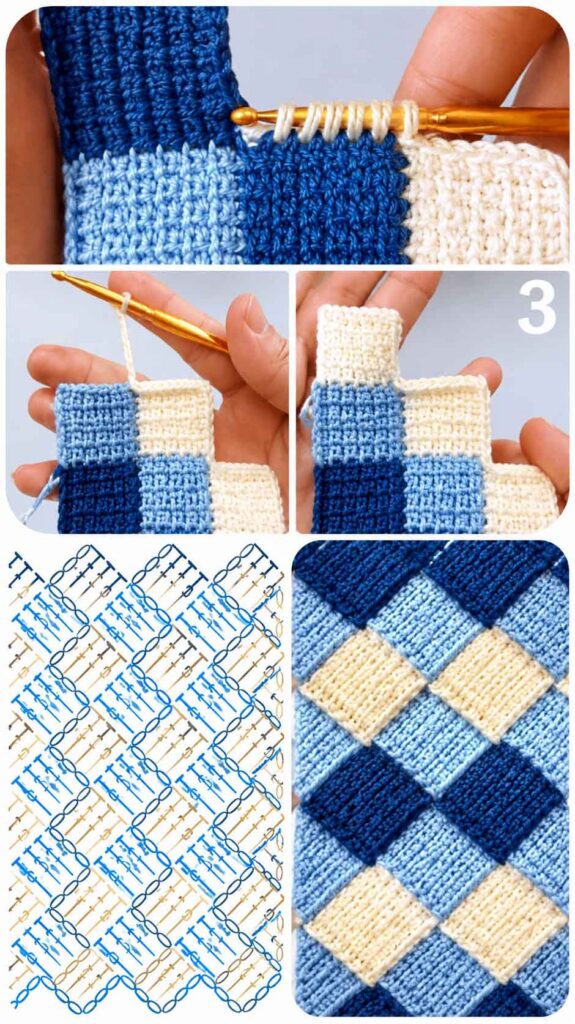
Use the accompanying graph as a visual reference while working through the pattern. It can help you follow the direction of each block and understand how the sections fit together.
Helpful Tips for a Beautiful Result
A few small things can make a big difference when working this stitch:
- Keep your tension relaxed. Pulling the yarn too tightly can make the blocks difficult to work into.
- Count your loops. Make sure you have the correct number before completing each block.
- Try a small sample first. Practicing with a few blocks will help you become familiar with the vertical insertion technique.
- Experiment with colors. Contrasting shades make the woven pattern stand out, while softer colors create a more delicate look.
- Use stitch markers if needed. They can help you keep track of the different sections.
- Be patient with the first row. Once you understand how the blocks connect, the rest becomes much more enjoyable.
Don’t worry if your first few blocks aren’t perfectly even. Like most crochet techniques, this one gets easier with practice.
Final Thoughts
The Entrelac Stitch is one of those crochet techniques that makes a finished project look truly special. Its interlocking blocks create a beautiful woven texture that works wonderfully for blankets, scarves, bags, throws, and so much more.
I especially love how different the stitch looks depending on the colors you choose. You can keep things simple with one shade or create a striking design using several colors.
If you’d like to learn the technique in more detail, be sure to check out the video tutorial by Naztazia, Tunisian Interlaced Diamonds Entrelac. It’s a useful visual guide to help you follow the steps.
Have you tried the Entrelac Stitch before? I’d love to know what you’d make with it. A cozy blanket would be my first choice!
Happy crocheting, everyone! ❤️

