

 soofha
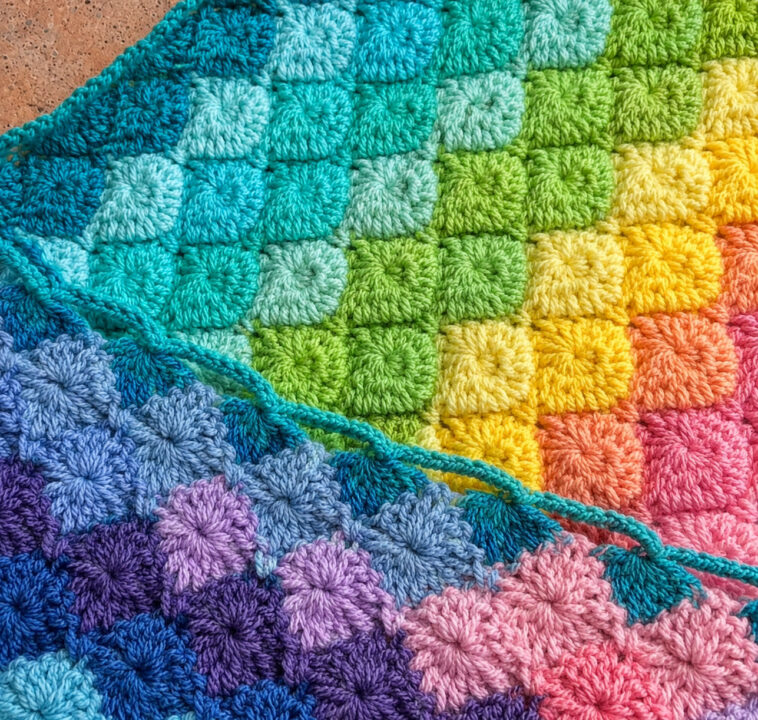
Crochet has a wonderful way of turning a simple strand of yarn into something beautiful, useful, and completely unique. If you are looking for a crochet stitch that combines texture, elegance, and a little bit of visual magic, the Harlequin stitch is a beautiful pattern to try.
With its eye-catching diamond shapes and repeating texture, the Harlequin stitch can transform even a simple crochet project into something special. It works beautifully for blankets, scarves, shawls, bags, pillows, and many other handmade creations. The finished fabric has a lovely combination of structure and softness, making this stitch both decorative and practical.
One of the most appealing features of the Harlequin stitch is the way its geometric design develops as you work through the rows. The pattern may look complicated at first glance, but once you understand the sequence of stitches and decreases, the rhythm becomes much easier to follow. It is also a wonderful stitch for experimenting with different yarn colors.
You can create a soft and delicate appearance with neutral shades, make the diamonds stand out with contrasting colors, or use several shades to create a bold, colorful design. The possibilities are almost endless.
In this tutorial, you will find the pattern notes, materials, abbreviations, and detailed row-by-row instructions for creating the Harlequin stitch. We will also look at color combinations and project ideas to help inspire your next crochet creation.
So gather your yarn and crochet hook, and let’s explore this beautiful and timeless stitch together!
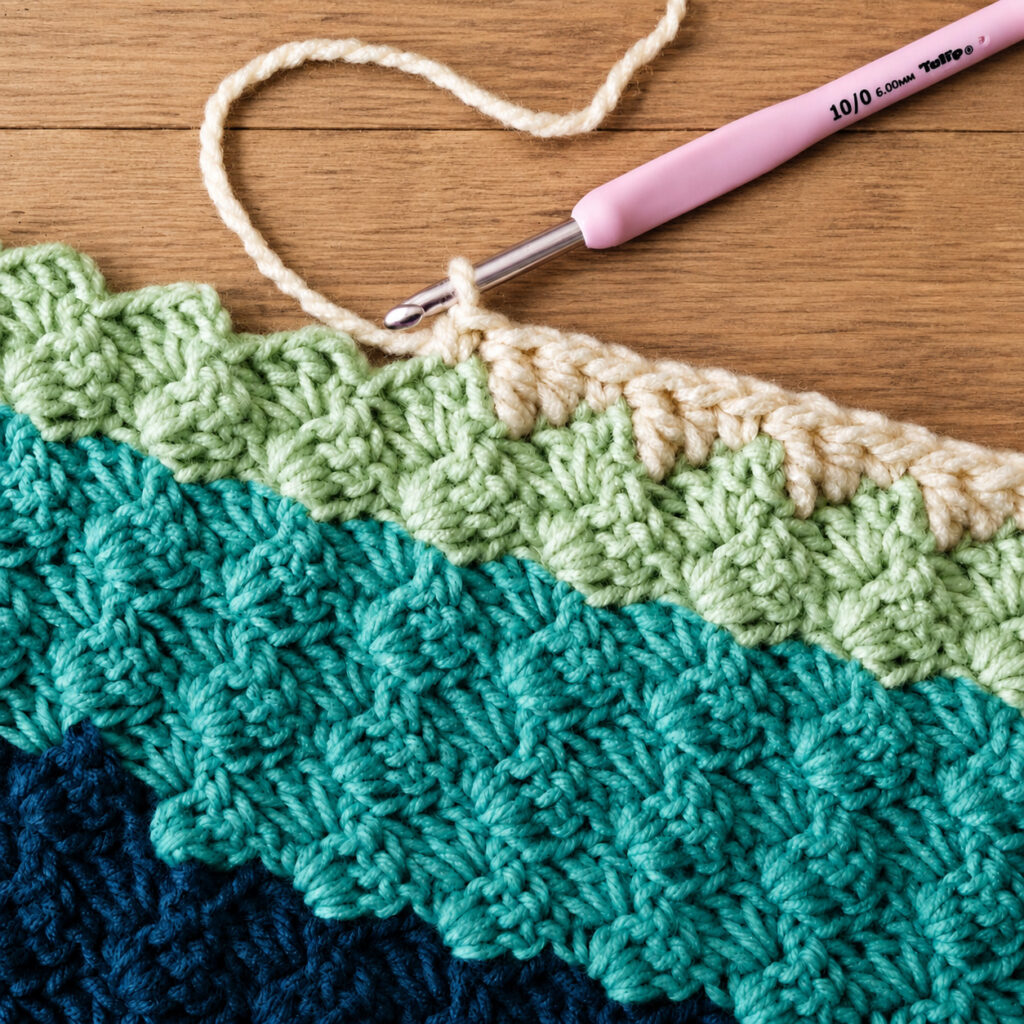
Harlequin Stitch Pattern Notes
The Harlequin stitch is worked using a multiple of 8 stitches, followed by 2 additional chains for the foundation.
When choosing the size of your project, first determine the number of stitches needed in multiples of 8. Then add 2 chains to complete the foundation chain.
For example:
- 8 stitches + 2 = 10 chains
- 16 stitches + 2 = 18 chains
- 24 stitches + 2 = 26 chains
- 32 stitches + 2 = 34 chains
- 40 stitches + 2 = 42 chains
For the sample pattern below, the foundation chain is 26 chains.
The stitch pattern is created through a combination of single crochet, double crochet, chain spaces, and decreases. As the rows progress, these stitches work together to form the characteristic diamond or harlequin effect.
Materials You Will Need
Before getting started, gather the following supplies:
- Medium-weight yarn
- 5.0 mm crochet hook
- Scissors
- Yarn needle for weaving in ends
A smooth, medium-weight yarn is a good choice when learning this stitch because the individual stitches and decreases are easier to see.
If you are making a blanket or larger project, you can also experiment with different yarn weights and hook sizes. Keep in mind that changing the yarn or hook size will affect the final dimensions and drape of your project.
Crochet Abbreviations
The pattern uses the following standard crochet abbreviations:
- ch – chain
- dec – decrease
- dc – double crochet
- prev – previous
- sc – single crochet
- st – stitch
- tog – together
- sk – skip
Harlequin Stitch Crochet Pattern
Foundation Chain
Ch 26.
This foundation creates the correct stitch count for the sample shown below.
Row 1
Starting in the 2nd chain from the hook, work 1 sc in each chain across.
Turn your work.
Row 2
Ch 1, sc in the first stitch.
Skip the next 3 stitches.
Work (3 dc, ch 1, 3 dc) into the next stitch.
Skip the next 3 stitches, then work 1 sc.
Repeat the sequence across the row:
(3 dc, ch 1, 3 dc) in the next stitch, sk 3 sts, sc;
Continue repeating until you reach the end of the row.
Turn.
Row 3
Ch 3.
Work a double crochet decrease over the next 3 stitches, joining them together.
Ch 7.
Then work a double crochet decrease over the next 6 dc, skipping over the center single crochet.
Ch 7.
Repeat this sequence across the row until only 3 dc remain.
Work the final 3 dc together.
Dc in the next stitch.
Turn.
Row 4
Ch 3.
Work 3 dc into the top of the 3-dc decrease from the previous row.
Next, join the ch-1 space and ch-7 space from the previous two rows with a single crochet. Insert your hook into the ch-1 space from two rows below as you work this stitch.
Continue with the following sequence:
(3 dc, ch 1, 3 dc) into the next decrease stitch, then sc the ch-1 and ch-7 spaces together.
Repeat across the row.
When you reach the final 3-dc decrease, work 3 dc into the top of that decrease.
Dc into the top of the turning chain.
Turn.
Row 5
Ch 4.
Work the next 6 dc together as a decrease, skipping over the center single crochet.
Then repeat:
Ch 7, dc the next 6 dc together, skipping over the center sc.
Continue across the row.
At the end, ch 3 and work 1 sc into the top of the turning chain.
Turn.
Row 6
Ch 1.
Sc in the first stitch.
Work (3 dc, ch 1, 3 dc) into the top of the next decrease stitch.
Then work a single crochet through the ch-7 and ch-1 spaces from the previous two rows, joining them together.
Work (3 dc, ch 1, 3 dc) into the top of the next decrease.
Continue repeating this sequence across the row.
Finish with a sc in the first chain of the starting ch-4 from the previous row.
Turn.
Row 7
Repeat Row 3.
Follow the same decrease and chain-space sequence used in Row 3.
Row 8
Repeat Row 4.
Continue forming the clusters and joining the chain spaces to build the diamond design.
Row 9
Repeat Row 5.
Continue the Pattern
Repeat Rows 6–9 until your crochet project reaches the desired length.
As you continue repeating the sequence, the distinctive Harlequin diamond pattern will become more visible and defined.
Tips for Crocheting the Harlequin Stitch
Although the Harlequin stitch creates an intricate-looking design, keeping track of the repeating sequence makes it much easier to work.
Count Your Stitches
Take a moment to check your stitch count at the end of each row. The decreases and chain spaces can make it easy to accidentally skip or add a stitch.
Pay Attention to the Chain Spaces
The chain-1 and chain-7 spaces are important parts of the pattern. They help create the open areas between the diamond shapes and are used again in later rows.
Keep Your Tension Consistent
Try to maintain an even tension throughout your project. If your tension changes significantly from one row to another, the diamond shapes may look uneven.
Use Stitch Markers if Needed
If you are new to the stitch, place stitch markers at important points in the pattern. This can make it easier to identify decreases and repeat sections.
Practice With a Small Swatch
Before starting a large blanket or garment, consider making a small swatch first. This gives you an opportunity to become familiar with the stitch sequence and check your gauge.
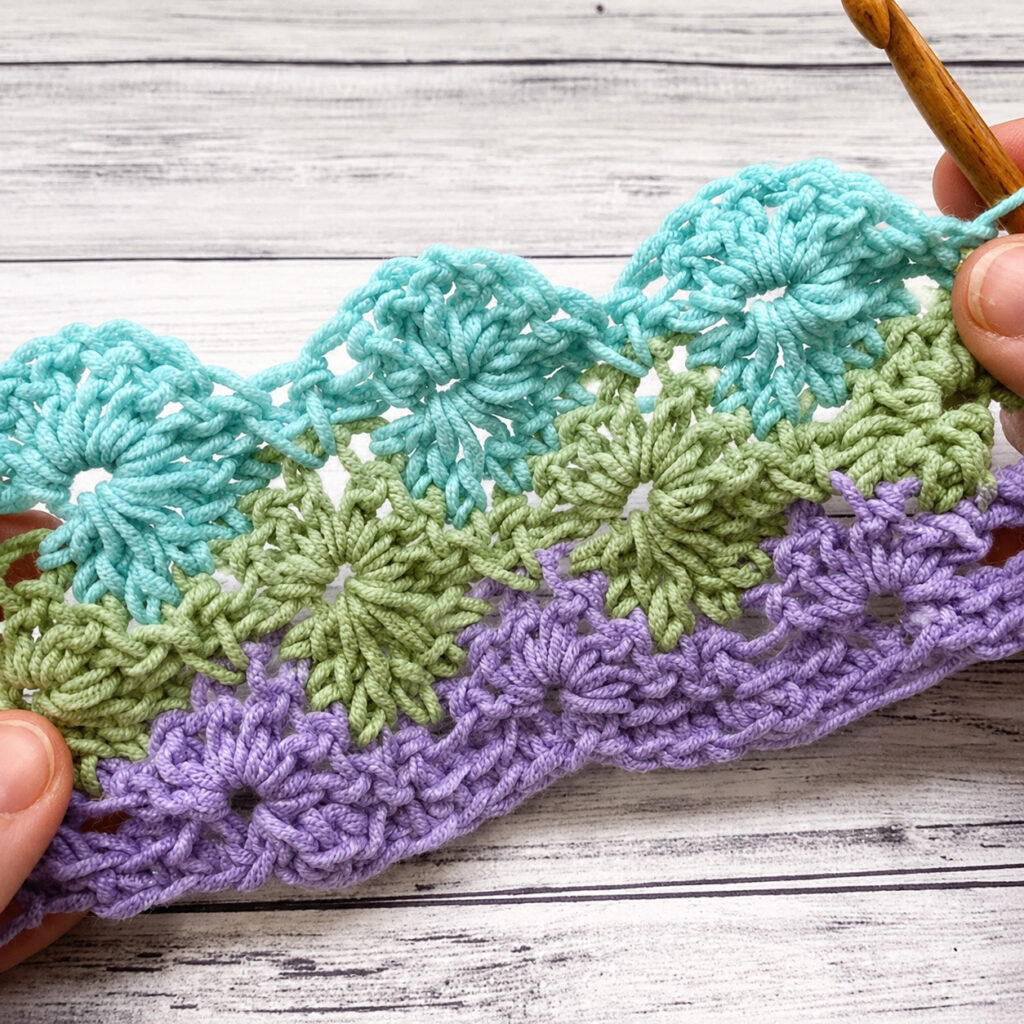
Harlequin Crochet Stitch Pattern
Beautiful Color Combinations for the Harlequin Stitch
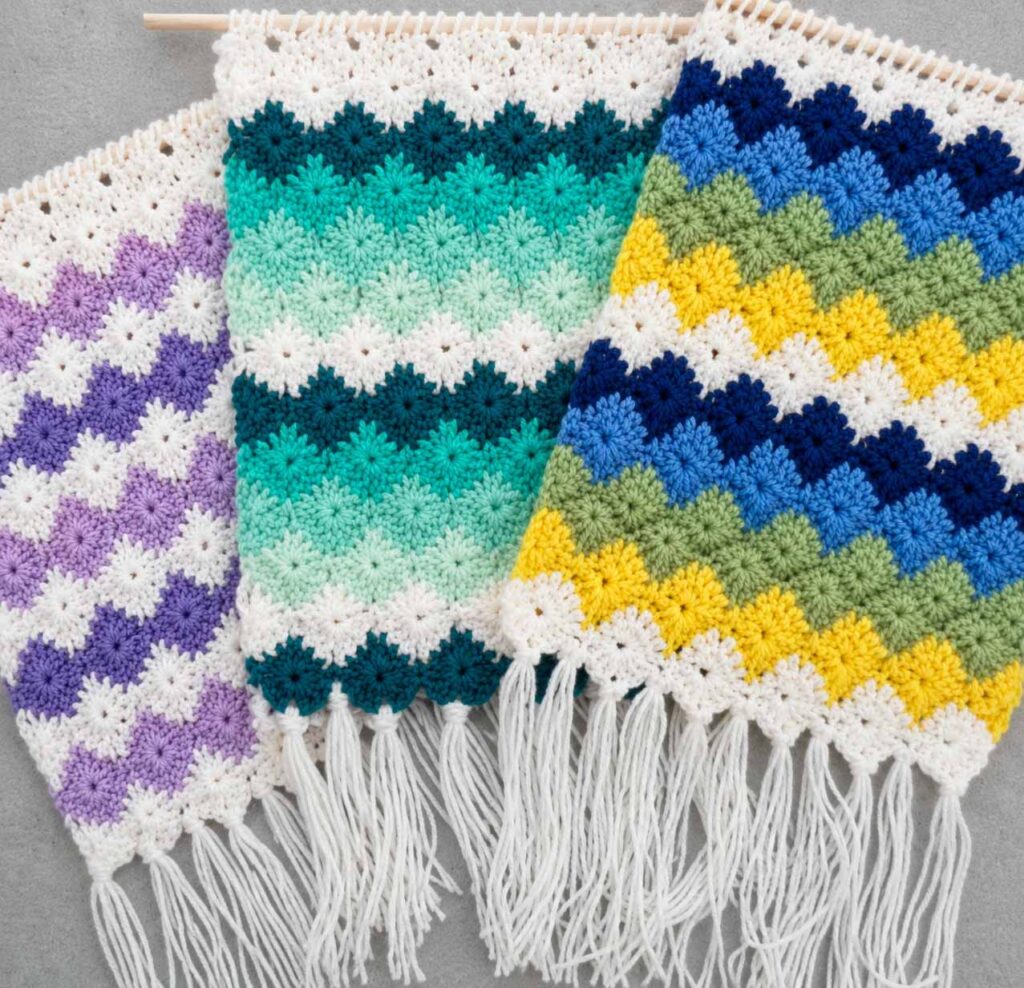
One of the most exciting things about the Harlequin stitch is how dramatically the design can change when you use different colors.
Here are a few combinations to inspire your next project.
Ocean Breeze
Try combining soft blue, pale aqua, cream, and white for a peaceful coastal-inspired palette.
These colors would look beautiful in:
- Summer blankets
- Beach bags
- Baby blankets
- Lightweight throws
- Decorative pillows
The soft shades highlight the geometric design without making the finished piece feel too bold.
Sunset Glow
For something brighter, combine shades of coral, orange, golden yellow, blush pink, and warm cream.
This energetic palette is perfect for a statement scarf, colorful blanket, cushion cover, or decorative wall hanging.
Alternating warm shades can make each diamond appear to glow as the pattern develops.
Forest Magic
For a more natural and rustic appearance, experiment with deep green, olive, brown, beige, and cream.
This combination works especially well for cozy blankets, market bags, tote bags, and autumn-inspired home accessories.
Soft Neutrals
If you prefer a classic and sophisticated look, try cream, beige, taupe, light gray, and soft brown.
Neutral colors allow the texture of the Harlequin stitch to become the main feature of the project.
Project Ideas for the Harlequin Stitch
The versatility of this stitch means you are not limited to blankets. Once you become comfortable with the pattern, you can incorporate it into many different crochet projects.
Harlequin Blankets
A blanket is one of the best ways to showcase the repeating diamond design. Use two or more contrasting colors to make the pattern stand out.
Crochet Scarves
The geometric texture makes an attractive scarf pattern. Choose a lightweight yarn for a soft accessory that can be worn throughout the cooler months.
Decorative Pillow Covers
Use the Harlequin stitch to create a textured pillow cover for your living room, bedroom, or reading corner.
Crochet Bags
The structured texture of this stitch can work beautifully for tote bags and decorative crochet purses.
Shawls
A lightweight yarn combined with the open spaces of the stitch can create an elegant shawl with plenty of visual interest.
Home Decor
You can also experiment with:
- Table runners
- Placemats
- Cushion covers
- Wall hangings
- Small baskets
- Decorative throws
The geometric nature of the Harlequin pattern makes it particularly attractive for modern and contemporary home decor.
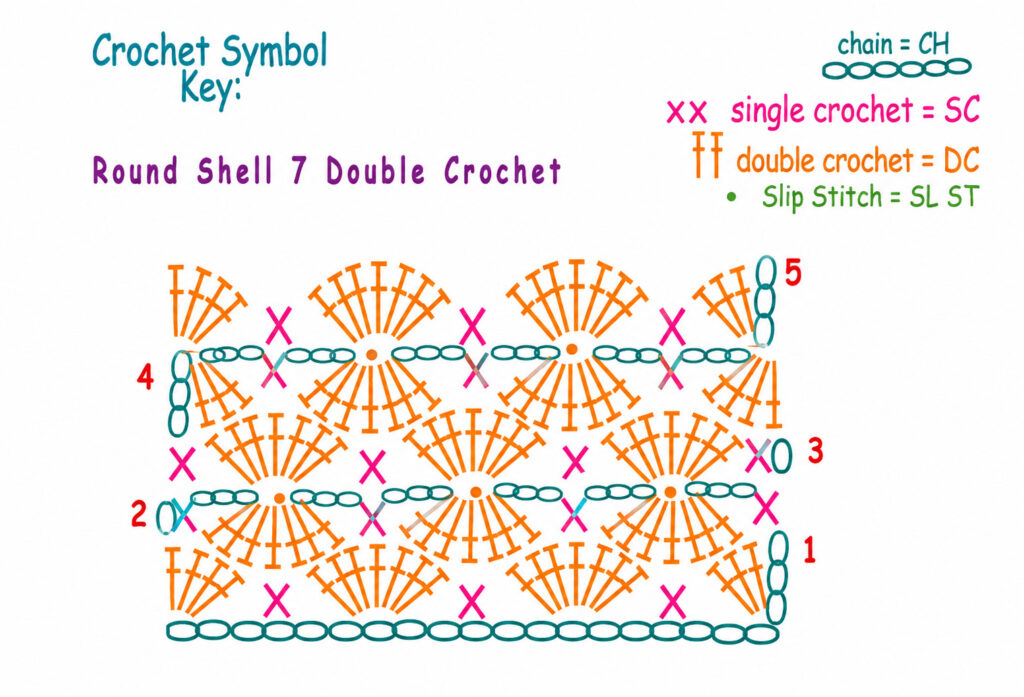
Harlequin Stitch Pattern Diagram
A stitch diagram can be especially helpful when learning this pattern because it allows you to see how the decreases, clusters, and chain spaces connect from one row to the next.
If you prefer visual learning, follow the diagram alongside the written instructions. This can make it easier to understand where each stitch should be placed and how the diamond shapes are formed.
Video Tutorial
If written crochet instructions feel difficult to visualize, a video tutorial can be a great way to learn the Harlequin stitch.
Watching the stitches being worked in real time can help you understand the decreases, chain spaces, and placement of the crochet clusters. Beginners may find it especially useful to pause the video after each row and practice the same section on their own project.
Final Thoughts
The Harlequin crochet stitch is a beautiful combination of texture, geometry, and creativity. Its repeating diamond pattern gives handmade projects an elegant appearance while still offering plenty of opportunities to experiment with color.
Once you understand the basic row sequence, the pattern becomes much more rhythmic and enjoyable to crochet. Whether you decide to make a cozy blanket, a colorful scarf, a stylish bag, or a decorative home accessory, this stitch can give your project a distinctive handmade character.
Don’t be afraid to experiment with different yarn colors and combinations. Soft pastels can create a delicate effect, bright colors can make the diamonds pop, and neutral shades can give the stitch a timeless and sophisticated appearance.
Grab your favorite yarn, pick up your crochet hook, and give the Harlequin stitch a try. You may be surprised by how quickly those beautiful diamond shapes begin to appear!

