

 soofha
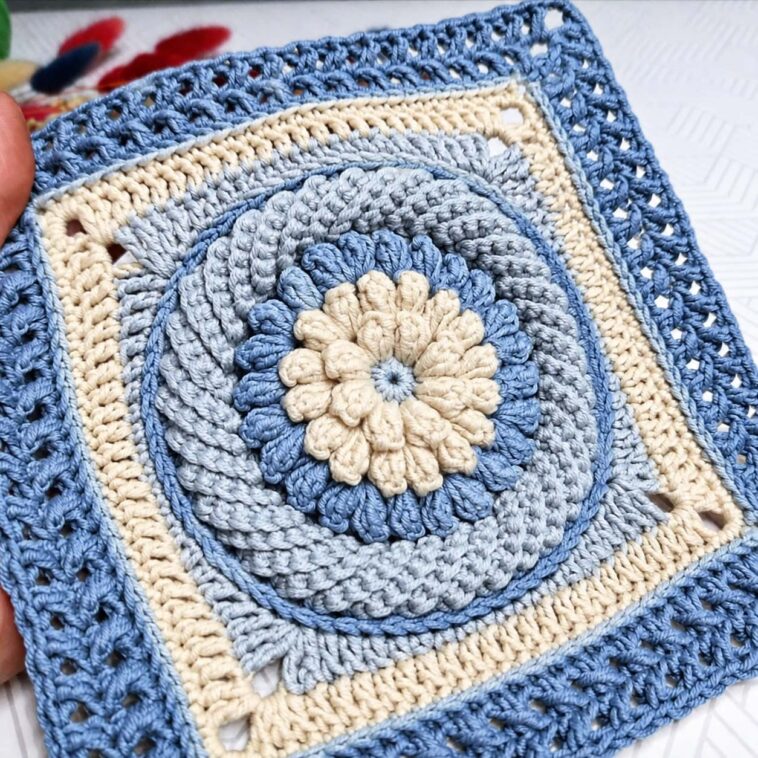
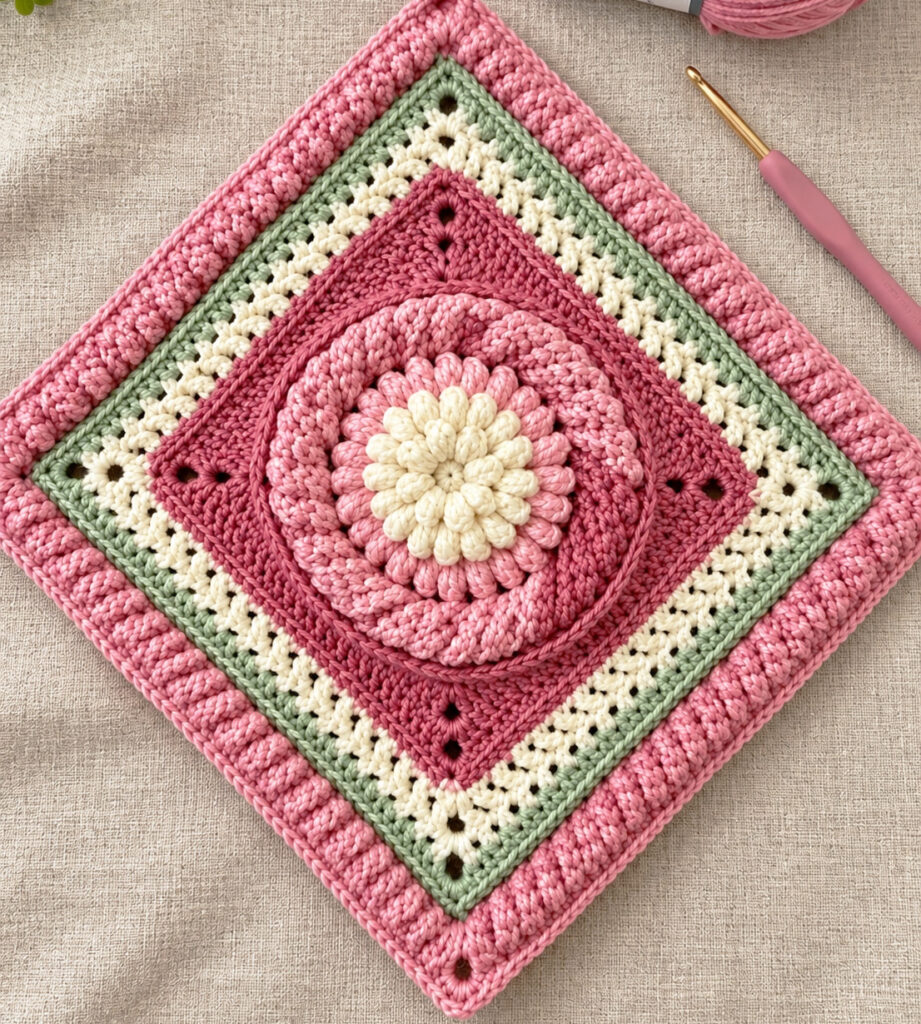
The Crochet Wonder Square is a beautiful textured motif that combines a rounded, dimensional center with a structured square border. Its eye-catching design makes it a wonderful choice for blankets, pillows, bags, accessories, home décor, and even larger wearable projects.
The pattern begins with a richly textured circular center featuring popcorn stitches. As the motif develops, the circle gradually transforms into a square through carefully placed increases, textured stitches, lace-like loops, and crossed double crochets. The crossed stitches create an attractive woven, herringbone-inspired effect that gives the finished square plenty of character.
This is an enjoyable project for adventurous beginners and intermediate crocheters who would like to experiment with texture and construction. You will use familiar basic stitches while also learning techniques such as popcorn stitches, back-post single crochet, lace loops, and crossed double crochets.
Once completed, the Wonder Square has a wonderfully dimensional appearance and can be made in a single color or several contrasting shades.
Skill Level
Adventurous Beginner to Intermediate
Some rounds involve special stitch techniques, including popcorn stitches and crossed double crochets. Take your time with the first few repeats, and the pattern will become easier as you progress.
Materials
- 4.5 mm crochet hook
- Size 4 / Aran-weight yarn – approximately 260 m
- Tapestry needle
- Stitch marker
- Scissors
Abbreviations – US Crochet Terms
- ss – Slip stitch
- st(s) – Stitch(es)
- ch – Chain
- sk – Skip
- ch-sp – Chain space
- sc – Single crochet
- hdc – Half double crochet
- dc – Double crochet
- tr – Treble crochet
- pc – Popcorn stitch
- blo – Back loop only
- flo – Front loop only
- yo – Yarn over
- sp – Space
Special Stitch Instructions
Popcorn Stitch (pc)
To make a popcorn stitch, work 5 double crochets into the same stitch or space.
Remove your hook from the working loop of the fifth double crochet. Insert your hook into the top of the first double crochet, then insert it into the loop you dropped from the fifth double crochet. Pull the fifth-dc loop through the first stitch and secure the popcorn by making ch 1.
This creates the raised, rounded texture that gives the center of the square its distinctive appearance.
Crossed Double Crochet – Left
On Round 15, use the following technique:
Skip the next stitch, make a double crochet in the following stitch, then work in front of the double crochet you just made and place another double crochet into the skipped stitch.
This creates a crossed or woven appearance.
Crossed Double Crochet – Right
On Round 16, reverse the direction of the crossing:
Skip the next stitch, make a double crochet in the following stitch, then work behind the double crochet just made and place a double crochet into the skipped stitch.
Together, these two crossed-stitch techniques create the attractive herringbone-style texture around the square.
Crochet Wonder Square Pattern
Creating the Center Circle
Round 1
Make a magic ring.
Work 7 sc into the ring, then join with a slip stitch to the first stitch.
Round 2
Chain 3, then work 4 dc into the same stitch.
Make 1 popcorn stitch, then continue making 1 popcorn stitch in each stitch around.
Join with a slip stitch.
Total: 8 popcorn stitches
Round 3
Slip stitch into the ch-1 space of the first popcorn.
Chain 3, then make 4 dc in the same space.
Work 1 popcorn stitch, followed by another popcorn stitch in the same space.
Continue around, working 2 popcorn stitches in each chain space.
Join with a slip stitch.
Total: 16 popcorn stitches
Round 4
Slip stitch into the ch-1 space.
Work 1 popcorn stitch in the next space, then 2 popcorn stitches in the following space.
Continue repeating this sequence around the circle.
Join with a slip stitch.
Total: 24 popcorn stitches
Round 5
Slip stitch into the next chain space.
Chain 1 and work 1 sc into the same space.
Chain 2, then work 1 sc into the next space.
Repeat this pattern all the way around.
Join with a slip stitch.
Round 6
Chain 1 and work 1 sc into the same stitch.
Work 2 sc into the next ch-2 space, followed by 1 sc into the next stitch.
Continue repeating around the motif.
Join with a slip stitch into the back loop of the first single crochet.
Total: 72 sc
Round 7
Chain 1.
Working in the back loops only, make 1 sc in every stitch around.
Place a stitch marker in the front loop of the eighth stitch.
Join with a slip stitch.
Total: 72 sc
Adding the Decorative Loops
Round 8
Chain 2, then make 1 dc in the same stitch.
Chain 6.
Slip stitch into the marked stitch.
Turn the work clockwise. Make 1 sc into each chain of the ch-6 loop, then slip stitch into the dc.
Turn the work again.
Work 1 dc into the next stitch and 2 dc into the following stitch.
Chain 6, skip the front loop immediately after the marker, and slip stitch into the next stitch.
Turn clockwise and work 1 sc into each chain of the loop. Slip stitch into the dc, then turn.
Continue repeating this sequence around the circle.
Finish with 1 dc in the final stitch and 1 dc into the first dc space. Join with a slip stitch.
Total: 36 loops
Round 9
Work 1 sc into each stitch around, making sure not to work into the slip stitches from the previous round.
At the end of the round, remove the hook from the working loop. Insert the hook into the first sc from back to front and pull the working loop through.
Total: 72 sc
Round 10
Chain 1.
Work 1 back-post single crochet (bpsc) around each stitch.
Join with a slip stitch.
Total: 72 sc
Shaping the Circle into a Square
The next rounds gradually transform the circular center into a square by introducing corner increases.
Round 11
Chain 4; this counts as the first treble crochet.
Work 1 tr into the same stitch.
Then work:
- 3 dc
- 2 hdc
- 7 sc
- 2 hdc
- 3 dc
Into the next stitch, make 2 tr, ch 3, 2 tr to form the corner.
Repeat this sequence around the motif.
Join with an hdc into the fourth chain.
Total: 84 stitches
Round 12
Chain 3; this counts as the first dc.
Work 1 dc into the same space.
Work 1 dc into each of the next 21 stitches.
In the corner space, work:
2 dc, ch 3, 2 dc
Repeat around all four sides.
Join with an hdc into the third chain.
Total: 100 stitches
Round 13
Chain 1.
Work 2 sc into the same space.
Make 1 sc in each of the next 25 stitches.
In the corner space, work:
2 sc, ch 1, 2 sc
Repeat around the square.
Join with a sc into the first stitch.
Total: 116 stitches
Round 14
Chain 1.
Work 1 sc into the same space.
Continue around the square using back-post single crochet in every stitch.
At each corner, work:
sc, ch 1, sc
Join to complete the round.
Total: 116 stitches
Creating the Herringbone Texture
Round 15
Chain 3.
Work 1 dc into the corner space immediately to the right of the chain-3.
Skip the next stitch.
Begin making crossed double crochets across the side until you have completed 16 crossed stitches.
At each corner, work:
crossed dc, ch 3, crossed dc
Join with an hdc.
Total: 68 crossed dc
Round 16
Chain 3.
Work 1 dc into the corner space to the right of the chain-3.
Begin working the crossed double crochet in the opposite direction, using the right-crossed technique and working behind the previous dc.
Continue across each side, making 18 crossed stitches per side.
At each corner, work:
crossed dc, ch 3, crossed dc
Join with an hdc.
Total: 76 crossed dc
Round 17
Chain 1.
Work 2 sc into the same space.
Continue with 1 sc in every stitch around.
At each corner, work:
2 sc, ch 1, 2 sc
Join to complete the round.
Total: 168 stitches
Round 18
Chain 1.
Work 1 sc into the same space.
Continue around using back-post single crochet in every stitch.
At each corner, work:
sc, ch 1, sc
Join with a slip stitch.
Total: 176 stitches
Decorative Outer Lace
Round 19
Chain 2.
Work 1 dc into the corner space.
Chain 4, skip 1 stitch, then slip stitch into the front loop of the next stitch.
Turn the work clockwise.
Work 1 sc into each chain of the ch-4 loop.
Slip stitch into the dc and turn.
Continue creating the decorative lace loops along each side of the square.
Follow the same corner construction as established in the pattern.
Join with an hdc.
Total: 96 loops
Round 20
Chain 1.
Work 2 sc into the same space.
Work sc stitches between the decorative loops around the square.
At each corner, work:
2 sc, ch 1, 2 sc
Join with a slip stitch.
Total: 200 stitches
Round 21
Chain 1.
Work 1 sc into the same space.
Continue around the entire square using back-post single crochet.
At each corner, work:
sc, ch 1, sc
Join and fasten off.
Finishing the Wonder Square
Thread the yarn tail onto a tapestry needle.
For a neat invisible-style finish, insert the needle into the first stitch from front to back. Then insert it into the top of the final stitch from top to back.
Pull gently to secure the join, then weave the remaining yarn ends through several stitches on the wrong side of the work.
Trim any excess yarn.
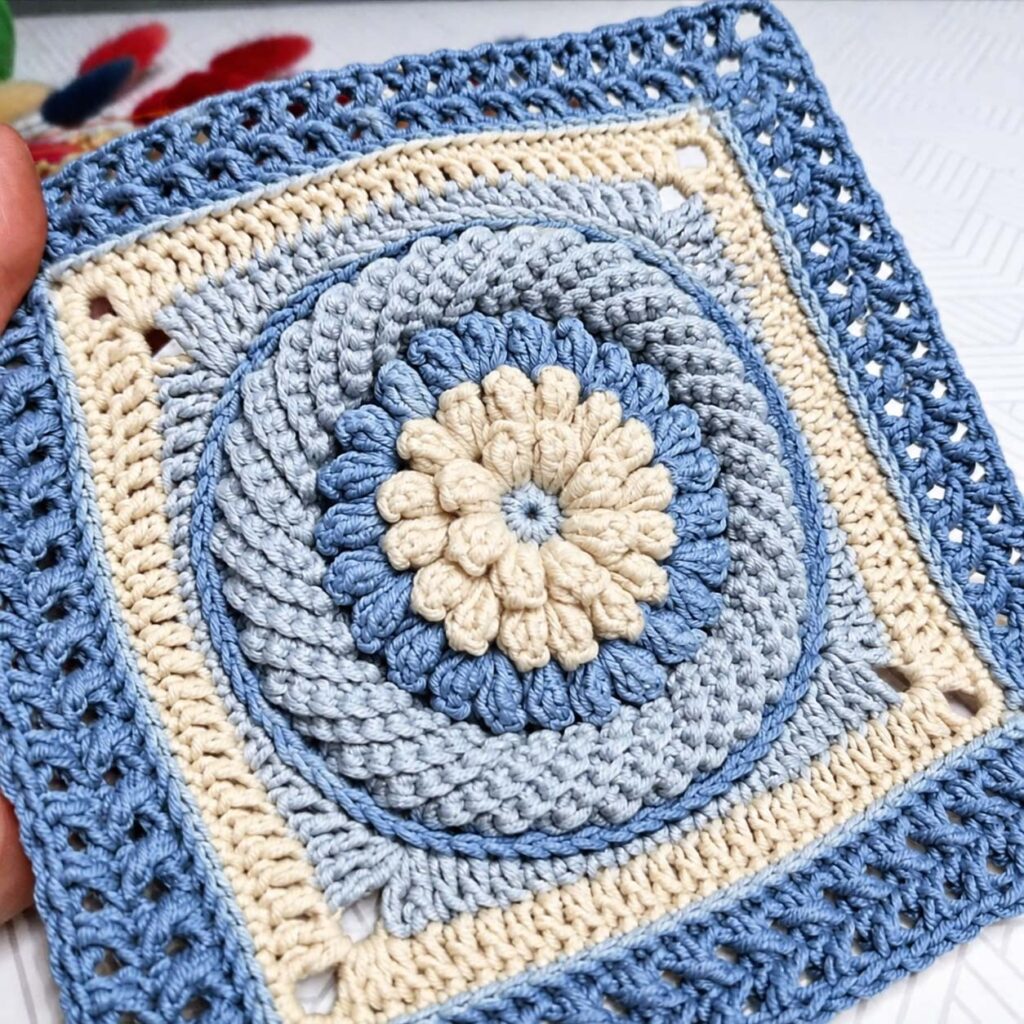
Crochet Wonder Square
Blocking Your Square
Blocking is highly recommended for this design, especially if you want crisp corners and clearly defined stitches.
Lightly dampen the finished square and gently shape it into an even square. Pin the corners and sides into position on a blocking mat, then allow the piece to dry completely.
Avoid stretching the motif excessively. The goal is simply to even out the stitches and give the square a clean, professional shape.
Ways to Use Your Crochet Wonder Square
The versatility of this motif makes it suitable for many different crochet projects.
Make a Blanket
Crochet multiple Wonder Squares in coordinating colors and join them together to create a beautiful textured blanket or throw.
Create a Cushion Cover
One large square can make a striking decorative cushion front. Pair it with a simple fabric or crochet backing for a stylish home accessory.
Design a Crochet Bag
Join several squares to create the body of a colorful crochet tote, shoulder bag, or small handbag.
Add It to Clothing
Wonder Squares can also be incorporated into cardigans, vests, shawls, ponchos, and other crochet garments.
Home Décor
A single square can be used as a decorative centerpiece, wall hanging, table accent, or part of a larger crochet display.
Color Ideas
This pattern is especially fun to experiment with because the different textures can really stand out when you change colors.
For a modern style, try bold contrasting shades such as deep blue, mustard, purple, teal, or coral.
For a soft neutral look, choose cream, beige, taupe, light gray, and warm brown.
For a more colorful and playful design, assign a different shade to each major section of the square.
Gradient or variegated yarn can also create beautiful effects as the motif develops from the center outward.
Final Thoughts
The Crochet Wonder Square is a rewarding project for anyone who enjoys discovering new textures and stitch combinations. From the raised popcorn center to the decorative loops and woven crossed-double-crochet border, every round adds another interesting detail.
Once you have completed one square, try making another in a different color combination. Before long, you can combine several motifs to create a unique blanket, cushion, bag, or other handmade project.
📂 Download PDF
Happy crocheting, and enjoy creating your very own Crochet Wonder Square!

