

 soofha
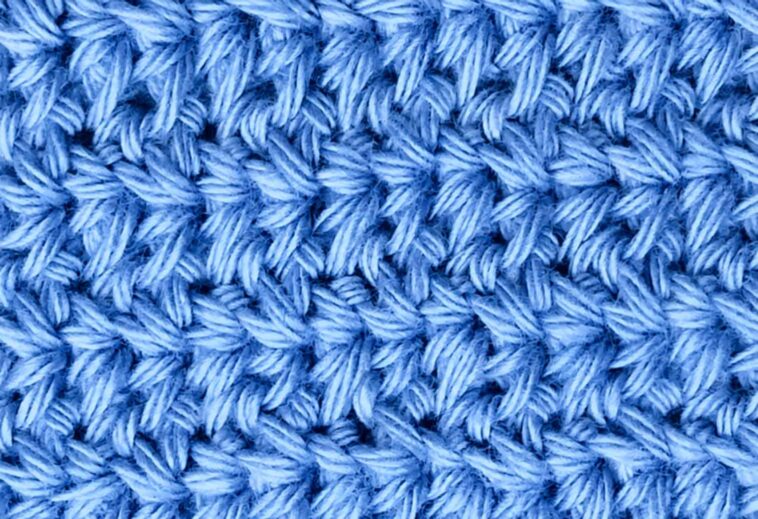
Welcome to Soofha! I’m so happy you’re here. If you love crochet stitches that are simple to learn but still create beautiful texture, the
is definitely one to add to your collection.
This stitch creates a soft, lightly textured fabric using only single crochet and chain stitches. At first glance, the pattern may look a little more complicated than it actually is, but once you complete the first row, the rest becomes wonderfully repetitive.
What makes the Spider Stitch especially enjoyable is that you work into the small chain-1 spaces created in the previous row. After you get comfortable recognizing those spaces, you can work row after row without constantly checking the pattern.
The finished fabric has a subtle, pebbled texture that works beautifully for blankets, baby blankets, scarves, washcloths, dishcloths, and other crochet projects.
Why You’ll Love the Spider Stitch
There are several reasons this stitch is such a fun one to learn.
The first is its texture. Each Spider Stitch is formed by working:
(sc, ch 1, sc)
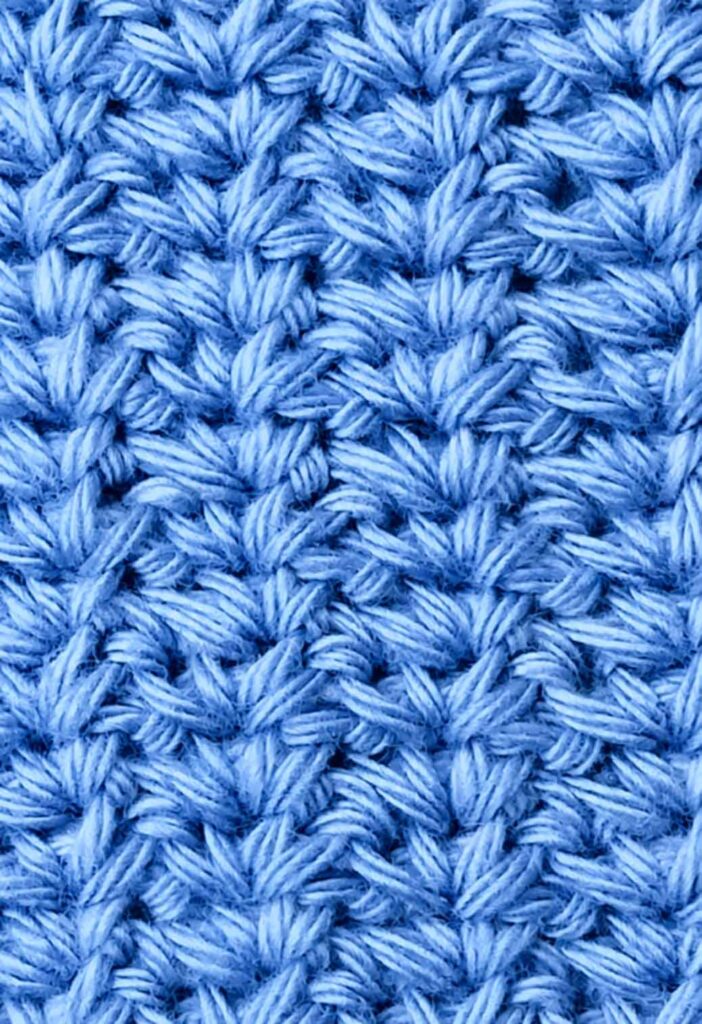
into the same stitch or chain space. When these little groups are stacked across several rows, they create a pretty textured surface without making the fabric overly bulky.
Another great feature is how easy the stitch becomes once you understand the placement. Instead of working into every stitch from the previous row, you simply find the ch-1 space in the center of each Spider Stitch and work your next group there.
This makes the Spider Stitch a relaxing pattern for crocheters who enjoy repetitive projects.
It is also an excellent stitch for beginners who are ready to move beyond basic rows of single crochet. You only need to know a couple of simple stitches, and the repeat is easy to memorize.
What Can You Make With the Spider Stitch?
The Spider Stitch is wonderfully versatile. Depending on your yarn and hook size, you can use it for many different projects, including:
- Baby blankets
- Afghans
- Lap blankets
- Scarves
- Cowls
- Washcloths
- Dishcloths
- Baby accessories
- Pillow covers
- Shawls
- Small crochet samplers
The texture is subtle enough for everyday items while still giving a handmade project plenty of visual interest.
Choosing Yarn and Colors
The Spider Stitch looks especially beautiful when worked in a solid color because the texture has room to stand out.
Soft shades such as cream, beige, sage green, dusty pink, light blue, soft gray, or warm neutrals would all look lovely.
You can also experiment with stripes. Changing colors every few rows creates a completely different look and can make the textured stitch pattern even more noticeable.
For your first sample, I recommend using a smooth yarn with good stitch definition. This will make the little chain spaces much easier to see while you are learning.
Crochet Spider Stitch Pattern
Skill Level: Beginner
Materials
- Yarn of your choice
- Crochet hook appropriate for your yarn
- Scissors
- Yarn needle
- Stitch markers, optional
Choose a yarn and hook combination that gives you a comfortable fabric without making the stitches too tight.
Abbreviations
- ch = chain
- sc = single crochet
- sk = skip
- st(s) = stitch(es)
- ch-1 sp = chain-1 space
Special Stitch: Spider Stitch
The Spider Stitch is simply:
(sc, ch 1, sc)
worked into the same stitch or chain space.
This creates one complete Spider Stitch.
Stitch Multiple
Begin with any odd number of chains.
For a small practice swatch, try:
Ch 21.
You can increase or decrease the number of chains depending on the width you want.
How to Crochet the Spider Stitch
Row 1
Begin with your foundation chain.
Work:
(sc, ch 1, sc) in the 3rd chain from the hook.
Skip the next chain.
Work:
(sc, ch 1, sc) in the next chain.
Continue across the row by repeating:
*Skip the next chain, (sc, ch 1, sc) in the next chain.
Repeat from the asterisk across the row until you have 2 chains remaining.
Skip the next chain.
Work 1 sc in the final chain.
Chain 2 and turn.
Your first row establishes the Spider Stitch pattern. The small chain-1 spaces created between the two single crochets will be important for the next row.
Row 2
The chain-2 turning chain creates the edge of the row.
Look across the previous row and locate the first ch-1 space in the center of the first Spider Stitch.
Work:
(sc, ch 1, sc) into the first ch-1 space.
Continue across the row, working:
(sc, ch 1, sc)
into each ch-1 space from the previous row.
When you reach the end, work 1 sc into the top of the turning ch-2 from the previous row.
Chain 2 and turn.
Row 3 and Beyond
Repeat Row 2.
For every new row:
Work (sc, ch 1, sc) into each ch-1 space across, then sc into the top of the turning chain. Ch 2 and turn.
Continue repeating until your project reaches the desired length.
That’s all there is to it!
Once Row 1 is established, the Spider Stitch becomes a simple and relaxing one-row repeat.
Understanding Spider Stitch Placement
The most important part of this pattern is learning where to place your stitches.
You do not work into every single crochet from the previous row.
Instead, look for the small chain-1 space located between the two single crochets of each Spider Stitch.
That little space is where your next Spider Stitch goes.
Work:
(sc, ch 1, sc)
directly into that space.
After working a few rows, these spaces become much easier to recognize. Eventually, you will be able to see exactly where your hook needs to go without having to count every stitch.
Tips for Straight and Neat Edges
Keeping your edges even can make a big difference in the finished appearance of your project.
The most important tip is to remember the final single crochet at the end of every row.
After completing the final Spider Stitch, work one single crochet into the top of the turning chain.
This helps maintain the correct stitch count and keeps the sides of your project straighter.
If you find the ch-1 spaces difficult to identify while learning, try placing stitch markers in a few of the spaces. After several rows, you will probably find that you no longer need them.
Keep Your Tension Consistent
Try not to crochet the Spider Stitch too tightly. If your stitches are very tight, the small chain spaces can become difficult to see and your fabric may feel stiff.
A relaxed, consistent tension will help the texture develop naturally.
How to Adjust the Size
One of the best things about the Spider Stitch is how easy it is to customize.
Simply start with an odd number of chains.
For example:
- Ch 21 – small practice swatch
- Ch 51 – medium-width sample
- Ch 101 – wider project
The actual number of chains you need will depend on your yarn weight, crochet hook, personal tension, and desired finished measurements.
For a blanket, I recommend making a small swatch first so you can determine how many stitches you need to reach your preferred width.
Changing Colors in the Spider Stitch
The Spider Stitch looks beautiful when worked in multiple colors.
You can create stripes by changing colors every row, every two rows, or after several rows.
To change colors neatly at the end of a row, begin your final single crochet with the current color. When you are ready for the final yarn over and pull-through, use the new color instead.
Then chain 2 and turn using the new color.
You can experiment with different color combinations to create everything from soft, subtle stripes to bright and playful blankets.
Spider Stitch Pattern Repeat
Once the first row is complete, the main repeat is very simple:
Work (sc, ch 1, sc) into every ch-1 space across, sc into the turning chain, ch 2, and turn.
Repeat this row until your project reaches the desired length.
The only detail you really need to watch is the edge stitch. Always remember to work the final single crochet into the top of the turning chain. This helps keep your edges neat and prevents the project from gradually becoming wider or narrower.
Spider Stitch Video Tutorial
If you prefer learning by watching, a video tutorial can be especially helpful for seeing exactly where to insert your hook into each ch-1 space.
Follow along slowly with your first few rows, and don’t worry if the stitch feels unfamiliar at first. Once you see how the Spider Stitch groups line up, the pattern becomes much easier to follow.
Final Thoughts
The Crochet Spider Stitch is one of those patterns that looks impressive while actually being wonderfully simple to make.
With just single crochet and chain stitches, you can create a fabric with a lovely textured appearance that is suitable for everything from cozy blankets to practical washcloths.
I especially love how quickly the pattern becomes rhythmic. Once your first row is established, you simply look for the little chain-1 spaces and work your next Spider Stitch into them.
If you’re new to textured crochet, start with a small swatch. After a few rows, you’ll begin to recognize the pattern naturally, and before long you may find yourself crocheting without needing to look at the instructions.
Choose your favorite yarn, grab your hook, and give this beautiful stitch a try. You may be surprised by how simple it is to create such a pretty textured fabric.
Happy crocheting, and thank you for spending some crochet time here at Soofha! 🧶❤️

