

 soofha
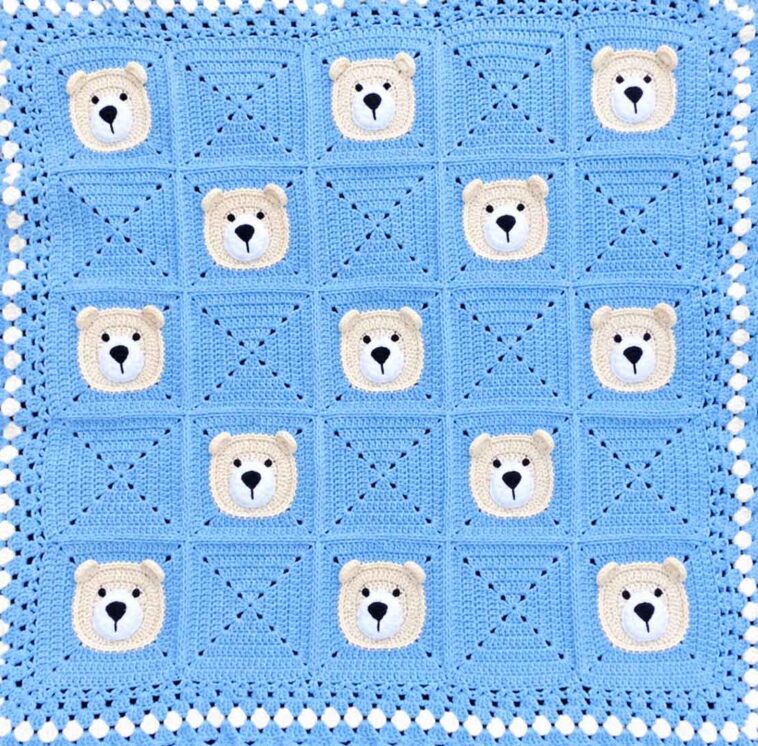
There’s something especially sweet about a handmade baby blanket, and this little Bear Blanket is no exception. With adorable bear faces tucked among simple solid squares, it has that cozy, playful look that works beautifully in a nursery or child’s bedroom.
This is also a fun pattern to work on because you’re not making the same square over and over again. The bear motifs give you something interesting to put together, while the solid squares break things up and keep the overall design balanced.
You can easily make the blanket your own by changing the colors. Soft creams, beige, brown, and pastel shades would give it a gentle nursery feel, while brighter colors would make the bears really stand out.
It would make a lovely baby shower gift, a special keepsake for a new arrival, or simply a cozy blanket for a little one to enjoy.
Materials
Here’s what you’ll need to make the blanket:
- 4 mm crochet hook
- 3.5 mm crochet hook for the smaller pieces
- Baby-friendly yarn in three or more colors
- Color 10 – bear
- Color 1/B – background and border
- Color 2 – embroidery details
- Tapestry needle for sewing and weaving in ends
- Scissors
Choose a soft, washable yarn that feels comfortable against a baby’s skin. Acrylic baby yarn or another yarn specifically designed for baby projects works well.
Crochet Terms and Abbreviations
This pattern uses standard US crochet terminology.
- ch – chain
- sl st – slip stitch
- sc – single crochet
- hdc – half double crochet
- dc – double crochet
- dc2tog – double crochet two together
- sp – space
- rep – repeat
Bear Square Pattern
Each bear square is worked in sections. First, you’ll crochet the bear’s head, then add the ears, snout, and nose. Once all the pieces are ready, they’re sewn onto the square background.
Take your time when placing the facial features. A small change in the position of the eyes or snout can give the bear a completely different expression.
Bear Head
Using a 4 mm crochet hook and Color 10, make a magic ring.
Round 1: Ch 3 (counts as dc), work 11 dc into the ring. Sl st into the third ch of the beginning ch-3.
(12 dc)
Round 2: Ch 3, dc in the same stitch, then work 2 dc in each stitch around. Sl st into the third ch of the beginning ch-3.
(24 dc)
Round 3: Ch 3, dc in the same stitch, *dc in the next stitch, 2 dc in the next stitch; repeat from * around. Sl st into the third ch of the beginning ch-3.
(36 dc)
Round 4: Ch 3, dc in the same stitch, *dc in the next 2 stitches, 2 dc in the next stitch; repeat from * around. Sl st into the third ch of the beginning ch-3.
(48 dc)
Round 5: Ch 1, sc in the next stitch, *sl st in the next stitch, sc in the next stitch; repeat from * around. Fasten off Color 10.
(48 sts)
Join Color 1 to any ch-2 space.
Round 6: Ch 3 (counts as dc), (dc, ch 2, 2 dc) in the same space, *dc in the next 12 stitches, hdc in the next 2 stitches, sc in the next 10 stitches, hdc in the next 2 stitches, dc in the next 12 stitches, (2 dc, ch 2, 2 dc) in the ch-2 space; repeat from * twice. Sl st into the third ch of the beginning ch-3.
Round 7: Sl st into the next stitch, (sl st, ch 3, dc, ch 2, 2 dc) in the corner space, *dc in the next 18 stitches, hdc in the next 2 stitches, sc in the next 16 stitches, hdc in the next 2 stitches, dc in the next 18 stitches, (2 dc, ch 2, 2 dc) in the corner space; repeat from * twice. Sl st into the third ch of the beginning ch-3.
Round 8: Sl st into the next stitch, (sl st, ch 3, dc, ch 2, 2 dc) in the corner space, *dc in the next 22 stitches, hdc in the next 2 stitches, sc in the next 20 stitches, hdc in the next 2 stitches, dc in the next 22 stitches, (2 dc, ch 2, 2 dc) in the corner space; repeat from * twice. Sl st into the third ch of the beginning ch-3.
Fasten off.
Inner Ears – Make 2
Using a 3.5 mm crochet hook and Color 9, make a magic ring.
Round 1: Work 3 sc into the ring.
(3 sc)
Fasten off, leaving a small tail for sewing.
Set the ears aside until the bear face is assembled.
Snout
Using a 3.5 mm hook and Color 4, make a magic ring.
Round 1: 6 sc in the ring.
(6 sc)
Round 2: Work 2 sc in each stitch around.
(12 sc)
Round 3: *2 sc in the next stitch, sc in the next stitch; repeat from * around.
(18 sc)
Round 4: *Sc in the next 2 stitches, 2 sc in the next stitch; repeat from * around.
(24 sc)
Round 5: *Sc in the next 3 stitches, 2 sc in the next stitch; repeat from * around.
(30 sc)
Fasten off.
Nose
Using a 3.5 mm crochet hook and Color 2, make a magic ring.
Round 1: Work 6 sc into the ring.
(6 sc)
Fasten off, leaving a tail for sewing.
Putting the Bear Face Together
Now comes the fun part—turning the individual pieces into a cute little bear.
First, sew the nose onto the center of the snout. Position the snout in the middle of the bear’s face and stitch it securely in place.
Next, sew the inner ears onto the head. Try to position them evenly on both sides so the bear has a balanced appearance.
Finally, use Color 2 to embroider the eyes and mouth. You can keep the face simple with small stitched eyes and a tiny curved mouth.
Don’t worry if your bears aren’t perfectly identical. Slight differences are part of what makes handmade blankets so charming.
Solid Squares
In addition to the bear motifs, you’ll need 12 solid squares to complete the blanket.
Use the solid square pattern from the original source/site to make these squares. Try to keep your tension consistent so the solid squares are approximately the same size as the bear squares.
Before joining everything together, lay all of your squares on a flat surface. This makes it much easier to check the color arrangement and make sure you’re happy with the overall look.
Blanket Layout
For the complete blanket, you’ll need:
- 13 Bear Squares
- 12 Solid Squares
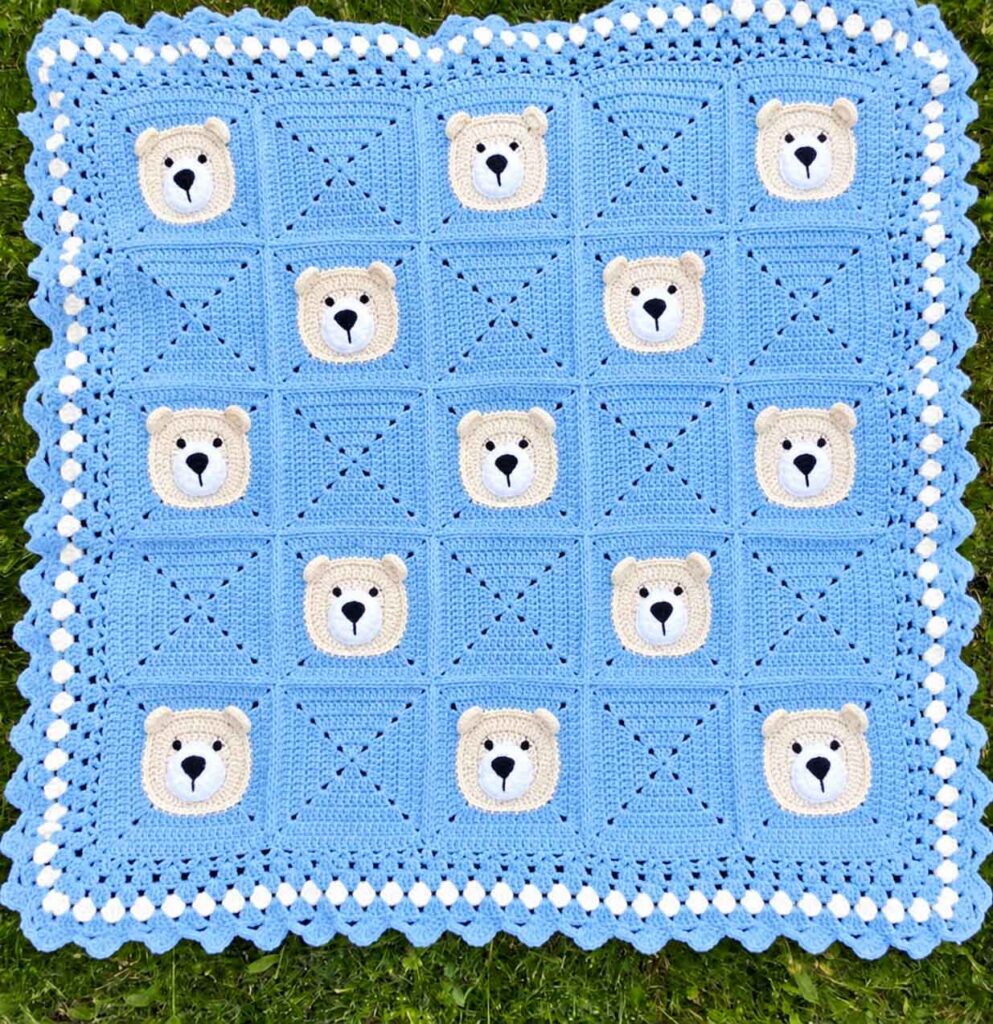
Arrange the squares in a 5 x 5 layout, alternating the bear motifs with the solid squares.
Take a moment to arrange everything before you start sewing. It’s much easier to move a square around now than after all the seams have been joined.
Make sure all of the bear faces are pointing in the same direction.
Joining the Squares
There are several good ways to join crochet squares. You can use a whip stitch, slip stitch join, or a join-as-you-go method.
For this blanket, choose a joining method that leaves the seams relatively flat and neat. A bulky join can change the way the finished blanket sits, so a flatter seam is especially nice for a baby blanket.
Start by joining the squares into individual rows. Once all five rows are complete, join the rows together to create the full blanket.
As you work, check the front of the blanket regularly to make sure the squares are sitting straight and the bear faces haven’t been turned in the wrong direction.
Border
Once all the squares have been joined, add the seven-round border. The border gives the blanket a finished look and helps frame all those adorable bear faces.
Use Color B to begin.
Round 1
Work (3 dc, ch 2, 3 dc) in the corner space.
Work 1 dc in each stitch across to the next corner space, working 1 dc2tog across each seam where the squares are joined.
Repeat around the blanket and join with a sl st to the first dc.
Round 2
Sl st into the corner space.
Work (3 dc, ch 2, 3 dc) in the corner, then skip the next 2 stitches and work a V-stitch in the next stitch.
Repeat this pattern around the blanket and join with a sl st.
Round 3
Sl st into the corner space.
Work (3 dc, ch 2, 3 dc) in the corner, ch 1, then work 3 dc in each V-stitch, with ch 1 between the groups.
Repeat around and join with a sl st.
Round 4
Sl st into the corner space.
Work (3 dc, ch 2, 3 dc) in the corner, ch 1, then work 3 dc in the next ch-1 space, followed by ch 1.
Repeat around and join with a sl st.
Fasten off Color B.
Round 5
Switch to Color A.
Repeat Round 4 around the blanket.
Fasten off.
Round 6
Switch back to Color B.
Repeat Round 4 once more.
Round 7
Sl st into the corner space.
Work (ch 3, dc in the next ch-1 space, 5 dc around the post of the last dc made, sc in the next ch-1 space) 19 times to the next corner.
Work ch 4, sc in the corner, then repeat the same pattern around the remaining sides.
Join with a sl st to the top of the beginning ch-3.
Fasten off.
Weave in all remaining ends carefully.
Finishing Your Bear Blanket
Before calling the blanket finished, take a few minutes to check all of the seams and appliqué pieces. Make sure the ears, snouts, noses, and embroidered details are firmly attached.
You may also want to gently block the finished blanket if the squares have become slightly uneven during joining. Blocking can help straighten the edges and give the entire blanket a more polished appearance.
And that’s it—you have your very own Bear Blanket!
A Sweet Handmade Keepsake
I love how this design combines simple crochet squares with those cute little bear faces. The result is playful without being overly complicated, and the color possibilities are almost endless.
For a classic nursery blanket, try cream, beige, soft brown, and white. Pastel blue or pink would also be beautiful, while sage green, mustard, terracotta, or dusty rose can give the blanket a more modern look.
Most importantly, have fun with it. Handmade blankets don’t need to be perfectly identical to be special. Each little bear will have its own personality, and that’s part of the charm of crocheting something by hand.
Whether you make this blanket for your own little one or give it as a gift, it’s the kind of project that can become a treasured keepsake long after it has been finished.

