

 soofha
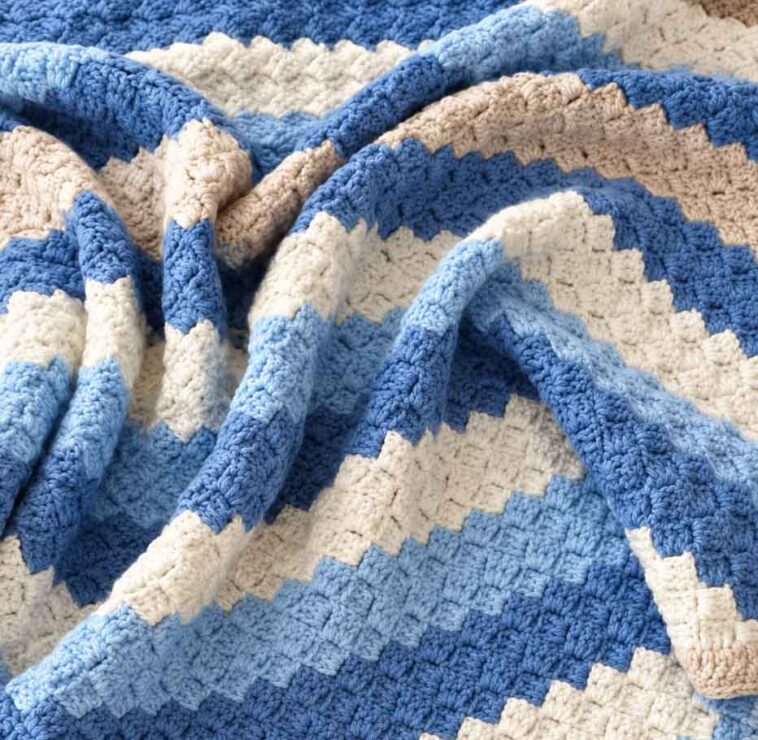
There’s something wonderfully satisfying about watching a C2C blanket grow. You start with just a tiny little cluster of stitches in one corner, and before you know it, you’re holding a full-sized blanket in your hands.
If you’ve never tried corner-to-corner crochet before, don’t let the name intimidate you. Once you understand how the little squares, or “tiles,” connect, the pattern becomes surprisingly easy to follow. Today, I’m walking you through the whole process, from that very first tile to the final corner.
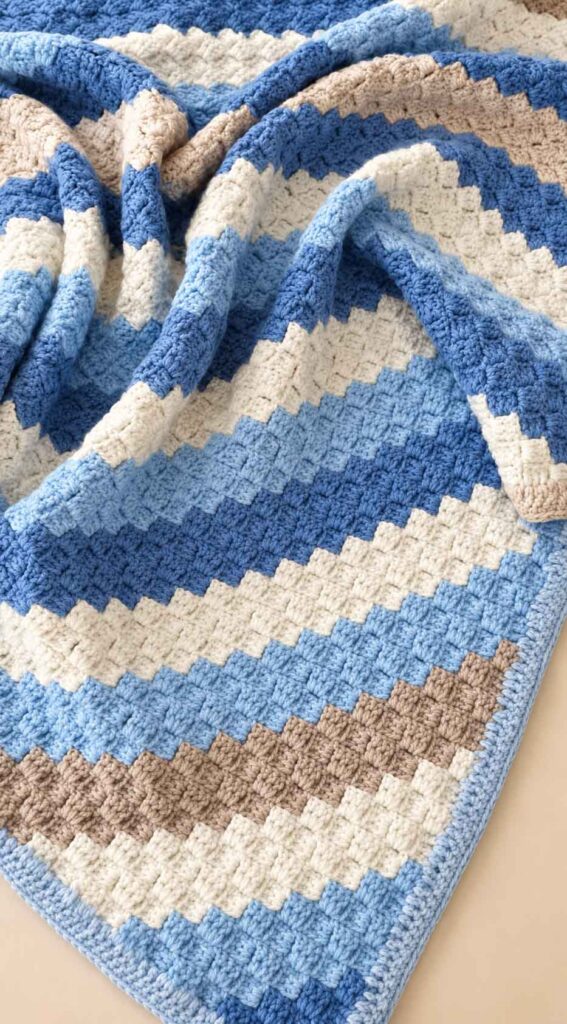
Unlike a traditional blanket that is worked back and forth in straight rows, a C2C blanket is worked diagonally. You begin in one corner, increase until the blanket reaches the desired width, and then decrease back down to the opposite corner.
One of my favorite things about this technique is how versatile it is. You can keep the colors simple, create stripes, make bold color blocks, or even use a graph to crochet pictures and letters. The little squares work almost like pixels, which makes C2C especially fun for personalized blankets.
For this pattern, we’ll keep things simple and make a classic square blanket. Once you get comfortable with the technique, you can easily experiment with different colors and sizes.
The first few rows may feel a little awkward. That’s completely normal. Take your time and focus on how each new tile attaches to the previous row. After a few rows, your hands will start to remember the motion, and you’ll probably find yourself crocheting without having to think about every stitch.
Let’s get started!
What You Need to Know First
Skill level: Easy
This blanket is a good project if you’re comfortable with basic crochet stitches such as chains, slip stitches, and double crochet. The only part that may be unfamiliar is how the individual tiles are joined together, but once you understand that little step, the rest follows a simple rhythm.
Materials
- Worsted weight (#4) yarn. The amount you need will depend on the finished size of your blanket. If you’re using multiple colors, it’s a good idea to have a little extra yarn from the same dye lot.
- 5 mm (H-8) or 5.5 mm (I-9) crochet hook, or the hook recommended on your yarn label
- Measuring tape
- Scissors
- Tapestry needle
Abbreviations – US Crochet Terms
- ch: chain
- sl st: slip stitch
- sc: single crochet
- dc: double crochet
- st(s): stitch(es)
- sp(s): space(s)
- * *: repeat the instructions between the asterisks as directed
Understanding the C2C Tiles
Before starting the blanket, it helps to understand what makes up one C2C tile.
Each tile consists of a chain 3 and three double crochet stitches. The chain-3 creates a small open space along the side of the tile. This is the ch-3 space, and it is where the next tile will be attached.
That’s really the key to the entire technique.
As the blanket grows, you add a new tile at the beginning of each row. Once you reach the widest point, you begin decreasing. Instead of adding another tile, you slip stitch across the final tile and turn, gradually reducing the number of tiles in each row.
Once you can recognize those ch-3 spaces, C2C becomes much easier to read.
Pattern Notes
Keep these points in mind while working:
- Turn your work at the end of every row.
- During the increase section, the row number tells you how many tiles should be in that row. For example, Row 1 has 1 tile, Row 2 has 2 tiles, and Row 10 has 10 tiles.
- For a square blanket, the number of tiles along each side will match the number of your final increase row.
- When changing colors, work the final yarn-over of the last double crochet with the new color.
- Try to keep your tension consistent throughout the blanket so the finished fabric stays even.
Corner to Corner (C2C) Blanket Pattern
Growing the Blanket – Increase Rows
This is the fun part because you can actually watch the blanket get bigger with every row.
Row 1
Ch 6. Dc in the 4th ch from the hook and in each of the next 2 ch.
(1 tile)
You have now made your very first C2C tile.
Row 2
Ch 6, turn.
Dc in the 4th ch from the hook and in each of the next 2 ch to create the new tile.
Sl st in the ch-3 space of the tile from Row 1. Ch 3, 3 dc in the same ch-3 space.
(2 tiles)
Row 3 and Every Increase Row After
Ch 6, turn.
Dc in the 4th ch from the hook and in each of the next 2 ch.
Sl st in the ch-3 space of the next tile from the previous row. Ch 3, 3 dc in the same ch-3 space.
Repeat from * across the row.
You should have one more tile than you had in the previous row.
Continue working the increase rows until the blanket reaches the desired size.
For example, if you want 40 tiles along each side, continue increasing until you have completed 40 increase rows.
Shrinking the Blanket – Decrease Rows
Once your blanket reaches the desired width, it’s time to start decreasing.
This section can look a little different at first, but the basic idea is simple: instead of adding a new tile at the beginning of the row, you slip stitch across the previous tile and begin working from the next ch-3 space.
Every Decrease Row
Turn.
Sl st in each of the first 3 dc, then sl st in the ch-3 space.
Ch 3, 3 dc in the same ch-3 space.
Sl st in the ch-3 space of the next tile. Ch 3, 3 dc in the same ch-3 space.
Repeat from * until one tile from the previous row remains.
Sl st in the ch-3 space of that final tile, but do not make a new tile there.
You should now have one fewer tile than in the previous row.
Continue repeating the decrease row until only one tile remains.
Fasten off.
And just like that, your C2C blanket is complete!
Planning the Size of Your Blanket
One of the nice things about C2C crochet is that you can easily adjust the size.
If you aren’t sure how many tiles you’ll need, make a small sample first. Try working about 8 increase rows, then lay your sample flat and measure along one straight edge.
Divide that measurement by 8 to get an approximate measurement for one tile.
From there, divide your desired blanket width by the size of one tile. This will give you a rough idea of how many tiles you’ll need along each side.
As a general guide:
- A baby blanket is often around 30–36 inches wide.
- A lap blanket may be around 36 × 48 inches.
- For a square blanket, simply continue increasing until you reach the number of tiles you want along each side, then begin decreasing.
Remember that your finished measurements can vary depending on your yarn, hook size, and crochet tension, so making a small gauge sample is always helpful.
Adding a Simple Border
A border can give your C2C blanket a neat, finished appearance and help smooth out the edges.
Round 1
Join your yarn in any corner with the right side facing you.
Ch 1 and work sc evenly around the blanket, working approximately 3 sc along the edge of each tile and 3 sc in each corner.
Join with a sl st to the first sc.
Round 2
Ch 1.
Sc in each sc around, working 3 sc in the center stitch of each corner.
Join with a sl st and fasten off.
Weave in all remaining ends.
Tips for Making Your C2C Blanket
C2C crochet is wonderfully repetitive once you get into the rhythm, but a few little tricks can make the process even easier.
Keep your starting chains loose.
The ch 6 at the beginning of an increase row needs a little flexibility. If you crochet these chains too tightly, the edge can start pulling inward.
Count your tiles.
When you’re increasing, the row number tells you how many tiles you should have. Row 15 should have 15 tiles, Row 20 should have 20 tiles, and so on. This makes it much easier to catch a mistake early.
Pay attention when decreasing.
When starting a decrease row, make sure you slip stitch across the double crochet stitches rather than accidentally working into the chain spaces. This helps keep the edge straight instead of creating bumps.
Use stitch markers for color changes.
If you’re working stripes or a more complicated color pattern, placing a stitch marker in the first tile of each row can make counting much easier.
Don’t worry if the first few rows feel strange.
C2C has its own rhythm, and it can take a few rows before your hands get used to the movement. Once you do, it becomes a wonderfully relaxing project.
C2C Color Ideas
This is where you can really have fun with your blanket.
Simple diagonal stripes are an easy place to start. Change colors every few rows to create a soft striped effect, or use several shades from the same color family for a gradual look.
For something a little bolder, divide the blanket into two contrasting color sections. You could use a soft neutral with a brighter shade, or combine several colors for a cheerful children’s blanket.
And if you enjoy working from charts, C2C opens up a whole new world of possibilities. Because each tile behaves almost like a pixel, you can use C2C graphs to create hearts, stars, flowers, initials, names, animals, and other pictures.
The possibilities are practically endless.
VIDEO TUTORIAL
If you’re a visual learner, watching the C2C technique in action can make everything click much faster. Follow along with the video tutorial as you work through your first few rows.
Final Thoughts
And there you have it — a simple Corner to Corner crochet blanket!
What I love most about C2C is how quickly a tiny beginning turns into something substantial. You start with one little tile, add another, and another, and suddenly you can see the blanket taking shape.
Once you understand the increase and decrease sections, you can use the same basic technique for blankets of all different sizes and designs. Try different yarn colors, experiment with stripes, or challenge yourself with a C2C graph.
Most importantly, don’t worry if your first few rows aren’t perfect. Give yourself a little time to get familiar with the technique. Once the tiles start clicking into place, you’ll find yourself reaching for this stitch again and again.
I hope you enjoy making your own C2C blanket as much as I enjoyed putting this pattern together for you.
Happy crocheting, and thank you for visiting Soofha!

