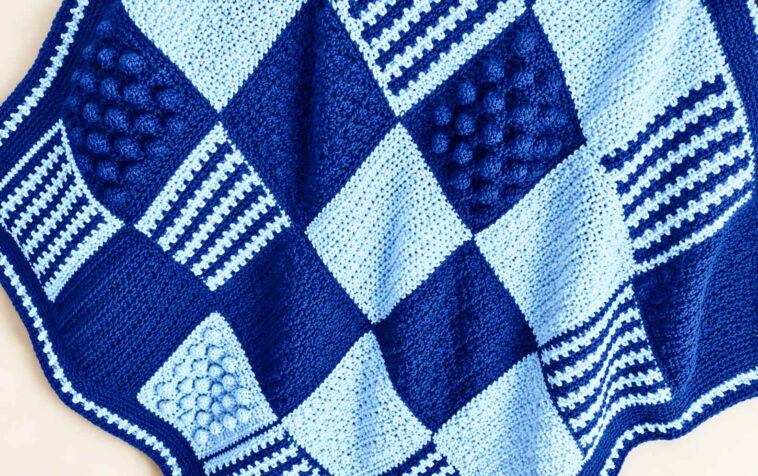
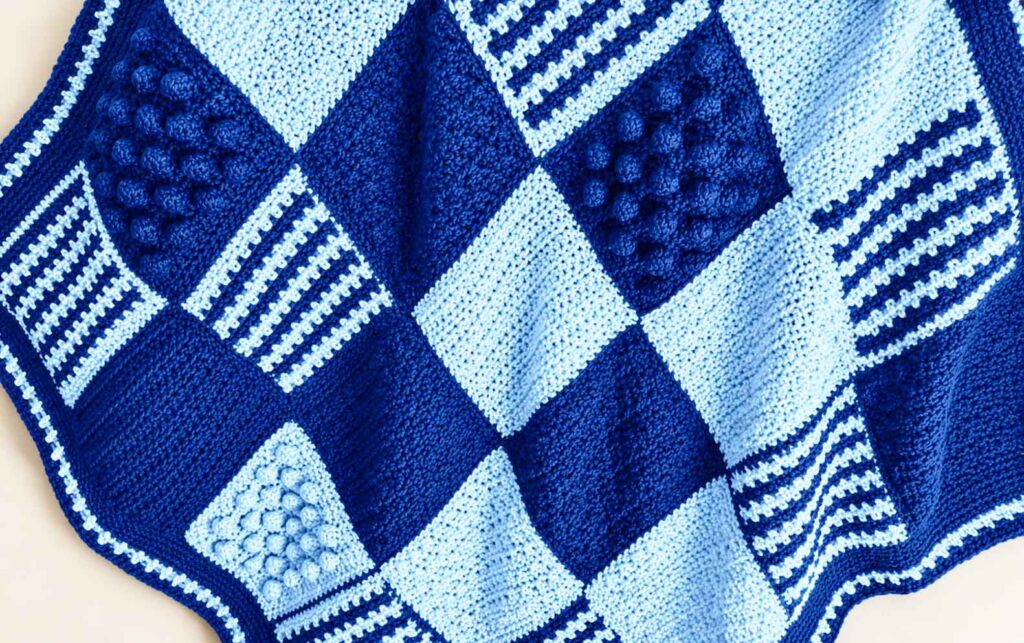
If you enjoy experimenting with different crochet stitches, this blanket is a project you’ll love making. Instead of repeating the same stitch from beginning to end, you’ll create a collection of textured crochet squares, each with its own look and feel. Once joined together, they form a beautiful blanket full of interesting patterns and details.
One of my favorite things about this design is how easy it is to make it your own. You can choose your favorite stitches, play around with different yarn colors, and arrange the squares however you like. No two blankets have to look exactly alike!
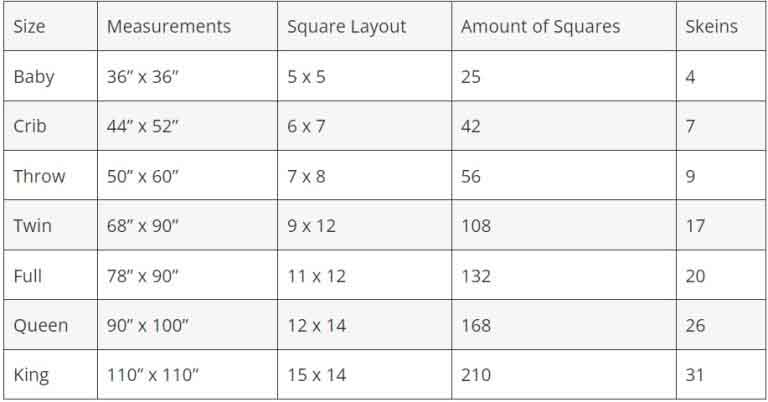
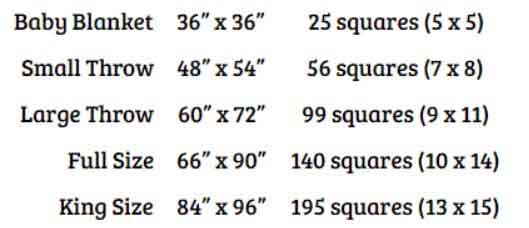
The pattern is also very versatile. Depending on how many squares you make, you can create anything from a small baby blanket to a cozy lapghan, a large throw, or even a king-size blanket.
The project is worked in three main stages: first, you’ll crochet the individual squares, then join them together, and finally add a border to give your blanket a neat, finished look.
Textured Crochet Blanket Pattern
Materials You’ll Need
Each square is designed to measure approximately 6 inches, although the finished size may vary slightly depending on your tension and yarn.
For the best results, use worsted-weight, Aran, or medium-weight (Category 4) yarn. You can choose one color for the entire blanket or combine several shades to create a more colorful design.
Suggested yarn amounts:
Baby blanket: approximately 925 yards
Small throw: approximately 2,200 yards
Large throw: approximately 3,800 yards
Full-size blanket: approximately 5,600 yards
King-size blanket: approximately 7,600 yards
Crochet hook: US I/9 (5.5 mm)
You’ll also need scissors, a yarn needle for weaving in the ends, and stitch markers to help with joining the squares.
})(jQuery);
Choosing Your Crochet Squares
Before you begin, decide how large you’d like your finished blanket to be. The number of squares you need will depend on your chosen size.
For example, a baby blanket requires 25 squares. A small throw needs approximately 56 squares.
You don’t have to use every stitch pattern listed below. Pick the ones you enjoy most and combine them to create a design that reflects your personal style.
Here are some lovely stitch options to try:
Half Double Crochet
Bobble Stitch
Crossed Double Crochet
Lemon Peel Stitch
Moss Stitch
Mini Bean Stitch
Waffle Stitch
Basket Weave Square
Crochet Weave Square
You can also experiment with other stitch patterns if you’d like to add even more texture.
Making the Crochet Squares
Each square is worked separately before being joined to the others. The most important thing is to keep the finished squares as close to the same size as possible. A difference of up to 1/2 inch is generally manageable, especially after blocking.
Don’t worry if every square has a slightly different stitch count along its edges. Since the patterns use different stitches, this is completely normal. Just try to keep your tension consistent so the squares are easier to join later.
The following patterns offer a variety of textures, from simple stitches to raised and woven designs.
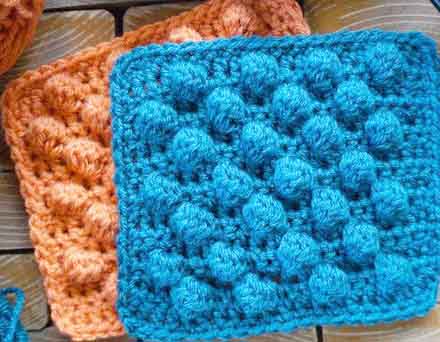
1. Bobble Stitch Square
Bobble Stitch Square
The bobble stitch adds lovely raised details to your blanket. It looks especially beautiful when worked in a contrasting color.
Foundation: Chain 20.
Row 1: Half double crochet in the second chain from the hook and in each chain across. (19 stitches)
Row 2: Chain 1 and turn. Single crochet in the first 2 stitches, make a bobble stitch in the next stitch, then single crochet in the next 3 stitches. Repeat the pattern across and finish with single crochet in the last 4 stitches.
Row 3: Chain 1 and turn. Half double crochet in every stitch across. (19 stitches)
Row 4: Chain 1 and turn. Single crochet in the first 4 stitches, make a bobble stitch in the next stitch, then single crochet in the next 3 stitches. Repeat across and finish with single crochet in the last 2 stitches.
Rows 5–15: Continue alternating Rows 3 and 4, keeping the bobbles staggered.
Border: Chain 1 and work single crochet stitches evenly around the square. Place 2 single crochets in each corner.
2. Lemon Peel Stitch Square
Lemon Peel Stitch Square
The lemon peel stitch is a wonderful choice when you want a textured fabric without complicated instructions. Alternating single and double crochet stitches creates a subtle, pebbled surface.
Foundation: Chain 19.
Row 1: Skip the first 2 chains and work a double crochet in the third chain from the hook. Single crochet in the next chain. Alternate double crochet and single crochet across. (17 stitches)
Row 2: Chain 1 and turn. Single crochet in the first stitch, double crochet in the next stitch. Repeat across, ending with a single crochet.
Row 3: Chain 2 and turn. Double crochet in the first stitch, single crochet in the next stitch. Repeat across, ending with a double crochet.
Rows 4–15: Repeat Rows 2 and 3 six times.
Row 16: Repeat Row 2.
Border: Chain 1 and work single crochet evenly around the square, placing 2 single crochets in each corner.
3. Crossed Double Crochet Square
Lemon Peel Stitch Square
For a little extra texture, the crossed double crochet stitch is a lovely option. The stitches cross over one another to create a decorative pattern that looks more complicated than it really is.
Row 1: Chain 20. Double crochet in the third chain from the hook. Skip the next chain and double crochet in the following chain. Then work back into the skipped chain with a double crochet. Repeat this crossed stitch pattern across, finishing with a double crochet in the last chain. (18 stitches)
Row 2: Chain 2. Skip the next stitch and double crochet in the following stitch. Then go back and double crochet in the skipped stitch. Repeat across. (18 stitches)
Row 3: Chain 2. Double crochet in the first stitch. Skip the next stitch and double crochet in the following stitch. Work back into the skipped stitch with a double crochet. Repeat until the last stitch, then double crochet in the final stitch. (18 stitches)
Repeat: Work Rows 2 and 3 three more times.
Border: Chain 1 and single crochet around the square, placing 2 single crochets in each corner.
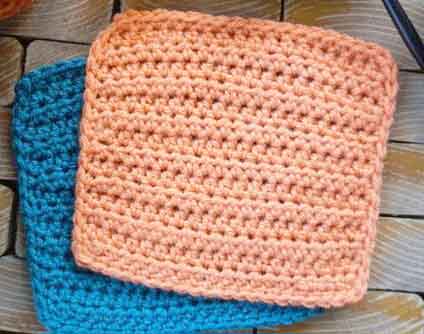
4. Half Double Crochet Square
Half Double Crochet Square
If you prefer something simple and relaxing, this square is a great choice. Its clean texture also makes it a nice contrast to the more detailed stitch patterns.
Row 1: Chain 20. Starting in the second chain from the hook, work one half double crochet in each chain across. (19 stitches)
Rows 2–14: Chain 1 and turn. Work one half double crochet in every stitch across. (19 stitches per row)
Border: Chain 1 and single crochet around the square. Work 2 single crochets in each corner to help keep the edges flat.
5. Moss Stitch Square
Moss Stitch Square
The moss stitch creates a soft woven appearance using just single crochet stitches and chain spaces. It’s a beautiful way to introduce another texture into your blanket.
Row 1: Chain 23. Single crochet in the second chain from the hook and in each chain across. (22 stitches)
Row 2: Chain 2 and turn. Skip the next stitch, single crochet in the following stitch, then chain 1. Repeat across, ending with a single crochet in the last stitch.
Change colors every other row. You can carry the unused yarn along the side instead of cutting it after every color change.
Rows 3–20: Chain 2 and turn. Single crochet in the first chain-1 space from the previous row, chain 1, then single crochet in the next chain-1 space. Continue across, working into each chain space and ending with a single crochet in the final chain space.
Row 21: Do not change colors. Chain 1 and turn. Single crochet in every chain and stitch across. (22 stitches)
Border: Work single crochet evenly around the square, placing 2 single crochets in each corner.
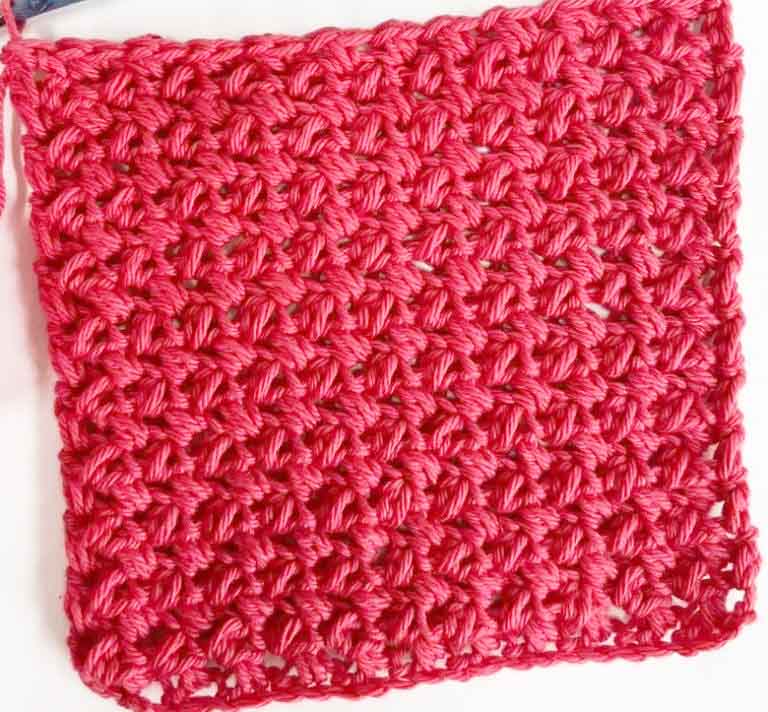
6. Mini Bean Stitch Square
Mini Bean Stitch Square
The mini bean stitch gives the fabric a lovely, bumpy texture. It’s a fun stitch to use when you want something a little different from traditional crochet patterns.
Row 1: Chain 21. Make a mini bean stitch in the third chain from the hook. Skip one stitch and make another mini bean stitch in the next chain. Repeat across. (10 mini bean stitches)
Rows 2–15: Chain 1 and turn. Make a mini bean stitch in the side of each mini bean stitch from the previous row. Continue across. (10 mini bean stitches per row)
Border: Work single crochet around the square, placing 2 single crochets in each corner.
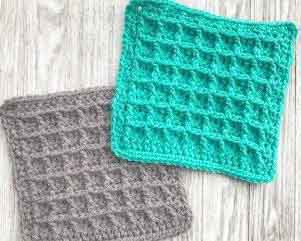
7. Waffle Stitch Square
Waffle Stitch Square
The waffle stitch is perfect for adding deep, raised texture. Its little squares give the blanket a cozy, almost quilted appearance.
Row 1: Chain 22. Double crochet in the third chain from the hook and in every chain across. (20 stitches)
Row 2: Chain 2 and turn. Double crochet in the first 2 stitches. Work a front post double crochet around the next stitch post, then double crochet in the next 2 stitches. Repeat from * to * across. (20 stitches)
Row 3: Chain 2 and turn. Double crochet in the first stitch, front post double crochet around the next stitch post. Double crochet in the next stitch, then front post double crochet around the next 2 stitch posts. Repeat 4 more times, then double crochet in the next stitch, front post double crochet around the next stitch, and double crochet in the last stitch. (20 stitches)
Rows 4–13: Repeat Rows 2 and 3.
Row 14: Repeat Row 2.
Border: Chain 1 and work single crochet evenly around the square, placing 2 single crochets in each corner.
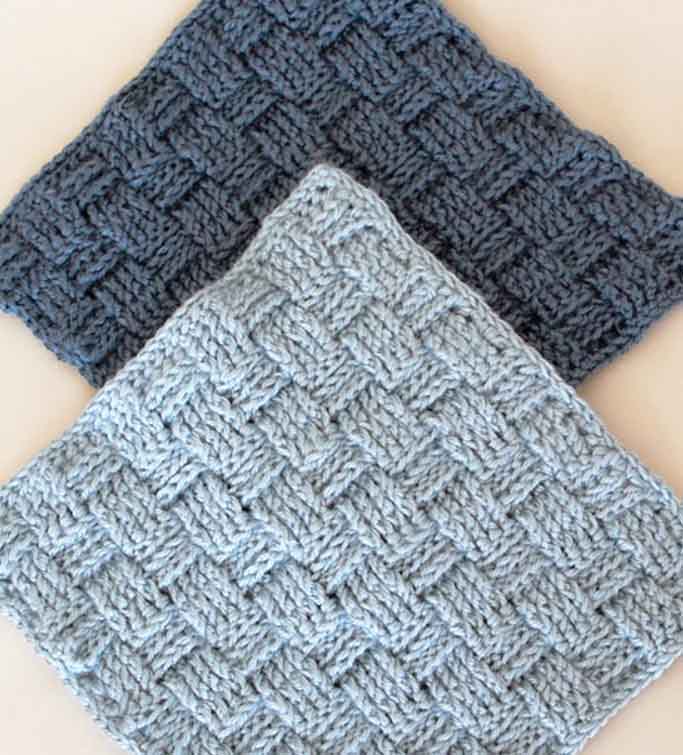
8. Basket Weave Square
Basket Weave Square
This stitch creates a beautiful woven effect by alternating front post and back post double crochet stitches. It adds wonderful depth and makes a lovely contrast to the flatter squares.
Row 1: Chain 38. Double crochet in the third chain from the hook and in each chain across. Alternatively, you can work 36 foundation double crochet stitches. (36 stitches)
Row 2: Chain 2 (does not count as a stitch) and turn. Work 4 front post double crochets, followed by 4 back post double crochets. Continue alternating these groups across. (36 stitches)
Row 3: Chain 2 and turn. Work 4 back post double crochets, followed by 4 front post double crochets. Continue across. (36 stitches)
Rows 4–9: Repeat Rows 2 and 3, alternating the front post and back post groups.
Rows 10–27: Repeat the pattern established in Rows 4–9 three more times. (36 stitches per row)
Border: Work 38 single crochet stitches along one side of the square, then chain 1 (this does not count as a stitch). Repeat along the remaining sides. Fasten off and weave in the ends.
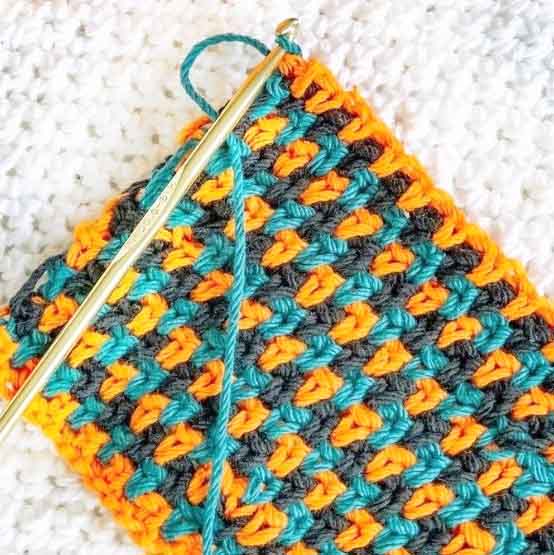
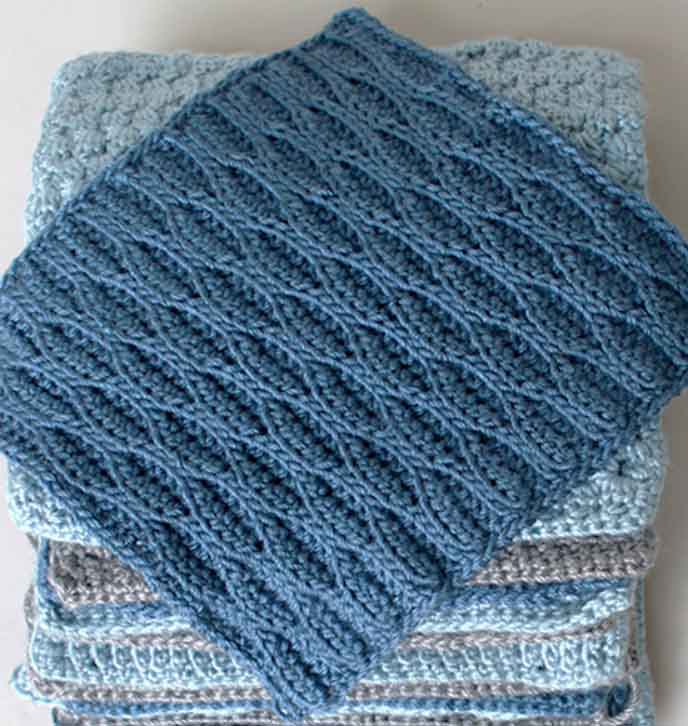
9. Crochet Weave Square
Crochet Weaves Square
This square has a lovely woven appearance created by alternating slip stitches and half double crochets. Working through the back loops gives the fabric even more texture.
Row 1: Chain 36.
Row 2: Starting in the second chain from the hook, work 5 slip stitches, followed by 5 half double crochets and 5 slip stitches. Repeat across. (35 stitches)
Important: From this point forward, work all stitches through the back loop only.
Row 3: Chain 1 and turn. Work 5 slip stitches, followed by 5 half double crochets and 5 slip stitches. Repeat across. (35 stitches)
Rows 4–5: Chain 2 and turn. Work 5 half double crochets, followed by 5 slip stitches and 5 half double crochets. Repeat across. (35 stitches)
Row 6: Chain 1 and turn. Work 5 slip stitches, followed by 5 half double crochets and 5 slip stitches. Repeat across. (35 stitches)
Repeat the pattern from Row 3 through Row 6 nine more times, continuing through Row 41. Maintain 35 stitches in every row.
Border: Work 38 single crochet stitches (through both loops) along one side of the square, then chain 1. Repeat along the remaining sides. Fasten off and weave in the loose ends.
Adding More Squares to Your Design
These nine square patterns are just a starting point. Feel free to add other stitches, experiment with different yarn colors, or repeat your favorite designs as many times as you like.
You can also try decorative squares such as:
Full Heart Bobble Square
Heart Bobble Square
Pin Wheel Square
Tilt-A-Whirl Square
The most important thing is to keep all your finished squares approximately the same size so they fit together nicely.
Blocking the Crochet Squares
Before joining everything together, it’s worth taking a little time to block your squares.
Blocking helps even out the edges, improves the shape of each square, and makes the joining process much easier. This is especially helpful when working with several different stitch patterns, as some stitches naturally produce a slightly different fabric shape.
Blocking isn’t absolutely necessary, but I highly recommend it if you want your finished blanket to look neat and even.
Once all your squares are blocked and dry, lay them out on a flat surface and start planning your arrangement.
A helpful trick is to group squares by stitch pattern first, then spread them throughout the blanket. Mix the colors and textures so that similar squares aren’t sitting right next to each other.
Take a moment to check the direction of each square, too. Some stitch patterns look different when turned sideways or upside down, so make sure everything is facing the way you want before joining.
Joining the Crochet Squares
Now comes the exciting part: bringing all those individual squares together!
There are two popular ways to join crochet squares: the Mattress Stitch and the Slip Stitch method. Both work beautifully, so the best choice depends on the finish you prefer and how comfortable you feel with each technique.
One thing to remember is that the squares may have different numbers of stitches along their edges. That’s perfectly normal with this type of blanket.
The trick is to line up the corners and keep the seams even.
A Helpful Tip for Even Seams
Use stitch markers to mark the corners and the midpoint of each square before joining. This makes it much easier to match the edges, even when the stitch counts are different.
If you need to skip a stitch on one side to make the corners line up, that’s fine. If you need to adjust more than a couple of stitches, spread those adjustments evenly along the seam rather than placing them all in one spot.
Also, try not to pull your joining stitches too tightly. Tight seams can make the blanket pucker or cause the squares to look uneven.
Method 1: Mattress Stitch
The Mattress Stitch is worked with a yarn needle and matching yarn. It creates a neat seam that is almost invisible from the right side.
Place two squares next to each other with their right sides facing up.
Thread your yarn needle with a length of yarn.
Begin at the bottom of the blanket and work along the edges, catching the corresponding loops of each square.
Continue stitching until the squares are securely joined.
Attach the remaining squares in the same way, completing the vertical seams first.
Once all vertical seams are finished, rotate the blanket clockwise and sew the horizontal seams.
Keep your stitches relaxed and check the fabric regularly to make sure the seam stays flat.
Method 2: Slip Stitch Join
If you prefer working with a crochet hook, the slip stitch method is another excellent option. It is generally quicker once you get comfortable with the technique and creates a slightly more visible seam.
Place two squares with their right sides facing each other.
Use stitch markers to keep the edges and corners aligned.
Insert your hook through the outside loops only of both squares.
Yarn over and pull through the loops to make a slip stitch.
Continue along the edge, checking the stitch markers as you go.
If necessary, skip a stitch occasionally to keep the corners and midpoint aligned.
Join all the squares along the vertical edges first. Then turn the blanket so the wrong side faces you, rotate it clockwise, and join the horizontal edges.
Take extra care where the seams intersect so that all the squares meet neatly.
Which Joining Method Should You Choose?
Both methods give lovely results. The Mattress Stitch creates a flatter, more subtle seam, while the Slip Stitch Join is a quicker crochet-based alternative.
If you’re unsure, try joining two practice squares using each method before deciding. You’ll soon discover which one feels more comfortable.
Whichever technique you choose, remember to keep your tension loose and even.
Adding the Blanket Border
You’re almost finished! Once all your squares are joined, it’s time to add the final border.
The border helps frame the different textures and gives the blanket a more polished appearance. You can use the same color as your squares or choose a contrasting shade for a little extra decoration.
Round 1: Join your yarn at any corner. Chain 1 and work single crochet evenly around the entire blanket. Place 3 single crochets in each corner. Join with a slip stitch to the first single crochet.
Rounds 2–6: Chain 1 and single crochet in every stitch around. Work 3 single crochets in each corner and join with a slip stitch to the first single crochet.
Round 7: Change to a contrasting yarn color. Chain 1. Work a half double crochet in the next stitch, chain 1, skip the next stitch. Repeat from * to * until you reach a corner.
Before the corner, work a half double crochet in the stitch before the last one, chain 2, skip the next stitch, and work a half double crochet in the following stitch. Continue around the blanket and join the round.
You may need to make small adjustments at the corners to keep the border lying flat.
Round 8: Change back to the main border color. Chain 1 and work 2 single crochets around each chain space from the previous round. At each corner, work 3 single crochets around the corner chain space. Join with a slip stitch to the first single crochet.
Rounds 9–10: Chain 1 and work single crochet in every stitch around. Place 3 single crochets in each corner and join with a slip stitch to the first stitch.
Fasten off and carefully weave in all remaining ends.
Your Textured Crochet Blanket Is Finished!
And there you have it! A beautiful textured blanket made from a collection of crochet squares, each bringing its own stitch pattern and personality to the finished design.
What makes this project so enjoyable is the freedom to experiment. You can make it colorful and playful, keep it soft and neutral, or create a completely different combination of textures. It’s also a wonderful way to practice new stitches without committing to a large project right away.
I’d love to know which stitch you’d choose for your blanket. Would you go for the raised bobble stitch, the cozy waffle stitch, or the classic moss stitch?
Thank you for stopping by Soofha! I hope this pattern inspires you to pick up your hook and start creating something special.
 soofha