

 soofha
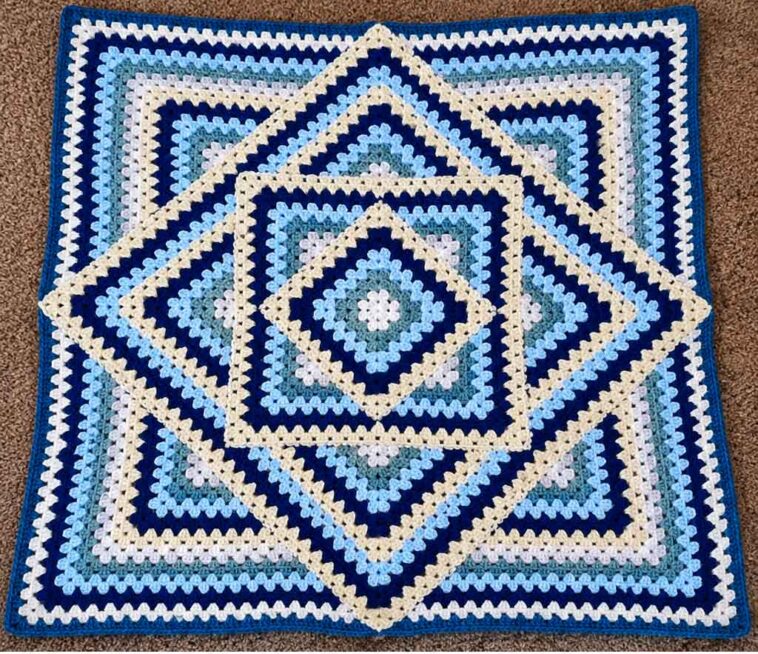
If you love granny squares but want to try something a little different, the Squared Diamond Granny Throw is a beautiful project to put on your crochet list. It takes the familiar granny-square technique and builds on it with additional layers, creating a lovely geometric design that looks like diamonds are sitting inside larger squares.
At first glance, the finished pattern may look complicated, but the construction is based on familiar crochet techniques. Once you understand how the granny clusters, corners, and outer sections fit together, the design starts to make much more sense.
The best part is that you can have fun with the colors. Soft, coordinating shades give the blanket a calm and traditional look, while brighter contrasting colors make the diamond shapes stand out. You can also change the number of rows or colors to create a blanket that is completely your own.
This pattern is worked in sections, so take your time as you go. The corners and connecting rows need a little extra attention, but the finished effect is well worth it.
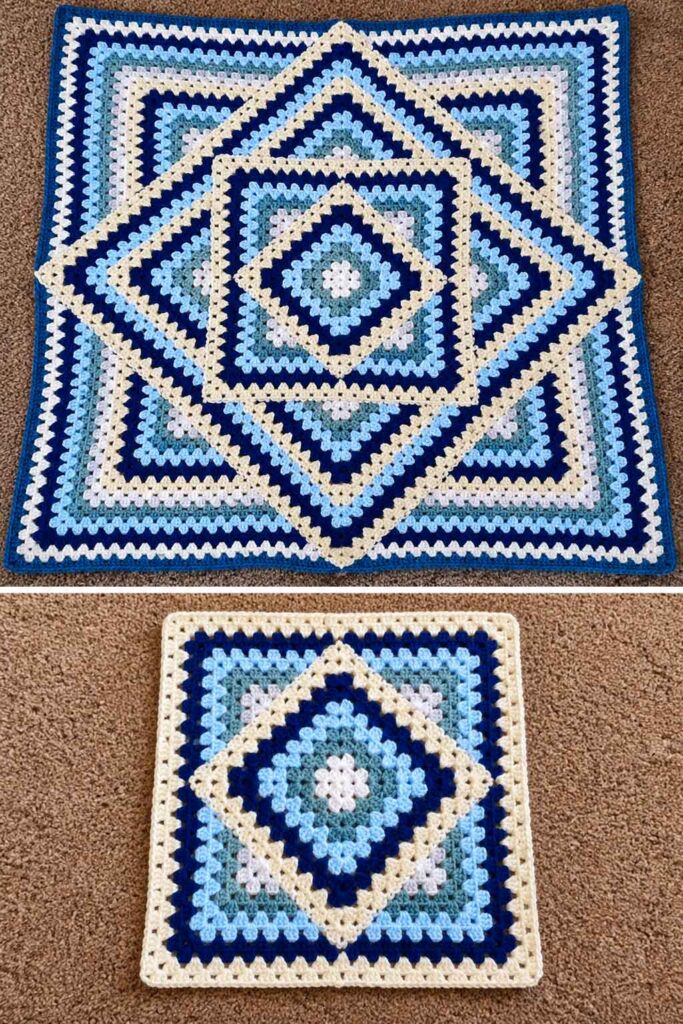
Squared Diamond Granny Throw Materials
Yarn
For the five-color version, you’ll need approximately five 7-ounce skeins of yarn.
The amount of yarn used for each color isn’t exactly the same. The outermost color uses almost an entire 7-ounce skein, while the innermost color uses about half a skein. The colors between them will require amounts somewhere in between.
Your actual yarn requirements may vary depending on your tension, yarn weight, hook size, and the finished size you choose.
Crochet Hook
The original throw was made using an I/9 (5.50 mm) crochet hook.
However, you don’t have to use exactly the same hook size. One of the nice things about this pattern is that you can adapt it to different yarns and projects.
For example, a G hook could be used to make smaller panels, while a K hook combined with bulky yarn would be suitable for a larger floor cover. A J hook with rug yarn could also make a sturdy floor covering.
If you crochet loosely, you may find that an H hook gives you a similar result to the original version.
The important thing is to choose a hook that works comfortably with your yarn and gives you the fabric you want.
Granny Stitch
For this granny throw, use traditional 3-double-crochet clusters (3 DC) with no chain between the clusters.
At each corner, work:
3 DC, Ch 3, 3 DC
There is one important detail to remember throughout this pattern: turn your work at the end of each row.
Turning helps keep the appearance of the inner granny square consistent with the outer corners. If you don’t turn your work, the stitches can look different and the corners may not line up the way you expect.
The total number of rows needs to be even. You can make your squares with:
4, 6, 8, 10, 12 rows, and so on.
The larger outer squares should also finish on an even-numbered row.
For the original version, 10 rows were worked using five colors, with two rows of each color. You can change this however you like. Use one row per color, two rows, three rows, or create your own color sequence.
How to Crochet the Basic Granny Square
Before building the outer layers, you’ll begin with a traditional granny-style square.
Start: Magic Circle
Create a magic circle.
Row 1
Chain 3. This counts as your first double crochet.
Work 2 DC into the magic circle.
Chain 3, then work 3 DC into the circle.
Repeat the corner and cluster sequence three more times.
Chain 2 and pull the magic circle closed.
Single crochet into the top of the beginning chain 3.
Chain 3 and turn your work.
Remember to turn your work at the beginning of each row.
Row 2
Work 2 DC into the chain-2 space from the previous row.
In the next chain-3 corner space, work:
3 DC, Ch 3, 3 DC
Repeat around the square.
At the end of the round, work 3 DC around the post of the single crochet from the previous row.
Chain 3 and slip stitch into the top of the first chain 3.
Fasten off and turn your work.
Row 3
Change to a new color.
Slip stitch into any side space.
Chain 3, which counts as your first DC, then work 2 more DC into the same space.
In the next corner space, work:
3 DC, Ch 3, 3 DC
Work 3 DC into the next gap.
Continue around the square, making a corner cluster in each corner.
When you reach the beginning, slip stitch into the top of the first chain 3.
Chain 3 and turn.
Row 4
Work 2 DC into the same space.
Continue working 3 DC into each following space.
At each corner, work:
3 DC, Ch 3, 3 DC
Slip stitch to the top of the beginning chain 3.
Fasten off and turn.
Row 5
Change color.
Slip stitch into any middle gap.
Chain 3 and work 2 DC into the same gap.
Work 3 DC into each gap around the square.
In every corner chain-3 space, work:
3 DC, Ch 3, 3 DC
Slip stitch to the top of the first chain 3.
Chain 3 and turn.
Row 6
Work 2 DC into the same gap.
Work 3 DC into each following gap.
In every corner chain-3 space, work a corner cluster.
Slip stitch to the beginning chain 3.
Fasten off and turn.
Row 7
Change color.
Slip stitch into any middle gap.
Chain 3 and work 2 DC into the same gap.
Work 3 DC into every remaining gap.
Make a corner cluster in each corner.
Slip stitch to the top of the beginning chain 3.
Chain 3 and turn.
Rows 8–10
Continue repeating Rows 6 and 7 until Row 10 is complete.
Do not turn your work after Row 10.
Finishing the Granny Square
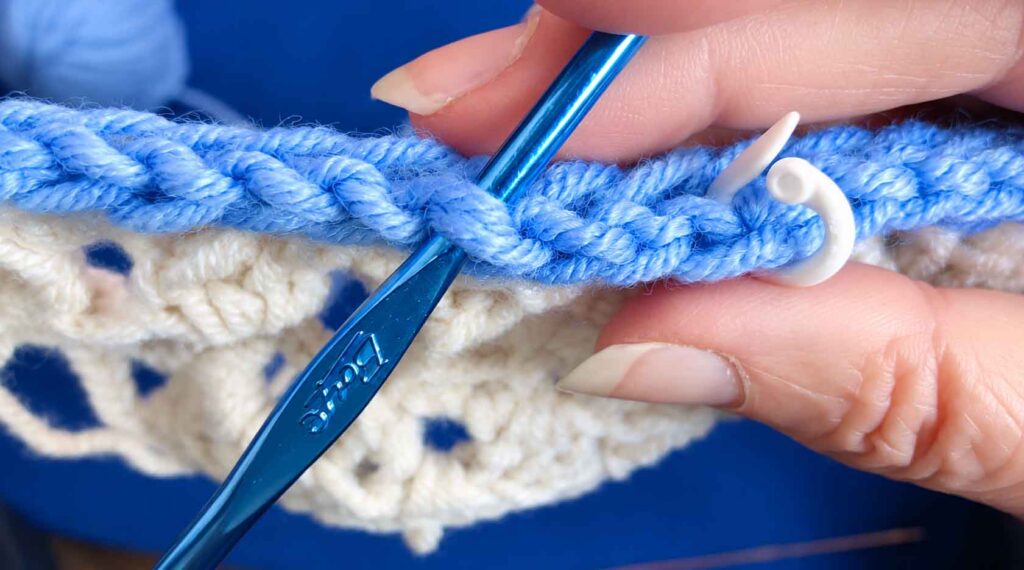
With the front of your work facing you, use the slip stitch already on your hook to work around the outside of the square.
Work a slip stitch into the front loop of each double crochet, working loosely through the chain spaces as well.
The slip stitches should not be tight. Keeping them loose will make the next part of the pattern much easier.
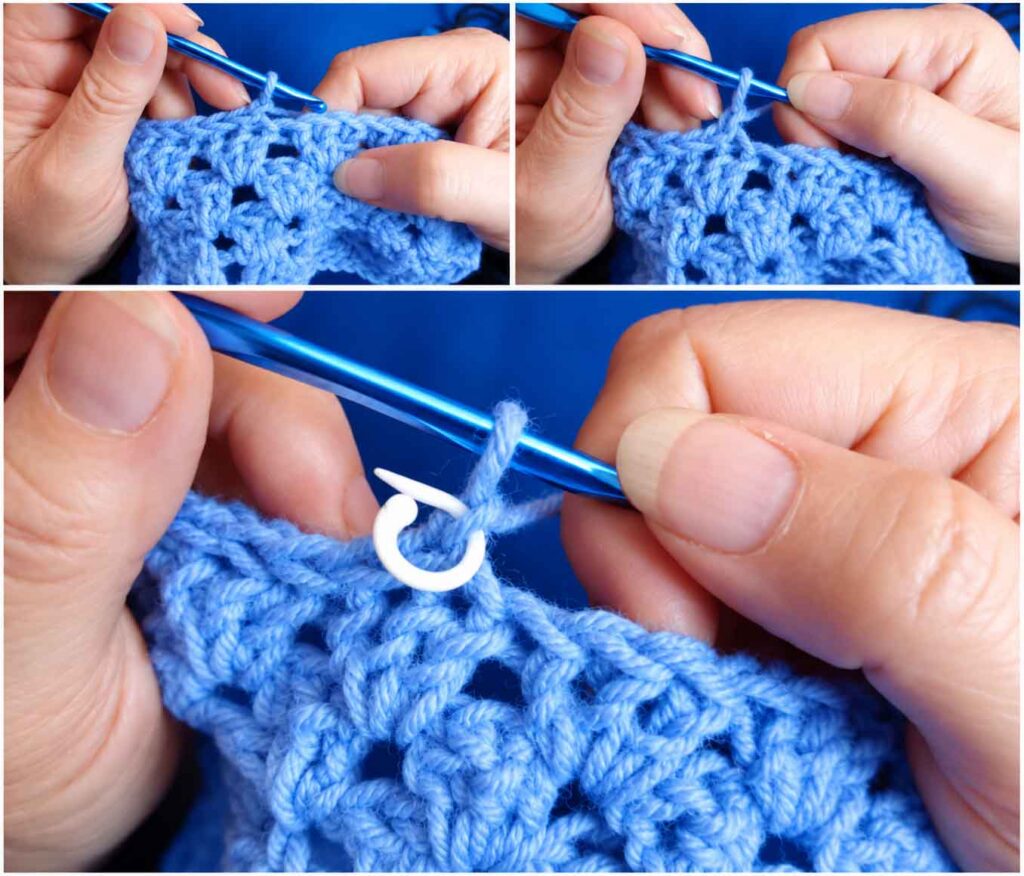
Chain 1 in the center of each side of the square and mark these stitches with stitch markers.
These marked chain-1 spaces will help you locate the center of each side when you begin adding the outer sections.
Counting the Stitches
Each side should have three stitches for every granny cluster, plus two additional stitches for the corners.
Do not count the middle of the chain-3 corner space as a stitch.
For example, if one side has 10 clusters:
10 × 3 = 30 stitches
Add the two corner stitches:
30 + 2 = 32 stitches
The extra stitch added in the center of the slip-stitch row isn’t counted as a separate stitch. It functions as both the last and first stitch in the center clusters.
Attaching the Outer Sections
There are two approaches described for attaching the outer sections: a two-sided connection and a one-sided connection.
Two-Sided Connection
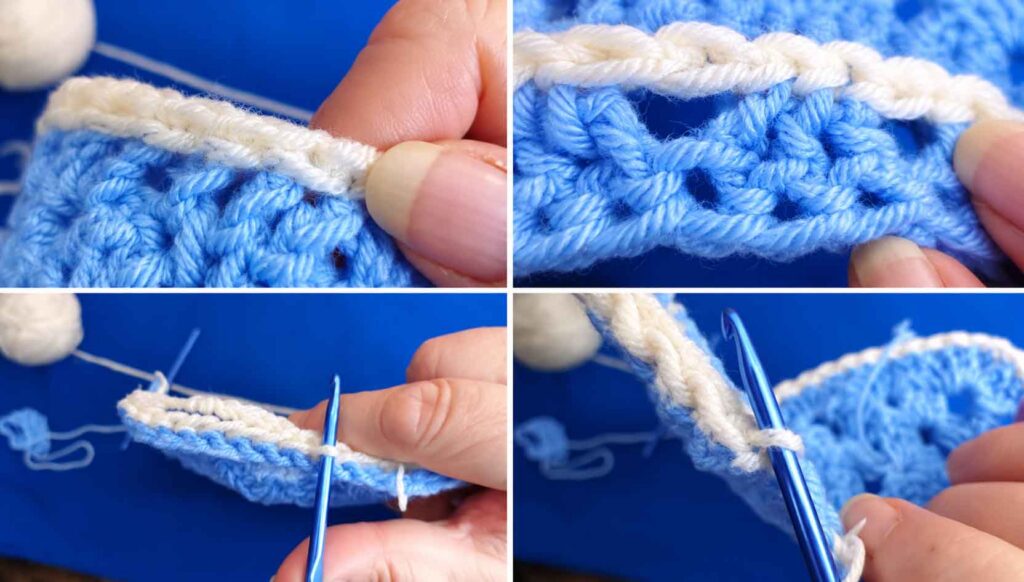
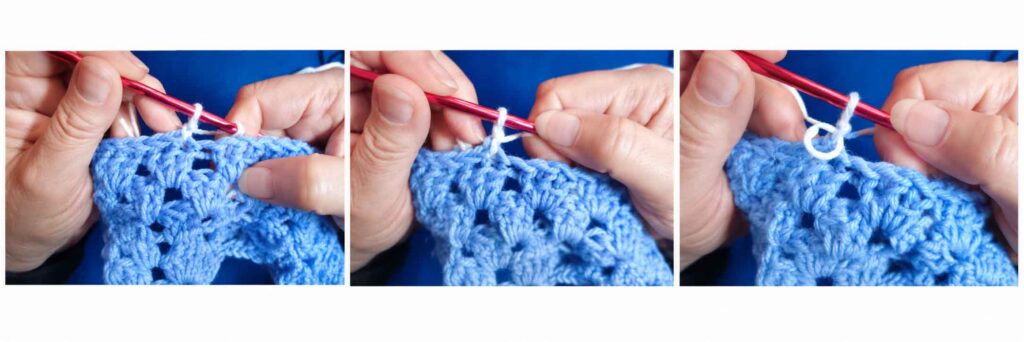
Look closely at the edge where you made the slip-stitch row.
You’ll see two threads behind the front and back loops. One will be slightly longer, while the other sits a little closer to the hand holding your hook.
Use these two threads when attaching the sides of the square.
This creates a raised ridge on both the front and back of the project.
At each corner, use the two threads in the center of the chain-1 space to help anchor the corner group.
One-Sided Connection
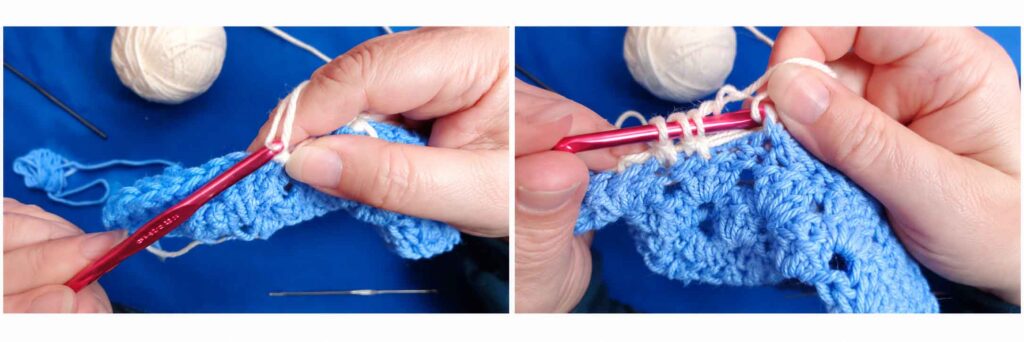
For the one-sided version, use one center thread together with one back loop when attaching each row.
The two back threads from the center chain-1 space are used to secure the corner group.
Helpful Note About Single Crochet
When working single crochet stitches at the beginning or end of a row, treat them like chain-1 spaces.
Work around the post of the single crochet in a similar way to how you would work around a chain stitch.
Starting the First Outer Section
Begin at the marked center chain stitch.
Move backward toward the hand holding your hook.
Single crochet into the second stitch from the center, at the edge of the center cluster.
Using your center color, chain 1.
In the marked center stitch, work the corner set:
3 DC, Ch 3, 3 DC
Chain 1.
Slip stitch into the second stitch on the opposite side of the center cluster.
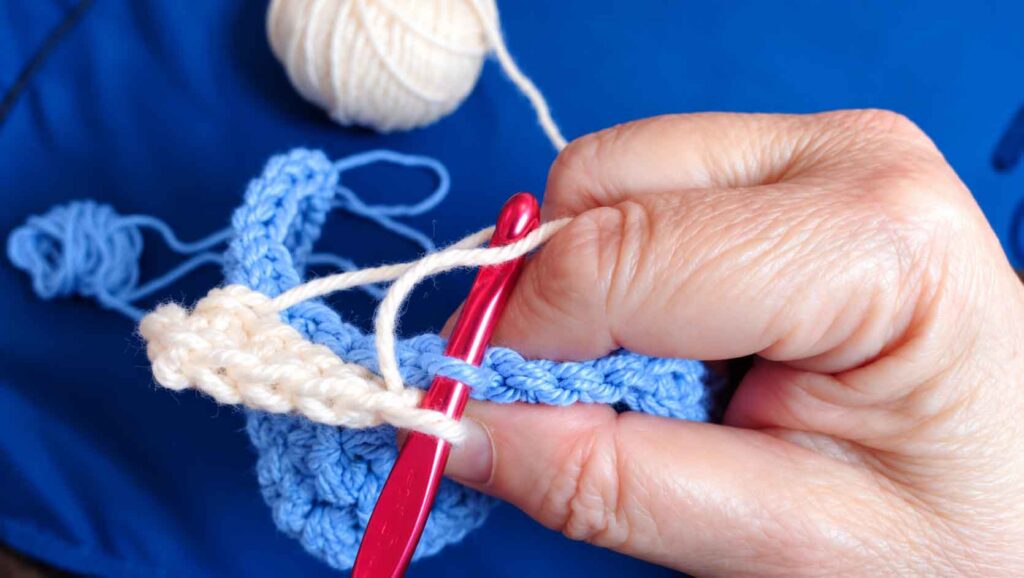
Chain 3.
Count two stitches from the point where you made the slip stitch and work a single crochet.
This creates the setup for the next granny cluster.
Turn your work.
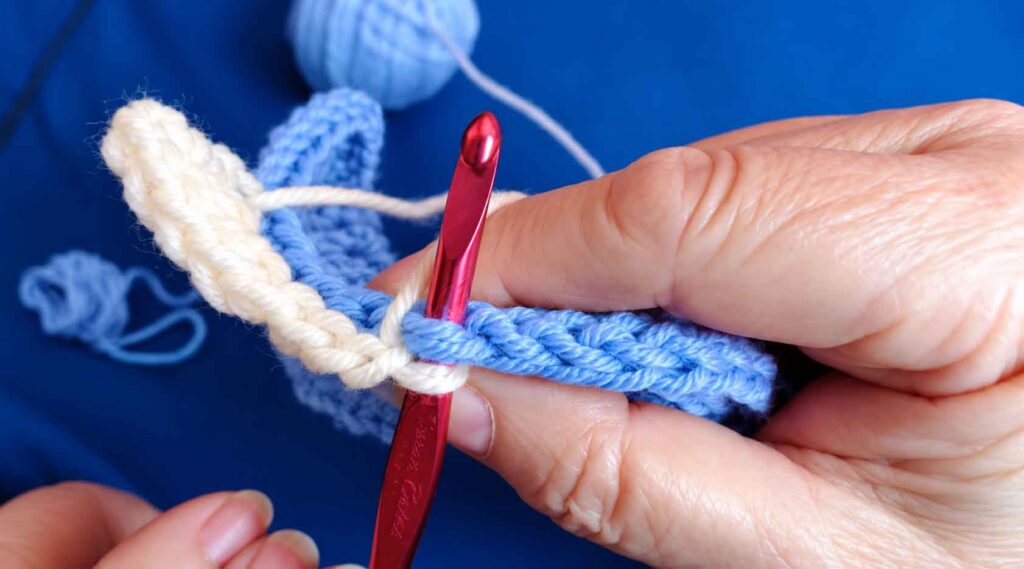
Outer Section Row 2
In the chain-1 space created at the base of the chain 3, work 2 DC. Together with the chain 3, these form a 3-DC cluster.
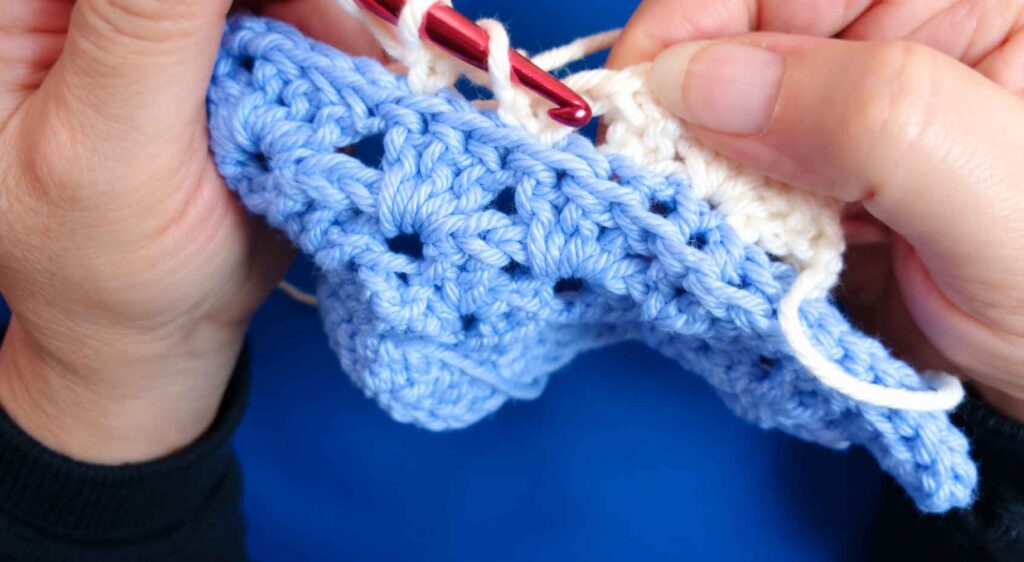
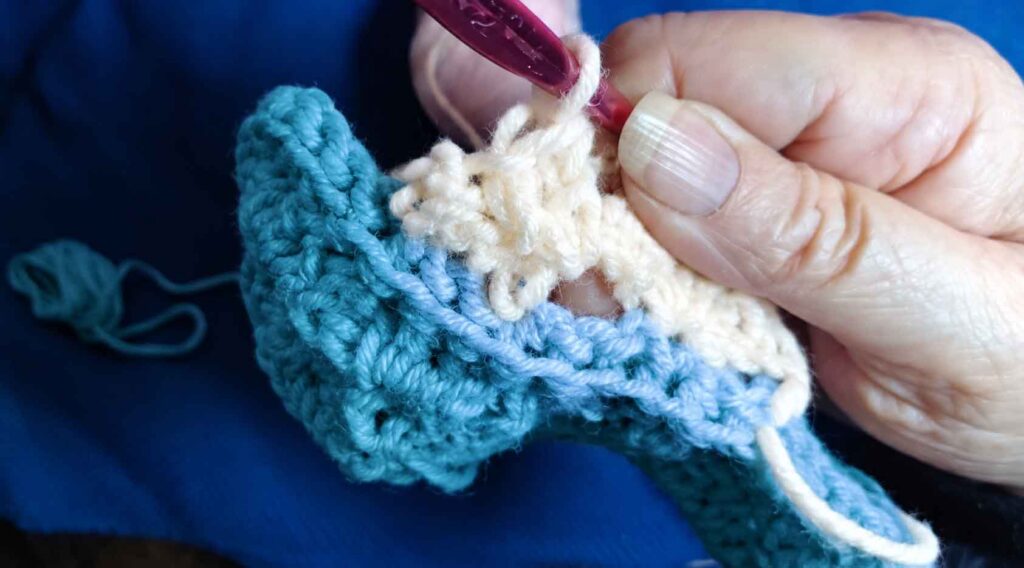
At the corner tip, work a standard corner cluster.
Then, in the original single crochet where you started the color, work another 3-DC cluster.
To finish the color section, work a single crochet into the second stitch up.
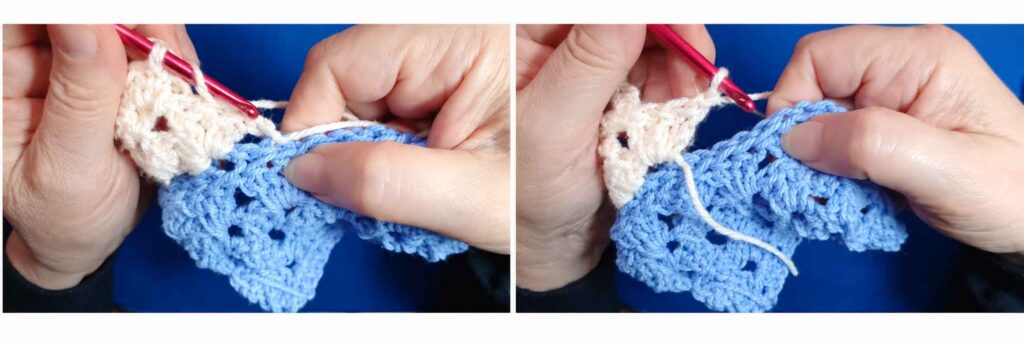
Fasten off and turn your work.
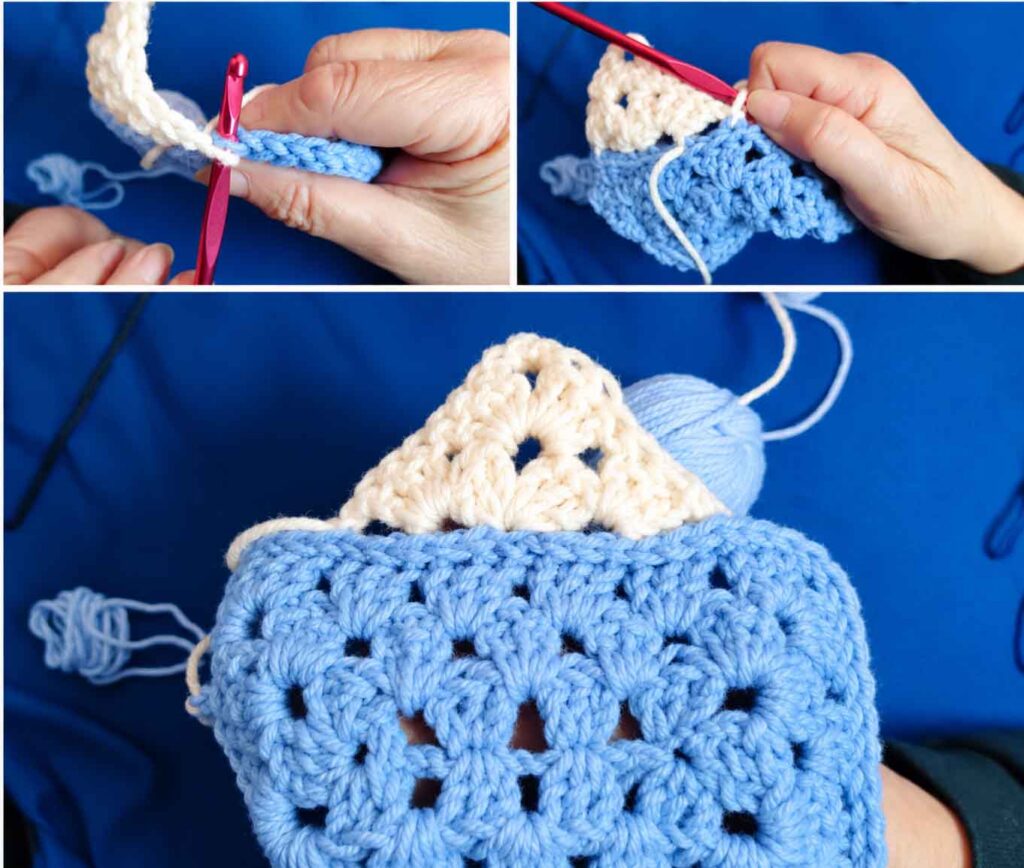
Why Use Single Crochet to Tie Off Colors?
Using single crochet at the beginning and end of a color section helps keep the yarn ends toward the inside of the color change rather than leaving them right along the outer edge.
This makes the ends easier to hide and gives the finished blanket a cleaner appearance.
Row 3
Position your work so you can add the next color.
Slip stitch to the second stitch from the last attachment point on that side.
Chain 1, then work a 3-DC cluster into the single crochet space at the end of the previous color.
Continue working in granny style across the side and around the corner.
When you reach the opposite side, chain 1 and slip stitch to the second chain from the previous attachment.
Chain 3 and work a single crochet into the second stitch from the last slip stitch.
Turn your work.
Continue repeating the same basic process for each row and color until you reach the corners.
Working the Corners
The corner section requires a little more attention than the regular rows, so take your time here.
For Row 8, begin by chaining 3 after completing Row 7.
Instead of attaching immediately to the side, turn your work and use the space from the previous row to continue down.
Complete the cluster that was started with the chain 3.
At the end of the row, don’t tie off or attach yet. Pull out a long loop or secure it temporarily, leaving a tail of approximately 4–5 inches, and cut the yarn.
Turn the work so the front is facing you.
Move to the next side.
At the end of Row 8, chain 1 and slip stitch into the top of the chain 3 from the previous section.
Fasten off and turn your work to the front again.
Move to the next side and repeat the process.
Continue around all four sides.
Finally, use the long tail from the first section to chain 1 and slip stitch to the final side to complete the edge.
Creating the Diamond Effect
The ninth row is where the layered diamond effect really starts to become visible.
Position the center cluster over the corners and conceal the chain-1 space in the same way you would hide a yarn tail.
When connecting the cluster to the corner stitch in the lower color, don’t work around the stitch in the same way you would with a standard granny corner.
Instead, work behind the front loop and use the two middle loops.
This leaves the stitch ridges visible along the inner diamond and creates the layered effect that makes the smaller square appear to sit on top of the larger one.
For the cleanest appearance, you can use the same color for the outer square as you used for the inner square. However, contrasting colors can also look beautiful.
Adding the Next Outer Layer
For each additional layer, follow the same basic process used for the first outer section.
Work the slip-stitch row through the front loops and attach the side connections to the inner loops of that row.
As the square becomes larger, the number of clusters and the side configuration will naturally change.
You can also introduce additional color bands or change the number of rows worked in each color.
If you need one or two additional rows to reach the finished size you want, simply add them.
Don’t be afraid to make small adjustments as you work. Crochet is quite forgiving, and minor changes can usually be incorporated without affecting the overall appearance.
Third Square and Additional Layers
For the third square, repeat the earlier outer-corner construction.
Rows 1–12 follow the same general steps used for the previous outer corner sections.
At Row 12, you will finish tying off the first color in the second round of color changes. This row begins and ends around the middle double crochet of the second-to-last cluster on each side.
For Row 13, introduce the second color with a slip stitch and chain 3. Work toward the inner corner.
At the inner corner, chain 1 and slip stitch into the last cluster.
The pattern then includes an additional connection step worked from the back of the slip stitch before continuing with the next clusters.
Repeat this process around each inner corner.
Continue working the granny clusters and corner sets around the square.
Rows 15–20 introduce additional color changes and follow the same general pattern established in the earlier sections.
Outside Edge
Once the final outer section is complete, the blanket is finished with a Barred Single Crochet edge.
This creates a distinctive two-sided finish that complements the reversible construction of the project.
After completing Row 20 with a slip stitch, chain 1 and turn your work. Working from the back of the project helps keep the appearance of the edge consistent around the entire blanket.
How to Work the Barred Single Crochet
To make the Barred Single Crochet, bring the working yarn forward using the side of your hook.
Insert your hook into the top of the next double crochet.
Bend the handle of your hook down and slightly forward. This helps position the working yarn so you can catch it along the edge of the stitch.
Pull the working yarn through the stitch.
Release the yarn from your thumb.
Yarn over and complete the single crochet as usual.
In simple terms:
- Bring the yarn forward.
- Insert the hook.
- Bend the hook handle forward.
- Catch the working yarn.
- Pull the loop through.
- Release the yarn.
- Yarn over.
- Pull through both loops.
Finish with a slip stitch to the starting chain and fasten off.
Quick Pattern Notes
For easier reference, keep these points in mind while working:
- Even rows: Begin and end with a single crochet.
- Odd rows: Begin and end with a chain 1.
- Row 8: Does not connect to the inner square.
- Outer layers: Continue the same basic construction while adjusting the number of clusters as the square grows.
- Color changes: You can customize the number of rows worked in each color.
- Slip-stitch rows: Work through the front loops as described in the pattern.
- Corners: Use the marked chain-1 spaces to help keep your sections aligned.
Color Ideas for the Squared Diamond Granny Throw
One of the most enjoyable parts of this crochet blanket is choosing the colors.
For a soft and understated blanket, try cream, beige, taupe, dusty blue, or muted green.
If you want the diamonds to really stand out, choose colors with stronger contrast. You could also work from dark in the center toward lighter shades on the outside.
Another option is to use one main color throughout the blanket and introduce just a few contrasting shades for the diamond sections.
There really isn’t a wrong combination. The geometric design gives you plenty of room to experiment.
Squared Diamond Granny Throw Video Tutorial
If you prefer watching the technique while you crochet, the original pattern also includes a video tutorial from the Crafty Chrystal YouTube channel, with versions for both right-handed and left-handed crocheters.
A visual tutorial can be especially helpful when you’re working through the outer corners and the layered diamond connection.
Frequently Asked Questions
How many colors do I need for the Squared Diamond Granny Throw?
The original version uses five colors, with two rows worked in each color. However, you can use as many colors as you like and change the number of rows per color.
What size crochet hook should I use?
The original project uses an I/9 (5.50 mm) hook. You can adjust the hook size according to your yarn, tension, and desired finished size.
Does the pattern need an even number of rows?
Yes. The pattern specifies an even number of rows, such as 4, 6, 8, 10, or 12 rows. The larger outer squares should also finish on an even-numbered row.
Can I make the Squared Diamond Granny Throw larger?
Yes. Additional outer layers and rows can be added to increase the finished size. The source pattern specifically notes that you can add one or two extra rows when needed.
Is this the same as a traditional granny square blanket?
Not quite. The design begins with a traditional granny-style square, but additional layers are built around it to create the distinctive diamond and square effect.
Why do I need to turn my work?
Turning your work at the end of each row helps keep the appearance of the inner square and outer corners consistent.
Final Thoughts
The Squared Diamond Granny Throw is a beautiful way to take a familiar granny-square technique and turn it into something much more eye-catching.
The design has plenty of room for creativity, especially when it comes to color. You can follow the original five-color arrangement or use your own favorite combination to make the blanket feel completely personal.
The outer sections and corners may take a little patience at first, but once you understand how the pieces connect, the pattern becomes much easier to follow.
And don’t worry if you need to make a small adjustment along the way. Crochet projects rarely have to be absolutely perfect to turn out beautiful.
So grab your favorite yarn, pick up your crochet hook, and give this Squared Diamond Granny Throw crochet pattern a try. Watching the smaller square develop into those layered diamond shapes is one of the most satisfying parts of the whole project.
Happy crocheting!

