

 soofha
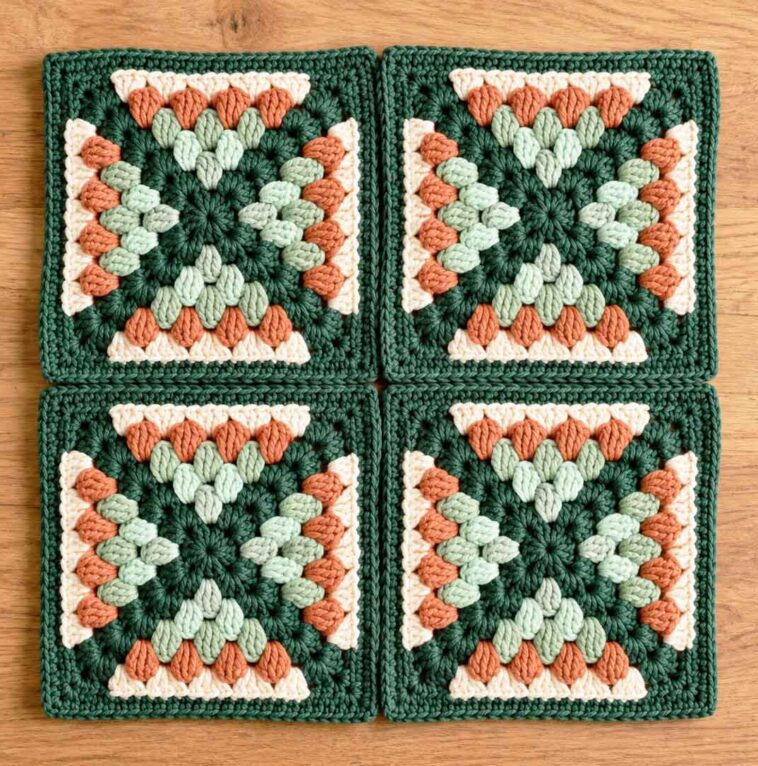
Welcome to Soofha! I’m so glad you’re here. Today, we’re taking a closer look at a beautiful and easy crochet square that caught my eye because of its lovely colors and textured puff stitches. The design features four colorful triangular sections, separated by contrasting stitches that give the motif a neat, balanced look.
What I love most about this crochet square is how a simple combination of colors and stitches can create something so eye-catching. Soft pinks and pastel shades give it a delicate appearance, while deeper colors make the raised puff stitches stand out beautifully.
If you enjoy making crochet squares for blankets, cushions, or other handmade projects, this design is definitely worth trying. The stitch pattern may look complicated at first, but taking it one section at a time makes the process much easier.
In this tutorial, we’ll look at the materials you’ll need, the basic stitches, how the colorful sections develop, and a few helpful tips for following the video demonstration.
Why You’ll Love This Beautiful Crochet Square
There is something special about a crochet motif that combines simple stitches with interesting texture. This square uses familiar double crochet stitches alongside raised puff stitches to create a design that looks much more detailed than its basic construction might suggest.
Here are a few reasons to give it a try:
- Beautiful texture: The puff stitches add dimension and make each colored section stand out.
- Lovely color combinations: You can use soft pastels, bold shades, or colors left over from other projects.
- Versatile design: Finished squares can be used for blankets, cushion covers, decorative mats, and other crochet creations.
- A rewarding project: Working through one square helps you become more comfortable with color changes and stitch placement.
If you’re still learning, don’t worry about making the first square perfect. Focus on understanding the construction, and the next one will usually feel much more manageable.
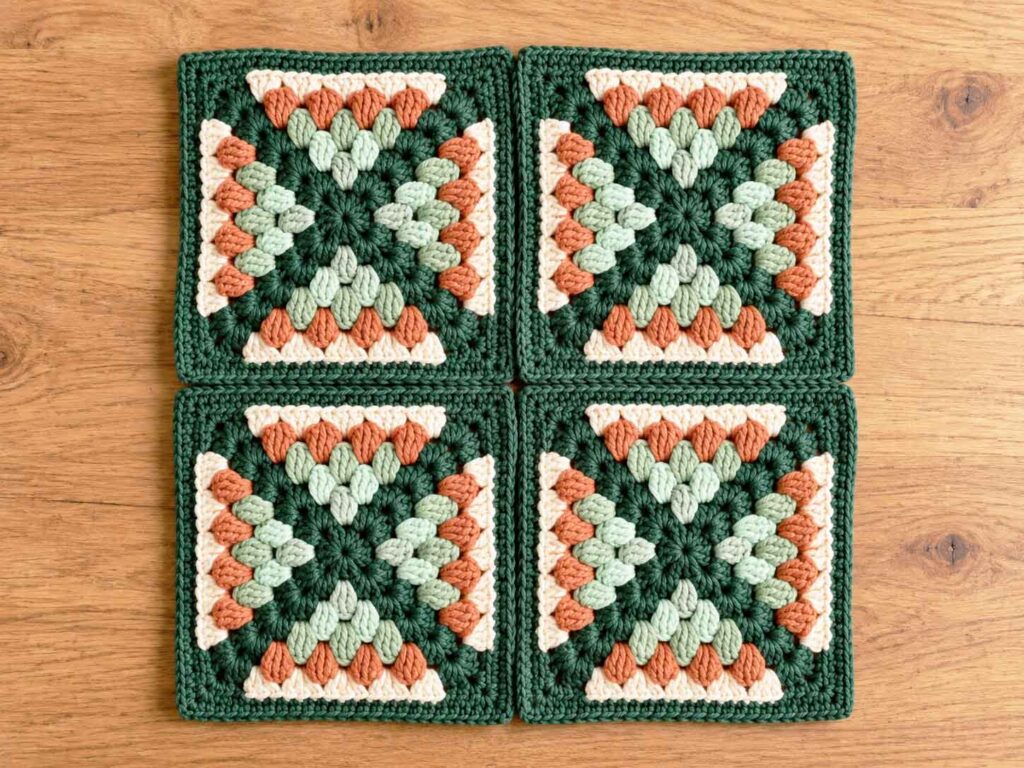
Materials You’ll Need
Before starting, gather your supplies and arrange your yarn colors so you can see how they look together.
- Several shades of baby yarn in coordinating colors
- A background color for the center and contrasting sections
- A crochet hook suitable for your chosen yarn
- Scissors
- A tapestry needle for weaving in the ends
- Removable stitch markers to identify the corners
The original demonstration uses several shades of baby yarn and a 2 mm crochet hook. However, the best hook size depends on the thickness of your yarn and your personal tension, so check the yarn label before beginning.
You can use the same color palette as the sample or create your own version. Pale pink, dusty rose, and cream give the square a soft, romantic look. Teal, blue, and white create a cooler combination, while brighter shades make the puff stitches the main attraction.
My tip: Lay all your yarn colors beside one another before you begin. Sometimes a small change in color order makes a surprisingly big difference to the finished design.
Understanding the Crochet Stitches
This pattern uses a combination of basic stitches and puff stitches. If you’re familiar with double crochet, you’ll already have a good starting point.
The following abbreviations use US crochet terminology.
- ch: Chain
- sl st: Slip stitch
- sc: Single crochet
- dc: Double crochet
- tr: Treble crochet
- st: Stitch
- sp: Space
A chain space is the opening created by working chain stitches. For example, a ch-3 space is the gap beneath three chain stitches.
The original video tutorial is in Turkish, so some stitch names or instructions may differ from the terminology you’re used to. Pay particular attention to the movement of the hook, the location of each stitch, and the way the colors are changed.
How to Make a Crochet Puff Stitch
The raised puff stitches give this square its distinctive appearance. They create a soft, dimensional texture that contrasts beautifully with the flatter double crochet sections.
To practice the puff stitch, follow these steps:
- Begin with one loop on your hook.
- Yarn over and insert the hook into the designated stitch or space.
- Yarn over again and pull up a loop to the same height as the others.
- Repeat the yarn-over and pull-up movement three more times in the same location.
- You should now have nine loops on your hook.
- Yarn over and pull through all nine loops.
- Work one chain to secure the puff.
Keep your loops at a similar height so the finished puff looks even. If the loops are too tight, pulling through all nine can be difficult. If they’re too loose or uneven, the puff may look untidy.
Try making a few practice stitches with leftover yarn before beginning the square. Once you get used to the movement, it becomes easier to maintain a consistent texture.
Remember that the chain used to close the puff is not necessarily the same as a chain used to create a space or change colors. Watch the demonstration carefully so you don’t accidentally add extra chains.
How the Beautiful Crochet Square Is Constructed
The square begins in the center and gradually grows outward. Four groups of double crochet stitches and their corner openings establish the basic shape.
As the work develops, the background color forms the corner sections while colorful puff stitches fill the areas between them. These contrasting sections create the triangular arrangement that makes the motif so attractive.
The demonstration shows the puff sections growing with each round:
- First section: One puff stitch per side
- Second section: Two puff stitches per side
- Third section: Three puff stitches per side
- Fourth section: Four puff stitches per side
Across all four sides, these stages correspond to 4, 8, 12, and 16 puff stitches, respectively. These numbers are useful checkpoints when following the video, rather than complete stitch counts for the entire rounds.
The placement of the stitches is just as important as the number of puffs. The first colored puff stitches are anchored into the middle stitch of the center groups. As the square grows, the next stitches are placed into the spaces beside and between the existing puffs.
Following those spaces carefully helps the colored sections expand evenly into triangular shapes.
The final section changes from puff stitches to taller stitches to complete the outer edge. Follow the video for the exact placement and corner construction, as the available instructions do not establish a fully verified written count for every round.
Step-by-Step Tips for Following the Video Tutorial
Step 1: Work the Center
Begin with your background yarn and follow the demonstration as the center ring, double crochet groups, and corner spaces are formed.
Use stitch markers to identify the four corners. These openings will help you keep track of the square as you add more rounds.
Before moving on, lay the work flat and check that the center looks balanced.
Step 2: Add the First Colorful Puff Stitches
Pay close attention when the first puff stitches are introduced. Notice exactly where the hook enters the fabric and how the yarn changes from one color to another.
Complete one side before moving to the next. This gives you a chance to check the stitch placement and make sure the first colored section sits correctly between the corners.
If something looks uneven, it’s easier to correct it now than after several more rounds.
Step 3: Expand the Triangular Sections
As you continue, the puff sections become wider. Look for the spaces at the edges of the previous colored section and use the demonstration to identify where the next puffs belong.
Count the puff stitches on each side before moving to the next round. Keeping the four sections consistent will help the square maintain its shape.
Don’t rush this part. A missing puff or an incorrect insertion point can affect the spacing in the following round.
Step 4: Manage Your Yarn During Color Changes
Colorwork can take a little practice, especially when several shades are used within the same motif.
Follow the demonstration to see how the unused yarn is carried along the work. Keep the carried strand relaxed rather than pulling it tightly around a corner.
A tight strand can make the fabric pucker, while excessive slack may leave unwanted loops on the back. Check the reverse side occasionally and adjust the tension as needed.
Step 5: Complete the Outer Edge
The finishing section uses taller stitches rather than simply continuing the puff stitch pattern.
Watch this part of the video before starting it yourself. Pay attention to the transition between the final puff stitches, the spaces between them, and the stitches that form the corners.
The outer edge helps define the finished square, so accurate placement is important.
Step 6: Weave in the Ends and Shape Your Square
Once you’ve finished crocheting, cut the yarn and secure the final loop. Use a tapestry needle to weave the loose ends through several stitches, changing direction to help keep them secure.
If the square looks slightly uneven, blocking may help. Follow the care instructions for your yarn and shape the motif gently, keeping the sides and corners as even as possible.
Allow it to dry completely before measuring it or joining it to other squares.
Video Tutorial: Beautiful and Easy Crochet Square
The original video is especially helpful for seeing the stitch placement and color changes. Because the complete round-by-round written instructions and stitch counts have not been independently verified, use the demonstration as your main guide for the exact construction.
Take your time, pause whenever you need a closer look, and replay any section that feels confusing. Working one complete square before making a whole set is a great way to become familiar with the design.
Helpful Video Timestamps
The following timestamps are approximate and refer to the original demonstration:
- 0:34: Beginning the center
- 2:55: First colorful puff section
- 6:55: Introducing the next color and expanding the design
- 10:32: Continuing the puff stitch arrangement
- 13:51: Further development of the square
- 17:20: Beginning the finishing section
Video timings may vary slightly depending on playback. If the tutorial doesn’t match your progress exactly, pause and compare the stitch placement rather than relying only on the timestamp.
What Can You Make With These Crochet Squares?
One of the nicest things about crochet squares is how many ways you can use them. Once you’ve made a sample and are happy with its size, you can start planning a larger project.
Crochet Blanket
Make several squares using the same background color for a coordinated look. You can keep the puff stitches in the same color order or vary the shades to create a more playful design.
Before making a large batch, block one square and measure it. Use that finished measurement to estimate how many motifs you’ll need for your desired blanket dimensions.
Cushion Cover
A colorful square can become a lovely feature on a handmade cushion. Make enough motifs to cover the front, then choose a simple backing that doesn’t compete with the raised stitches.
Decorative Mat
A single square can also be used as a decorative accent for a table or another suitable surface. Choose yarn that fits the intended use and follow its care instructions.
A Handmade Gift
These squares can be a thoughtful starting point for a handmade gift. Choose colors that suit the recipient and turn your finished motifs into something practical and personal.
Tips for Joining Your Crochet Squares
If you plan to make a blanket or cushion cover, finish at least two squares before choosing your joining method.
Place the squares side by side on a flat surface and compare their dimensions. Make sure the edges line up without stretching the fabric.
You can test a short section of your chosen seam before joining the entire piece. Take care not to pull the edges too tightly or flatten the raised puff stitches more than necessary.
For a coordinated finish, keep the background color consistent throughout your project. You can then experiment with different puff stitch colors while maintaining a unified appearance.
It’s also helpful to photograph your chosen color arrangement and write down the yarn shades you used. That way, you can easily recreate the same combination if you take a break between squares.
Frequently Asked Questions
Is this crochet square suitable for beginners?
It can be a good learning project for crocheters who already know the basic stitches. Beginners may need extra practice with puff stitches, color changes, and working into specific spaces. Following the video one section at a time can make the process easier.
What yarn and hook should I use?
The original demonstration uses baby yarn and a 2 mm hook. Check the label on your own yarn and select a compatible hook. Your finished square may differ in size from the sample if you use a different yarn or tension.
Can I use different colors?
Absolutely! This design is a lovely opportunity to experiment with color. Pastel shades create a gentle look, while bold or contrasting colors make the raised stitches stand out.
Can I use these squares to make a blanket?
Yes. Make and measure one completed square first, then use its blocked dimensions to plan the blanket. Remember to allow for the joining seams and any border you intend to add.
Why does my crochet square curl or look uneven?
Curling or uneven edges can result from inconsistent tension, missed stitches, or incorrect placement around the corners. Check your stitch placement and compare each side as you work. Gentle blocking may help with minor irregularities, but it won’t correct missing stitches or a construction error.
Is there a complete written pattern for this square?
This article explains the materials, stitches, construction, and general working process. It does not provide a fully verified round-by-round pattern with every stitch count. For the exact sequence, follow the original video demonstration.
Final Thoughts
This beautiful and easy crochet square is a lovely example of how simple stitches can create an interesting design when texture and color are combined. The raised puff stitches give each section depth, while the contrasting background helps the colorful triangles stand out.
Take your time with the first square, especially when working the corners and changing colors. Once you understand how the sections grow, you’ll have a much better idea of how to keep the remaining squares consistent.
At Soofha, I love sharing crochet ideas that inspire you to pick up your hook and try something new. I hope this colorful motif gives you a little inspiration for your next handmade project.
Have you tried making crochet squares with puff stitches? I’d love to hear which colors you’d choose and whether you’d turn this design into a blanket, a cushion, or something completely different. Share your ideas in the comments!
Happy crocheting!

