

 soofha
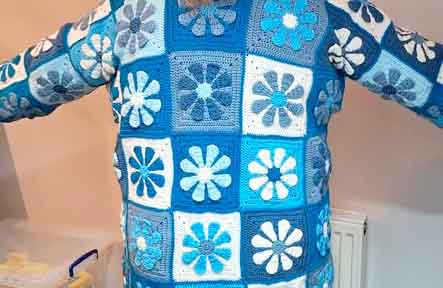
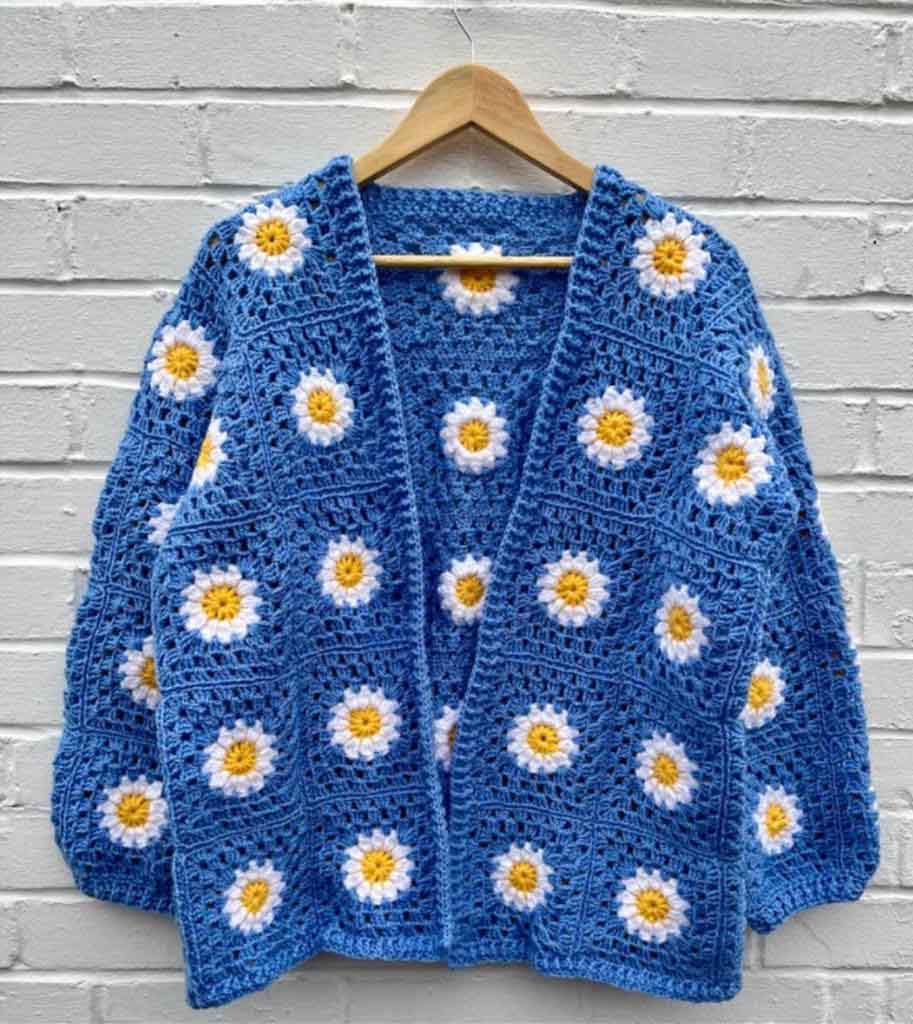
There is something special about a handmade cardigan covered in colorful crochet flowers. This beautiful granny square cardigan combines shades of blue, turquoise, white, and navy to create a floral jacket that feels both cozy and eye-catching. The raised 3D daisy motifs give each square extra texture, while the classic granny square construction makes it a wonderful project for anyone who enjoys joining colorful crochet pieces together.
Whether you want to make a cardigan for yourself, create a thoughtful handmade gift, or use up some of your favorite yarn colors, this floral design is full of possibilities. You can keep the original blue color palette or choose soft pastels, warm autumn shades, or cheerful pinks to make it your own.
Please note: The photograph shows the finished cardigan, not a verified original pattern. The instructions below are an adaptable pattern-style guide for recreating a similar design. Exact stitch counts and sizing may need adjustment to suit your measurements and gauge.
What Makes This Crochet Daisy Cardigan Special?
The charm of this cardigan comes from its combination of traditional crochet techniques and dimensional floral details.
-
3D daisy granny squares: Raised flower centers and textured petals give the motifs a lovely handmade appearance.
-
Beautiful blue color palette: Navy, royal blue, turquoise, pale blue, and white work together to create contrast.
-
Classic open-front design: The cardigan can be worn over a T-shirt, blouse, or lightweight sweater.
-
Comfortable long sleeves: The square-based construction makes it possible to adjust sleeve length and width.
-
Customizable fit: You can add or remove squares to make the cardigan shorter, longer, or wider.
Materials You Will Need
Yarn
-
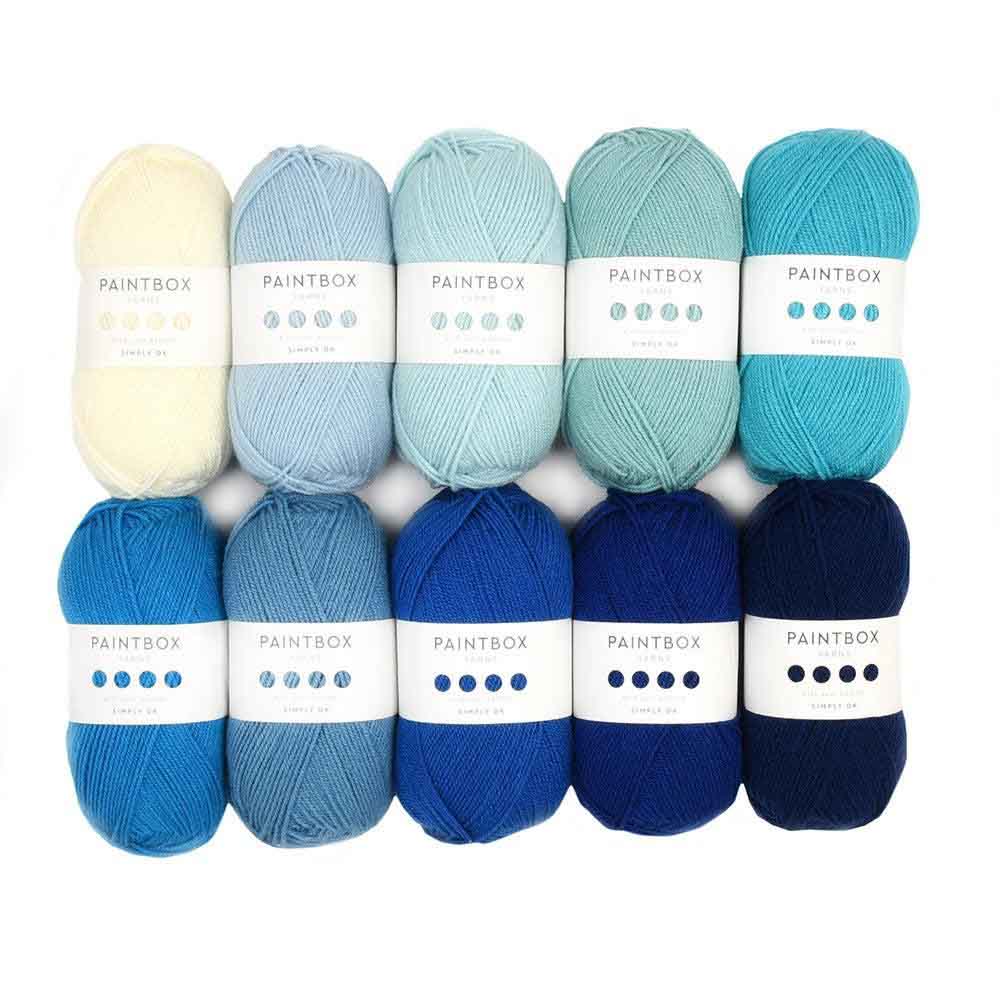
Medium-weight yarn, such as worsted-weight yarn
-
Navy blue for the borders and edging
-
Royal blue and turquoise
-
White and pale blue for the daisy petals
-
A small amount of yellow or another contrasting color for flower centers, if desired
"use strict";
var adace_load_6ad1ae9a26b56 = function(){
var viewport = $(window).width();
var tabletStart = 601;
var landscapeStart = 801;
var tabletEnd = 961;
var content = '%3Cdiv%20class%3D%22adace_adsense_6ad1ae9a26a20%22%3E%3Cscript%20async%20src%3D%22%2F%2Fpagead2.googlesyndication.com%2Fpagead%2Fjs%2Fadsbygoogle.js%22%3E%3C%2Fscript%3E%0A%09%09%3Cins%20class%3D%22adsbygoogle%22%0A%09%09style%3D%22display%3Ablock%3B%22%0A%09%09data-ad-client%3D%22ca-pub-2805240993257385%22%0A%09%09data-ad-slot%3D%223220898588%22%0A%09%09data-ad-format%3D%22auto%22%0A%09%09%3E%3C%2Fins%3E%0A%09%09%3Cscript%3E%28adsbygoogle%20%3D%20window.adsbygoogle%20%7C%7C%20%5B%5D%29.push%28%7B%7D%29%3B%3C%2Fscript%3E%3C%2Fdiv%3E';
var unpack = true;
if(viewport
})(jQuery);
Tools and accessories
-
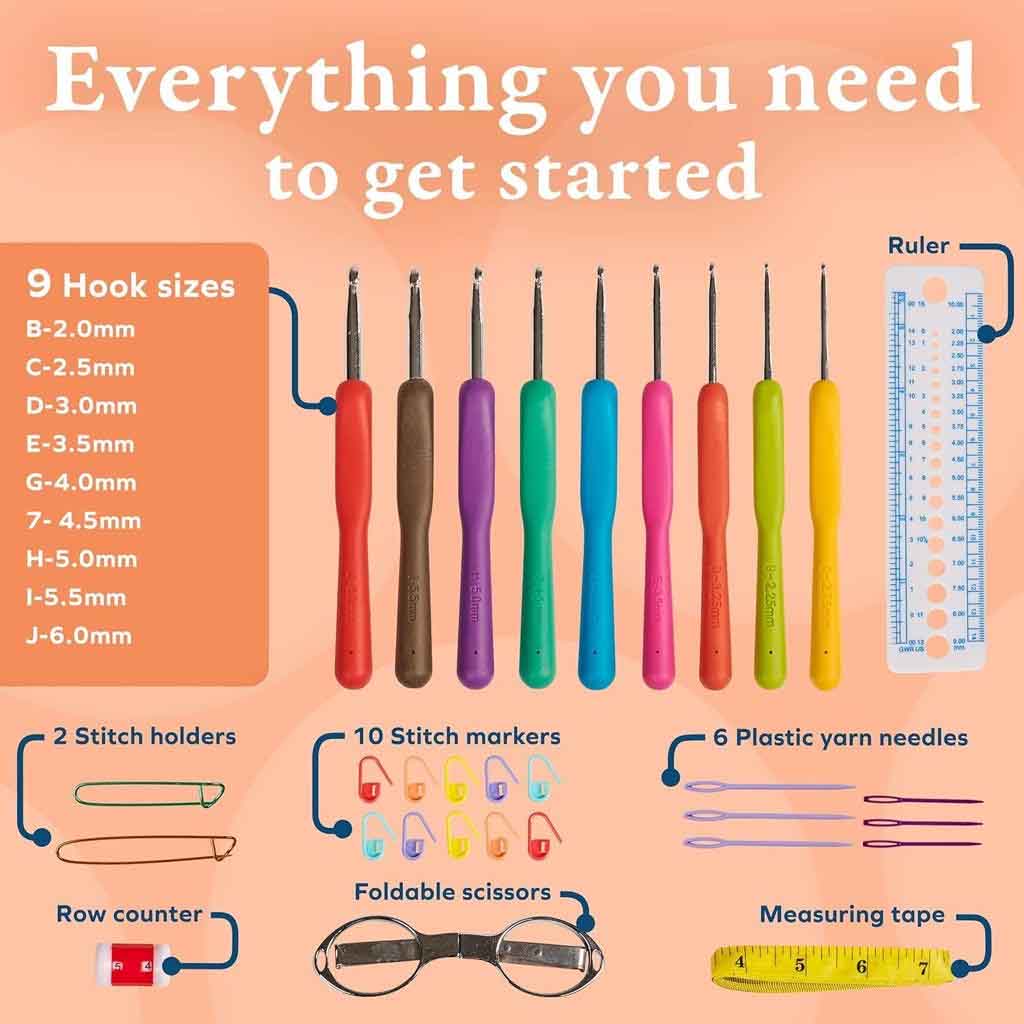
5 mm crochet hook, or the size needed for your yarn
-
Yarn needle
-
Scissors
-
Measuring tape
-
Stitch markers
Choose a yarn that feels comfortable against your skin. Acrylic yarn is an affordable, easy-care choice, while a soft wool blend can provide extra warmth.
Crochet Abbreviations
The following abbreviations use standard US crochet terminology.
| Abbreviation | Meaning |
|---|---|
| ch | Chain |
| sl st | Slip stitch |
| sc | Single crochet |
| hdc | Half double crochet |
| dc | Double crochet |
| tr | Treble crochet |
| st(s) | Stitch(es) |
| sp | Space |
| rnd | Round |
| rep | Repeat |
Special stitch: A 3D daisy petal can be made using a cluster of stitches worked into the same space. This creates the raised flower effect.
How to Crochet a 3D Daisy Granny Square
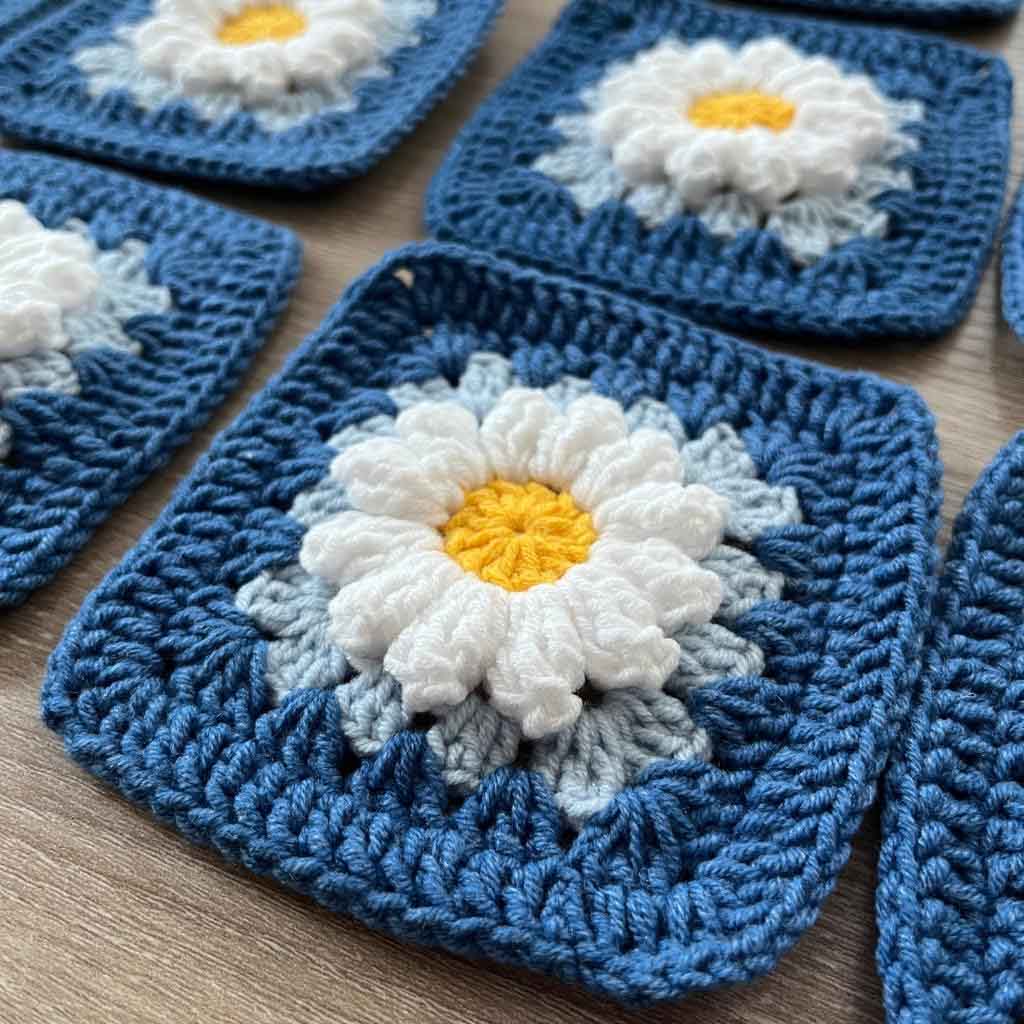
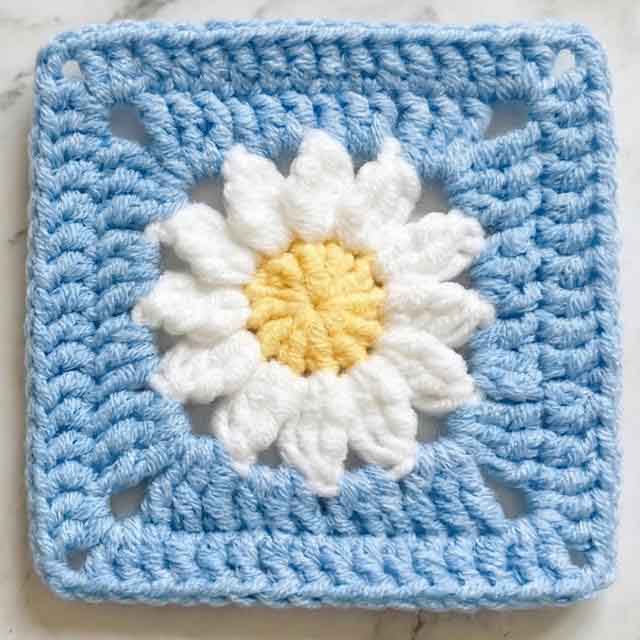
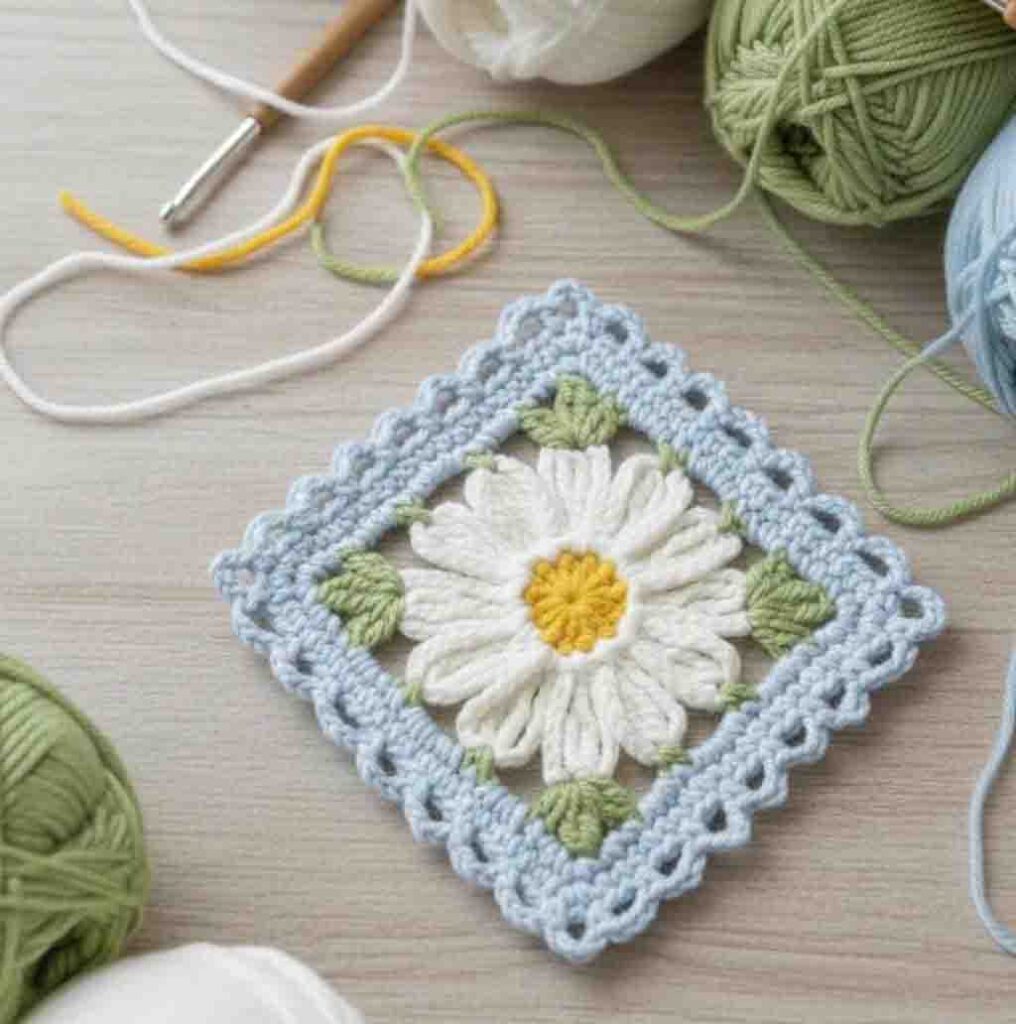
For a cardigan similar to the photograph, make floral squares with white or pale-blue petals and different shades of blue around the flowers. A dark navy border helps the finished garment look coordinated.
Step 1: Make the Flower Center
With your chosen center color, make a magic ring.
-
Chain 1.
-
Work 12 single crochet stitches into the ring.
-
Pull the ring closed and join with a slip stitch to the first single crochet.
-
Fasten off if you want to change colors.
You should now have a small, firm circle for the middle of your daisy.
Step 2: Crochet the Raised Petals
Attach white yarn to a stitch in the center.
For a simple raised petal, work the following into the same stitch:
-
Chain 2.
-
Work 2 double crochet stitches.
-
Chain 2.
-
Slip stitch into the same stitch.
Repeat around the flower center, spacing the petals evenly. Depending on the size of your center and the look you prefer, you may need to adjust the number of petals or the stitches in each petal.
This creates a textured flower. For a fuller, puffier daisy, use a puff-stitch or cluster-style petal instead.
Step 3: Turn the Flower Into a Square
Attach a contrasting blue yarn in a space between two petals.
-
Chain 3 to count as the first double crochet.
-
Work double crochet stitches around the flower, using the spaces between petals to form the corners.
-
At each corner, work a corner group of 3 double crochet stitches, chain 2, and 3 double crochet stitches into the same corner space.
-
Work along each side with evenly spaced double crochet groups.
-
Join the round with a slip stitch.
If the square still looks rounded, add another round of double crochet groups, keeping the four corners consistent.
Step 4: Add the Final Border
Use navy blue or another dark shade for the last round.
Work double crochet groups along the sides and the usual corner groups at each corner. Finish with a slip stitch and fasten off.
Measure your square and make sure all your motifs are approximately the same size. Consistent squares make joining much easier.
Planning the Cardigan Size
Before making all your motifs, decide how long and wide you want the cardigan to be. The number of squares depends on the finished size of each motif and the wearer’s measurements.
| Area | How to plan it |
|---|---|
| Back | Arrange squares in a rectangle wide enough for the back |
| Front panels | Make two separate panels, allowing room for the open front |
| Sleeves | Join squares into two tubes or rectangular sleeve panels |
| Cuffs | Add a few rounds of single crochet or ribbed crochet |
| Lower hem | Add a border to create a neat, finished edge |
For a larger cardigan, use more squares or make each square bigger. For a shorter jacket, reduce the number of rows in the body.
Helpful tip: Lay your squares out on a flat surface before joining them. This allows you to balance the colors and avoid placing too many identical motifs together.
How to Assemble the Cardigan
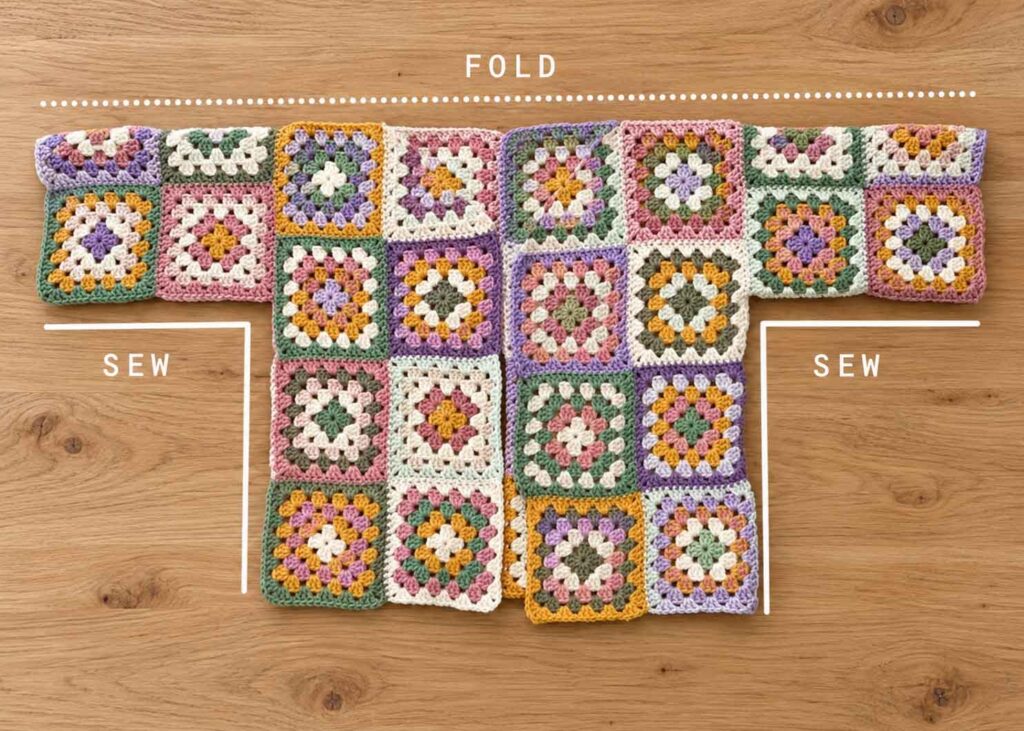
Once all your squares are finished, block them gently if your yarn allows it. Blocking helps even out the edges and makes the finished garment look neater.
1. Join the Back Panel
Arrange the squares into the rectangle you planned for the back. Join them using a slip-stitch seam, mattress stitch, or another joining method you prefer.
Try to keep the seams even without pulling the yarn too tightly.
2. Create the Front Panels
Make two panels using the same square arrangement, leaving the center open. The front panels should align with the back at the shoulders and sides.
If you want a more fitted appearance, you can adjust the panel width or add a narrow edging along the opening.
3. Join the Shoulders
Place the front panels against the back panel, with the right sides facing as desired. Join the shoulder edges, leaving enough room for the neckline.
Try the cardigan against your body or compare it with a well-fitting jacket before finishing the seams.
4. Attach the Sleeves
Join the sleeve squares into rectangular panels or tubes, depending on your layout. Sew or crochet the sleeve seams, then attach each sleeve to the body.
Make sure the sleeve seams line up with the body seams where possible. This gives the cardigan a cleaner finish.
5. Finish the Cuffs and Hem
Work several rounds of single crochet around the sleeve openings and lower edge if you want a simple border.
For a more structured finish, alternate front-post and back-post double crochet stitches to create ribbing. Keep the tension comfortable so the cuffs and hem do not become too tight.
6. Add the Front Edging
Attach navy yarn along one front edge, around the neckline if desired, and down the other front edge.
Work even rows of single crochet or half double crochet until the edging looks balanced. You can make it narrow and simple or wider for a more defined frame.
Weave in all loose ends carefully.
Color Combinations to Try
Blue Daisy Classic
Navy, royal blue, turquoise, pale blue, and white. This combination stays close to the inspiration cardigan and gives each flower a crisp outline.
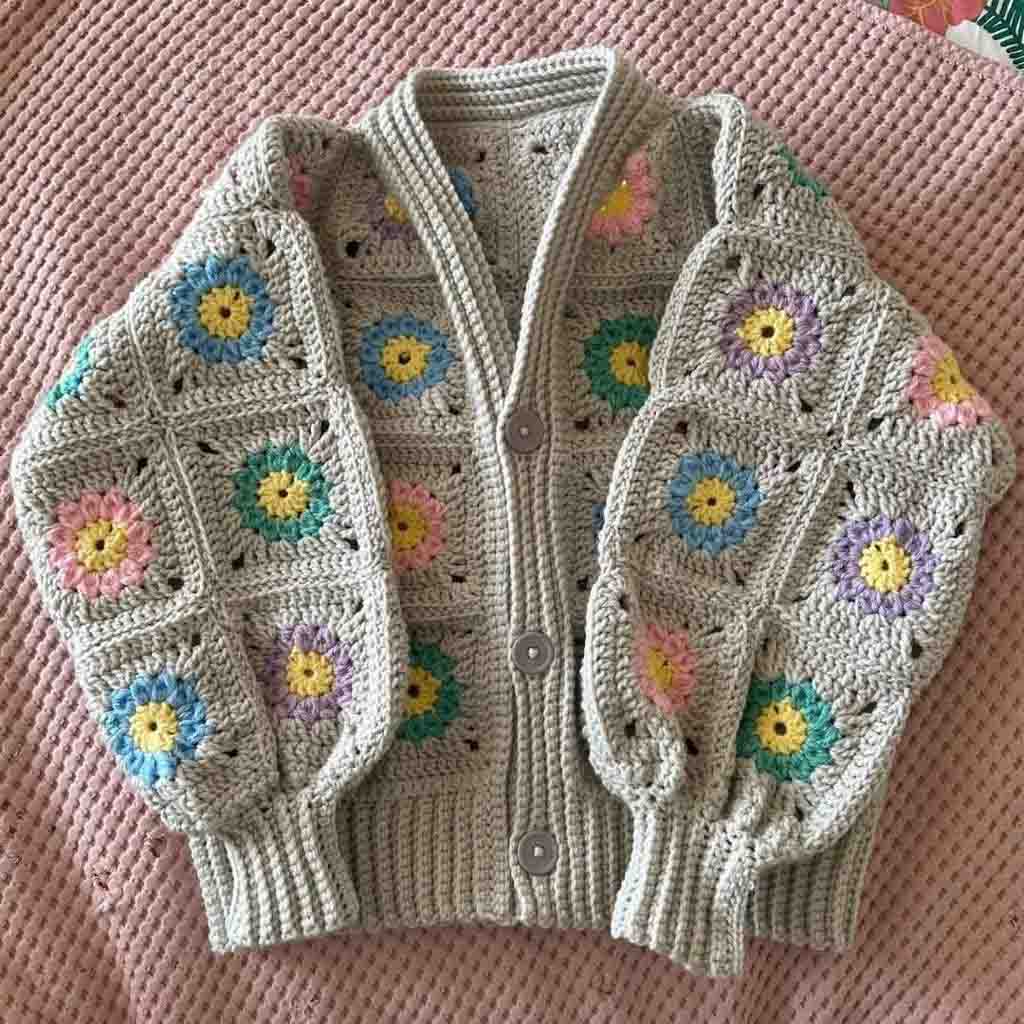
Soft Pastels
Blush pink, lavender, cream, and soft lilac create a gentle, romantic look that works beautifully for spring.
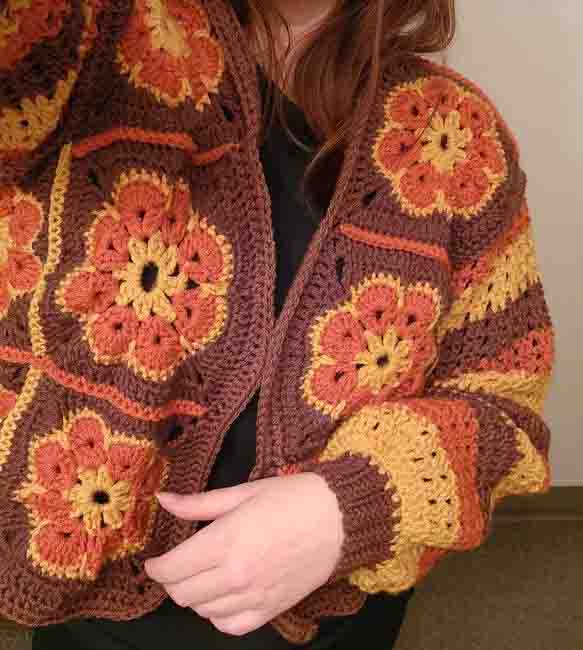
Warm Autumn Flowers
Rust, mustard, cream, and chocolate brown create a cozy cardigan that pairs well with jeans and neutral outfits.
DOWNLOAD CROCHET GRANNY SQUARE CARDIGAN PDF
Tips for a Better Finished Cardigan
-
Check your gauge: Make two or three squares first and measure them before planning the full garment.
-
Keep the motifs consistent: Use the same stitch counts and hook size for every square.
-
Watch the color balance: Spread the darkest squares throughout the design rather than grouping them all in one area.
-
Try it on as you go: Check the body width, sleeve length, and overall length before sewing everything together.
-
Secure your ends: Weave in loose yarn ends in several directions to help prevent them from working free.
-
Care for the yarn properly: Follow the care label and test your washing method on a sample if you’re unsure.
Frequently Asked Questions
Is this cardigan suitable for beginners?
It can be a good project for a confident beginner who knows basic crochet stitches, can follow a granny square pattern, and is comfortable joining motifs. The raised flower centers and garment assembly may require a little practice.
Can I make the cardigan in different sizes?
Yes. The easiest approach is to measure the wearer, calculate the dimensions of your finished squares, and adjust the number of squares in the back, front panels, and sleeves.
What yarn works best for a floral granny square cardigan?
Medium-weight acrylic yarn is a practical choice because it is widely available and comes in many colors. A soft wool blend can also work well if you prefer a warmer garment.
How can I make the daisy flowers stand out?
Use a contrasting color for the petals and work them in a raised cluster or puff-style stitch. A darker border around each square can make the flower motifs stand out even more.
Can I sell a cardigan made using this guide?
You can generally sell your own handmade finished items, subject to applicable laws and the terms of any pattern you use. If you adapt another designer’s pattern, check their specific conditions and do not claim their original design as your own.
Final Thoughts
A 3D daisy granny square cardigan is a lovely way to turn simple crochet motifs into something you can wear and enjoy for years. The combination of raised flowers, colorful squares, and a classic open-front shape gives the jacket plenty of personality.
Take your time choosing the colors, make a few test squares, and arrange the motifs until you love the overall look. The best part is that you can make the cardigan completely your own, from the flower colors to the sleeve length and final edging.
Pattern note: This is an original, adaptable construction guide inspired by the photograph, not a stitch-for-stitch reconstruction of the pictured cardigan. Exact yarn quantities, finished measurements, and a tested square layout would be needed for a fully specified, size-graded pattern.

