

 soofha
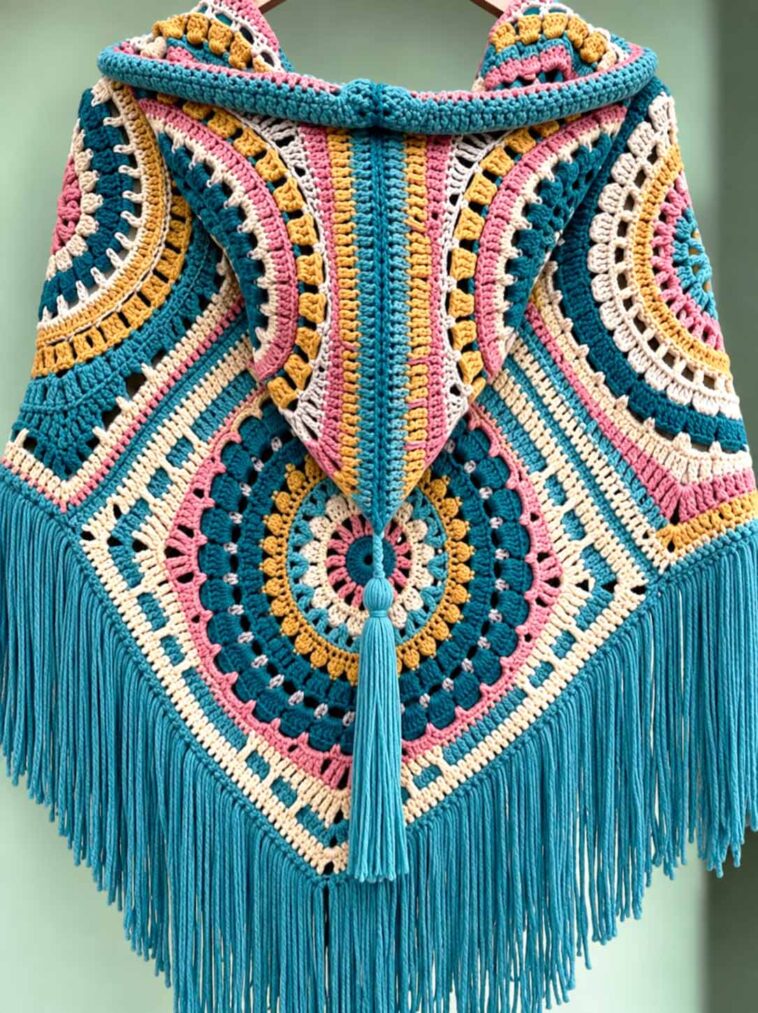
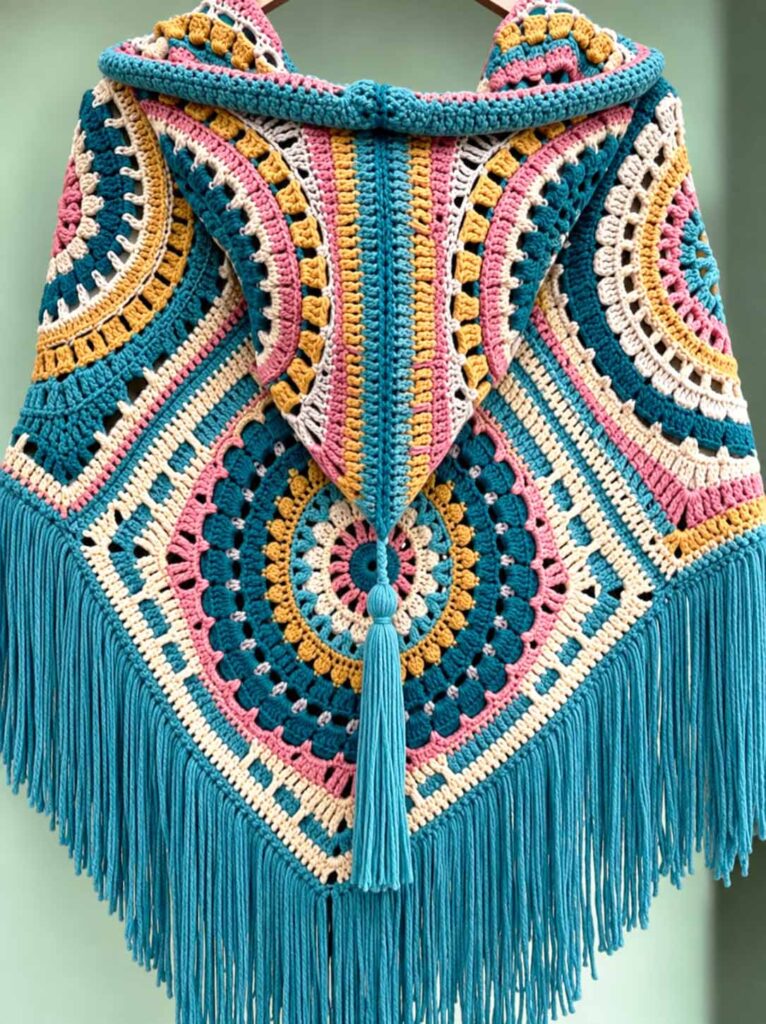
A cozy hooded poncho is a wonderful addition to any handmade wardrobe. Warm, comfortable, and easy to style, it is perfect for cool mornings, crisp evenings, or adding an extra layer when the weather gets chilly. This beautiful design combines several interesting stitches to create lovely texture and dimension, while the hood adds an extra touch of warmth and comfort.
This crochet poncho is a great project for adventurous beginners who are ready to experiment with a variety of stitches. It is also an enjoyable make for experienced crocheters who want a relaxing project with an eye-catching finished result. Choose a soft neutral shade for a classic everyday accessory, or use several bright colors to create a fun and colorful statement piece.
A handmade hooded poncho also makes a thoughtful gift for family and friends. The repetitive stitch patterns create a soothing crochet rhythm, making this project enjoyable to work on while you watch the fabric gradually grow into a beautiful wearable garment. Once finished, you’ll have a versatile piece that can be dressed up or worn casually throughout the cooler seasons.
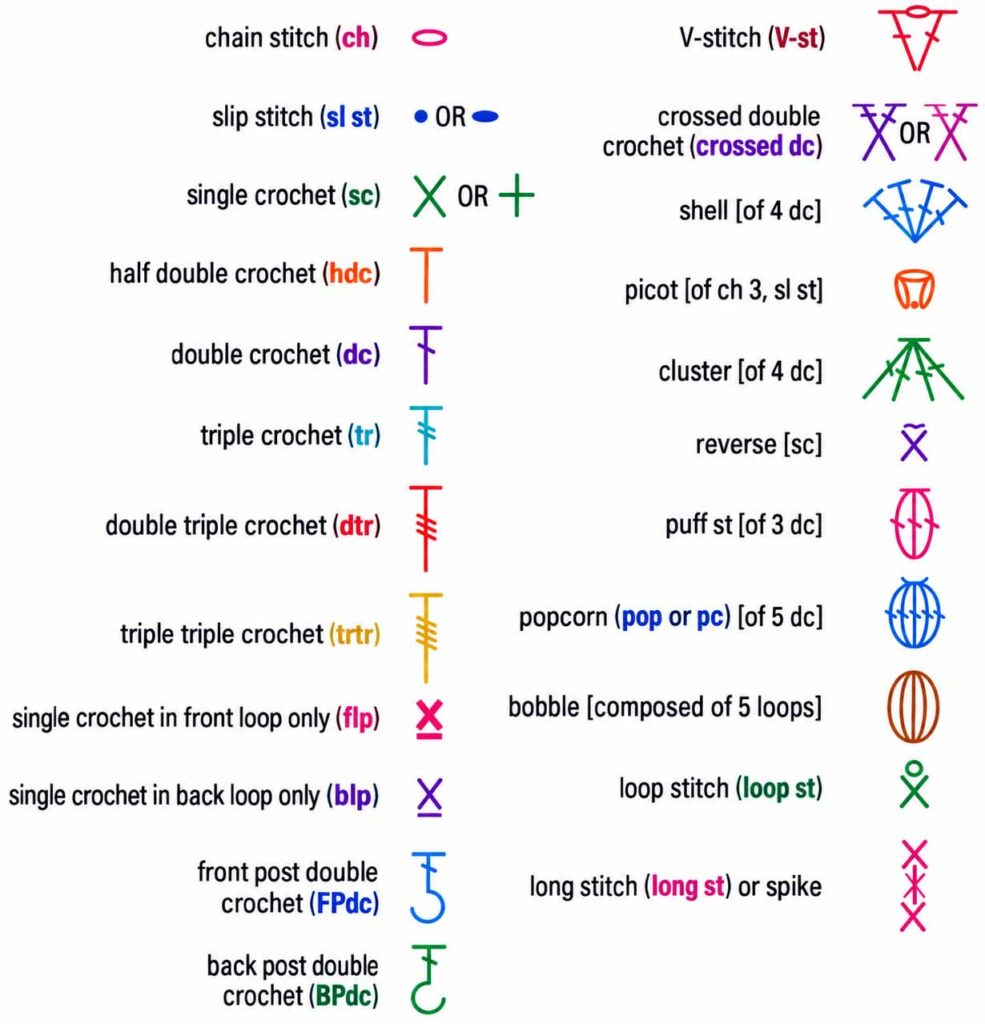
Abbreviations
- Ch – Chain
- Hdc – Half double crochet
- DC – Double crochet
- Tr – Triple crochet
- St(s) – Stitch(es)
- Sl st – Slip stitch
- Sk a st – Skip a stitch
- Sp(s) – Space(s)
- Repeat – Repeat the instructions shown in parentheses
- Numbers at the end of each round indicate the stitch and space counts.
Pattern Instructions
Foundation
Chain 7, then slip stitch into the first chain to form a small ring.
Round 1
Chain 3 (does not count as a stitch), then work 24 tr around the ring. Slip stitch into the top of the first tr to join.
24 tr
Round 2
Chain 7 (counts as 1 dc and ch-4), skip the next stitch, (dc in the next stitch, ch 4, skip the next stitch). Repeat the sequence around.
Finish with ch 4, skip the final stitch, and slip stitch into the 3rd chain of the beginning ch 7.
12 dc, 12 ch-4 spaces
Round 3
Slip stitch into the first ch-4 space. Chain 3 (counts as dc), then work 4 dc into the same space. Chain 1.
(Work 5 dc into the next ch-4 space, ch 1) and repeat around.
Finish with ch 1 and slip stitch into the 3rd chain of the beginning ch 3.
60 dc, 12 ch-1 spaces
Round 4
Chain 6 (counts as tr and ch 2), tr in the next ch-1 space, then ch 4.
(Tr in the same ch-4 space, ch 2, tr in the next ch-1 space). Repeat around until reaching the final ch-1 space.
Work ch 4, tr in the same ch-1 space, ch 2, then tr in the ch-1 space before the beginning ch 6. Chain 4 and slip stitch into the 4th chain of the beginning ch 6.
24 tr, 12 ch-4 spaces, 12 ch-2 spaces
Round 5
Slip stitch into the first ch-2 space. Chain 3 (counts as dc), then work 2 dc into the same space. Chain 1.
Work 4 dc in the next ch-4 space, ch 1.
(3 dc in the next ch-2 space, ch 1, 4 dc in the next ch-4 space, ch 1). Repeat around.
Slip stitch into the 3rd chain of the beginning ch 3.
84 dc, 24 ch-1 spaces
Round 6
Slip stitch into the previous chain space. Chain 7 (counts as dc and ch 4).
(Dc in the next ch-1 space, ch 4) and repeat around.
Slip stitch into the 3rd chain of the beginning ch 3.
24 ch-4 spaces, 24 dc
Round 7
Slip stitch into the first ch-4 space. Chain 3 (counts as dc), then work 4 dc into the same space. Chain 1.
(5 dc in the next ch-4 space, ch 1). Repeat around.
Slip stitch into the 3rd chain of the beginning ch 3.
120 dc, 24 ch-1 spaces
Round 8
Slip stitch into the previous ch-1 space. Chain 1 (does not count as a stitch), then work sc in the same space.
Chain 5.
(Sc in the next ch-1 space, ch 5). Repeat around.
Slip stitch into the top of the beginning sc.
24 sc, 24 ch-5 spaces
Round 9
Slip stitch into the first ch-5 space. Chain 3 (counts as dc), then work 4 dc into the same space. Chain 1.
(5 dc in the next ch-5 space, ch 1). Repeat around.
Slip stitch into the 3rd chain of the beginning ch 3.
120 dc, 24 ch-1 spaces
Round 10
Slip stitch into the previous ch-1 space. Work sc in the same space, then chain 6.
(Sc in the next ch-1 space, ch 6). Repeat around.
Slip stitch into the top of the beginning sc.
24 sc, 24 ch-6 spaces
Round 11
Slip stitch into the first ch-6 space.
Chain 4 (counts as tr), then work 3 tr in the same space. Chain 3, followed by 4 tr in the same space.
Work 7 dc in the next ch-6 space, followed by 7 hdc in each of the next 3 ch-6 spaces. Work 7 dc in the next ch-6 space.
Repeat the following sequence around:
(4 tr in the next ch-6 space, ch 3, 4 tr in the same space, 7 dc in the next ch-6 space, 7 hdc in each of the next 3 ch-6 spaces, 7 dc in the next ch-6 space).
Slip stitch into the 4th chain of the beginning ch 4.
4 ch-3 spaces, 32 tr, 56 dc, 84 hdc
Round 12
Chain 4 (counts as tr), then tr in each of the next 3 stitches.
Work 9 tr in the ch-3 space, followed by tr in the next 6 stitches.
Work dc in the next 31 stitches.
Repeat the following sequence twice:
(Tr in the next 6 stitches, 9 tr in the ch-3 space, tr in the next 6 stitches, dc in the next 31 stitches).
Finish with tr in the final 2 stitches, then slip stitch into the 4th chain of the beginning ch 4.
84 tr, 124 dc
Round 13
Chain 1 (does not count as a stitch), then sc in the same stitch. Work sc in each of the next 7 stitches.
Work 3 sc in the next stitch, which is the center stitch of the 9-tr group from the previous round.
(Sc in the next 51 stitches, 3 sc in the next stitch). Repeat twice.
Finish with sc in the final 43 stitches, then slip stitch into the top of the beginning sc.
216 sc
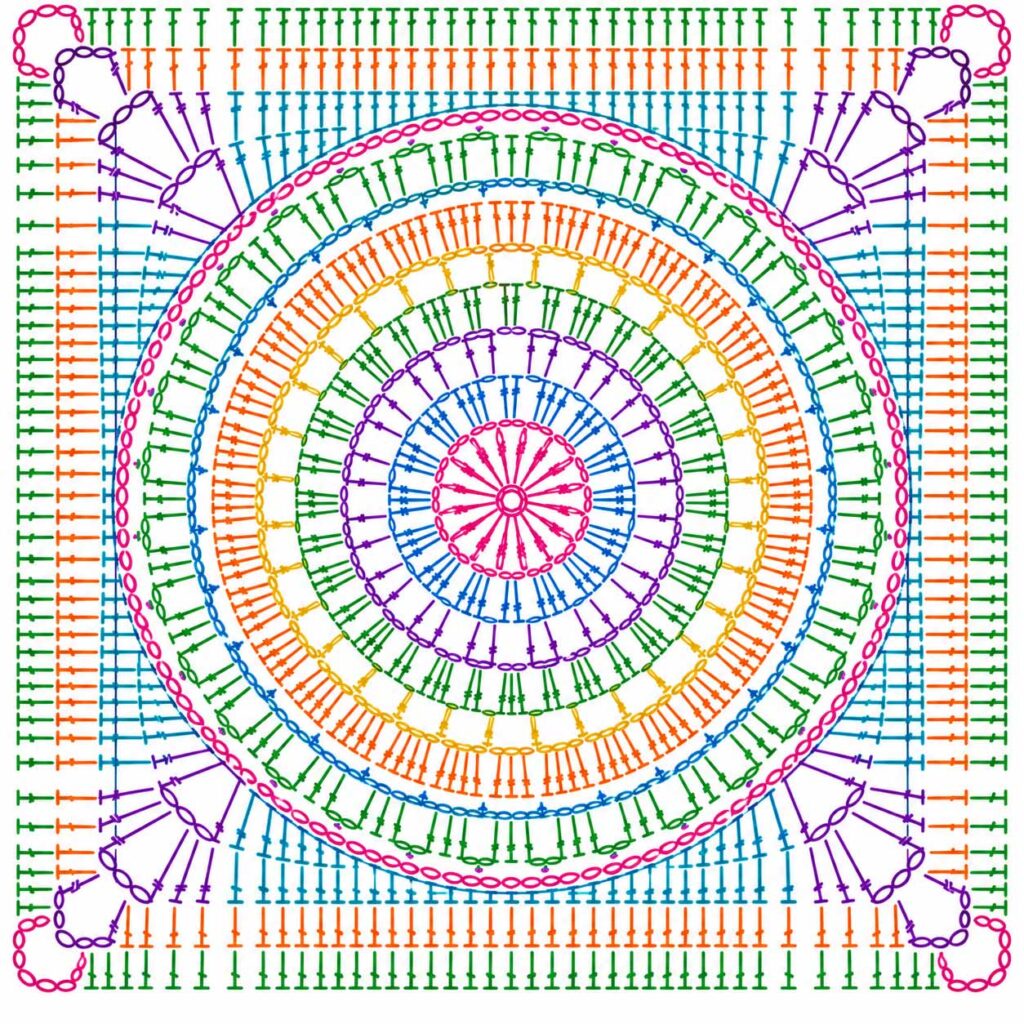
Diagram
Finishing Your Hooded Poncho
When you have completed the final round, carefully weave in all loose yarn ends using a yarn needle. For the best finished shape, gently block your poncho and allow it to dry completely.
You can personalize your poncho with additional decorative details. Add a row of tassels or fringe around the bottom edge for a playful finish, or attach a beautiful button near the neckline for a touch of elegance and added functionality.
Whether you make yours in a single classic color or experiment with a combination of shades, this hooded poncho is sure to become a favorite handmade piece. It is cozy enough for chilly days, stylish enough to wear with everyday outfits, and special enough to make a wonderful handmade gift.
Enjoy every stitch and have fun creating your beautiful crochet hooded poncho!

