

 soofha
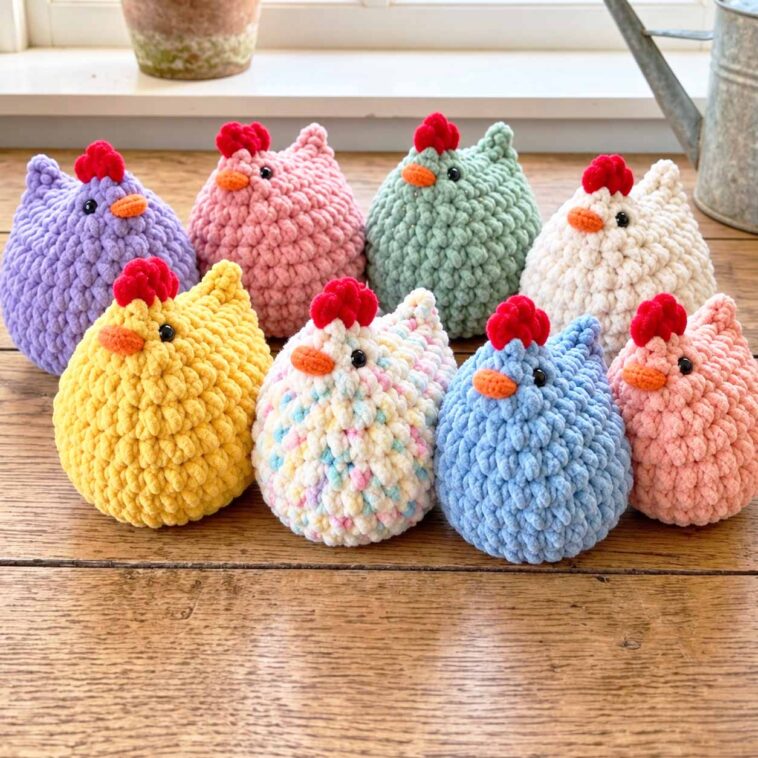
There’s just something about crocheted farm animals that makes them impossible not to love. This little Crochet Chicken is a perfect example. With its round body, tiny wings, bright comb, little beak, and sweet face, it has so much personality despite being made from a few simple crochet shapes.
This is a fun project if you enjoy amigurumi or simply want to make something a little different from another blanket or scarf. It would look adorable sitting on a shelf, tucked into a farmhouse-style display, or added to a spring or Easter decoration.
And once you make one, you may find yourself wanting to make a whole flock!
A Little About This Crochet Chicken
One of my favorite things about this design is the way the body is constructed.
Rather than making the body, neck, and head as completely separate pieces and sewing everything together afterward, the main part of the chicken is worked almost continuously. You begin with an oval base, build the body upward, and gradually shape it toward the top.
Once the body has been narrowed, part of the opening is closed to create the back. The remaining stitches are then used to form the neck and head.
It sounds a little unusual when you first read through the instructions, but it makes sense once you reach that part of the pattern. It also means there is considerably less sewing to do at the end.
The wings are made separately and attached afterward. Small details such as the comb, beak, and wattles are added once the head is finished.
Why You’ll Enjoy Making It
This little chicken is a great project for practicing several useful amigurumi techniques.
You’ll work with:
- An oval foundation
- Continuous spiral rounds
- Increases and decreases
- Shaping
- Joining two layers of crochet
- Stuffing
- Attaching small decorative pieces
- Sewing dimensional pieces onto a finished project
The wings are especially fun. Each one begins as a simple crochet circle. The circle is folded in half and joined along the straight edge, leaving a curved outer edge. A small scalloped border is then worked along that edge.
I like leaving the scalloped portion slightly loose rather than sewing it completely flat. It gives the wing a little movement and makes it look much more dimensional.
Choosing Your Colors
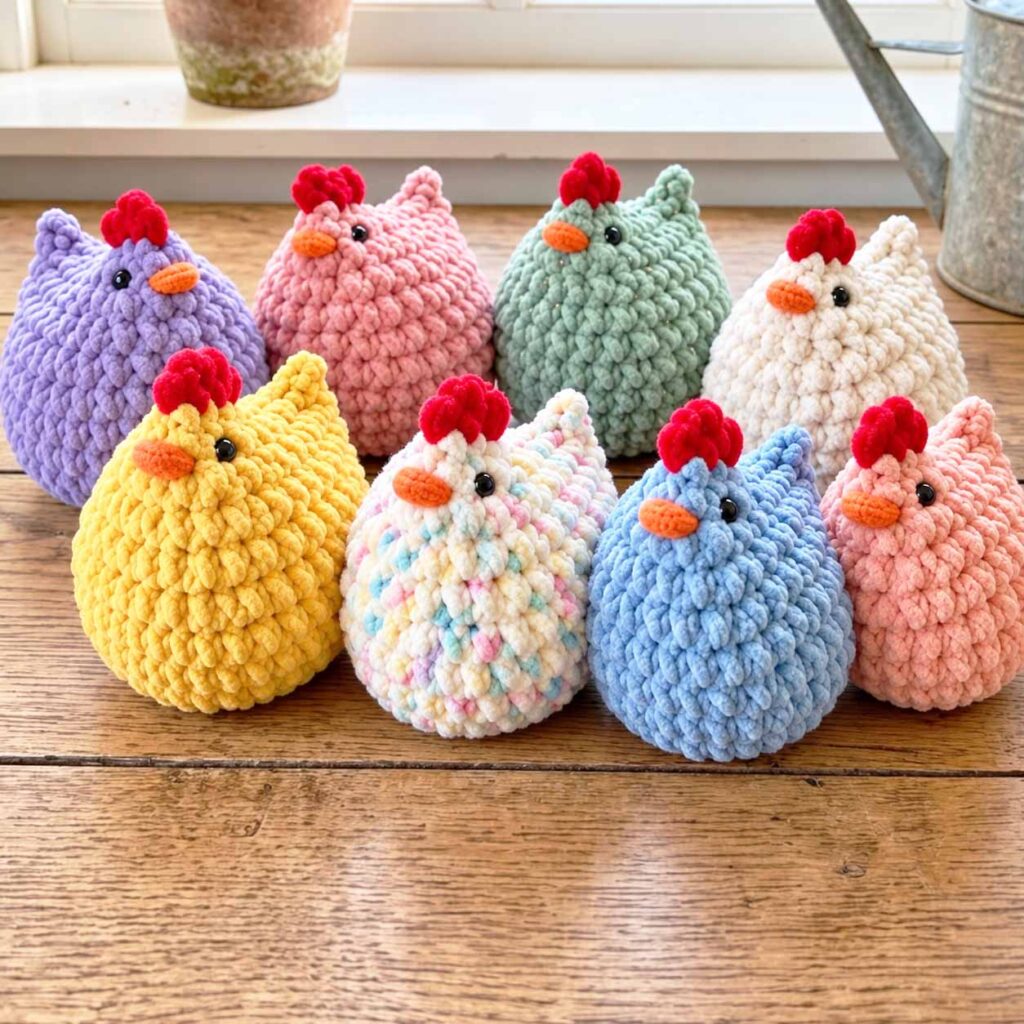
You don’t have to stick with traditional chicken colors.
A white or cream body with a red comb gives you that classic farmhouse look, while brown, rust, beige, or warm neutral shades can create a more rustic hen.
For spring or Easter decorating, try soft pastel colors. You could even make several chickens in different shades and arrange them together as a little handmade flock.
Some ideas include:
- Cream with a red comb
- White with orange and red details
- Brown with a burgundy comb
- Rust with cream wings
- Soft pastel colors for Easter
- Black or charcoal with a bright comb
- A colorful scrap-yarn version
The small amount of yarn needed for the details makes this a great project for using up leftovers from your stash.
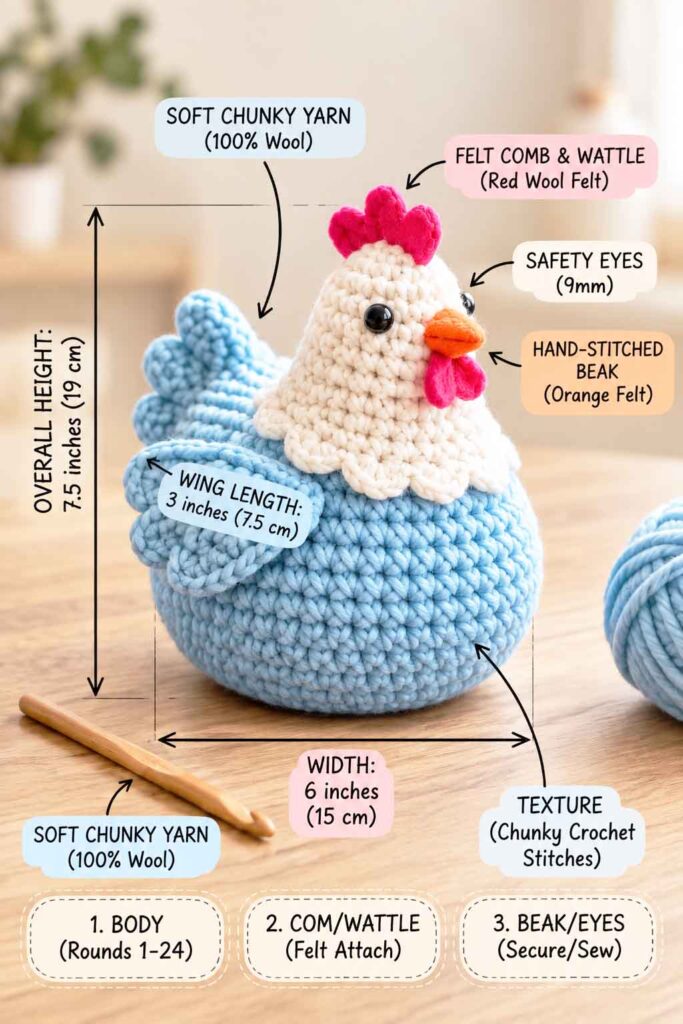
Crochet Chicken Pattern
Materials
Here’s what you’ll need to make the chicken:
- Medium or worsted-weight yarn for the body
- Small amounts of contrasting yarn for the wings, comb, beak, and wattles
- 3.75 mm crochet hook
- Fiberfill stuffing
- Safety eyes
- Stitch marker
- Yarn needle
- Scissors
The reference pattern uses a 3.75 mm crochet hook, with the safety eyes positioned between Rounds 23 and 24.
Crochet Abbreviations
- MR – magic ring
- ch – chain
- sc – single crochet
- hdc – half double crochet
- dc – double crochet
- sl st – slip stitch
- inc – 2 sc in the same stitch
- dec – invisible single crochet decrease
- st / sts – stitch / stitches
- Rnd – round
- FO – fasten off
Before You Begin
The chicken’s body is worked in continuous spiral rounds, so you won’t normally join at the end of each round.
Place a stitch marker in the first stitch of the round and move it upward as you work. This will make it much easier to keep track of where each round begins.
The first five rounds are worked around both sides of the starting chain. This creates the oval base that forms the bottom of the chicken.
When stuffing, add the fiberfill gradually. You want the chicken to feel firm enough to hold its shape, but avoid stuffing it so tightly that the stitches become stretched or distorted.
Crochet Chicken Body
Using your main body color, begin with the oval base.
Round 1
Ch 15.
Starting in the second chain from the hook:
- Inc in the first ch
- Sc in the next 12 ch
- Work 4 sc in the final ch
Now rotate the foundation chain so you can work along the unused loops on the opposite side.
- Sc in the next 12 ch
- Inc in the final foundation chain
32 sts
At this point, you’ve crocheted all the way around the foundation chain. The increases at both ends are what give the base its rounded shape.
Do not turn your work.
Round 2
Work:
- Inc in each of the next 2 sts
- Sc in the next 12 sts
- Inc in each of the next 4 sts
- Sc in the next 12 sts
- Inc in each of the final 2 sts
40 sts
Round 3
Repeat the following:
- (Sc, inc) × 2
- Sc in the next 12 sts
- (Sc, inc) × 4
- Sc in the next 12 sts
- (Sc, inc) × 2
48 sts
Round 4
Work:
- (2 sc, inc) × 2
- Sc in the next 12 sts
- (2 sc, inc) × 4
- Sc in the next 12 sts
- (2 sc, inc) × 2
56 sts
Round 5
Work:
- (3 sc, inc) × 2
- Sc in the next 12 sts
- (3 sc, inc) × 4
- Sc in the next 12 sts
- (3 sc, inc) × 2
64 sts
Your base should now be a nice, wide oval.
Building the Chicken Body
Rounds 6–13
Sc in every stitch around.
64 sts in each round
Work a total of eight even rounds.
As you work these rounds, you’ll notice that the flat oval starts turning upward. This is where the walls of the chicken’s body begin to take shape.
Shaping the Upper Body
Now it’s time to start narrowing the body.
Round 14
Work:
- Dec
- Sc in the next 28 sts
- Dec × 2
- Sc in the next 28 sts
- Dec
60 sts
The decreases are spaced around the two ends of the oval, allowing the body to narrow evenly rather than pulling it to one side.
Round 15
Sc around.
60 sts
Round 16
Repeat:
8 sc, dec
around.
54 sts
Round 17
Repeat:
7 sc, dec
around.
48 sts
Round 18
Sc around.
48 sts
Round 19
Repeat:
6 sc, dec
around.
42 sts
Round 20
Sc around.
42 sts
Start Stuffing
Now is a good time to begin adding your fiberfill.
Start by stuffing the lower and middle portions of the body. You don’t need to fill the upper opening completely yet because you’ll soon be manipulating this section to create the back and neck.
Keep the stuffing firm but flexible.
Round 21
Repeat:
5 sc, dec
around.
36 sts
At this stage, the stitch count has progressed from:
64 → 60 → 54 → 48 → 42 → 36
The body is now ready for the unusual but clever part of the construction.
Forming the Back and Neck
This is the part of the pattern that can be confusing if you don’t know what you’re supposed to do with the 36 stitches.
Take your time here.
You currently have 36 stitches around the opening.
Flatten the opening so that you have:
- 18 stitches along the front layer
- 18 stitches along the back layer
Make sure the sides are lined up evenly.
You’re going to close only half of this opening.
Creating the Back Seam
Starting at one outer edge, insert your hook through:
- One stitch from the front layer
- The corresponding stitch directly behind it
Work 1 sc through both layers together.
Repeat this across 9 pairs of stitches.
You’ll make:
9 sc through both layers
Those nine joined stitches use 18 of the original 36 stitches.
Important
Don’t close the remaining stitches.
The other 18 stitches must stay open. These will become the neck and head.
This is what gives the chicken its raised head instead of closing the entire top of the body.
Round 22 – Begin the Neck
Place your stitch marker in the first unjoined stitch.
Work:
1 sc in each of the 18 remaining stitches around the opening.
18 sts
You should now be able to see the shape beginning to emerge.
The closed section forms the chicken’s back, while the smaller open section rises from the opposite side and becomes the neck and head.
If the body needs a little more stuffing, add it now before moving on.
Crochet Chicken Head
Round 23
Sc around.
18 sts
Round 24
Sc around.
18 sts
Don’t close the head yet. You’ll need to add the eyes and stuffing first.
Add the Safety Eyes
Insert the safety eyes between Rounds 23 and 24.
Leave approximately 3 stitches between the eyes.
Before you permanently secure the backs of the eyes, take a moment to look at the chicken from the front.
Check that:
- Both eyes are at the same height.
- The back seam is behind the head.
- The face is centered.
Once you’re happy with the placement, secure the eyes.
Now add stuffing to the neck and head.
Be careful not to overstuff this area. Too much fiberfill can push against the eyes and make the head look distorted.
Closing the Head
Round 25
Repeat:
Sc, dec
around.
12 sts
Add the last little bit of stuffing and use your fingers to gently shape the head.
Round 26
Dec × 6
6 sts
Fasten off, leaving a short yarn tail.
Thread the yarn tail through the front loops of the final six stitches. Pull firmly to close the opening.
Secure the yarn and weave the remaining tail into the head.
Crochet Wings
Make 2 wings.
The wings are surprisingly simple. Each one begins as a small flat circle and is then folded in half.
Using your chosen wing color:
Round 1
6 sc in MR
6 sts
Round 2
Inc in every stitch.
12 sts
Round 3
Repeat:
Sc, inc
around.
18 sts
Round 4
Repeat:
2 sc, inc
around.
24 sts
Do not fasten off.
Fold the Wing
Fold the crochet circle exactly in half.
You should now have 12 stitches along each layer.
Insert your hook through one stitch from the front layer and the corresponding stitch from the back layer.
Work a sc through both layers.
Continue across.
12 sc
The wing should now look like a little semicircle.
Don’t cut the yarn yet.
Add the Scalloped Wing Edge
Ch 2.
Across the 12 joined stitches, repeat:
3 hdc in next st, sl st in next st
Repeat this sequence 6 times.
This uses all 12 stitches and creates six little scallops along the curved edge.
Fasten off, leaving a long yarn tail for sewing.
Make the second wing in exactly the same way.
The scalloped edge is one of those little details that makes these wings look much more interesting than a plain flat piece.
Attach the Wings
Place one wing on each side of the chicken.
The straight folded edge should sit against the body, while the scalloped edge faces outward and slightly downward.
Position the top of each wing approximately 2–3 rounds below the upper back/head area.
Before sewing them permanently, pin the wings in place and look at the chicken from the front and both sides.
This makes it much easier to get them at the same height.
Using the long yarn tail, sew along the straight upper edge of each wing.
Try not to sew the scalloped edge flat. Leaving those little scallops free gives the wings a softer, more three-dimensional look.
Crochet Chicken Comb
For the comb, red is the traditional choice, but burgundy, pink, or another contrasting shade can work beautifully too.
The comb is worked directly onto the top of the head.
Find the center line of the head and attach your yarn approximately one round behind the eye line.
First Comb Bump
Ch 3.
Work 1 dc into the first chain made, creating a small rounded loop.
Anchor it to the head with a sl st slightly farther toward the back.
Second and Third Bumps
Repeat the same sequence twice:
Ch 3, dc into first ch, sl st to the head.
You should now have three raised sections running along the top of the head.
Fasten off securely.
Comb Placement Tip
Try to keep the comb along the center ridge of the head. It should run from the front toward the back rather than stretching from one side of the head to the other.
Crochet Chicken Beak
Use yellow, orange, or mustard yarn.
Find the midpoint between and slightly below the eyes.
Attach the yarn.
Ch 2.
Work 1 sc into the first chain made, using the chain closest to the head.
This creates the tiny pointed beak.
Slip stitch back into the attachment point if needed to secure it.
Fasten off and weave the yarn ends inside the head.
A Small Beak Tip
Try not to pull the beak too tightly against the face.
Allow the little chain-and-sc section to sit slightly away from the head so the point remains visible.
Add the Wattles
Using red yarn or the same color you used for the comb, attach the yarn directly underneath the beak.
First Wattle
Ch 2.
Sl st into the first chain.
Second Wattle
Ch 2 again.
Sl st into the same attachment point on the head.
Fasten off securely.
You should now have two tiny loops hanging beneath the beak.
Final Stuffing and Shaping
Your little chicken is almost finished!
Take a few moments to gently massage the stuffing around inside the body. This helps smooth out any uneven areas and gives the chicken a more balanced shape.
Ideally, the finished chicken should have:
- A broad oval lower body
- A gently narrowed upper body
- A defined back seam
- A raised neck and head
- Two dimensional wings
If your chicken is leaning slightly to one side, try redistributing the stuffing with your fingers before adding more.
Sometimes a little reshaping is all that’s needed.
Final Assembly Checklist
Before weaving in all of your remaining yarn ends, give your chicken a final inspection.
Body
- Is the oval base sitting evenly?
- Is the back seam secure?
- Does the neck rise naturally from the opposite side of the seam?
Face
- Are both eyes level?
- Is the beak centered?
- Are the wattles directly underneath the beak?
- Does the comb follow the center line of the head?
Wings
- Are both wings at approximately the same height?
- Are the scalloped edges still loose?
- Are the wings securely attached?
A few minutes spent checking these details can make a surprisingly big difference in the finished appearance.
Easy Color and Design Ideas
One of the nicest things about making a crochet chicken is how easily you can change its personality just by changing the colors.
Try:
- Cream or beige for a farmhouse-style hen
- White with a bright red comb
- Brown with rust-colored details
- Pastel shades for Easter
- Black or charcoal for a more dramatic look
- Multicolored wings made from leftover yarn
You could also embroider tiny eyelashes or eyebrows if you’d like to give your chicken a little more personality.
Making a few chickens with different color combinations would make a really cute handmade flock.
Safety Note
If this chicken is going to be given to a baby or very young child, don’t use plastic safety eyes.
Instead, embroider the eyes securely with black yarn.
Make sure all sewn-on pieces are firmly attached and that there are no loose yarn tails that could come undone.
Crochet Chicken Troubleshooting
My oval base is twisting. What did I do wrong?
Make sure you worked around both sides of the foundation chain and placed the increases at the rounded ends.
The first five rounds are what establish the oval shape, so keeping those increases in the correct places is important.
My stitch marker keeps moving.
That’s completely normal when working in continuous spiral rounds.
Simply move the marker into the first stitch of each new round as you go.
I don’t have 36 stitches before forming the back.
Stop before folding the opening and check your previous rounds.
Round 21 should finish with 36 stitches.
It’s worth correcting the stitch count before continuing because the next step depends on dividing those 36 stitches into two groups of 18.
Why do I only make 9 sc when closing the back?
This is one of the easiest parts of the pattern to misunderstand.
Each of those nine sc stitches is worked through two layers at the same time.
So one joined sc uses:
- One stitch from the front layer
- One corresponding stitch from the back layer
Nine joined stitches therefore use 18 of the original 36 stitches.
That leaves exactly 18 stitches for the neck.
My head looks off-center.
The opening may not have been aligned correctly before you created the back seam.
If necessary, undo the nine-stitch seam, flatten the body again, and make sure the two sides are lined up before joining them.
My wings are curling.
A little curve is perfectly normal.
If they’re curling dramatically, your tension may be too tight. Try relaxing your tension slightly when working the wing or scalloped border.
Video Tutorial
If you’d rather see the construction as you work, a video tutorial can be especially helpful for the body shaping and the step where the upper opening is folded to create the back and neck.
The written instructions can be followed on their own, but seeing that particular construction step visually may make the process much easier to understand.
Have Fun With Your Little Flock
I love how a project like this can start with something as simple as an oval and gradually turn into a little character with its own personality.
The body doesn’t require complicated stitches, but the shaping gives it a surprisingly expressive silhouette. Then the wings, comb, beak, and wattles bring everything together.
Don’t be afraid to experiment with the colors. A contrasting wing color can completely change the look, and leftover yarn is perfect for the smaller details.
You could make a traditional white hen, a rustic brown chicken, a pastel Easter version, or several different ones and create your own little crocheted flock.
Most importantly, take your time with the shaping and placement. Small details such as keeping the eyes level, centering the beak, and positioning the wings evenly can make the finished chicken look much more polished.
Happy crocheting, and enjoy making your own adorable little chicken!
Thank you for visiting Soofha. Be sure to explore the other crochet patterns and handmade projects on the blog for more creative ideas, seasonal makes, cute characters, and crochet inspiration.

