

 soofha
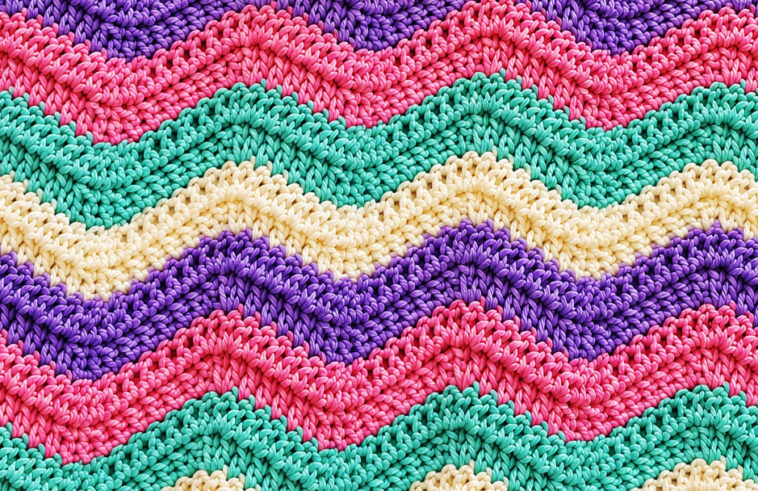
The Crochet Ripple Stitch is a classic pattern for creating beautiful waves, zigzags, and gentle peaks across a crochet project. It is especially lovely for blankets because the repeating texture gives the fabric movement while color changes make each ripple stand out.
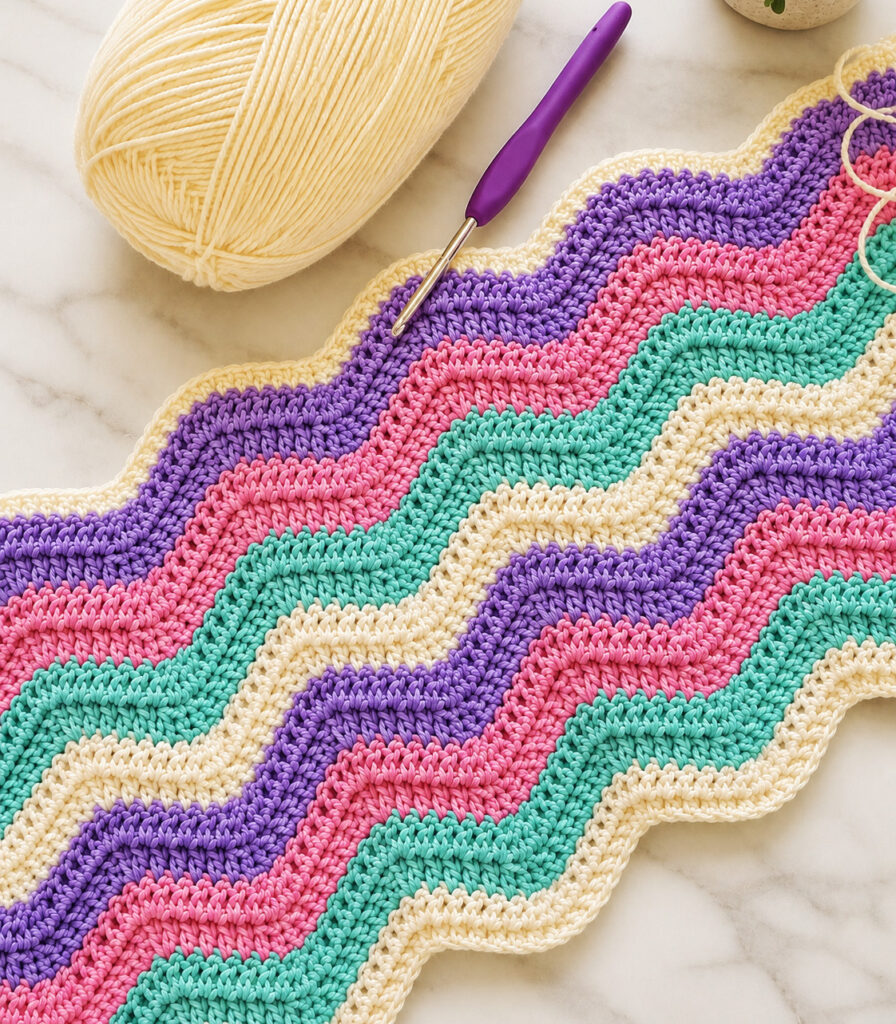
This version uses soft waves of cream, purple, pink, and turquoise, finished with a simple cream edging. The result is colorful, cozy, and eye-catching without being overly complicated.
Whether you are making a baby blanket, lapghan, throw, scarf, or decorative home accessory, the ripple stitch is a wonderful pattern to keep in your crochet collection.
What Is the Crochet Ripple Stitch?
The ripple stitch is created by strategically increasing and decreasing stitches across each row.
- Increases create the peaks.
- Decreases create the valleys.
- Repeating these sections produces the characteristic wave shape.
The stitch can be made with different heights of crochet stitches. This tutorial uses double crochet (US terminology) to create a substantial, flexible fabric with clearly defined waves.
The beauty of the ripple stitch is that once you understand the sequence, you can easily repeat it across an entire blanket.
Materials
For a blanket similar to the one shown, you will need:
- Worsted-weight or aran-weight yarn
- Crochet hook appropriate for your yarn, approximately 5.0–5.5 mm
- Yarn needle
- Scissors
- Stitch markers, optional
Suggested Color Palette
For a soft pastel look, try:
- Cream or ivory
- Lavender purple
- Soft pink
- Turquoise or mint
- Cream for the border
You can use as many colors as you like. Alternating colors every 1–4 rows gives the ripple design a strong striped appearance.
Crochet Abbreviations
This pattern uses US crochet terminology.
- ch – chain
- dc – double crochet
- st – stitch
- sts – stitches
- sk – skip
- dc2tog – double crochet 2 stitches together
- sl st – slip stitch
- rep – repeat
Gauge
Gauge is not critical if you are making a simple blanket, but it is useful if you want your finished project to reach a particular size.
Make a small swatch using your chosen yarn and hook. If the fabric feels too stiff, use a larger hook. If it feels too loose, use a smaller hook.
The most important thing is maintaining a consistent tension throughout the project.
How to Crochet the Ripple Stitch
Step 1: Make the Foundation Chain
The ripple pattern requires a foundation chain made from a suitable multiple of stitches.
For this style, you can begin with a chain that is a multiple of 14 + 3.
For example:
14 × 8 = 112
Then add 3:
112 + 3 = 115 chains
So a starting chain of 115 works for an eight-repeat project.
You can increase or decrease the number of repeats depending on how wide you want your blanket to be.
Tip: Always make sure your starting chain follows the stitch multiple. Otherwise, the peaks and valleys may not line up correctly.
Step 2: Work the First Row
Chain 3 to count as the first double crochet.
Work double crochet stitches across the foundation chain while following the increase and decrease sequence.
A basic ripple sequence can be structured like this:
Increase section → straight section → decrease section → straight section → repeat
The exact number of stitches in each section determines how dramatic your waves will be.
For a pronounced ripple, use a combination such as:
- 2 dc in one stitch to create an increase
- Several dc stitches across the row
- dc2tog to create a decrease
- Several dc stitches across the row
- Repeat
Continue this rhythm across the entire row.
Step 3: Create the Peaks
The peaks are the raised portions of the ripple.
An easy way to create a peak is to work 2 double crochets into the same stitch.
This adds an extra stitch and causes the fabric to move upward.
When working your next rows, keep the increase positioned above the previous increase. This keeps the wave pattern aligned.
Step 4: Create the Valleys
The valleys are created by decreasing stitches.
Work a dc2tog over two stitches.
This combines two stitches into one and pulls the fabric inward.
Keep your decreases aligned with the previous row’s decreases.
The combination of increases and decreases is what creates the characteristic zigzag shape.
Simple Ripple Stitch Repeat
A basic repeating concept looks like this:
Peak → downward slope → valley → upward slope → peak
Continue repeating the same sequence across the row.
The exact stitch count can vary according to the pattern repeat you choose, so it is helpful to count your stitches after every row.
Your project should gradually develop a shape similar to:
////////
rather than a straight rectangle.
Working the Next Rows
After completing the first row, chain 3 and turn.
Work the same ripple sequence across the next row.
The important rule is:
Increase above increase and decrease above decrease.
This keeps the waves consistent.
Continue repeating the row until your blanket reaches your desired length.
For a standard rectangular blanket, keep checking the edges as you work. If one side begins becoming wider or narrower, count your stitches and look for a missed increase or decrease.
Adding Color Changes
Color changes are one of the best features of a ripple blanket.
The sample shown uses several pastel colors to emphasize the waves.
A simple color arrangement could be:
Cream → Purple → Pink → Turquoise → Cream → Purple → Pink → Turquoise
You can change colors every two rows for narrow stripes or every four rows for broader bands.
How to Change Colors Neatly
At the end of the final stitch of your color section, begin the last double crochet but stop before completing the final yarn-over.
Drop the old yarn and pick up the new color.
Use the new yarn to complete the stitch.
Then chain 3 and begin the next row with the new color.
This gives your stripes a clean transition.
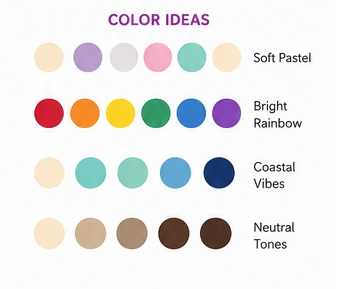
Color Combination Ideas
Soft Pastel Ripple
- Ivory
- Lavender
- Blush pink
- Mint
- Ivory
Bright Rainbow Ripple
- Red
- Orange
- Yellow
- Green
- Blue
- Purple
Coastal Ripple
- Cream
- Aqua
- Seafoam
- Sky blue
- Navy
Neutral Ripple
- Cream
- Beige
- Taupe
- Warm brown
- Chocolate
How to Keep the Ripple Edges Straight
One of the most common difficulties with ripple blankets is keeping the edges neat.
The easiest solution is to count your stitches regularly.
After every row:
- Count the stitches.
- Confirm that you still have the same total.
- Check that every peak contains the intended increase.
- Check that every valley contains the intended decrease.
- Make sure the first and last stitches are worked correctly.
If your stitch count changes unexpectedly, correct the mistake as soon as possible.
It is much easier to fix one row than several inches of crochet.
Finishing the Blanket
Continue working rows until the blanket reaches the desired length.
For a baby blanket, you might choose a smaller finished size. For a sofa throw, simply continue adding rows until the blanket is long enough.
When you finish the final row, fasten off and leave a yarn tail.
Use a yarn needle to weave the end securely through the back of the stitches.
Repeat with all remaining yarn tails.
Adding a Ripple-Friendly Border
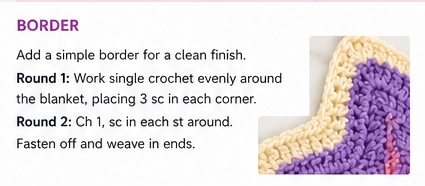
A simple border can give your blanket a more polished appearance.
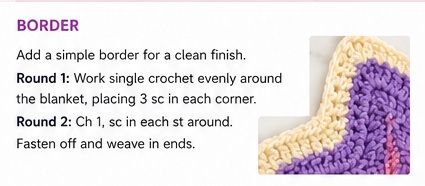
The sample uses a soft cream edging that frames the colorful waves beautifully.
Because the blanket already has a strong ripple shape, you do not need an elaborate border.
Round 1
Attach your border color near one corner.
Work single crochet stitches around the blanket, following the natural shape of the edges.
Along the rippled edge, avoid pulling the stitches too tightly.
At corners, work additional stitches as needed to help the border lie flat.
Join with a slip stitch.
Round 2
Chain 1 and work another round of single crochet around the entire blanket.
Keep your tension relaxed.
If the border begins to ruffle, you may be adding too many stitches. If it starts pulling or curling inward, you may need a few additional stitches in strategic areas.
Fasten off and weave in the ends.
Troubleshooting the Ripple Stitch
Why is my blanket becoming wider?
You may have accidentally added extra stitches.
Check your peaks and make sure you are not working an increase where the pattern requires a normal stitch.
Why is my blanket getting narrower?
You may have missed an increase or worked too many decreases.
Count the stitches at the end of your rows and compare them with the previous row.
Why are my waves not lining up?
Your increases and decreases may not be positioned consistently.
The increase should remain aligned with the previous peak, while the decrease should remain aligned with the previous valley.
Why does the edge look uneven?
Uneven tension can make ripple edges look irregular.
Try to keep your hands relaxed and maintain the same tension from row to row.
Blocking can also help improve the finished shape.
Blocking Your Crochet Ripple Blanket
Blocking is optional, but it can make a noticeable difference.
Once your blanket is finished, gently wash or lightly dampen it according to the yarn manufacturer’s recommendations.
Lay it flat on a clean surface.
Gently shape the peaks and valleys so the waves are even.
Allow the blanket to dry completely before removing it from the blocking surface.
Avoid stretching the blanket excessively. The goal is simply to encourage the stitches into a more uniform shape.
Adjusting the Blanket Size
One of the easiest things about this pattern is that you can customize the size.
For a baby blanket, use fewer repeats and fewer rows.
For a lapghan, increase the width slightly.
For a large sofa throw, add more pattern repeats to the foundation chain and continue working additional rows.
Remember that the foundation chain must follow your chosen pattern multiple.
If your repeat is based on 14 stitches + 3, maintain that formula when changing the width.
Project Ideas Using Ripple Stitch
Once you know the basic ripple technique, you can use it for much more than blankets.
Try making:
- Baby blankets
- Full-size bed blankets
- Lapghans
- Sofa throws
- Scarves
- Shawls
- Cushion covers
- Table runners
- Baby stroller blankets
- Pet blankets
- Decorative wall hangings
The stitch also looks beautiful when made with one color. In a single shade, the texture becomes the star of the project.
Tips for a Beautiful Finished Project
Choose colors with enough contrast.
If the colors are too similar, the waves may be harder to see.
Keep your tension consistent.
Consistent tension produces smoother peaks and valleys.
Count regularly.
A quick stitch count at the end of each row can prevent major problems.
Do not rush the decreases.
The valleys are essential to the ripple effect, so make sure each decrease is worked correctly.
Try a swatch first.
A small sample lets you test your yarn, hook size, colors, and tension before starting the full blanket.
Weave in ends as you go.
If you change colors frequently, dealing with dozens of yarn tails at the end can be frustrating.
Frequently Asked Questions
Is the ripple stitch suitable for beginners?
Yes. Once you understand increases and decreases, the repeating structure becomes fairly straightforward. Beginners should practice on a small swatch before starting a large blanket.
How many chains do I need?
That depends on the width you want and the stitch multiple used by your chosen ripple pattern. For the repeat described here, use a multiple of 14 + 3.
Can I use different yarn weights?
Yes. The stitch works with many yarn weights. Simply choose a hook recommended for your yarn and make a swatch first.
Can I make a ripple blanket with one color?
Absolutely. A single-color ripple blanket can have a beautiful textured appearance, especially with soft neutral yarn.
Can I use chunky yarn?
Yes. Chunky yarn will create a thicker and warmer blanket and will work up much faster. You may need to adjust your hook size accordingly.
Is this stitch good for baby blankets?
Yes. The ripple design is especially popular for baby blankets. Choose soft, washable yarn and avoid overly loose stitches.
Final Thoughts
The Crochet Ripple Stitch is one of those timeless crochet techniques that can be adapted to almost any project. Its combination of peaks, valleys, texture, and color makes it perfect for blankets that feel handmade, cheerful, and full of personality.
The pastel combination of purple, pink, turquoise, and cream gives this particular design a soft and playful appearance, but the same stitch can look completely different when worked in bold rainbow shades, elegant neutrals, or a single solid color.
Once you master the increase-and-decrease rhythm, you can customize the width, length, colors, and yarn weight to create your own unique ripple project.
For an additional video reference, you can follow the Ripple Stitch tutorial here:
Save this pattern for your next crochet blanket project and experiment with your favorite color combinations!

