

 soofha
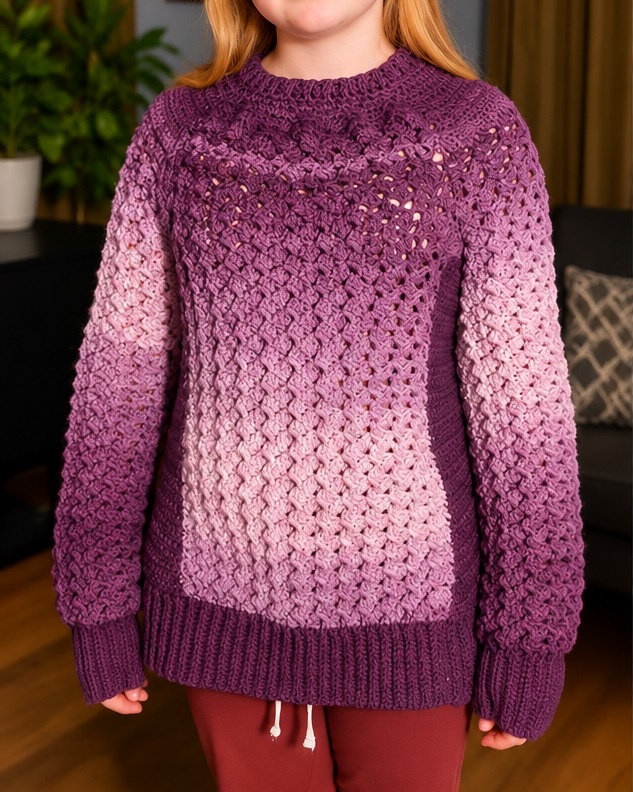
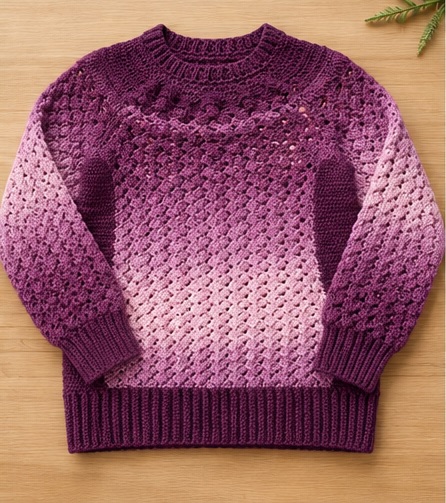
This cozy crochet sweater is inspired by the sweater in your photo, featuring a textured stitch, gradient color changes, ribbed neckline, cuffs, and hem, with a relaxed slightly oversized fit.
Note: A photo alone can’t reveal the original designer’s exact stitch counts or construction, so this is a recreated pattern inspired by the pictured sweater, not the original pattern.
Finished Size
This version is designed approximately for a child/youth size 10–12, with an easy relaxed fit.
- Bust: approximately 34–36 in (86–91 cm)
- Length: approximately 21 in (53 cm)
- Sleeve length: approximately 19 in (48 cm)
- Neck opening: approximately 17 in (43 cm)
You can adjust the width and length by changing the number of repeats.
Materials
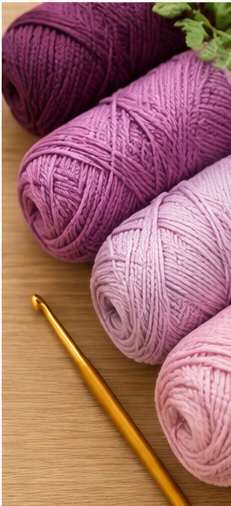
- Worsted/Aran weight yarn (#4)
- Approximately 1,000–1,300 yards total
- 5.0 mm crochet hook
- 4.5 mm crochet hook for ribbing
- Yarn needle
- Stitch markers
- Scissors
Color Palette
For the look in the photograph, use several shades of purple/lilac:
- Color A: Dark plum
- Color B: Medium mauve
- Color C: Dusty lavender
- Color D: Light dusty pink/lavender
You can also make the entire sweater in one color.
crochet textured sweater pattern
Abbreviations
- ch – chain
- sc – single crochet
- hdc – half double crochet
- dc – double crochet
- sl st – slip stitch
- st/sts – stitch/stitches
- sk – skip
- rep – repeat
- RS – right side
- WS – wrong side
Main Textured Stitch
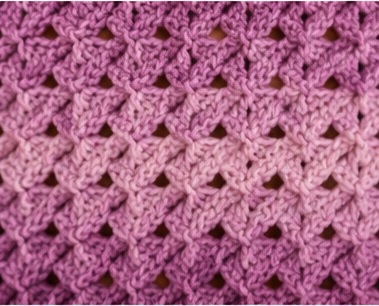
The sweater uses a simple textured stitch that creates the raised diagonal appearance.
Textured Repeat
Work in multiples of 2 stitches + 1.
Row 1:
Ch 2, hdc in each stitch across. Turn.
Row 2:
Ch 1, sc in first stitch.
Working around the post of the next hdc, work 1 front-post hdc (FPHDC), sc in next stitch.
Repeat across. Turn.
Row 3:
Ch 2, hdc in each stitch across. Turn.
Row 4:
Ch 1, sc in first stitch.
FPHDC around the next hdc, sc in next stitch.
Repeat across.
Continue repeating Rows 1–4.
This creates a dense, slightly raised texture similar to the fabric shown in the photograph.
Back Panel
With the 5.0 mm hook and Color A:
Foundation: Ch 73.
You should have 72 stitches after the foundation row.
Row 1
Hdc in 2nd ch from hook and across.
72 sts
Rows 2–4
Work the textured stitch pattern.
Continue until the piece measures approximately 20 inches (51 cm) from the bottom.
Color Changes
For the gradient effect, change colors gradually:
- Rows 1–18: Color A
- Rows 19–30: Color B
- Rows 31–44: Color C
- Rows 45–end: Color D
For a softer transition, alternate the old and new colors for one row before switching completely.
Fasten off.
Front Panel
Work exactly the same as the back panel until you reach approximately 16½ inches (42 cm).
Now create the neckline.
Shoulder 1
Work approximately 20 stitches in pattern.
Fasten off.
Center Neck
Skip approximately 32 stitches.
Shoulder 2
Join yarn to the remaining stitches and work the second shoulder.
Continue until the front and back are the same length.
Fasten off.
Shoulder Seams
Place the front and back panels together with the right sides facing inward.
Use a yarn needle and matching yarn to sew the shoulders together.
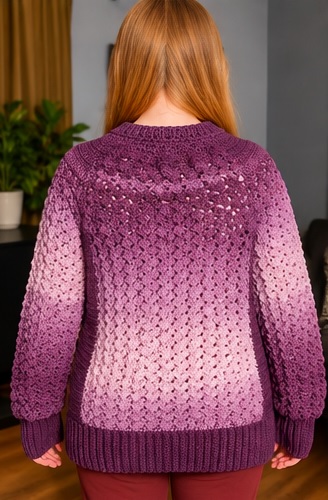
For a slightly dropped-shoulder look like the photograph, sew approximately 6–7 inches (15–18 cm) from the outer edge toward the neckline.
Leave the remaining opening for the neck.
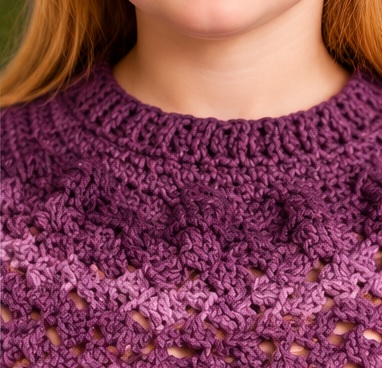
Neckline Ribbing
Using the 4.5 mm hook and Color A:
Join yarn around the neckline.
Round 1
Ch 1 and sc evenly around the entire neckline.
Join with sl st.
Round 2
Ch 1.
FPsc around next stitch, BPsc around next stitch.
Repeat around.
Join.
Rounds 3–6
Continue alternating front-post and back-post single crochet.
Fasten off.
This creates the stretchy ribbed neckline seen in the photo.
Sleeves
The sleeves are worked directly into the arm openings.
Join Color A at the underarm.
Round 1
Ch 2.
Work approximately 48 hdc evenly around the armhole.
Join with sl st.
Round 2
Ch 2.
Hdc around.
Join.
Round 3
Begin the textured stitch pattern.
Continue working in rounds.
Sleeve Shaping
To create the gently tapered sleeve:
Work approximately:
- 8 rounds without decreases
- Decrease 2 stitches
- 8 rounds
- Decrease 2 stitches
- 8 rounds
- Decrease 2 stitches
- Continue until the sleeve reaches the desired length.
Decrease Round
Ch 2.
Hdc2tog, then hdc across until 2 stitches remain.
Hdc2tog.
Join.
Continue until the sleeve measures approximately 17–19 inches (43–48 cm).
Adjust the length to fit.
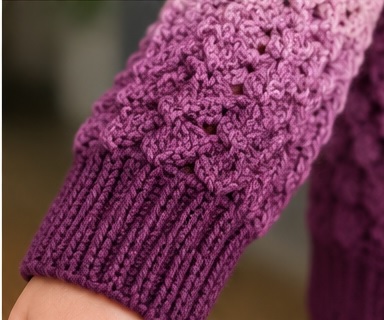
Sleeve Cuff
Switch to the 4.5 mm hook.
Round 1
Sc around.
Round 2
FPsc around next stitch, BPsc around next stitch.
Repeat around.
Continue for 8–12 rounds.
Fasten off.
Repeat for the second sleeve.
Bottom Ribbing
For the ribbed hem shown in the photo, use the 4.5 mm hook.
Join Color A around the bottom edge.
Work approximately 1 sc for every stitch/row around.
Ribbing
Ch 11.
Sc in 2nd ch from hook and across.
Sl st into the next 2 stitches along the sweater edge.
Turn.
Sc through the back loops only across the ribbing.
Turn.
Repeat around the entire sweater.
When you reach the beginning, sew the two ends together.
Fasten off and weave in the ends.
Creating the Ombre Effect
For the beautiful gradual color transition, don’t make every color change at exactly the same place.
Try this sequence:
Dark Plum → Plum → Mauve → Dusty Rose → Lavender
For an even softer gradient:
- Work several rows in the first color.
- Introduce the second color.
- Alternate the two colors for 2–3 rows.
- Continue completely with the second color.
- Repeat for each transition.
This gives the sweater the blended appearance visible in the photo.
Free Crochet Textured Sweater Pattern
Finishing
Weave all yarn tails securely into the wrong side.
Lightly steam or wet-block the sweater.
Do not stretch it aggressively, as the textured stitches can become distorted.
Lay flat to dry.
Easy Size Adjustments
To make it wider
Add 2 stitches to the foundation chain for every additional approximately ½ inch of width.
To make it longer
Simply add additional textured rows before beginning the neckline.
To make the sleeves wider
Add additional stitches when working around the armhole.
To make the sleeves longer
Add more rounds before starting the cuff.
Adult Size
The same design works beautifully for an adult sweater.
For a women’s medium/large, start with approximately 91–101 foundation chains for each body panel, depending on the desired ease.
Measure the wearer rather than relying only on stitch counts:
Desired finished bust = body bust measurement + 4–8 inches of ease.
For an oversized sweater like the one pictured, use approximately 6–10 inches of positive ease.
Finishing Touch
For the closest look to the photograph, use a soft acrylic or acrylic/wool worsted yarn and keep your tension fairly loose. The combination of the textured body stitch and ribbed cuffs/hem is what gives this sweater its cozy, handmade appearance.

