

 soofha
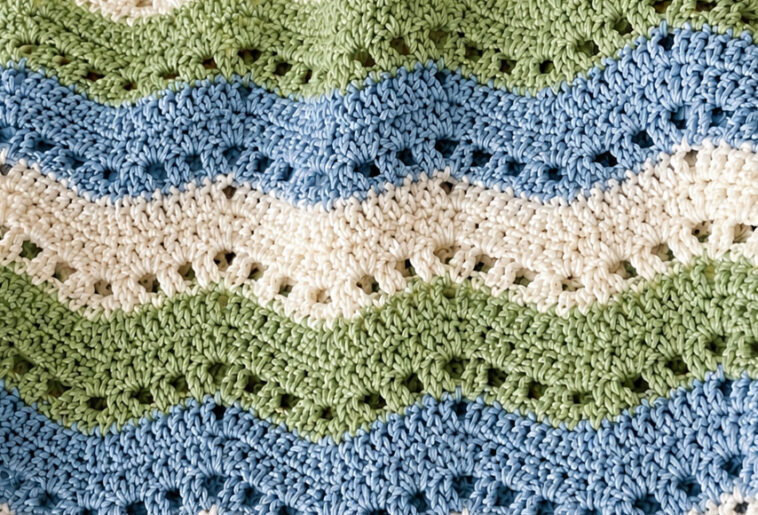
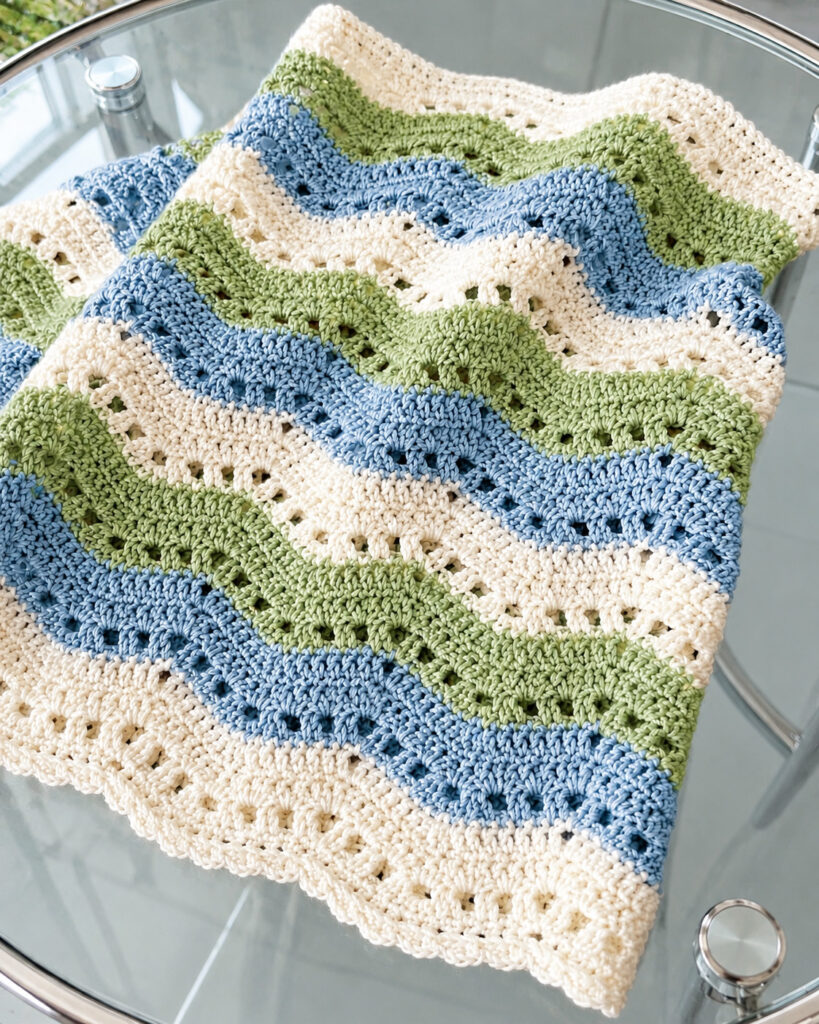
Discover the beauty of textured crochet with this Crochet Zig Zag Blanket Pattern, featuring a classic chevron ripple design combined with front post and back post double crochet stitches. The result is a cozy blanket with beautiful peaks, valleys, and raised ribbed texture that gives the finished piece a dimensional, handmade look.
This pattern is suitable for confident beginners as well as experienced crocheters who want to practice working with textured stitches, color changes, increases, and decreases. Whether you make it as a baby blanket, lap throw, sofa blanket, or larger bedspread, the finished design is sure to become a favorite handmade piece.
The traditional chevron shape creates the recognizable zig zag movement, while alternating FPdc and BPdc stitches gives the blanket extra depth and a soft ribbed appearance. A warm combination of terracotta, mustard, sage, teal, and cream creates an earthy, modern palette, but you can easily substitute your favorite colors.
If you’re still deciding which yarn to use, choosing a soft worsted-weight yarn with good stitch definition will help the textured stitches stand out beautifully.
Why You’ll Love This Chevron Blanket
There are several reasons this crochet ripple blanket makes such an enjoyable project:
- Classic zig zag chevron design
- Raised front post and back post texture
- Great project for practicing color changes
- Easy repeating stitch pattern
- Suitable for different blanket sizes
- Beautiful for gifts or home décor
- Works well with many different color combinations
- Can be customized in width and length
The combination of simple double crochet shaping and post stitches makes this blanket especially interesting to crochet. Once you establish the repeating pattern, the rows become much easier to follow.
Materials
Affiliate Disclosure: This article may contain affiliate links. If you purchase something through an affiliate link, we may earn a small commission at no additional cost to you. Thank you for supporting our crochet projects.
Yarn
- Color A – Terracotta: Lion Brand Heartland Yarn, worsted weight, approximately 8 skeins
- Color B – Mustard: Lion Brand Heartland Yarn, approximately 6 skeins
- Color C – Sage Green: Lion Brand Heartland Yarn, approximately 6 skeins
- Color D – Teal: Lion Brand Heartland Yarn, approximately 6 skeins
- Color E – Cream: Lion Brand Heartland Yarn, approximately 4 skeins
The quantities above are intended for a generously sized throw and may vary depending on your tension and final blanket dimensions.
Crochet Tools
- 6.5 mm (K-10.5) crochet hook
- Stitch markers
- Row counter
- Yarn needle
- Sharp scissors
- Measuring tape
Finished Size
The sample begins with a foundation chain of approximately 170 chains, creating a blanket around 50 inches wide, depending on yarn, hook size, and tension.
The length can be adjusted simply by continuing the repeating color sections until your desired measurement is reached.
For a wider blanket, increase the starting chain using the established stitch repeat. Always make a small swatch first to confirm your gauge.
Crochet Abbreviations
The pattern uses standard US crochet terminology.
- ch – chain
- dc – double crochet
- sc – single crochet
- FPdc – front post double crochet
- BPdc – back post double crochet
- dc3tog – double crochet 3 together
- st/sts – stitch/stitches
- RS – right side
- WS – wrong side
Gauge
Approximately:
12 stitches x 6 rows = 4 inches
Your exact gauge will depend on your yarn, hook size, and personal tension.
If your blanket is coming out significantly wider or narrower than expected, adjust your hook size before beginning the full project.
How to Crochet the Zig Zag Ripple Blanket
Foundation Chain
Using Cream (Color E), chain approximately 170 stitches.
The chevron repeat is based on a repeating multiple of 12 stitches plus 2, so you can modify the starting chain to create a different blanket width.
Switch to Terracotta (Color A) for the first patterned row.
Row 1 – Chevron Foundation
With Color A:
Chain 3. This counts as the first double crochet.
Work double crochet stitches across the foundation chain according to the following sequence:
dc in the next 7 chains, 3 dc in the next chain, dc in the next 7 chains, dc3tog across the next 3 chains.
Repeat the sequence across the row, creating alternating increases for the peaks and decreases for the valleys.
Finish the row with the appropriate double crochet stitches and turn.
Understanding the Chevron Shape
The 3 dc worked into one stitch creates the raised peak of the zig zag.
The dc3tog forms the valley.
Once these two shaping techniques become familiar, the chevron pattern is very easy to recognize.
Chain 3 and turn.
Rows 2–10: Terracotta Textured Section
Continue using Terracotta (Color A).
Row 2 – Back Post Texture
Chain 3.
Work BPdc around the next 7 stitches.
At the peak, work 3 BPdc around the designated peak stitch.
Continue with BPdc across the next section, then work the decrease at the valley using the appropriate post-stitch technique.
Repeat the established chevron sequence across the row.
Finish with a double crochet in the top of the turning chain.
Chain 3 and turn.
The back post stitches pull selected stitches toward the back of the fabric, creating the ribbed texture.
Row 3 – Front Post Texture
Chain 3.
Work FPdc around the next 7 stitches.
At the peak, work 3 FPdc around the peak stitch.
Continue across the row, following the established chevron sequence and working the decrease at each valley.
Finish with a double crochet in the top of the turning chain.
Chain 3 and turn.
The front post stitches push the ribs toward the front of the blanket, creating a raised textured effect.
Repeat
Continue alternating Rows 2 and 3 until you have completed approximately 10 rows in Terracotta.
Fasten off and weave in the end later.
Rows 11–20: Mustard Section
Join Mustard (Color B).
Continue the same textured chevron pattern for approximately 10 rows.
Alternate the BPdc and FPdc rows just as you did in the Terracotta section.
The mustard section creates a bright contrast against the deeper terracotta and makes the peaks and valleys especially noticeable.
Helpful Tip
Place a stitch marker at regular intervals along the row. This makes it much easier to identify your peaks and valleys, especially when working on a large blanket.
If the chevron points begin to look uneven, stop and count the stitches around the affected section before continuing.
Rows 21–30: Sage Green Section
Join Sage Green (Color C).
Continue the established front-post/back-post chevron sequence for approximately 10 rows.
The softer sage shade creates a natural transition between the warmer and cooler colors.
Pay particular attention to the decreases at the valleys. Keep your tension consistent so the points remain clearly defined.
How to Work dc3tog
To create the valley:
- Yarn over and insert the hook into the first stitch.
- Yarn over and pull up a loop.
- Yarn over and pull through two loops.
- Repeat the process in the second stitch.
- Repeat again in the third stitch.
- Yarn over and pull through all remaining loops on the hook.
This combines three stitches into one and creates the downward point of the chevron.
Rows 31–40: Teal Section
Join Teal (Color D).
Work another 10-row color section using the same FPdc and BPdc chevron pattern.
The rich teal shade adds contrast and helps emphasize the dimensional appearance of the blanket.
Keep checking that every peak and valley lines up vertically with the rows underneath. Consistent stitch placement is the key to achieving clean zig zag lines.
Rows 41–50: Cream Section
Join Cream (Color E).
Continue the established pattern for approximately 10 rows.
Cream acts as a visual break between the stronger colors and gives the finished blanket a softer, more balanced appearance.
Continue repeating the five-color sequence:
Terracotta → Mustard → Sage → Teal → Cream
Repeat the complete color sequence until your blanket reaches the desired length.
For a large throw, approximately 200 rows may be needed, although the exact number will depend on your gauge and preferred dimensions.
Adjusting the Blanket Size
One of the best features of this crochet chevron blanket is how easy it is to customize.
To Make It Wider
Increase the foundation chain while maintaining the established stitch-repeat multiple.
To Make It Longer
Simply continue working additional color blocks until the blanket reaches your preferred length.
Baby Blanket
Use a shorter foundation chain and fewer color repeats.
Lap Blanket
Create a medium-width foundation and continue the pattern until you reach a comfortable lap-blanket length.
Bedspread
Use a longer foundation chain and continue repeating the color sequence for additional rows.
Always keep your starting chain consistent with the pattern repeat so the peaks and valleys remain aligned.
Crochet Blanket Border
Once the main body of the blanket is complete, use Cream (Color E) to create a simple finishing border.
Work single crochet evenly around the entire blanket.
At each corner, work 3 sc in the corner stitch or space to help the border turn smoothly.
Continue around the blanket and join with a slip stitch.
Fasten off and leave a long enough tail for weaving in.
Finishing
Use a yarn needle to carefully weave all loose ends into the back of the blanket.
For the cleanest result, weave the ends through several stitches in different directions before trimming the excess yarn.
Blocking the Blanket
Blocking can help improve the overall shape of the finished chevron blanket.
Lay the blanket flat on a clean surface and gently arrange the peaks and valleys.
Lightly mist the fabric with water and use pins to hold the edges and zig zag points in the desired shape.
Allow the blanket to dry completely before removing the pins.
Avoid stretching the fabric excessively, as this can distort the chevron pattern.
Tips for Perfect Chevron Stitches
Keep Your Tension Consistent
Uneven tension is one of the most common reasons chevron blankets lose their crisp shape.
Try to maintain the same tension throughout every row.
Count Your Stitches
If the peaks or valleys suddenly shift, check your stitch count before continuing.
A missing increase or decrease can quickly cause the entire zig zag pattern to move.
Mark the Peaks
Using stitch markers at the peak points can make the pattern easier to follow, especially during the first few rows.
Watch the Turning Chain
Keep the turning chain consistent from row to row. If you accidentally add or remove stitches around the edges, the blanket can gradually become wider or narrower.
Practice the Texture
If front post and back post stitches are new to you, practice a small swatch before starting the blanket.
This will help you become comfortable inserting the hook around the stitch post rather than through the traditional stitch loops.
Common Problems and Solutions
Why Are My Chevron Peaks Flat?
Your increases may not be positioned correctly, or your tension may be too tight.
Check that each peak contains the required increase stitches and try relaxing your tension slightly.
Why Are My Valleys Not Deep Enough?
Make sure your dc3tog decreases are being worked over the correct three stitches.
Also check that you haven’t accidentally added an extra stitch near the valley.
Why Is My Blanket Getting Wider?
Count the stitches at the end of several rows.
Extra stitches often occur when the turning chain is accidentally worked as a stitch when it should not be.
Why Is My Blanket Getting Narrower?
Look for missed stitches, particularly near the edges and around the chevron decreases.
How Can I Make the Texture More Pronounced?
A slightly smaller hook can sometimes produce firmer, more defined post stitches, while a larger hook creates a softer, more flexible fabric.
Always make a swatch before changing hook sizes for the entire blanket.
Color Ideas for Your Chevron Blanket
Although the terracotta, mustard, sage, teal, and cream combination gives this blanket a warm modern appearance, there are countless ways to customize it.
Try:
- Dusty rose, cream, sage, and beige
- Navy, gray, white, and mustard
- Blush, ivory, peach, and taupe
- Forest green, cream, rust, and brown
- Lavender, sage, white, and soft gray
- Blue, cream, teal, and charcoal
For a baby blanket, softer pastel shades can create a delicate nursery-friendly design.
For a modern living room throw, neutral colors combined with one or two bold accent shades can make the chevron texture stand out.
Video Tutorial
A video tutorial can be especially helpful when learning how to work front post double crochet, back post double crochet, chevron increases, and chevron decreases.
If you’re following a video from another crocheter, keep in mind that the yarn weight, hook size, color sequence, and row count may differ from this written version. Use the video primarily to understand the stitch movements and compare the technique with the written instructions.
More Crochet Inspiration
If you enjoyed this textured zig zag blanket, you may also enjoy exploring:
- How to Choose the Best Yarn for Crochet Blankets
- Crochet Hook Sizes Explained
- Best Row Counters for Crochet Projects
- Best Stitch Markers for Crochet
- How to Fix Uneven Crochet Tension
- Best Yarn Needles for Crochet
These resources can help you choose the right supplies and troubleshoot common problems while working on larger crochet projects.
Frequently Asked Questions
Is this chevron blanket beginner-friendly?
Yes. The basic chevron construction is repetitive once you understand the increases and decreases. Beginners who are comfortable with double crochet can practice the post stitches on a small swatch before beginning the full blanket.
What yarn is best for a crochet zig zag blanket?
A soft worsted-weight acrylic yarn is an excellent choice. It is durable, easy to care for, widely available, and provides good stitch definition for textured patterns.
Can I use a different crochet hook?
Yes. A different hook size will change the gauge and finished dimensions. Make a gauge swatch first if you want to maintain a particular blanket size.
Can I use fewer colors?
Absolutely. The blanket can be made with two, three, four, or five colors. You can even work the entire project in a single shade to create a subtle textured blanket.
Can I make this pattern into a baby blanket?
Yes. Simply reduce the foundation-chain length while maintaining the stitch-repeat structure, then work fewer color blocks to achieve the desired size.
How do I keep the zig zags straight?
Count your stitches regularly and make sure every increase and decrease is placed correctly. Keeping the peaks and valleys aligned from row to row is the most important part of maintaining the chevron shape.
Final Thoughts
This Crochet Zig Zag Blanket Pattern combines the timeless beauty of a chevron ripple with the rich texture of front post and back post double crochet stitches. The alternating raised ribs give the blanket a cozy, dimensional appearance, while the changing colors add movement and visual interest.
The terracotta, mustard, sage, teal, and cream palette creates a warm and sophisticated look, but don’t be afraid to experiment with your own color combinations.
Once you understand the repeating sequence, you can easily adjust the width and length to create everything from a small baby blanket to a generous sofa throw or bedspread.
Most importantly, take your time with the first few rows, count your stitches carefully, and maintain consistent tension. Once the rhythm of the chevron pattern becomes familiar, you’ll find this blanket relaxing and enjoyable to crochet.
Enjoy creating your own beautiful zig zag masterpiece, and happy crocheting!

