

 soofha
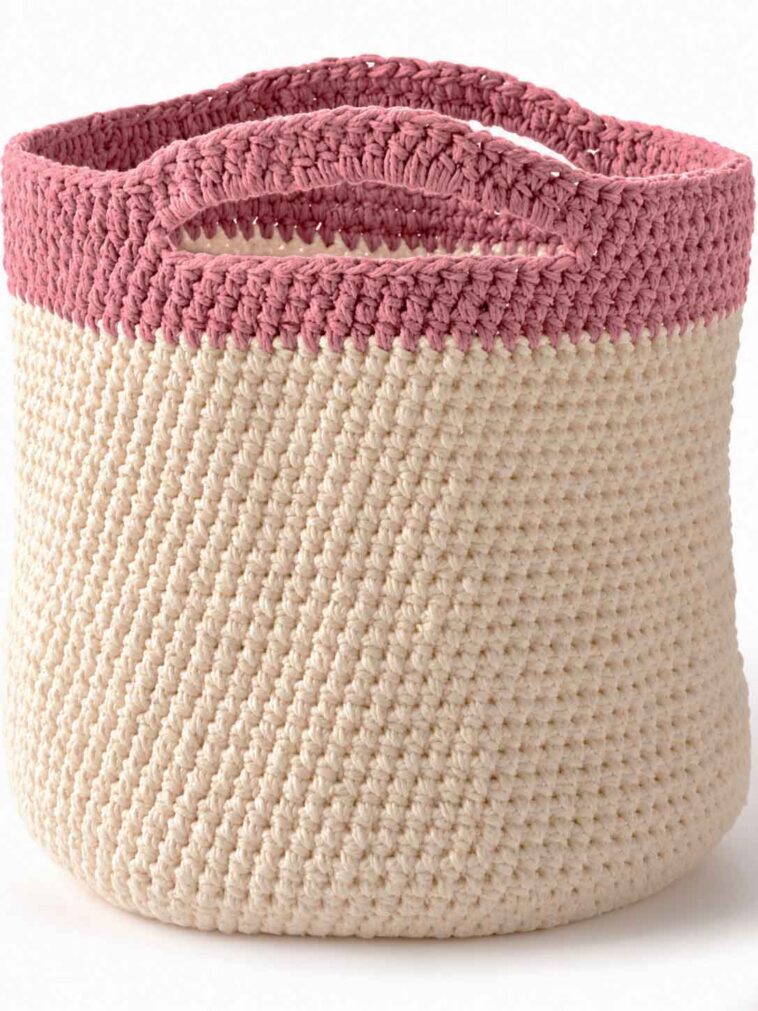
If you love crochet projects that are both pretty and useful, this Handy Basket is a fun one to have on your list. It’s sturdy, roomy, and can be used in so many different ways around the house.
Use it to keep your dog’s toys together, organize your yarn, store blankets, or simply keep those little everyday things that always seem to need a home. You can also make it in colors that match your space, so it becomes part of the decor rather than something you need to tuck away.
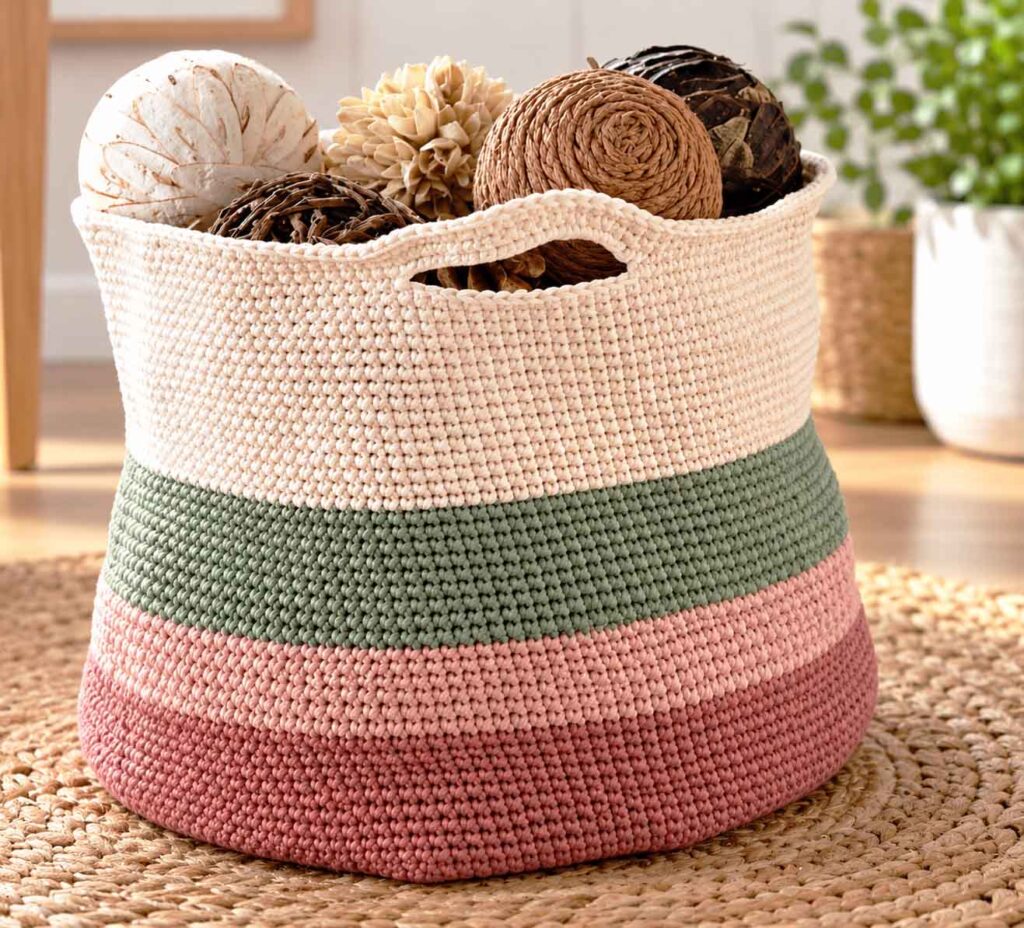
The basket is worked from the bottom up. Once the base is finished, the sides are worked in single crochet before adding the simple openings that form the handles. The pattern uses three colors, but you can easily change the combination or make the entire basket in one shade.
Materials
Here’s what you’ll need to make the basket:
- Bernat Maker Home Dec (8.8 oz/250 g; 317 yds/290 m)
- Contrast A: Steel Blue (11006) — 1 ball, approximately 220 yds/200 m
- Contrast B: Clay (11008) — 1 ball, approximately 115 yds/105 m
- Contrast C: Cream (11009) — 1 ball, approximately 148 yds/135 m
- U.S. G/6 (4 mm) crochet hook, or the size needed to obtain gauge
- 1 stitch marker
Feel free to substitute another yarn if you prefer. Just keep in mind that changing the yarn weight or hook size will affect the finished measurements.
Finished Measurements
The completed basket measures approximately:
- 10 inches (25.5 cm) in diameter
- 10 inches (25.5 cm) in height
Crochet Gauge
17 stitches and 19 rows = approximately 4 inches (10 cm)
Checking your gauge before starting is a good idea, especially if you want your basket to come out close to the stated measurements.
Abbreviations
- Approx – Approximately
- Ch – Chain
- Cont – Continue
- Inc(s) – Increase(s)
- PM – Place marker
- Rep – Repeat
- Rnd(s) – Round(s)
- Sc – Single crochet
- Sl st – Slip stitch
- Sp – Space
Note: Join each round with a slip stitch to the first single crochet unless otherwise stated.
Handy Basket Instructions
Making the Base
The basket begins with a small circle that gradually increases to create the flat base.
Round 1: Make a slip knot and chain 2. Work 8 sc into the second chain from the hook. Join with a sl st to the first sc. You should have 8 sc.
Round 2: Ch 1. Work 2 sc in each sc around. Join with a sl st. You should now have 16 sc.
Round 3: Ch 1. Work 2 sc in the next sc, then 1 sc in the next sc. Repeat around. Join with a sl st. You should have 24 sc.
Round 4: Ch 1. Work 2 sc in the next sc, then 1 sc in each of the next 2 sc. Repeat around. Join with a sl st. You should have 32 sc.
Round 5: Ch 1. Work 2 sc in the next sc, then 1 sc in each of the next 3 sc. Repeat around. Join with a sl st. You should have 40 sc.
Round 6: Ch 1. Work 2 sc in the next sc, then 1 sc in each of the next 4 sc. Repeat around. Join with a sl st. You should have 48 sc.
Continue increasing in the same manner, adding 8 stitches in each round, until you reach 144 sc, which will be approximately 18 rounds in total.
Take your time with the base and make sure it stays nice and flat as you work. If it begins to curl, check your tension before continuing.
Working the Sides
Once the base is the desired size, the basket will start taking shape.
Next Round: Ch 1. Work 1 sc in each sc around, working through the back loops only. Join with a sl st to the first sc. Place a stitch marker at the end of this round.
This back-loop-only round creates a subtle ridge and helps define the bottom edge of the basket.
Following Round: Ch 1. Work 1 sc in each sc around, this time working through both loops. Join with a sl st.
Continue repeating this round until the basket measures approximately 3 inches (7.5 cm) from the marked round.
At the end of this round, change to Contrast B and fasten off Contrast A.
Adding the Second Color
With Contrast B, continue working 1 sc in each stitch around.
Keep working until the basket measures approximately 6 inches (15 cm) from the marked round.
At the end of the round, change to Contrast C and fasten off Contrast B.
Finishing the Main Body
With Contrast C, continue working 1 sc in each stitch around until the basket measures approximately 9½ inches (24 cm) from the marked round.
At this point, you’re ready to add the openings for the handles.
Shaping the Handles
The handle openings are created by replacing sections of stitches with chains.
Next Round: Ch 1.
- Work 1 sc in each of the next 29 sc.
- Ch 14.
- Skip the next 14 sc.
- Work 1 sc in each of the next 58 sc.
- Ch 14.
- Skip the next 14 sc.
- Work 1 sc in each of the final 29 sc.
Join with a sl st to the first sc.
You should now have two chain spaces where the handles will be formed.
Working Around the Handle Openings
Next Round: Begin with 1 sc in each of the next 29 sc. Work 17 sc into the next chain-14 space.
Continue with 1 sc in each of the next 58 sc, then work 17 sc into the second chain-14 space.
Finish with 1 sc in each of the next 29 sc. Join with a sl st.
The extra stitches worked into the chain spaces help create sturdy, comfortable handles.
Final Rounds
Next 2 Rounds: Ch 1. Work 1 sc in each sc around. Join with a sl st.
Fasten off at the end of the second round and weave in your ends securely.
Your Handy Basket is finished!
Make It Your Own
One of the nicest things about a simple basket like this is how easy it is to personalize.
You can keep the three-color combination from the original design, choose three completely different shades, or make the entire basket in a single color. Soft neutrals would give it a simple, modern look, while brighter colors could make it a fun addition to a child’s room or craft space.
You could also add small details such as a pom-pom, tassels, embroidery, or another decorative touch. Just remember that the basket is already attractive in its simple form, so you don’t need to add much to make it special.
What Can You Use the Basket For?
There are plenty of ways to put this basket to work around the house. Here are a few ideas:
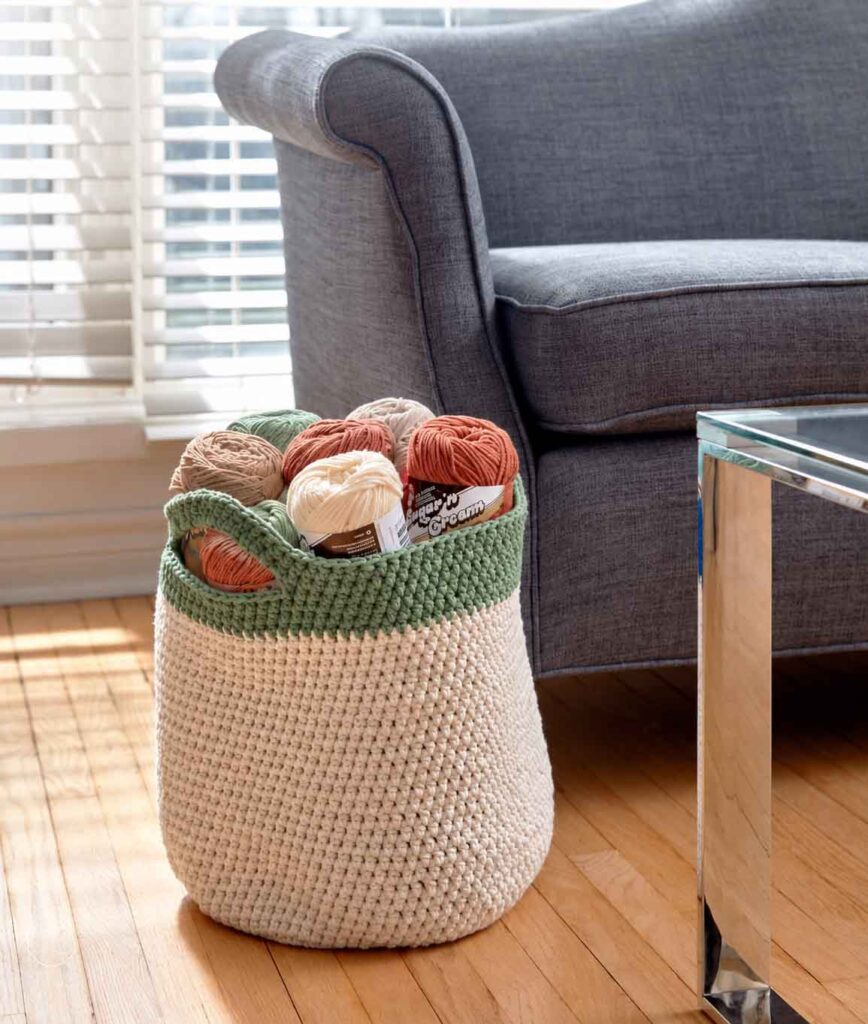
- Store your crochet yarn and supplies
- Keep children’s toys organized
- Hold dog or cat toys
- Store small blankets
- Organize craft supplies
- Keep magazines together
- Use it as a simple decorative storage basket
- Make one as a handmade gift for a friend or family member
Because it has a fairly generous size and sturdy construction, it’s the kind of crochet project you’ll probably find yourself using every day.
Handy Crochet Basket Pattern
PDF Pattern
If you prefer working from a printable pattern, you can follow the original Handy Basket instructions in PDF format from Yarnspirations.
👉 HANDY BASKET PDF 👈
Having the pattern in PDF form can be especially convenient if you like keeping your crochet instructions beside you while you work.
Video Tutorial
If you prefer watching someone work through the project, a helpful video tutorial is also available from the Treasures Made From Yarn YouTube channel.
Following along with a video can be useful if you’re unsure about the construction of the base, the color changes, or the handle openings.
Final Thoughts
The Handy Basket is one of those crochet projects that looks simple but ends up being surprisingly useful. Once you understand how the base increases and the sides are worked, the rest comes together fairly quickly.
It’s also a great project for experimenting with color. You can stick with the suggested shades or use whatever yarn you already have in your stash.
So grab your hook, choose a few colors you love, and give this basket a try. Whether you make it for your own home or as a handmade gift, it’s a practical project that you’ll be able to enjoy long after the last stitch is finished.

