

 soofha
There’s something special about making a piece of home décor with your own two hands. A little yarn, a crochet hook, and some patience can turn into something beautiful that you’ll enjoy using every day.
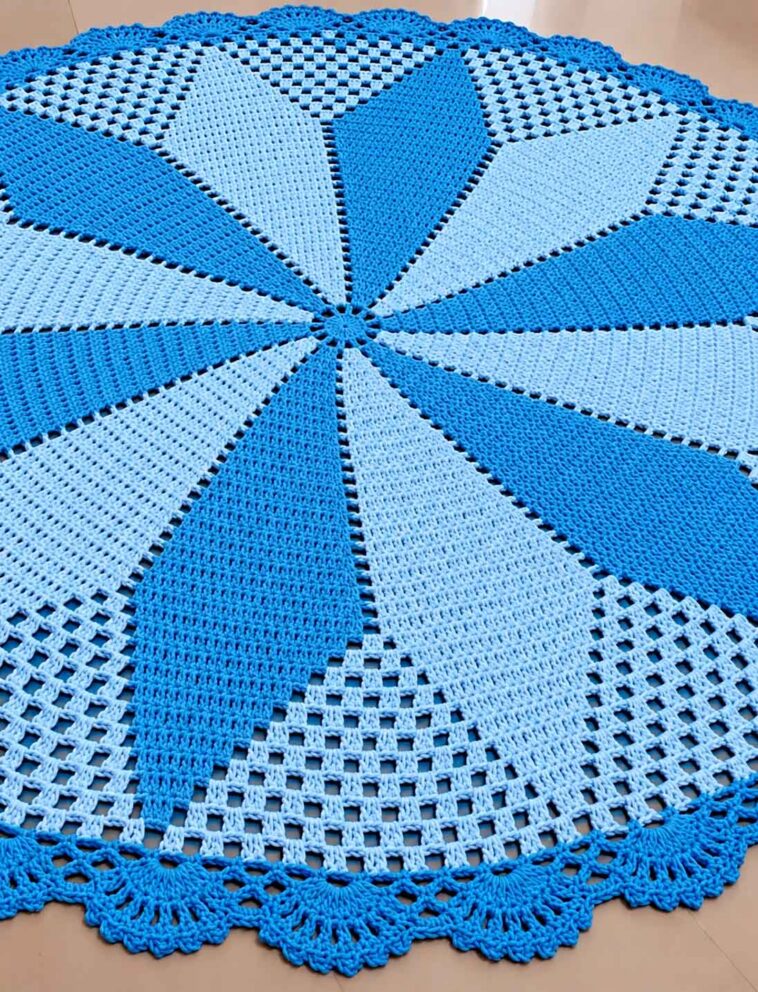
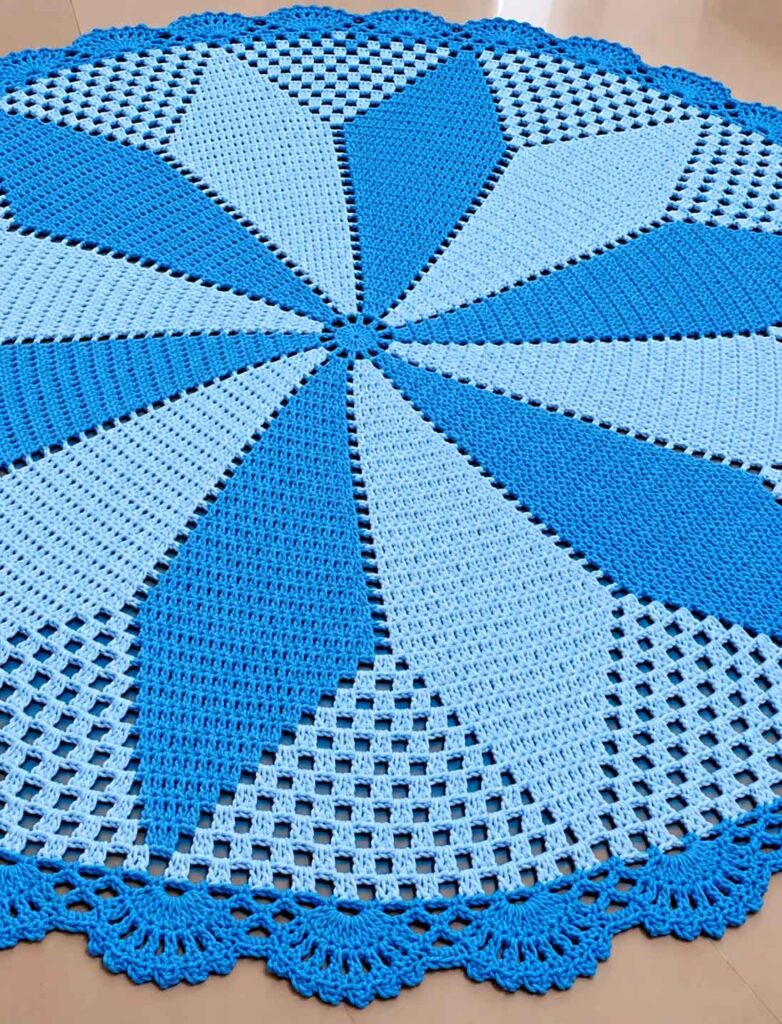
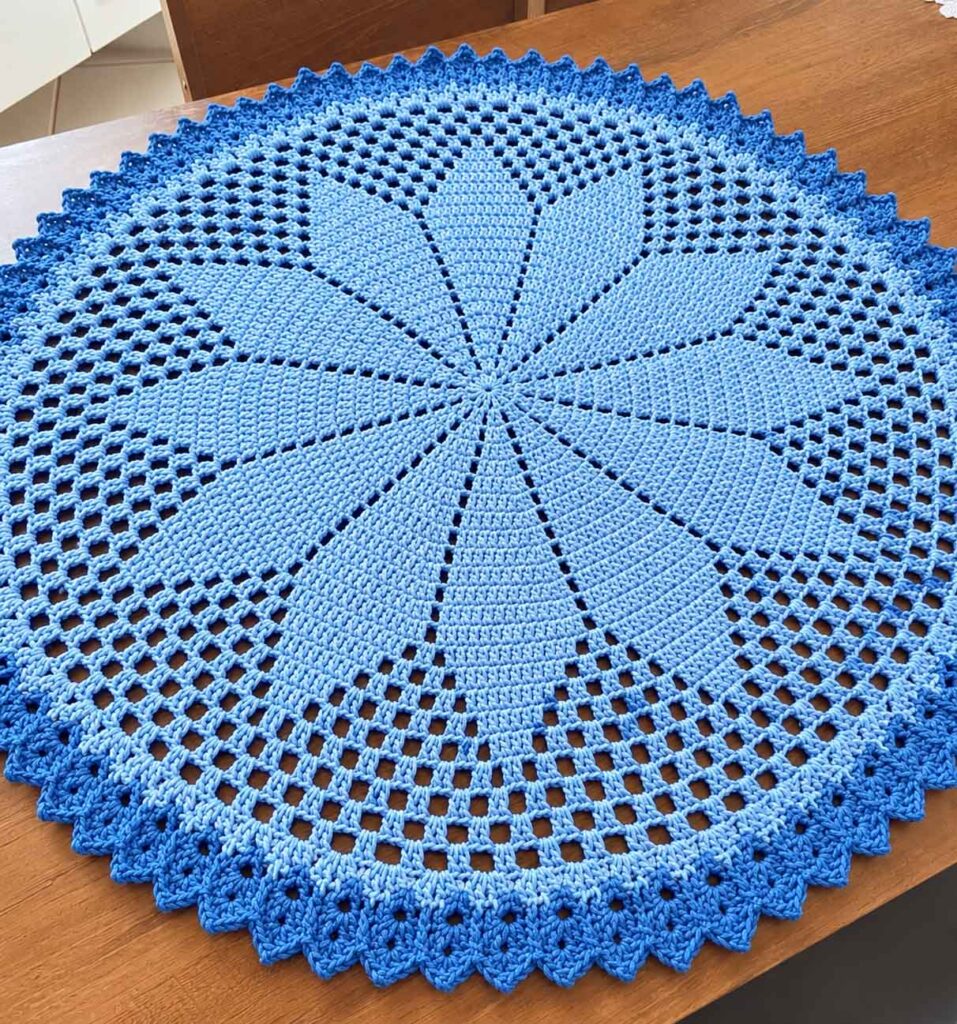
Today on Soofha, we’re making a round crochet rug with a lovely shell border and delicate picot details. The finished design has a classic look, with a textured center and a decorative edge that gives the whole piece a polished finish.
The rug is worked in joined rounds, starting at the center and gradually growing outward. The stitch pattern becomes more interesting as you work through the tapered sections, and the final shell border adds a soft, scalloped edge.
Although the finished rug looks detailed, much of the pattern comes from repeating familiar stitches. Once you get comfortable with the rhythm, you can settle into your crochet and watch the design take shape round by round.
A natural cotton color gives this rug a timeless appearance, but feel free to choose a shade that works with your home. Whether you prefer a simple neutral or something more colorful, this pattern offers plenty of room to make it your own.
What Makes This Round Crochet Rug Special?
The design begins with a small circle of double crochet stitches. As you work outward, the stitches form 12 large sections that gradually increase in size. Later, these sections become narrower while smaller groups of stitches fill the spaces between them.
The final rounds create a decorative border of repeating shells. Small picots add a delicate touch to the outer edge, giving the rug its distinctive finish.
It’s a satisfying project for crocheters who enjoy working in the round and seeing a design develop gradually. The repeating sections also make it easier to keep track of your progress as the rug grows.
Materials and Finished Size
Before you begin, gather the following supplies:
- Brazilian No. 6 cotton crochet cord
- 3.5 mm crochet hook
- Scissors
- Tapestry needle for weaving in the ends
Finished size: Approximately 59 inches (1.5 meters) in diameter.
Yarn requirement: Approximately 2,275 grams of cotton cord.
These measurements come from the designer’s sample. Your finished rug may be slightly larger or smaller depending on your tension, hook, and the cord you use.
One important detail when choosing your yarn: Brazilian No. 6 cotton cord does not necessarily correspond to US category 6 yarn. Check the actual thickness of your cord rather than relying on the number alone.
No measured gauge is provided for this pattern. Instead, pay attention to the shape of your work as you crochet. The rug should remain flat without curling upward or developing waves.
Crochet Abbreviations
This pattern uses standard US crochet terminology.
- ch: Chain
- sl st: Slip stitch
- dc: Double crochet
- st / sts: Stitch / stitches
- sp: Space
- sk: Skip
- rep: Repeat
Special Stitches
Shell: Work (2 dc, ch 2, 2 dc) into the indicated stitch or space.
Picot: Ch 3, then sl st into the first chain made.
Final shell with picots: Work 3 dc into the indicated space, make a picot, work 3 more dc into the same space, and make a second picot.
Before You Start
A few notes will help you follow the pattern more easily.
- Work in joined rounds without turning your work.
- In Rounds 1 and 2, the beginning ch 3 counts as a dc.
- From Round 3 onward, the beginning ch 2 counts as a dc.
- Unless otherwise stated, join each round with a sl st to the top of the beginning chain.
- When an instruction tells you to repeat a sequence, continue until you have completed the required number of repeats.
- Whenever two dc stitches are worked into the same stitch or space, they are separate stitches, not a decrease.
- Keep your chain spaces consistent, especially while establishing the main pattern.
Throughout the project, check that the rug is lying flat. Small adjustments made early can save you from having to undo several rounds later.
Round Crochet Rug Pattern
Part 1: Creating the Center
The first few rounds establish the circular center of your rug. Take your time here, as a neat beginning will make the following rounds easier to manage.
Round 1
Make a magic ring.
Ch 3, then work 11 dc into the ring. Pull the ring closed and join with a sl st to the top of the beginning ch 3.
Stitch count: 12 dc.
If you prefer not to use a magic ring, ch 5 and join with a sl st to form a ring. Work the same stitches into the ring.
Round 2
Ch 5. This counts as 1 dc and ch 2.
Repeat the following sequence 11 times: dc in the next st, ch 2.
Join with a sl st to the third chain of the beginning ch 5.
Stitch count: 12 dc and 12 ch-2 spaces.
Round 3
Sl st into the first ch-2 space.
Ch 2, work 2 dc into the same space, then ch 1.
Repeat the following sequence 11 times: work 3 dc into the next ch-2 space, ch 1.
Join.
Stitch count: 12 groups of 3 dc and 12 ch-1 spaces.
Part 2: Building the Main Sections
In this part, the 12 sections gradually become wider. You will add stitches to each group while keeping a small chain space between neighboring groups.
Round 4
Ch 2, work 1 dc in the next st, then work 2 dc in the last st of the first group. Ch 1.
For each remaining group, work 1 dc in every stitch except the last stitch. Work 2 dc in the last stitch, then ch 1.
Do not work into the chain spaces.
Join.
Stitch count: 12 groups of 4 dc and 12 ch-1 spaces.
Rounds 5–30
Ch 2, counting it as the first dc of the first group.
Work 1 dc into each remaining stitch of the group except the last. Work 2 dc into the last stitch, then ch 1.
Repeat the same sequence for each remaining group: work 1 dc in every stitch except the last, work 2 dc in the last stitch, then ch 1.
Join at the end of the round.
With every round, each large group gains one additional dc. Keep following the same sequence until you finish Round 30.
Round 30 stitch count: 12 groups of 30 dc and 12 ch-1 spaces.
At this stage, you should have a much larger circle with 12 clearly defined sections.
Part 3: Shaping the Tapered Sections
Now the construction changes slightly. Instead of continuing to increase the large groups, you will begin reducing their size.
The first and last stitches of each large group are left unworked. At the same time, new groups of 2 dc are added into the chain spaces between the larger sections.
As you continue, the large groups become narrower and the smaller groups gradually fill the spaces around them.
Round 31
Sl st into the second dc of the first large group.
Ch 2. This counts as the first dc worked in that second stitch.
Work 1 dc into each following stitch through the next-to-last stitch of the group. Leave the final stitch unworked.
Ch 1, work 2 dc into the next ch-1 space, then ch 1.
For each remaining large group:
- Skip the first stitch.
- Work 1 dc into each stitch through the next-to-last stitch.
- Skip the last stitch.
- Ch 1, work 2 dc into the next ch-1 space, then ch 1.
Join at the end of the round.
Stitch count: 12 large groups of 28 dc, with one small group of 2 dc between each pair of large groups.
Round 32
Sl st into the second dc of the first large group.
Ch 2, then work 1 dc into each stitch through the next-to-last stitch. Leave the final stitch unworked.
Ch 1, work 2 dc into the next ch-1 space, then ch 1.
Skip the existing small group of 2 dc. Work 2 dc into the following ch-1 space, then ch 1.
Continue around, leaving the first and last stitches of each large group unworked. Between the large groups, work 2 dc into every ch-1 space, with ch 1 between groups. Skip the existing small groups of 2 dc.
Join.
Stitch count: 12 large groups of 26 dc, with two small groups of 2 dc between each pair of large groups.
Rounds 33–44
Continue using the same method throughout these rounds.
At the beginning of each round, sl st into the second stitch of the first large group. Ch 2, then work 1 dc into each stitch through the next-to-last stitch of that group, leaving the last stitch unworked.
Ch 1. Between the large groups, work (2 dc, ch 1) into each ch-1 space, skipping the existing small groups of 2 dc.
For every remaining large group, skip the first stitch and the last stitch, working 1 dc into each stitch between them.
Join after the final ch 1.
With each new round, every large group loses 2 dc, while one additional small group is added between neighboring large groups.
Use the following table to keep track of your progress.
| Round | Dc in each large group | Small groups between large groups |
|---|---|---|
| 33 | 24 | 3 |
| 34 | 22 | 4 |
| 35 | 20 | 5 |
| 36 | 18 | 6 |
| 37 | 16 | 7 |
| 38 | 14 | 8 |
| 39 | 12 | 9 |
| 40 | 10 | 10 |
| 41 | 8 | 11 |
| 42 | 6 | 12 |
| 43 | 4 | 13 |
| 44 | 2 | 14 |
By the end of Round 44, the original large groups will have narrowed to just 2 dc each.
Round 44 count: 180 groups of 2 dc, with 180 ch-1 spaces between them.
Take a moment to check your work before moving on. This transition creates the foundation for the solid round that supports the decorative border.
Part 4: Preparing the Border
The next round works dc stitches throughout the existing stitches and adds increases in selected chain spaces. This creates the foundation needed for the shells.
Round 45
Ch 2, then work 1 dc in the next stitch.
Continue around, working 1 dc into every dc stitch.
In the chain spaces, use the following sequence:
- Work 1 dc into each of the next four ch-1 spaces.
- Work 2 dc into the fifth ch-1 space.
Repeat this chain-space sequence 36 times around while continuing to work dc into every stitch.
Join.
Stitch count: 576 dc.
This count follows the stated chain spacing and increase placement. If you have adjusted the spacing or increases to suit your tension, recount your stitches before starting the shell border.
Part 5: Working the Shell Border
The shell border is where the rug begins to take on its finished appearance. The repeated shells form a scalloped edge, while the individual dc stitches between them keep the pattern organized.
Round 46
Ch 2. In the same stitch, work (1 dc, ch 2, 2 dc) to complete the first shell.
Repeat the following sequence 95 times:
Sk 2 sts, dc in the next st, sk 2 sts, shell in the next st.
After the final repeat, sk 2 sts, dc in the next st, then skip the final 2 sts.
Join with a sl st to the top of the beginning ch 2.
Stitch count: 96 shells and 96 individual dc stitches.
Round 47
Sl st into the next dc, then sl st into the ch-2 space of the first shell.
Ch 2, then work (1 dc, ch 2, 2 dc) into the same space.
Work 1 dc into the individual dc stitch between this shell and the next.
Repeat around: work a shell into the ch-2 space of the next shell, then work 1 dc into the next individual dc stitch.
Join.
For this round, work only into the shell’s ch-2 space and the individual dc stitches between shells. Leave the other shell stitches unworked.
Stitch count: 96 shells and 96 individual dc stitches.
Round 48
Repeat Round 47, working a shell into each shell’s ch-2 space and a single dc into each individual dc stitch.
Join at the end of the round.
Round 49
Sl st across to the ch-2 space of the first shell.
Ch 2, then work (1 dc, ch 2, 2 dc) into the same space.
Ch 1, work 1 dc into the next individual dc stitch, then ch 1.
Repeat around: work a shell into the next shell’s ch-2 space, ch 1, work 1 dc into the next individual dc stitch, then ch 1.
Join.
Rounds 50–56
Repeat Round 49 for each of these rounds.
Continue working shells into the ch-2 spaces of the previous round’s shells and individual dc stitches into the individual dc stitches. Leave the separating ch-1 spaces unworked.
Stitch count per round: 96 shells, 96 individual dc stitches, and 192 separating ch-1 spaces.
As you work, keep the shells aligned with one another. This repeated sequence creates the decorative border and gives the outer edge a consistent shape.
Part 6: Adding the Picot Edging
The final round adds small picots to the shells. These tiny details give the border a delicate finish without making the overall design too busy.
Round 57
Sl st across to the ch-2 space of the first shell.
Ch 2, then work 2 dc into the same space.
Make a picot by chaining 3 and slip stitching into the first chain made.
Work 3 more dc into the same space, then make a second picot.
Ch 1, work 1 dc into the next individual dc stitch, then ch 1.
Repeat around: work a final shell with two picots into the next shell’s ch-2 space, ch 1, work 1 dc into the next individual dc stitch, then ch 1.
Join with a sl st to the top of the beginning ch 2.
Fasten off.
If you prefer a simpler border, you can leave out the second picot from each shell.
Round Crochet Rug with Shell Border
Finishing Your Crochet Rug
You’re almost there! Once the final round is complete, fasten off your yarn and weave in all loose ends securely on the wrong side of the rug.
Lay the rug on a flat surface and gently arrange the border so the shells sit neatly around the edge. Give the rug a little time to settle into its finished shape.
One of the most useful habits when making a large crochet rug is checking its shape regularly. If the center begins to cup, your stitches may be too tight or you may need a little more room between sections. If the rug starts to ripple, the fabric may have too much fullness.
The designer suggests adjusting the hook size or chain spacing to suit your tension. Additional chains may help relieve cupping, while fewer separating chains or a smaller hook may help with rippling. Make small adjustments and check the fabric again before continuing.
Because a rug uses a substantial amount of yarn, it’s worth checking the shape every few rounds rather than waiting until the end.
How to Make Your Rug Smaller or Larger
One of the nice things about this pattern is that you can adjust the size of the center to suit your space.
For a smaller rug, work fewer rounds in the expanding section. For a larger rug, add more rounds before beginning the tapered section.
The designer recommends ending the expanding section on an even-numbered round and adding or removing rounds in increments of two. Continue the tapered sections until each large group has narrowed to 2 dc.
Keep in mind that changing the number of expanding rounds also changes the later round numbers, stitch counts, and amount of cord needed. The counts in this pattern apply to the version with 30 expanding rounds.
If you’re making a different size, use the construction sequence as your guide rather than expecting every stitch count to match the original sample.
Video Tutorial
The accompanying video tutorials are in Portuguese. If you don’t speak Portuguese, try turning on captions where available and watching the hand movements closely.
Seeing how the hook moves through the stitches can be especially helpful when working the tapered sections and joining the shell border.
Follow along with the written instructions, pausing the video whenever you need a closer look at a particular stitch or sequence.
Final Thoughts
This round crochet rug is a lovely project for anyone who enjoys creating practical pieces with a decorative touch. The center is built from familiar double crochet stitches, the tapered sections give the design its distinctive structure, and the shell-and-picot border brings everything together.
The project does take time and a fair amount of cotton cord, but the repeating rounds make it easier to settle into a comfortable rhythm as you work. You can also experiment with different colors to create a rug that feels right at home in your space.
Whether you place it in a bedroom, a cozy sitting area, or another favorite corner of your home, a handmade rug adds a personal touch that store-bought décor simply can’t replicate.
Happy crocheting from Soofha! 🧶

