

 soofha
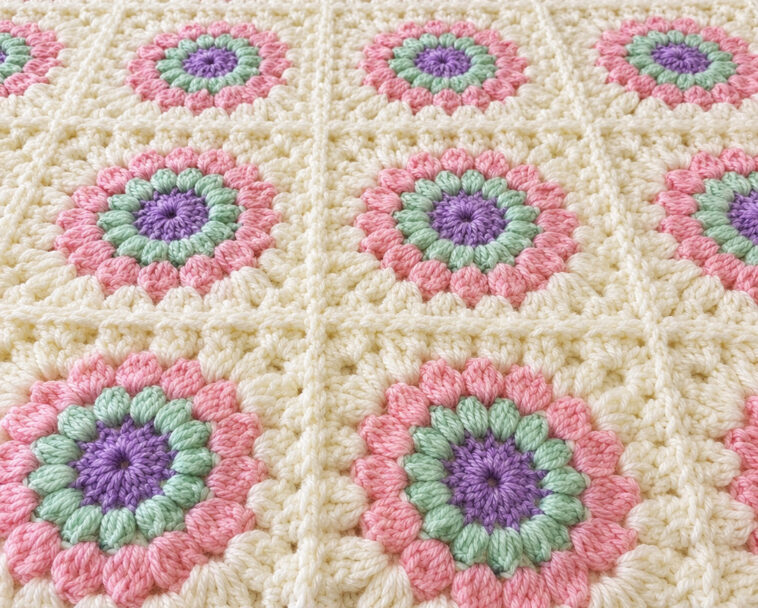
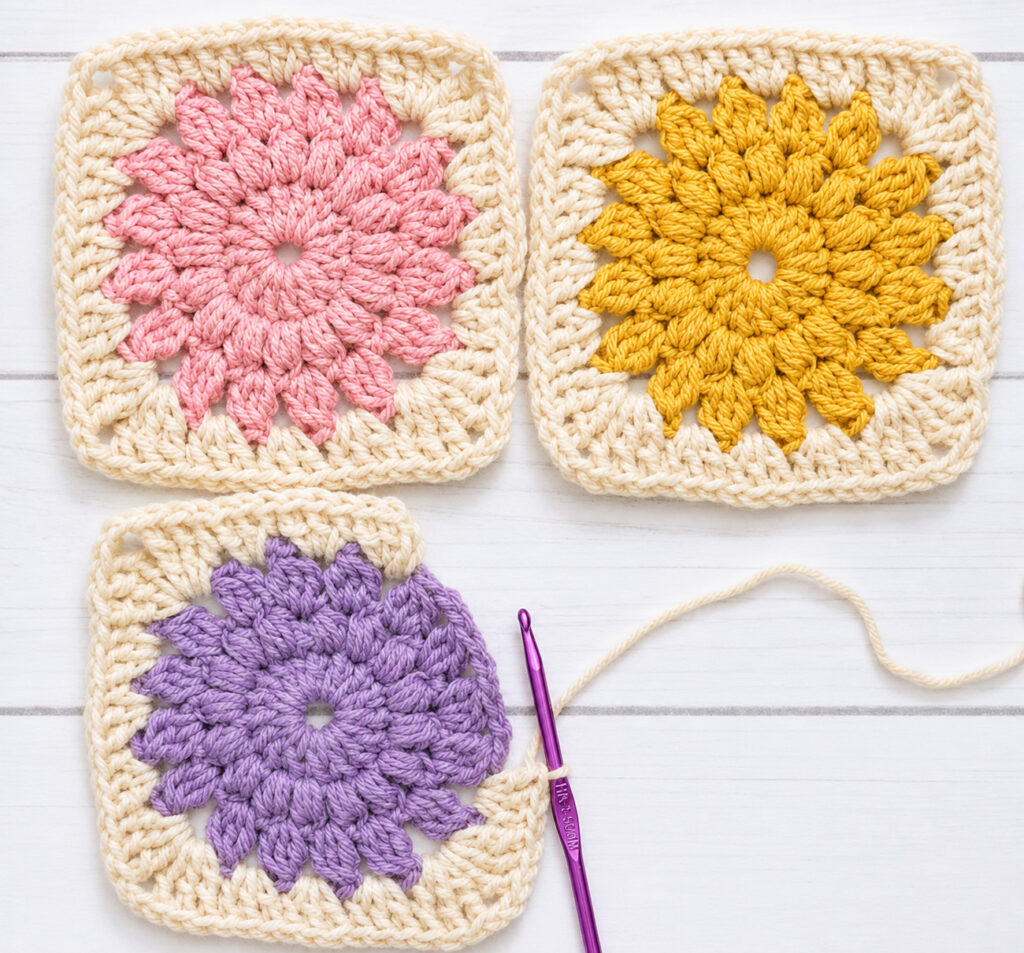
The Sunburst Granny Square is a cheerful crochet motif filled with texture, color, and a beautiful circular design. With its radiating center and classic square border, this pattern is perfect for crocheters who want to create something bright and eye-catching.
Once you make a few squares, you can combine them to create blankets, cushions, bags, scarves, throws, and many other handmade projects. The best part is that you can easily customize the colors to match your personal style.
What Makes the Sunburst Granny Square Special?
Traditional granny squares are known for their simple clusters and timeless appearance. The Sunburst version adds a more decorative twist by beginning with a rounded, textured center before transforming into a square.
The combination of puff stitches, cluster stitches, and corner sections gives the motif plenty of dimension. You can use several contrasting colors for a vibrant look or choose a softer palette for a more subtle, modern finish.
Sunburst Granny Square Project Ideas
There are countless ways to use these colorful crochet squares. Here are a few ideas to get you started:
Blankets and Afghans: Join multiple squares together to create a warm, colorful blanket. Try repeating the same color sequence or mixing different combinations for a more playful effect.
Cushions and Pillows: Turn your finished squares into decorative cushion covers. They are a lovely way to add handmade texture and color to a room.
Bags and Totes: Several Sunburst squares can be joined together to create a unique crochet bag or market tote.
Scarves and Shawls: Arrange the squares in a long strip or larger pattern to make a colorful accessory.
Wall Art: Frame a single square or arrange several motifs together for an inexpensive handmade decoration.
Materials You’ll Need
Before beginning, gather the following supplies:
- Crochet yarn in your preferred colors
- A crochet hook suitable for your yarn
- Sharp scissors
- A yarn or tapestry needle
- Stitch markers, if desired
The exact yarn quantity and hook size will depend on the size of your finished square and the yarn weight you choose. Always check your yarn label for the manufacturer’s recommended hook size.
Abbreviations
The pattern below uses common US crochet terminology:
- ch – chain
- sl st – slip stitch
- dc – double crochet
- tr – treble crochet
- dc3tog – double crochet three together
- puff stitch – textured puff stitch
How to Crochet the Sunburst Granny Square
Round 1: Create the Center
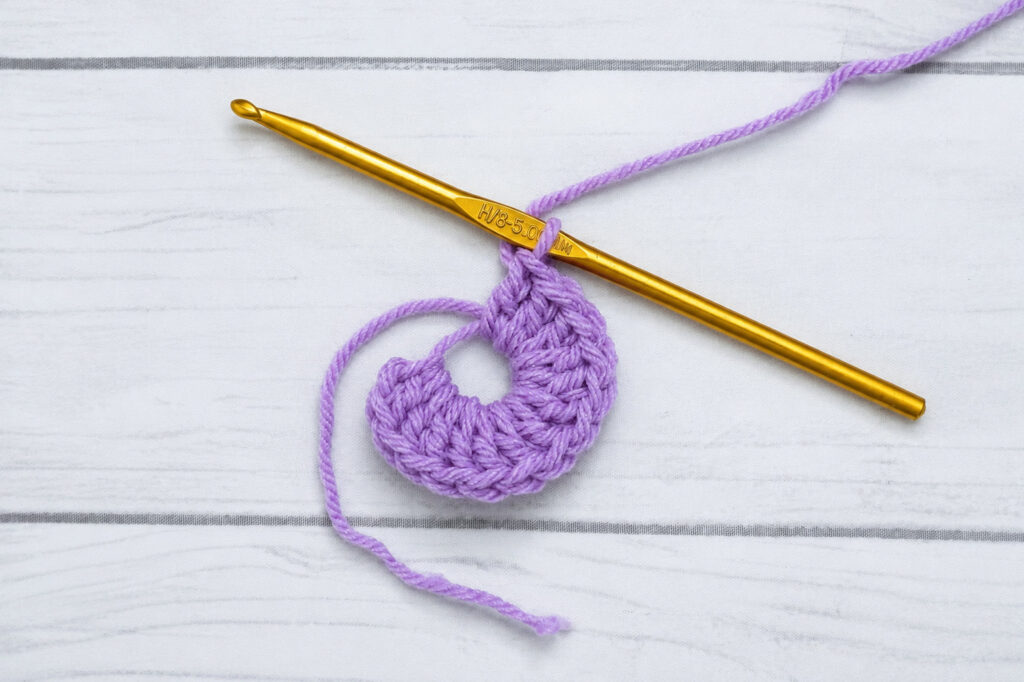
Begin with a magic ring. If you prefer, you can chain 4 and join with a slip stitch to form a small ring.
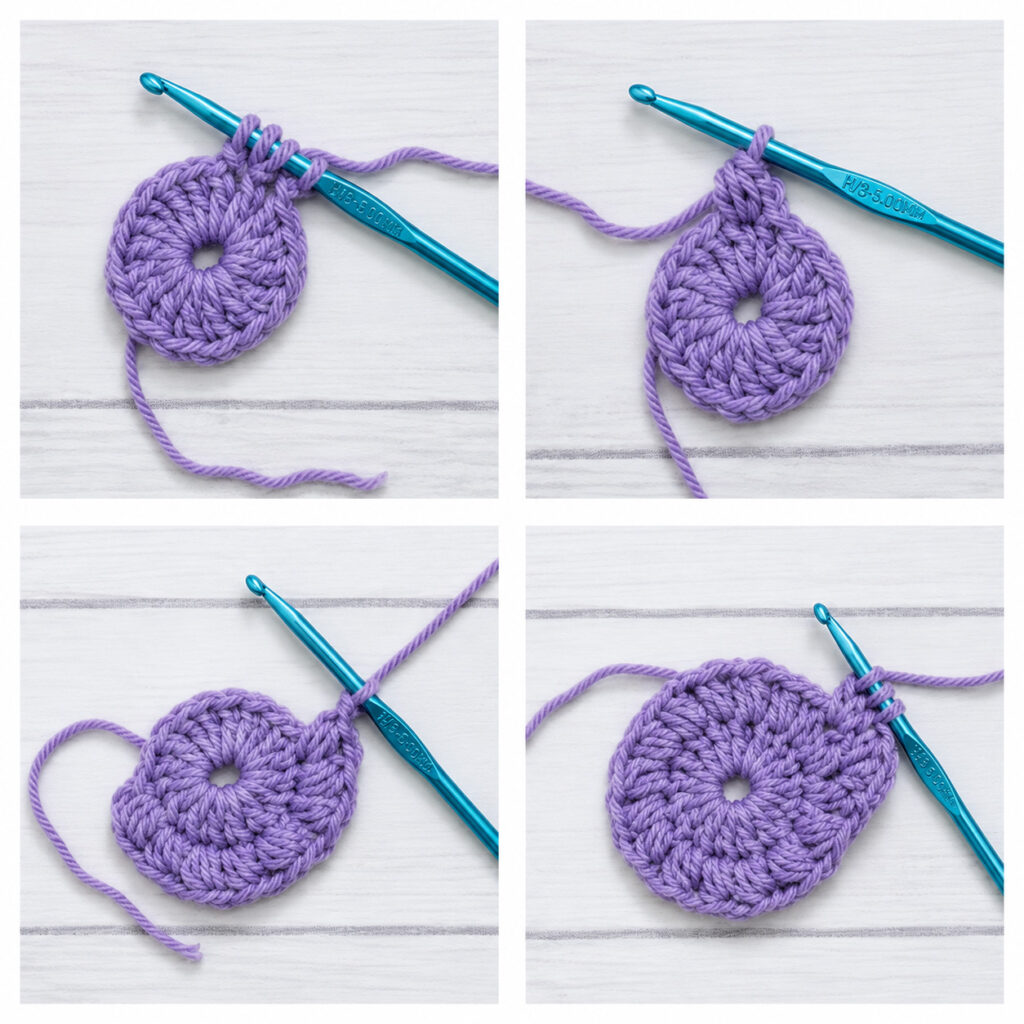
Chain 2, which counts as the first double crochet. Work 15 more double crochets into the center of the ring.
You should have 16 double crochets altogether.
Join the round with a slip stitch to the top of the beginning chain.
Fasten off if you plan to change colors for the next round.
Create the First Round
Round 2: Add the Puff Stitches
Join your next color in an appropriate stitch or space.
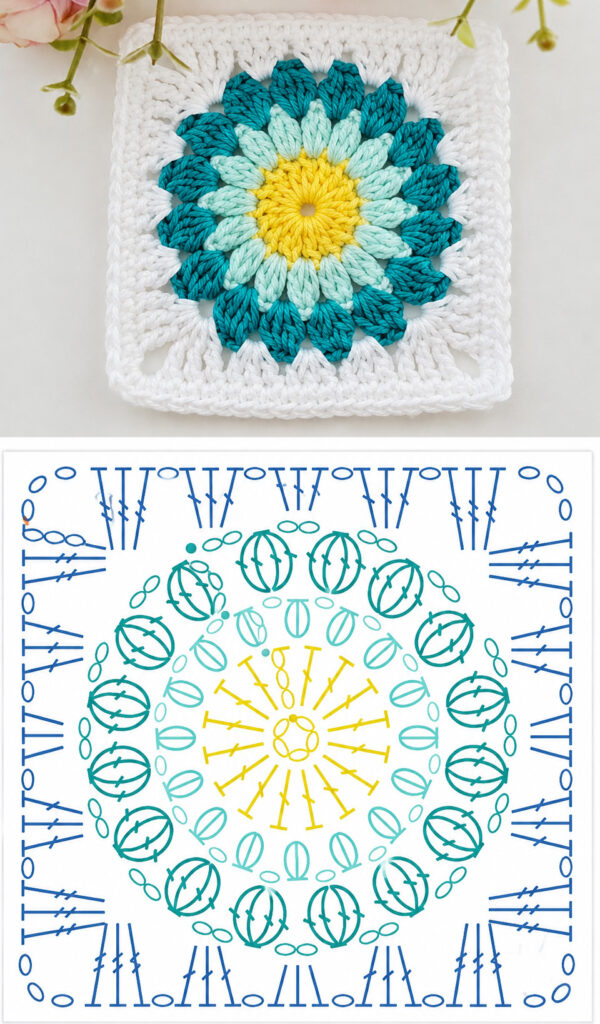
Chain 2, then work a puff stitch into the next double crochet. Chain 1.
Continue working one puff stitch followed by one chain around the entire round.
You should finish with 16 puff stitches and 16 chain spaces.
Join with a slip stitch to complete the round.
How to Make the Puff Stitch
To make the puff stitch, yarn over and insert your hook into the indicated stitch. Yarn over again and pull up a loop.
Repeat this process several times in the same stitch until you have multiple loops on your hook. Yarn over once more and pull through all of the loops.
Finish the puff stitch with a chain stitch.
The result should be a raised, rounded stitch that gives the center of the Sunburst Granny Square its distinctive texture.
Round 3: Form the Textured Clusters
For the next round, work your cluster stitches into the chain spaces between the puff stitches.
Begin by making the appropriate starting chain. Work a dc3tog into the next chain space, followed by 1 chain.
Repeat this sequence around the entire circle:
dc3tog, ch 1
Continue until you have completed 16 dc3tog clusters.
Join the round with a slip stitch.
If you want to introduce another color, this is a good point to fasten off and weave in your ends.
What Is a dc3tog?
The dc3tog is a cluster created by partially working three double crochets and then joining them together at the top.
To make it, begin a double crochet but stop before completing the final pull-through. Repeat the process twice more in the same space.
You will have several loops on your hook. Yarn over and pull through all the remaining loops to complete the cluster.
This stitch creates the textured ring that helps the circular center transition into the square shape.
Round 4: Turn the Circle Into a Square
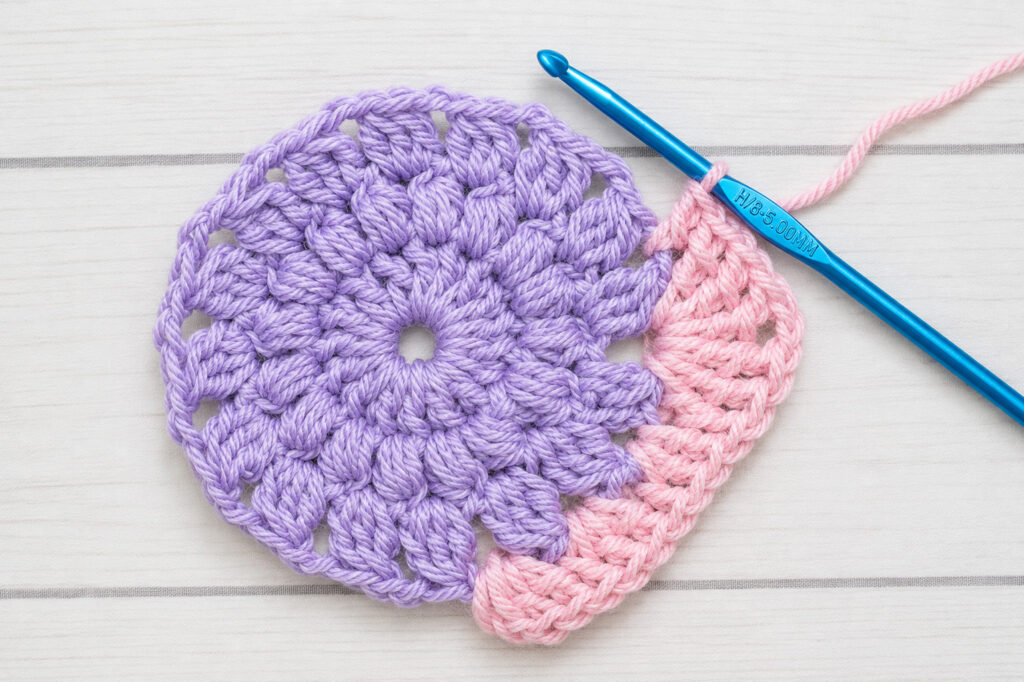
Now it is time to create the four corners that give the motif its classic granny-square shape.
Attach your border color to one of the chain spaces between the dc3tog clusters.
Chain 2, which counts as the first double crochet.
Work 2 more double crochets into the same chain space.
Continue along the side by working 3 double crochets in each of the next three chain spaces.
When you reach the next chain space, create the first corner:
3 treble crochets, ch 2, 3 treble crochets
This forms one corner of the square.
Continue around the motif by working three double crochets into each of the next three chain spaces.
Then make another corner using:
3 tr, ch 2, 3 tr
Repeat this side-and-corner sequence around the entire square until you have four corners.
Finish the round with a slip stitch to the top of the beginning chain.
Fasten off and weave in all loose ends with a tapestry needle.
Making the Square Larger
One of the advantages of this pattern is that you can continue growing the square beyond the original four rounds.
For each additional round, continue working groups of three double crochets along the sides and the same corner structure in each corner.
As the square grows, you will add one additional group of three double crochets along each side compared with the previous round.
For example, the next round will contain four groups of three double crochets along each side before reaching the corner.
Continue in this manner until your square reaches the size you need.
Choosing Colors for Your Sunburst Square
Color selection can completely change the appearance of this motif.
For a bright and energetic design, try combinations such as:
- Yellow, orange, pink, turquoise, and cream
- Coral, peach, mustard, and white
- Purple, pink, blue, and green
For a softer look, consider:
- Cream, beige, dusty rose, and sage
- Pale blue, ivory, lavender, and soft gray
- Blush pink, cream, light green, and peach
You can also make every round a different color for a classic retro crochet appearance.
If you prefer a coordinated look, use the same center colors throughout your project and vary only the outer border colors.
Joining Your Sunburst Granny Squares
Once you have made enough squares for your project, they can be joined in several different ways.
A whip stitch creates a straightforward seam and is easy for beginners.
A slip-stitch join gives the project a more defined seam and can add an attractive decorative detail.
For a seamless-looking finish, you can also experiment with a mattress-style join or other invisible joining techniques.
Before joining all of your squares, lay them out on a flat surface. This allows you to move the colors around and find an arrangement you like.
Helpful Crochet Tips
Keep your tension consistent. Even tension will help your squares maintain a similar size.
Block your squares if needed. Blocking can straighten the edges and make joining much easier.
Weave in ends as you go. This can save considerable time when your project contains many individual squares.
Count your stitches. If your square begins to look uneven, check your stitch count before continuing to the next round.
Experiment with yarn. Cotton, acrylic, wool blends, and other suitable yarns can all create different effects.
Finishing Your Sunburst Granny Square
After completing the final round, gently shape the square with your hands. If the edges are uneven, blocking can help create a cleaner, more professional finish.
Use a tapestry needle to weave the remaining yarn tails securely through the back of the stitches. Trim only after the ends are firmly secured.
And that’s it—you’ve completed a beautiful Sunburst Granny Square!
Final Thoughts
The Sunburst Granny Square is a wonderful project for experimenting with color and texture. Its combination of a rounded, dimensional center and traditional granny-square border gives it a distinctive handmade character.
Make one square as a small decorative motif, or create dozens and join them together into a beautiful blanket. You can also experiment with different yarn weights, color combinations, and square sizes to make the design completely your own.
Most importantly, have fun with the process. Crochet is all about creativity, and there is no single “right” color palette for a Sunburst Granny Square.
Video Tutorial
If you are a visual learner, watching a video while following the written instructions can make the puff stitches and cluster sections much easier to understand. A video tutorial from the Blossom Crochet channel can be especially helpful for seeing how the rounds come together.
Want a PDF Version?
If you prefer keeping your crochet patterns in a convenient format, save or print a PDF copy of the Sunburst Granny Square instructions so you can easily refer to the pattern while working on your next project.
Happy crocheting, and enjoy bringing a little sunshine to your handmade creations!

