

 soofha
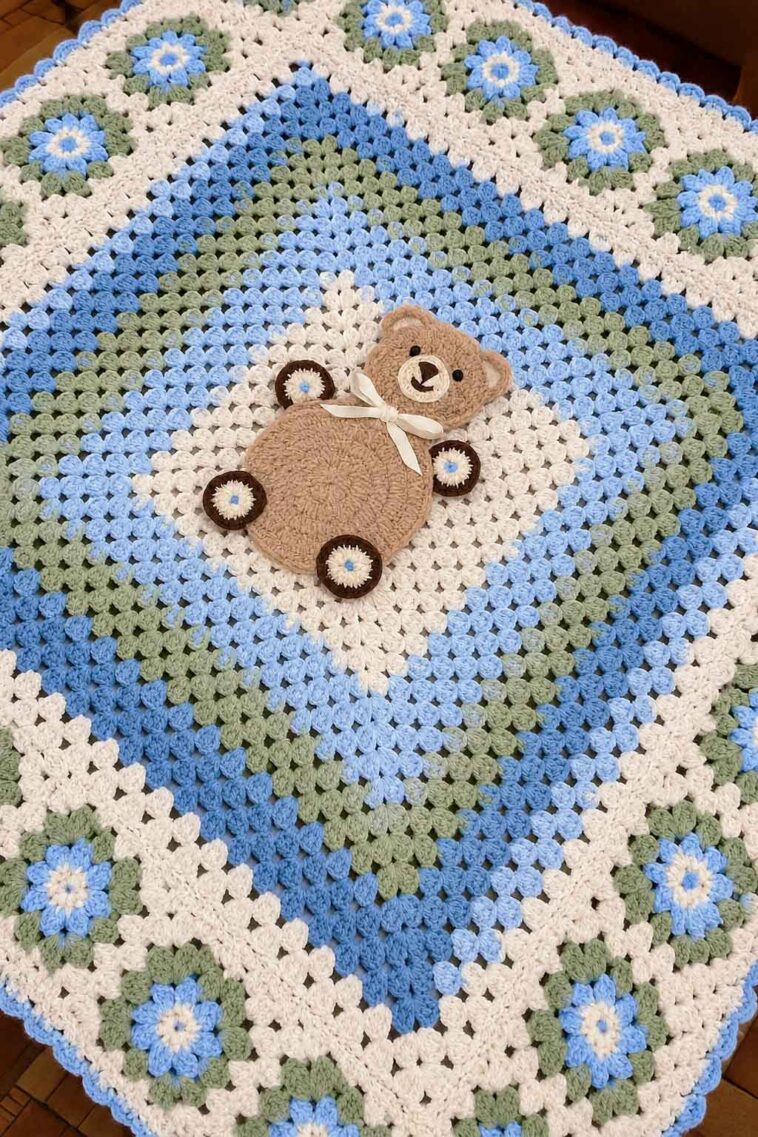
If you love making crochet blankets for babies and little ones, this teddy bear blanket is such a sweet project to have on your list. It has that cozy, old-fashioned feel of a classic granny square blanket, but the teddy bear in the center gives it a playful little twist.
It would make a lovely baby shower gift, a nursery blanket, or even a special keepsake for a child. I especially love projects like this because they can be made in colors that match almost any nursery. Soft creams, beige, dusty blue, blush pink, sage green, or traditional shades of brown would all look beautiful.
The blanket is built in a few sections. You’ll begin by making the smaller granny-style squares that form the border, then work the large center square. Once those pieces are ready, the smaller squares are crocheted around the center. The final touch is the teddy bear appliqué, which is made separately and sewn onto the middle of the blanket.
The pattern is best suited to an intermediate crocheter, although a confident beginner who is comfortable with granny squares and basic increases should be able to follow along. Take your time with the appliqué pieces, especially when shaping and sewing the teddy bear. Those little details are what really bring the blanket to life.
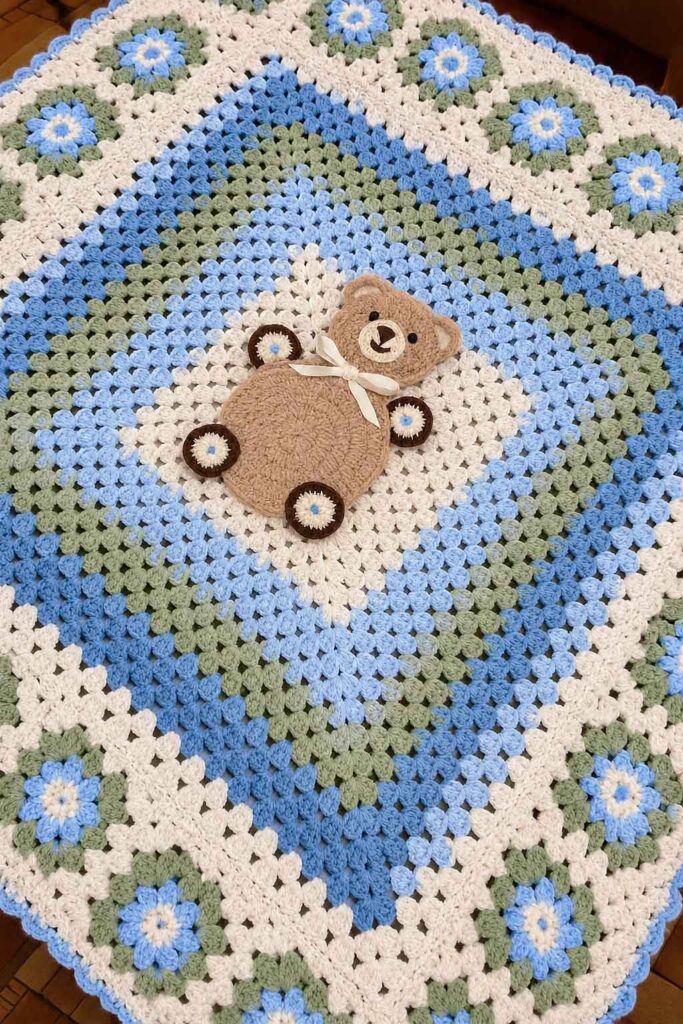
Materials
- 5.5 mm crochet hook for the blanket
- 5 mm crochet hook for the teddy bear
- Soft worsted-weight or aran yarn in your chosen colors
- Dark yarn for the eyes and facial details
- Tapestry needle
- Scissors
- Optional ribbon for the teddy bear’s bow
Choose a soft yarn that feels comfortable against the skin if you are making the blanket for a baby.
Crochet Abbreviations
- ch – chain
- sl st – slip stitch
- st(s) – stitch(es)
- sc – single crochet
- hdc – half double crochet
- dc – double crochet
- tr – treble crochet
Part 1 – Small Border Squares
Make 24 squares using a 5.5 mm crochet hook.
Starting Round
Chain 5 and join with a slip stitch to form a ring.
Round 1
Chain 3, which counts as the first double crochet.
Work 2 dc into the ring, then work:
ch 2, 3 dc in ring
Repeat the section in brackets 3 times. Chain 2 and join with a slip stitch.
Fasten off.
Round 2
Join your yarn in any corner space.
Work:
(2 dc, ch 2, 3 dc) in the same corner.
Then work:
ch 1, (3 dc, ch 2, 3 dc) in the next corner
Repeat around the square. Finish with ch 1 and join with a slip stitch.
Fasten off.
Round 3
Join yarn in any corner space.
Work:
(2 dc, ch 2, 3 dc) in the corner.
Chain 1, then work 3 dc into the next ch-1 space.
Continue around the square, working ch 1 between the 3-dc groups and (3 dc, ch 2, 3 dc) in each corner.
Join with a slip stitch and fasten off.
Repeat until you have 24 small squares.
Set them aside while you work on the center of the blanket.
Part 2 – Large Center Square
For the large center square, use your 5.5 mm crochet hook.
Work the square using the same basic granny-square construction as the smaller squares. The main difference is that you will continue working around the square rather than fastening off after every round.
At the end of each round, join as directed and continue into the following round.
Work through Round 13. At this point, you should have 13 groups of 3 dc along each side.
Continue adding rounds until you reach Round 20.
As the square grows, each new round adds another 3-dc group and another ch-1 space along each side.
Keep your stitches relaxed and try not to pull the yarn too tightly. This will help the large square stay flat as it gets bigger.
Part 3 – Joining the Border Squares
Now comes the fun part — putting all those pieces together.
Using the same 5.5 mm hook, arrange the 24 small granny squares around the large center square.
Rather than sewing them together afterward, attach the squares directly to the center square with crochet joins.
Work single crochet joins at the corners and through the ch-1 spaces, continuing the granny-style 3-dc groups along the sides as needed.
Work carefully around the blanket, checking your placement as you go. It helps to lay all 24 squares around the center before joining them so you can see how the colors will look together.
Continue until all 24 border squares have been attached.
Part 4 – Adding the Outer Border
Once all of the squares are joined, you can continue working granny-style rounds around the entire blanket.
Keep adding rounds until the blanket reaches the size you want. As a guide, you can work approximately Rounds 21–35, depending on the yarn you use and the finished size you’re aiming for.
You don’t have to stop at Round 35. If you want a larger blanket, simply continue adding rounds while keeping the same general granny-square pattern.
Decorative Final Round
For the last round, give the blanket a slightly more decorative finish.
Work 5 sc in each corner.
Along each side, repeat:
7 dc in ch-1 space, sc in next ch-1 space
Continue this pattern across all four sides, working 5 sc in each corner.
Join, fasten off, and weave in your ends.
At this stage, you should have a beautiful granny-style blanket ready for its star attraction — the teddy bear.
Part 5 – Teddy Bear Appliqué
The teddy bear is worked separately and then sewn onto the center of the blanket.
For the teddy bear, switch to a 5 mm crochet hook.
You can make the bear in a traditional brown shade, or use a completely different color for a more modern nursery look.
Teddy Bear Body
Round 1
Chain 4.
Work 13 dc into the 4th chain from the hook.
Join with a slip stitch to complete the round.
You should have 14 dc.
Round 2
Chain 3.
Work 1 dc in the same stitch, then work:
2 dc in each stitch around
You should have 28 dc.
Round 3
Work:
dc in the next 2 stitches, 2 dc in the next stitch
Repeat around.
You should have 42 stitches.
Round 4
Work:
dc in the next 3 stitches, 2 dc in the next stitch
Repeat around.
You should have 56 stitches.
Round 5
Work:
dc in the next 4 stitches, 2 dc in the next stitch
Repeat around.
You should have 70 stitches.
Fasten off, leaving a long yarn tail for sewing.
Teddy Bear Head and Ears
Work the head in the same way as the body through Round 4, finishing with 56 dc.
To position the ears, mark 2 stitches near the top of the circle, approximately 11 dc apart.
Ears
For each ear, join your yarn at the marked stitch.
Chain 3, then work 9 dc into the same stitch.
Fasten off.
Repeat for the second ear.
Once both ears are complete, work sc around the outside of the head and ears to give the piece a neat finished edge.
Fasten off, leaving a long tail for sewing.
Teddy Bear Muzzle
Round 1
Chain 4.
Work 13 dc into the 4th chain from the hook.
You should have 14 dc.
Round 2
Work 2 dc in each stitch around.
You should have 28 stitches.
Round 3
Work one loose hdc in each stitch around.
Fasten off, leaving a long tail.
The muzzle should remain fairly soft and slightly rounded rather than being pulled too tightly.
Teddy Bear Nose
Using the teddy bear’s darker yarn, work into the 4th chain from the hook:
4 dc, 2 sc, 4 dc
Fasten off, leaving a long yarn tail.
Sew the nose securely to the center of the muzzle.
Once the nose is attached, use the same dark yarn to embroider a small mouth underneath.
Teddy Bear Eyes
For the eyes, use dark yarn and a tapestry needle.
Simple embroidered X-shaped eyes work beautifully for this design.
Try to keep the eyes evenly positioned on either side of the muzzle. Before sewing them permanently, it can help to pin or loosely place the head and facial pieces so you can check the placement.
Teddy Bear Paws
Front Paws – Make 2
Chain 4.
Work 13 dc into the 4th chain from the hook and join.
Round 2
Work 2 dc in each stitch around.
You should have 28 stitches.
Fasten off, leaving a long tail.
Position the front paws behind the body and sew them securely into place.
Back Paws – Make 2
Chain 4.
Work 13 dc into the 4th chain from the hook and join.
For the second round, use a combination of dc and tr stitches where needed to create a gentle curved shape for the paw.
You should have approximately 28 stitches.
Round 3
Work a loose round of sc around the paw.
Fasten off and leave a long sewing tail.
Repeat for the second back paw.
Putting the Teddy Bear Together
Once all the individual pieces are finished, it’s time to assemble your little bear.
Start by sewing the head securely to the body.
Next, attach the muzzle and nose. Check the placement of the facial features before making your final stitches so the teddy has an even, friendly expression.
Sew the front and back paws into position.
Take your time with the stitching. The appliqué will be handled quite a bit, especially if the blanket is going to be used by a child, so make sure each piece is attached securely.
Attaching the Teddy Bear to the Blanket
Place the completed teddy bear in the center of the blanket.
Use pins or a few temporary stitches to hold it in position while you check that it is centered.
Using a matching yarn color, carefully sew around the teddy bear, attaching it securely to the blanket.
Try to keep your stitches neat and close to the edge of the appliqué. Weave the yarn ends securely into the back of the blanket when you’re finished.
For an extra sweet finishing touch, tie a small ribbon bow underneath the teddy bear’s head.
If the blanket is intended for a very young baby, make sure the bow is securely attached and avoid any loose or detachable pieces.
Finishing Your Teddy Bear Blanket
Give the entire blanket a quick check for loose ends, uneven joins, or areas that need a little extra stitching. Weave in any remaining yarn tails and gently block the blanket if necessary to help the squares sit evenly.
And that’s it!
Your Teddy Bear Blanket Crochet Pattern is finished. 🧸🧶
There is something especially lovely about a handmade blanket like this. The granny-square construction gives it a timeless feel, while the teddy bear in the center makes it personal and playful. Change the colors to match a nursery, make the bear in a favorite shade, or use leftover yarn to create a colorful version.
Whether you make it for a new baby, a grandchild, a birthday, or simply because you couldn’t resist the adorable teddy bear design, this is the kind of crochet project that can become a treasured keepsake for years to come.

