

 soofha
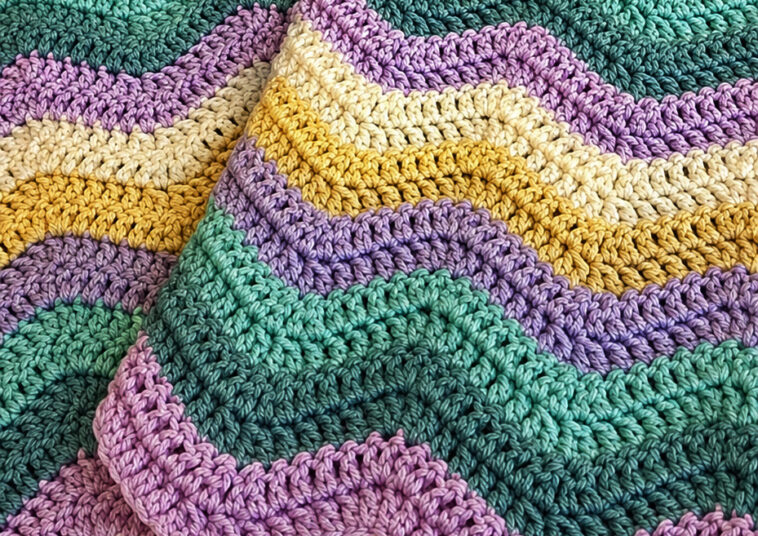
There is something wonderfully satisfying about crocheting a blanket with a beautiful zig zag design. Row after row, the stitches rise and fall to create soft waves that give the finished fabric movement, texture, and personality. The Zig Zag Crochet Stitch is a classic pattern that can be used to make cozy blankets, baby blankets, throws, scarves, cushions, and many other handmade projects.
If you enjoy crochet patterns that look complicated but become surprisingly relaxing once you learn the repeat, this stitch is definitely worth adding to your collection.
The combination of double crochet stitches, increases, and skipped stitches creates the characteristic peaks and valleys. Once you understand where those stitches belong, the pattern becomes wonderfully rhythmic. You can simply settle into the repeat and watch your blanket grow.
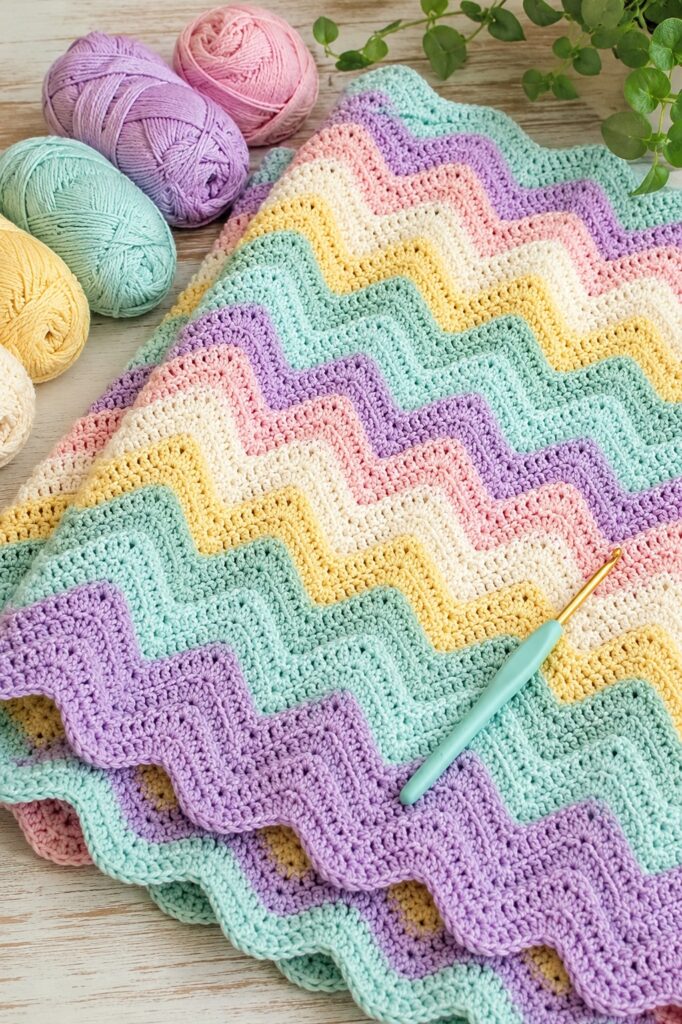
For this tutorial, we’re focusing on a soft, colorful zig zag blanket made with dreamy shades such as mint green, lavender, pale yellow, cream, and aqua. Of course, you can choose completely different colors to match your own style.
What Makes the Zig Zag Stitch So Special?
The zig zag stitch is popular because it combines simplicity with a beautiful finished appearance.
Unlike a completely flat blanket made from basic rows, the zig zag pattern creates natural movement across the fabric. The raised sections form peaks, while the skipped stitches create the lower sections between them.
This makes the finished blanket look much more detailed than the basic stitches used to create it.
Another wonderful feature is its versatility. You can make the same stitch look completely different simply by changing your yarn colors.
For example, pastel colors create a soft and delicate baby blanket, while jewel tones create a dramatic statement piece. Neutral colors can give you a sophisticated blanket that works beautifully with modern home décor.
Ideas for Using the Zig Zag Stitch
Once you’ve learned this stitch, you don’t have to stop at blankets.
You can use the pattern to create:
- Baby blankets
- Lap blankets
- Sofa throws
- Bed blankets
- Toddler blankets
- Scarves
- Shawls
- Pillow covers
- Cushion panels
- Table runners
- Decorative crochet pieces
- Handmade gifts
The stitch is particularly attractive for blankets because the repeated waves create a lovely visual effect over a large surface.
Materials You’ll Need
You don’t need a long list of supplies to get started.
Yarn
Choose a yarn that feels comfortable and works well with the crochet hook you plan to use.
For a blanket, worsted-weight yarn is a popular option because it creates a fabric that is warm without becoming excessively heavy.
You can use one color or several colors.
For a soft pastel blanket similar to the inspiration for this pattern, consider using:
- Mint green
- Soft aqua
- Lavender
- Pale yellow
- Cream
- Light pink
- Soft blue
You can also use a multicolor yarn if you’d prefer to avoid changing colors manually.
Crochet Hook
Use a crochet hook appropriate for your yarn weight.
Always check the yarn label for the manufacturer’s recommended hook size. If your stitches feel very tight, you may want to try a slightly larger hook.
Other Supplies
You’ll also need:
- Scissors
- Yarn needle
- Stitch markers, optional
- Measuring tape, optional
A stitch marker can be especially helpful while learning the pattern because it allows you to mark important peaks and valleys.
Zig Zag Crochet Stitch Pattern
Before beginning, it is important to understand the structure of the foundation chain.
For this version of the pattern, make a foundation chain that is a multiple of 17 stitches, plus 16 additional chains.
The exact number of chains depends on how large you want your finished project to be.
Keep in mind that ripple and zig zag patterns naturally draw the fabric inward. Because of this, the finished width can be considerably narrower than the original foundation chain.
For this reason, making a small test swatch is highly recommended.
Step 1: Make the Foundation Chain
Begin by making your foundation chain using the required stitch multiple.
Try not to crochet the chain too tightly. A very tight foundation chain can make the first row difficult to work into and may cause the bottom edge of your blanket to pull inward.
Keep your chain relaxed and even.
Once you’ve completed the foundation chain, take a moment to count your stitches.
Counting now is much easier than trying to find a missing stitch several rows later.
Step 2: Begin the First Double Crochet Section
Start the row by working 1 double crochet into each of the next 5 chains.
These first stitches establish the beginning of the zig zag sequence.
Keep your tension consistent as you work.
If your first stitches are very loose and the following stitches are tight, the edge may appear uneven.
Step 3: Create the First Peak
Now comes one of the most important parts of the pattern.
In the next chain, work 3 double crochets into the same chain.
Instead of placing one stitch into the chain, you’ll place three double crochets into that single space.
This creates the raised portion, or peak, of your zig zag.
You should begin to see the fabric changing direction as the three stitches are worked into one stitch.
Step 4: Work Across the Next Section
After creating the peak, work 1 double crochet into each of the next 7 chains.
These stitches move the pattern away from the peak and toward the lower section of the zig zag.
Keep checking your work as you go.
If the pattern is correct, you’ll begin to see a gentle diagonal movement developing.
Step 5: Create the Valley
Next, skip the following 2 chains.
This skipped section is essential because it creates the valley between the zig zag peaks.
Don’t accidentally place stitches into these chains.
The combination of the increase at the peak and the skipped chains at the valley is what gives the pattern its characteristic shape.
Step 6: Crochet Back Toward the Next Peak
After skipping the two chains, work 1 double crochet into each of the next 7 chains.
These stitches begin moving the pattern upward again.
At this point, you should be able to see one complete wave taking shape.
Step 7: Repeat the Sequence
Continue working the same sequence across the foundation chain.
The basic rhythm is:
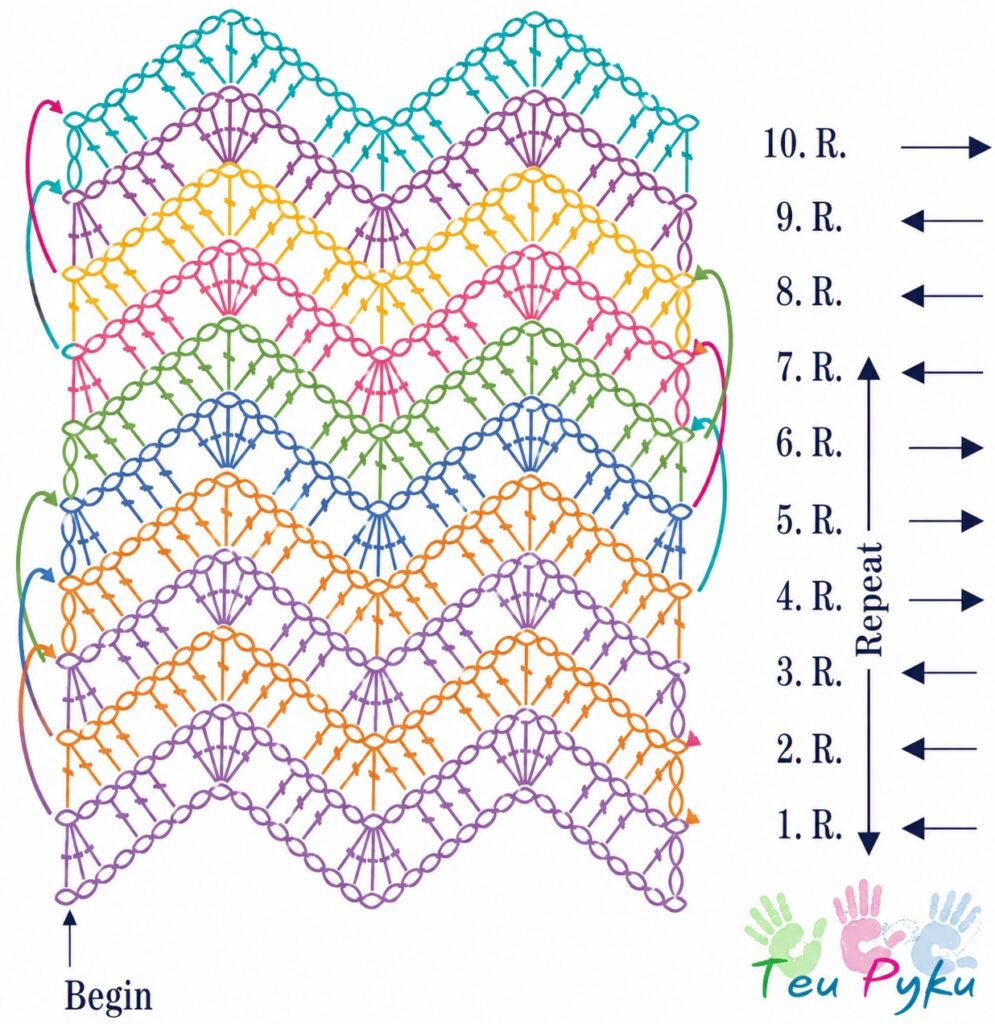
5 double crochets → 3 double crochets in one chain → 7 double crochets → skip 2 chains → 7 double crochets
Repeat this sequence across the row.
As you continue, the peaks and valleys will begin forming the familiar zig zag design.
Understanding the Zig Zag Rhythm
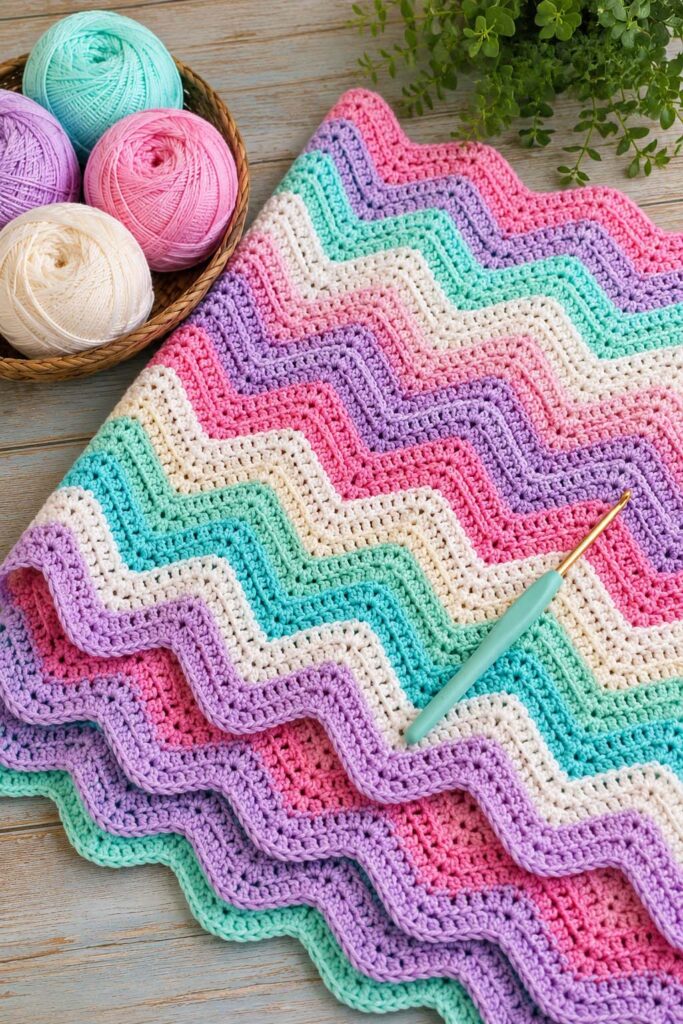
One of the easiest ways to learn this pattern is to think about it as a repeating wave rather than a long list of individual stitches.
The three double crochets worked into one chain create the peak.
The two skipped chains create the valley.
The seven double crochets between these shaping points connect the peaks and valleys together.
Once you recognize these landmarks, it becomes much easier to read your work.
You can look at the blanket and identify:
- High point
- Descending section
- Low point
- Ascending section
- High point
- Repeat
This visual approach can be much easier than constantly counting every stitch.
Tips for Keeping Your Zig Zag Pattern Straight
Ripple patterns can sometimes be intimidating for beginners because one misplaced stitch can affect the shape of the following rows.
Fortunately, a few simple habits can make the process much easier.
Count Your Stitches
Counting your stitches regularly is one of the best ways to prevent mistakes.
If you finish a row and your stitch count is incorrect, it is much easier to fix the problem immediately.
Watch the Peaks
The peaks should remain aligned as your blanket grows.
If you suddenly notice that one peak appears farther to the side than the others, check your previous row.
Watch the Valleys
The valleys are equally important.
Make sure you’re consistently skipping the correct stitches where the pattern calls for the dip.
Keep Your Tension Consistent
Try to maintain the same amount of tension throughout each row.
Very tight stitches can make the blanket stiff and narrow, while very loose stitches can make the fabric overly open.
Use Stitch Markers
If you’re having trouble identifying the peaks and valleys, place stitch markers at important points.
You can remove them as you become more comfortable with the pattern.
Choosing the Perfect Color Combination
Color is one of the most exciting parts of making a zig zag blanket.
Because the pattern naturally creates horizontal waves, color changes can emphasize the movement and make each row stand out.
Soft Pastel Zig Zag Blanket
For a gentle and dreamy blanket, try:
- Mint
- Lavender
- Cream
- Pale yellow
- Soft aqua
This combination works especially well for nurseries, children’s rooms, spring décor, and cozy throws.
Classic Blue and White
For a timeless look, alternate different shades of blue with white or cream.
This combination is especially beautiful for beach-inspired décor.
Rainbow Zig Zag Blanket
Use several bright colors and change colors every one or two rows.
The repeating waves will create a cheerful rainbow effect.
Neutral Zig Zag Blanket
If you prefer a modern look, try:
- Cream
- Beige
- Taupe
- Light gray
- Charcoal
Neutral colors allow the texture of the stitch to become the main feature.
How to Change Colors
Changing colors is optional, but it can make your zig zag blanket even more attractive.
You can change color at the end of a row and begin the next row with your new shade.
For clean-looking stripes, try changing colors after every two or three rows.
For a more random design, change colors whenever you finish a skein or whenever a particular shade feels right.
If you want a coordinated look, choose a color palette before beginning rather than selecting completely random shades.
Making a Baby Zig Zag Blanket
This stitch works beautifully for baby blankets.
For a baby blanket, choose soft yarn and gentle colors.
Popular combinations include:
- Mint and cream
- Lavender and white
- Baby blue and cream
- Blush pink and ivory
- Yellow and white
- Aqua and pale gray
A smaller blanket is also a good project for beginners because you’ll be able to practice the stitch without committing to a very large project.
Making a Larger Throw
If you’re making a blanket for your sofa or bed, simply increase the foundation chain while maintaining the required stitch multiple.
Before beginning, decide approximately how wide you’d like your finished blanket to be.
Remember that the zig zag shaping can reduce the finished width compared with the foundation chain.
For this reason, making a sample is particularly useful when you’re working toward a specific finished measurement.
What to Do If Your Blanket Looks Too Narrow
Don’t panic if your blanket appears narrower than expected.
This is a natural characteristic of ripple and zig zag crochet patterns.
The shaping pulls the fabric inward, especially around the valleys.
Blocking the finished blanket can help open the fabric slightly and create a more even shape.
However, blocking won’t completely change the basic width created by your stitch pattern, so it’s better to account for the contraction before starting.
What to Do If the Edges Look Uneven
The edges of a zig zag blanket can sometimes look slightly different from the center of the project.
This is usually related to tension or the way the beginning and ending sections are worked.
Try to keep your edge stitches consistent.
A decorative border can also help give the finished blanket a more polished appearance.
A simple single crochet border is a great choice if you want something understated.
For a more decorative finish, you can experiment with shell stitches, scallops, picots, or other edging patterns.
Adding a Crochet Border
Once you’ve completed the main zig zag section, you can add a border around the entire blanket.
A simple border in a contrasting color can frame the waves beautifully.
For example, a cream border around a pastel zig zag blanket can create a clean finished look.
Alternatively, use one of your main blanket colors for a coordinated appearance.
When adding a border, take your time around the zig zag edges. You may need to adjust stitch placement slightly to keep the border flat.
If the border begins to ruffle, you may have too many stitches. If it starts pulling inward, you may not have enough stitches.
Blocking Your Finished Blanket
Blocking isn’t always necessary, but it can make a significant difference to the finished appearance.
Blocking helps even out stitches and gives the blanket a more uniform shape.
If your blanket has uneven edges or the waves don’t appear as consistent as you’d like, gentle blocking may help.
Always consider the fiber content of your yarn before choosing a blocking method and follow the yarn manufacturer’s care recommendations.
Common Zig Zag Crochet Mistakes
Missing an Increase
If you forget to work all three double crochets at a peak, the shape may become distorted.
Adding a Stitch to a Valley
The skipped stitches are important. Accidentally crocheting into them can flatten the valley.
Losing Track of the Repeat
When you’re new to the pattern, it can be easy to forget where one repeat ends and another begins.
Try using stitch markers or counting groups rather than individual stitches.
Crocheting Too Tightly
Very tight tension can make the blanket stiff and can exaggerate the contraction of the zig zag design.
Relax your hands and allow the hook to move naturally through the stitches.
Is the Zig Zag Stitch Beginner-Friendly?
Yes, although complete beginners may want to practice the basic double crochet stitch first.
The actual stitches used in this pattern are not particularly complicated. The main challenge is keeping track of where the increases and skipped stitches belong.
Once you’ve completed several rows, the pattern becomes much easier to recognize.
If you’re new to crochet, don’t be discouraged if your first attempt isn’t perfect. Crochet is a skill that improves with practice.
How Long Does a Zig Zag Blanket Take?
The time required depends on several factors, including:
- Blanket size
- Yarn weight
- Crochet hook size
- Your crochet speed
- Number of color changes
- Amount of experience
A small baby blanket may be completed relatively quickly, while a large bed-sized blanket can take considerably longer.
One of the enjoyable things about this pattern is that you can work on it gradually. Even a few rows at a time will eventually create a beautiful finished blanket.
A Great Scrap Yarn Project
If you have leftover yarn from previous crochet projects, the zig zag stitch is an excellent way to use it.
You don’t necessarily need every color to contain the same amount of yarn.
You can create irregular stripes based on how much yarn you have available.
This makes the project economical and gives the finished blanket a unique handmade appearance.
Instead of throwing away small amounts of leftover yarn, save them for your next colorful zig zag blanket.
Caring for Your Finished Crochet Blanket
Always check the washing instructions for the yarn you used.
Some yarns can be machine washed, while others require more delicate care.
If you’re making a blanket as a gift, consider including a small care note with the finished project.
Proper care will help preserve the softness, color, and shape of your handmade blanket for years to come.
Frequently Asked Questions
Can I use different yarn weights?
Yes. The stitch can be adapted to different yarn weights, although the final size and texture will change.
Always choose a crochet hook appropriate for the yarn you’re using.
Can I make the blanket with only one color?
Absolutely. A single-color zig zag blanket can look elegant because the texture and movement of the stitch become the main focus.
Can I use several colors?
Yes. This pattern is perfect for stripes and color changes.
Try alternating two colors for a classic appearance or use several shades for a more playful design.
Why is my blanket narrower than my starting chain?
The zig zag shaping naturally pulls the fabric inward. This is normal for ripple-style crochet patterns.
Do I need to add a border?
No. A border is completely optional.
The blanket can be left with its natural zig zag edges, or you can add a border if you want a more finished look.
Can beginners make this blanket?
Yes. If you know how to make a double crochet, you can learn this pattern with a little practice.
The most important thing is to carefully follow the increase and skip sections.
What happens if I make a mistake?
If you notice a mistake a few rows back, it’s usually better to carefully unravel back to that point and correct it.
Don’t be afraid to undo stitches. Even experienced crocheters occasionally have to rip out a few rows.
Stitch Diagram
Video Tutorial
If you’re someone who learns best by watching the stitches being made, a video tutorial can be a helpful companion while learning this pattern. A visual demonstration makes it easier to see exactly how the peaks, valleys, increases, and skipped stitches come together.
You can also pause and replay the tutorial as many times as needed while practicing your own zig zag rows.
Once you’ve completed a few repeats, you’ll likely find that the pattern becomes much easier to follow and memorize.
Look for a Zig Zag Stitch crochet tutorial from Hobbii for additional visual guidance and stitch demonstrations.
Final Thoughts
The Zig Zag Crochet Stitch is a beautiful pattern for anyone who wants to create a blanket filled with texture, movement, and color.
What makes this stitch so enjoyable is its rhythm. At first, you’ll concentrate carefully on the increases, double crochets, and skipped stitches. After a few rows, however, your hands will begin to remember the sequence, and the project becomes much more relaxing.
The pastel combination of mint, lavender, yellow, cream, and aqua creates a particularly soft and cheerful look, but don’t be afraid to experiment with your own favorite colors.
Make a small baby blanket, a cozy lap throw, a large sofa blanket, or a colorful scrap-yarn project. Add a simple border or leave the natural waves exposed.
Most importantly, enjoy every part of the process.
Crochet is about more than simply reaching the finished piece. It’s about the quiet moments spent creating something with your own hands, one stitch at a time.
So grab your favorite yarn, pick up your crochet hook, and start creating your own beautiful zig zag blanket.
Happy crocheting!

