

 soofha
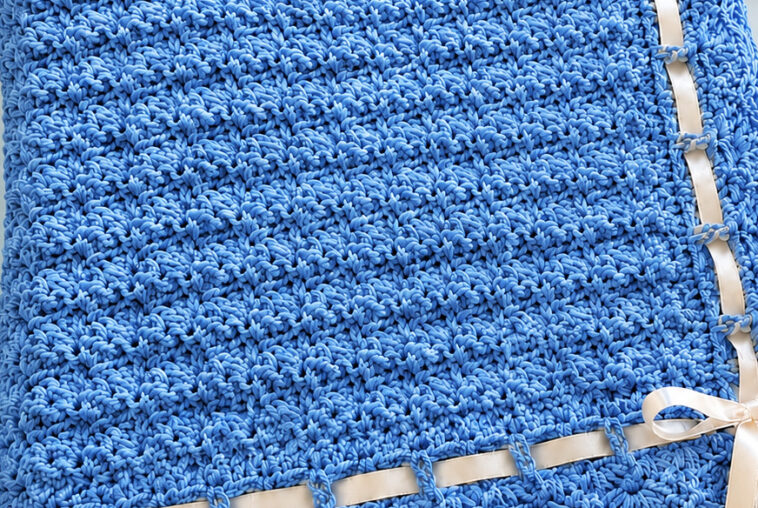
The Textured Moss Stitch Blanket is a beautiful crochet project for anyone who loves a soft, richly textured fabric with a clean and timeless appearance. The blanket shown above features a gorgeous blue shade and a wonderfully dense surface, finished with a delicate satin ribbon for an elegant decorative touch.
The stitch is based on the classic Moss Stitch, also known as Linen Stitch, Granite Stitch, or Woven Stitch. It combines simple single crochet and chain stitches to create a fabric that looks much more complicated than it actually is.
Whether you’re making a baby blanket, lap blanket, sofa throw, or handmade gift, this pattern is easy to customize.
Textured Moss Stitch Blanket Pattern
About This Blanket
This blanket is worked flat from one end to the other using a simple repeating moss stitch pattern. The combination of single crochet stitches and chain spaces produces small woven-looking sections that give the fabric its distinctive texture.
The stitch is especially nice for blankets because it creates a relatively dense fabric while still maintaining flexibility and drape. It is also beginner-friendly because you only need to know chain stitch and single crochet.
Skill Level
Beginner to Easy
You should be comfortable with:
- Chain stitch
- Single crochet
- Skipping stitches
- Working into chain spaces
- Turning your work
- Weaving in ends
Materials
For a throw-sized blanket, you will need:
- Yarn: Medium worsted-weight (#4) yarn
- Color: Blue, or your favorite color
- Crochet hook: 5.0 mm or the size needed to obtain your preferred fabric
- Yarn needle
- Scissors
- Measuring tape
- Optional: satin ribbon for decoration
- Optional: stitch markers
Yarn Choice
Acrylic yarn is an excellent choice for this blanket because it is affordable, washable, durable, and available in a huge range of colors.
For a softer blanket, you can also use:
- Cotton/acrylic blend
- Premium acrylic
- Cotton
- Merino blend
- Soft wool blend
Choose a yarn that feels comfortable against the skin if you’re making this blanket for a baby or child.
Crochet Abbreviations
The pattern uses US crochet terminology.
| Abbreviation | Meaning |
|---|---|
| ch | Chain |
| sc | Single crochet |
| sk | Skip |
| st | Stitch |
| rep | Repeat |
| sl st | Slip stitch |
Finished Blanket Size
The sample can be adapted to virtually any size.
For a comfortable throw, try approximately:
45 × 60 inches (114 × 152 cm)
For a baby blanket, you can make a smaller foundation chain and crochet fewer rows.
The important thing is that the foundation chain follows the stitch repeat rather than strictly copying a particular number of stitches.
Textured Moss Stitch Blanket Instructions
Step 1: Make the Foundation Chain
Chain a number that gives you the width you want, using an even number of chains.
For example:
Chain 160
You can make the blanket narrower or wider by adding or removing chains in the appropriate repeat.
Tip: Make your foundation chain fairly relaxed. A tight foundation chain can cause the bottom edge of your blanket to pull inward.
Row 1
Single crochet into the second chain from the hook.
Chain 1, skip the next chain, single crochet into the next chain.
Repeat the sequence across the entire foundation chain.
At the end of the row, turn.
The basic structure is:
sc, ch 1, skip 1, sc
This creates the first row of the moss stitch.
The moss stitch is commonly formed by alternating single crochet stitches and chain spaces, with subsequent rows worked into the spaces created below.
Row 2
Chain 1 and turn.
Single crochet into the first stitch.
Then:
Chain 1, skip the next single crochet, single crochet into the next chain-1 space.
Repeat across the row.
When you reach the final stitches, finish neatly at the edge and turn.
Row 3
Chain 1 and turn.
Single crochet into the first stitch.
Then repeat:
Ch 1, skip the next sc, sc into the next ch-1 space.
Continue across.
Finish with the appropriate edge single crochet.
Rows 4 and Beyond
Continue repeating the moss stitch pattern until your blanket reaches the desired length.
The stitch is essentially a simple repeating combination of single crochet + chain 1, with the single crochet worked into the chain spaces of the previous row.
Continue crocheting until the blanket is approximately the same length as its width, or adjust the proportions according to how you want your finished blanket to look.
How the Moss Stitch Creates the Texture
One of the nicest things about this blanket is that the stitch pattern is extremely simple while producing an interesting woven appearance.
Instead of placing every single crochet directly into the stitch from the previous row, you work into the chain-1 spaces.
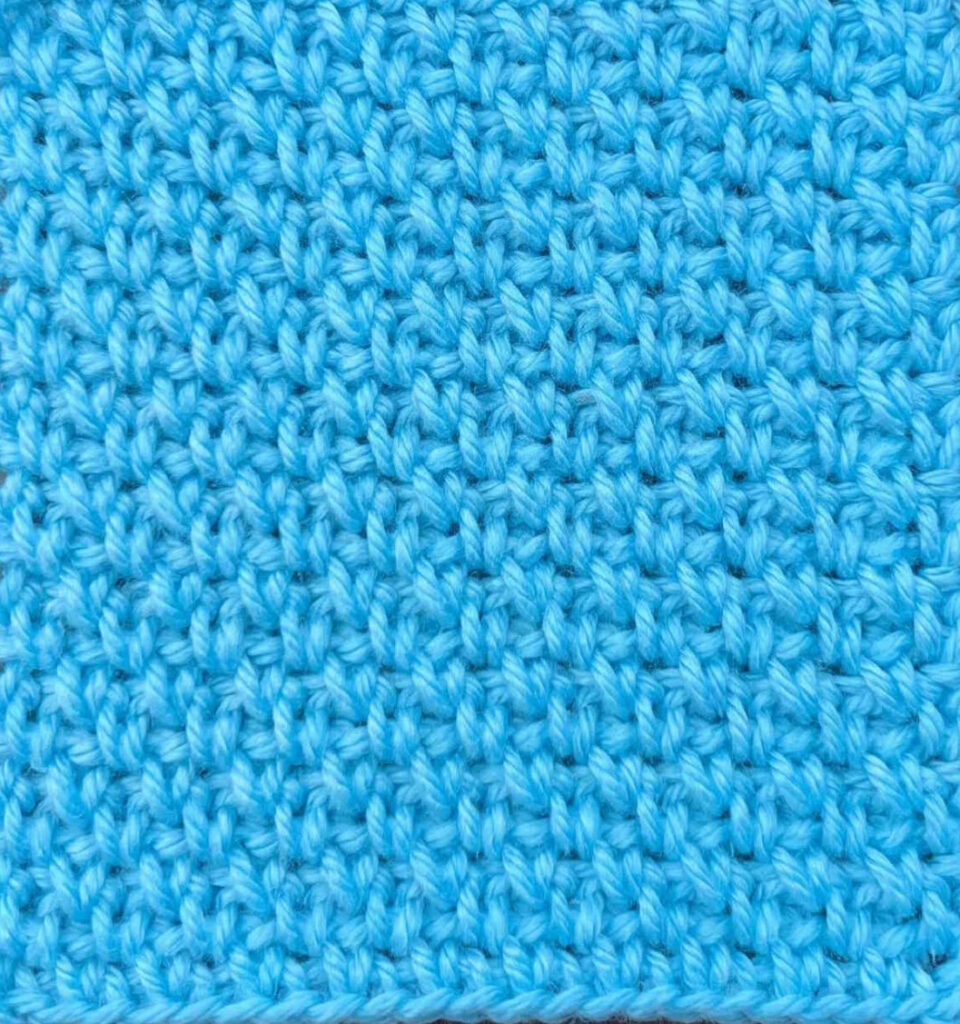
The chain spaces create small openings, while the single crochet stitches sit between them. As the rows build, these elements interlock visually and create the textured surface.
This is why the finished blanket has such a beautiful, almost woven appearance.
The moss stitch is also reversible, making it especially useful for blankets that will be displayed or used from either side.
Tips for Crocheting a Beautiful Moss Stitch Blanket
1. Keep Your Tension Consistent
Consistent tension is one of the biggest secrets to achieving a smooth blanket.
If your stitches become tighter or looser throughout the project, the blanket may gradually change width.
Try to maintain a relaxed grip on your hook and yarn.
2. Don’t Make the Foundation Chain Too Tight
This is particularly important with blankets.
If your foundation chain is tighter than your later rows, the bottom edge can become narrower than the rest of the blanket.
If you naturally crochet tightly, consider using a crochet hook 0.5–1 mm larger just for the foundation chain.
3. Use Stitch Markers
Place stitch markers at both edges if you’re having difficulty identifying the first and last stitches.
This can make a huge difference when you’re first learning moss stitch.
4. Check Your Width Frequently
Every few rows, lay the blanket flat and check the edges.
If one side begins pulling inward or expanding outward, correct your tension early rather than waiting until the blanket is finished.
5. Work Into the Chain Spaces
This is the most important part of the stitch.
Don’t accidentally work your single crochet into the top of the previous single crochet when the pattern calls for the chain space.
The chain spaces are what give moss stitch its characteristic texture.
Adding the Decorative Ribbon
The blue blanket in the photo has an elegant satin ribbon woven across the surface, creating a pretty gift-like presentation.
The ribbon isn’t necessary for the crochet pattern, but it makes an excellent finishing detail for a baby blanket, wedding gift, christening blanket, or special handmade present.
To Add Ribbon
- Finish and block your blanket.
- Choose a satin ribbon that complements the yarn.
- Measure the length required.
- Carefully weave the ribbon horizontally through selected spaces.
- Continue across the blanket.
- Repeat vertically if you want the crossed-ribbon appearance shown in the inspiration image.
- Tie the ribbon into a decorative bow.
For everyday-use blankets, you may prefer to leave the ribbon off because it can make washing more complicated.
Optional Crochet Border
A simple border can give your blanket a more finished appearance.
For a clean beginner-friendly border, work a round of single crochet around all four sides.
Border Round
Attach yarn in a corner.
Ch 1, sc evenly around the blanket, placing 3 sc in each corner.
Join with a slip stitch.
Repeat for additional rounds if you want a wider border.
For the blue sample, a matching blue border would keep the entire blanket monochromatic and elegant.
How to Make the Blanket Larger or Smaller
The beauty of moss stitch is that you don’t need to follow one fixed blanket size.
Baby Blanket
Start with a smaller foundation chain and work fewer rows.
Lapghan
Use approximately 100–120 foundation chains, depending on yarn weight and tension.
Throw Blanket
Start with approximately 150–170 chains and continue until you reach your desired length.
Large Bed Blanket
Increase the foundation chain substantially and continue adding rows until the blanket covers the desired area.
Always make a small swatch first if exact measurements are important.
Changing Colors
Although the pictured blanket uses one beautiful blue shade, moss stitch looks wonderful with multiple colors.
Try:
- Blue + white
- Sage green + cream
- Dusty pink + ivory
- Gray + white
- Beige + caramel
- Lavender + white
- Navy + pale blue
For stripes, change colors at the end of a row.
You can make:
- 2-row stripes
- 4-row stripes
- 6-row stripes
- Wide color blocks
- Rainbow stripes
- Neutral alternating stripes
The simple stitch structure makes color changes particularly attractive because the chain spaces allow the colors to visually blend together.
Blocking the Finished Blanket
Blocking isn’t absolutely necessary, but it can improve the finished shape.
After weaving in your ends:
- Gently wash or lightly dampen the blanket.
- Lay it flat on a clean surface.
- Smooth the blanket into shape.
- Straighten the edges.
- Allow it to dry completely.
Don’t stretch it aggressively. The goal is simply to encourage the blanket to lie flat and maintain its intended dimensions.
Finishing Your Blanket
When you’ve completed the final row:
- Cut the yarn, leaving a 6–8 inch tail.
- Pull the yarn through the final loop.
- Tighten gently.
- Thread the yarn tail onto a yarn needle.
- Weave it securely through several stitches.
- Repeat for all remaining ends.
- Trim excess yarn.
- Add your optional border.
- Block the blanket.
- Add ribbon if desired.
Your Textured Moss Stitch Blanket is now complete!
Video Tutorial
If you’re new to moss stitch, watching the stitch being worked can make the pattern much easier to understand. This tutorial demonstrates the moss stitch blanket technique and shows how the simple single crochet + chain repeat builds the textured fabric.
For another beginner-focused demonstration, this chunky moss stitch blanket tutorial also walks through the foundation chain, rows, color changes, and finishing process. Youtube
Frequently Asked Questions
Is moss stitch good for blankets?
Yes. Moss stitch is particularly well suited to blankets because it creates a textured, flexible fabric while requiring only basic crochet stitches. It is also easy to resize. Ravelry
Is the moss stitch beginner-friendly?
Absolutely. The main stitch pattern uses only single crochet and chain stitches, making it a great project for beginners who want to move beyond basic single crochet rows. Lovableloops
What is another name for moss stitch?
Moss stitch is commonly called Linen Stitch, Granite Stitch, or Woven Stitch. Crochetkingdom
Can I use different yarn weights?
Yes. You can make this blanket with different yarn weights. Just remember that changing yarn weight and hook size will affect the finished dimensions and amount of yarn required.
Can I make a moss stitch blanket in one color?
Definitely. A single-color moss stitch blanket creates a sophisticated, understated look, especially when made in a soft neutral or rich solid shade.
Can I add a border?
Yes. A single crochet border is a simple choice, but you can also add a moss stitch border, scalloped border, shell border, or other decorative edging.
Final Thoughts
The Textured Moss Stitch Blanket is a wonderful combination of simplicity and texture. While the stitch pattern uses only basic crochet techniques, the finished fabric has a detailed woven appearance that makes the blanket look sophisticated and handmade.
The beautiful blue color shown here gives the blanket a calm, classic feel, while the satin ribbon adds an elegant finishing touch. For a more practical everyday throw, simply leave off the ribbon and finish the blanket with a crochet border.
Most importantly, don’t be afraid to experiment. Change the yarn color, adjust the size, add stripes, or create a contrasting border to make your blanket completely your own.
Save this Textured Moss Stitch Blanket pattern for your next cozy crochet project and share your finished blanket with other crochet lovers!

