

 soofha
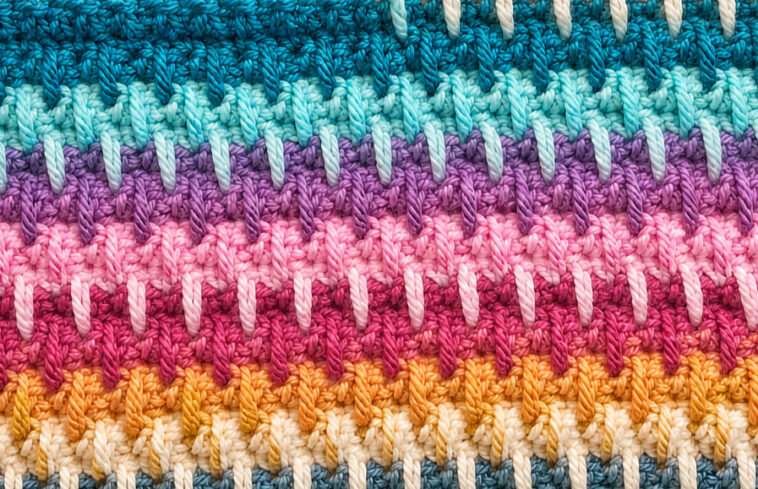
The Crochet Larksfoot Stitch is a beautiful textured crochet technique that creates rows of elongated stitches, colorful stripes, and a distinctive feather-like appearance. It is especially eye-catching when worked in contrasting colors, making it an excellent choice for blankets, throws, scarves, baby blankets, cushions, bags, and other crochet projects.
The stitch shown in the photo combines rich shades of turquoise, aqua, purple, pink, orange, cream, and blue to create a cheerful striped design. The raised elongated stitches add both texture and visual movement, while the simple background keeps the overall pattern balanced.
If you are looking for a crochet stitch that looks complicated but is actually made from straightforward stitches, the Larksfoot Stitch is definitely worth trying.
What Is the Larksfoot Crochet Stitch?
The Larksfoot Stitch is a repeating crochet pattern made by combining basic stitches with long or elongated double crochet stitches worked into lower rows.
The elongated stitches extend upward through the fabric, creating the characteristic decorative marks that resemble little feathers or larks’ feet. When the stitch is worked in alternating colors, these elongated stitches become even more noticeable.
One of the most appealing features of this stitch is its versatility. You can use just two colors for a clean striped effect, or introduce a new color every row or every few rows for a bright rainbow design.
Why You’ll Love the Larksfoot Stitch
There are many reasons to add this stitch to your crochet collection.
- It creates beautiful texture without complicated techniques.
- It works wonderfully with multiple colors.
- The stitch pattern is repetitive and easy to memorize.
- It is suitable for beginners who are ready to learn a new textured stitch.
- The finished fabric has a lovely combination of softness and structure.
- It looks especially beautiful in blankets and throws.
- It can be adapted to many different yarn weights.
- The elongated stitches create attractive vertical details across the fabric.
The Larksfoot Stitch is also a great way to use leftover yarn. Try combining several coordinating colors to make a unique striped crochet project.
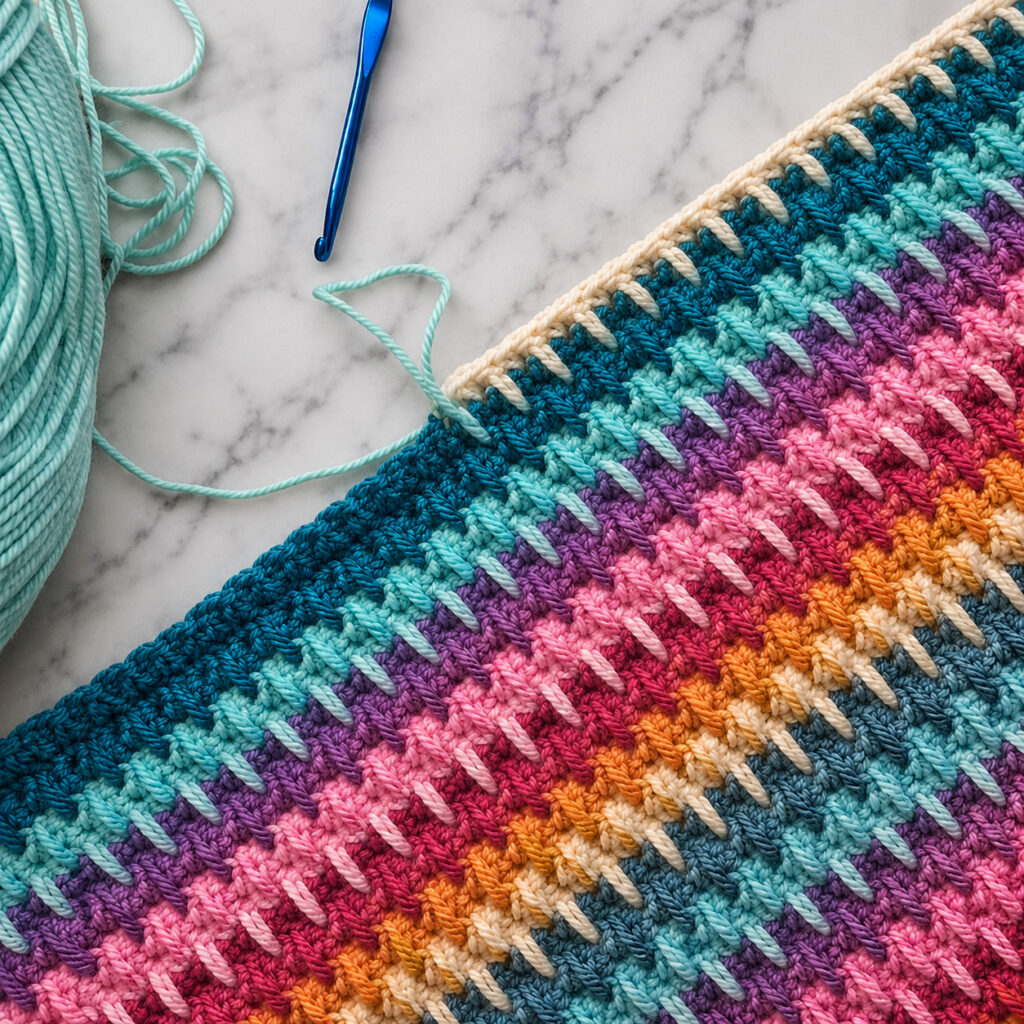
Materials You’ll Need
To practice the Larksfoot Stitch, gather the following supplies:
- Medium-weight worsted yarn
- Crochet hook appropriate for your yarn
- Scissors
- Yarn needle
- Stitch markers, optional
For a colorful blanket, choose several shades that contrast well with one another.
A combination of turquoise, aqua, purple, pink, coral, orange, cream, and blue creates a look similar to the sample shown above.
For a more traditional appearance, choose one main background color and several accent colors.
Crochet Abbreviations
This tutorial uses standard US crochet terminology.
- ch – chain
- sc – single crochet
- dc – double crochet
- st – stitch
- sts – stitches
- sk – skip
- yo – yarn over
- rep – repeat
- sp – space
Larksfoot Stitch Pattern
The exact stitch repeat can vary slightly between Larksfoot patterns. The following is a simple version designed to demonstrate the characteristic elongated-stitch effect.
Foundation Chain
Start with a foundation chain in a multiple of 4 + 1.
For example:
Chain 25 for a small practice swatch.
You can increase the size by adding groups of four chains.
Row 1 – Double Crochet
With your first color, make a double crochet in the fourth chain from the hook.
Continue working 1 dc in each chain across.
At the end of the row, turn.
This creates the basic foundation row for the stitch pattern.
Row 2 – Single Crochet
Change color if desired.
Chain 1 and turn.
Work 1 sc in each stitch across.
This simple row creates a firm background for the elongated stitches that will appear in the following rows.
Row 3 – Creating the Larksfoot Detail
Change to your next color.
Chain 2 and turn.
Begin working double crochet stitches across the row.
At the designated repeat points, create an elongated double crochet by inserting your hook into a stitch or space several rows below rather than directly into the current row.
Yarn over and draw the yarn upward to the height of the current row. Complete the double crochet normally.
Continue across the row, alternating regular double crochet stitches with the elongated stitches according to your chosen repeat.
The important feature is that the elongated stitch reaches down into the fabric while its finished height remains aligned with the current row.
Row 4 – Single Crochet Background
Change color again.
Chain 1 and turn.
Work single crochet stitches across the row.
Keep your tension even, especially around the elongated stitches.
This row helps secure the previous decorative stitches and prepares the fabric for the next Larksfoot row.
Row 5 – Repeat the Textured Pattern
Change to another color.
Chain 2 and turn.
Work double crochet stitches across the row, placing elongated double crochet stitches according to the established repeat.
Continue alternating regular double crochet stitches and elongated stitches.
As you work, you’ll notice the elongated stitches begin forming diagonal or feather-like marks across the fabric.
Row 6 – Single Crochet
Change color.
Chain 1 and turn.
Work one single crochet into every stitch across.
Repeat the sequence from the beginning.
Understanding the Repeat
Once you have completed a few rows, the pattern becomes much easier to recognize.
The basic structure is:
Double Crochet Row → Single Crochet Row → Textured Double Crochet Row → Single Crochet Row
The elongated stitches are what give the pattern its distinctive appearance.
If you’re working a multicolored project, changing yarn colors between rows makes the texture stand out dramatically.
How to Change Colors Neatly
Color changes are one of the best features of the Larksfoot Stitch.
For clean transitions, complete the final stitch of the old color until the last yarn-over remains. Drop the old yarn and use the new color to complete the final yarn-over.
Then continue with the new color.
When working a striped blanket, you can carry unused colors up the side if the pattern allows it. Otherwise, fasten off each color and weave in the ends later.
For a polished finished project, avoid carrying too many colors along the edges because this can make the sides bulky.
Choosing Yarn Colors
The Larksfoot Stitch is perfect for experimenting with color.
Bright Rainbow
Try:
- Turquoise
- Aqua
- Purple
- Pink
- Magenta
- Orange
- Cream
- Blue
This combination gives the project a playful, modern appearance.
Soft Baby Colors
For a baby blanket, consider:
- Soft mint
- Pale blue
- Lavender
- Blush pink
- Cream
- Light yellow
Neutral Larksfoot
For a more sophisticated blanket, use:
- Cream
- Beige
- Taupe
- Gray
- Charcoal
A neutral palette allows the stitch texture to become the main focus.
Tips for Perfect Larksfoot Stitches
1. Maintain Consistent Tension
The elongated stitches need enough height to reach the correct row without pulling the fabric too tightly.
If your elongated stitches are too short, the pattern may look compressed.
If they are too long, you may create loose loops on the surface.
2. Keep Your Rows Straight
Count your stitches at the end of each row.
Because the stitch pattern uses skipped areas and elongated stitches, it can be easy to accidentally add or lose a stitch.
3. Use a Stitch Marker
If you’re new to repeating stitch patterns, place a marker at the beginning or end of your repeat.
This makes it easier to see where the decorative stitches belong.
4. Practice With a Small Swatch
Before beginning a large blanket, make a small sample.
A swatch lets you check:
- Your stitch count
- Your tension
- Your color sequence
- The height of your elongated stitches
- The appearance of the finished texture
5. Don’t Pull the Long Stitch Too Tightly
When drawing the yarn up from the lower row, gently pull it to the height of the current row.
Do not tighten the loop excessively.
The stitch needs enough length to create the characteristic Larksfoot effect.
What Can You Make With Larksfoot Stitch?
The stitch is suitable for many crochet projects.
Larksfoot Crochet Blanket
A blanket is probably the most popular way to showcase this stitch.
The repeating stripes create a beautiful surface design, while the textured stitches give the blanket extra character.
You can make a small baby blanket or continue the pattern until you reach your desired size.
Baby Blanket
Choose soft yarn and gentle colors for a beautiful handmade baby blanket.
Pastel Larksfoot stripes can create a sweet nursery-inspired design.
Crochet Throw
Use bold colors for a modern throw that can brighten a living room or bedroom.
Scarf
The stitch works nicely for scarves because the repeated rows create visual interest without requiring complicated shaping.
Pillow Cover
A Larksfoot pillow cover can add color and texture to a sofa or chair.
Try matching the colors to your existing home décor.
Crochet Bag
The textured fabric can also be used for bags and totes.
For a sturdy bag, choose a suitable cotton or cotton-blend yarn and make sure your fabric is dense enough for the intended use.
Larksfoot Stitch for Beginners
Although the finished design looks intricate, the basic techniques are quite approachable.
If you already know how to make chains, single crochet, and double crochet, you have most of the skills needed to start.
The main technique to practice is the elongated double crochet.
The key is understanding exactly where to insert the hook and how high to draw the loop.
Once you understand that movement, the rest of the pattern becomes repetitive.
How to Make Your Larksfoot Project Larger
The foundation chain should follow the stitch repeat.
For a repeat based on 4 + 1, your starting chain can be:
- 17 chains
- 21 chains
- 25 chains
- 29 chains
- 33 chains
- 37 chains
Continue adding four chains whenever you want to increase the width.
Always make a small swatch first, because your individual tension and yarn thickness will affect the finished dimensions.
Blocking Your Finished Project
Blocking is optional, but it can make a significant difference in the final appearance.
After finishing your crochet piece, gently wash or dampen it according to the yarn manufacturer’s recommendations.
Lay it flat and carefully shape the edges.
Pay particular attention to the corners and side edges.
Allow the piece to dry completely before removing the pins or moving it.
Blocking can help even out the stitches and make the repeating Larksfoot design look cleaner.
Frequently Asked Questions
Is the Larksfoot Stitch difficult?
No. The stitch uses basic crochet techniques combined with elongated stitches. Once you understand where the elongated stitches are placed, the repeating pattern becomes quite easy to follow.
What yarn is best for Larksfoot Stitch?
Worsted-weight yarn is an excellent choice for learning the stitch. Cotton, acrylic, wool, and many blended yarns can also work well depending on the project.
Can I use one color?
Absolutely. A single-color Larksfoot Stitch still creates beautiful texture. However, multiple colors make the elongated stitches particularly noticeable.
Can I make a blanket with this stitch?
Yes. Larksfoot Stitch is especially well suited to blankets and throws. Simply continue repeating the stitch pattern until you reach your preferred length.
Does Larksfoot Stitch use a lot of yarn?
The elongated stitches add texture but do not necessarily make the stitch excessively yarn-hungry. Your yarn usage will depend on the yarn weight, hook size, tension, and final project dimensions.
Final Thoughts
The Crochet Larksfoot Stitch is a wonderful choice when you want a crochet project with plenty of color, texture, and personality. Its distinctive elongated stitches create a feather-like design that becomes especially striking when worked in contrasting stripes.
Whether you’re making a cozy blanket, colorful throw, scarf, baby project, pillow, or bag, this stitch gives you plenty of opportunities to experiment.
Start with a small swatch, practice the elongated stitches, and then experiment with your favorite color combinations. Once you become comfortable with the repeat, you’ll be able to create beautiful handmade pieces with a distinctive textured finish.
Save this Crochet Larksfoot Stitch pattern for your next colorful crochet project and experiment with different yarn combinations to create your own unique version.

