

 soofha
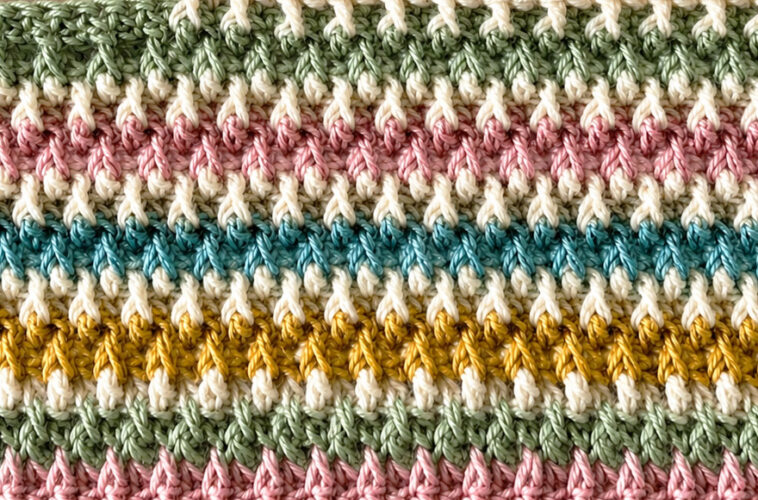
Welcome back to Soofha Crochet! Today, we’re taking a closer look at the beautiful Alpine Stitch, a crochet pattern that creates gorgeous texture and dimension. With its raised stitches and repeating design, this stitch is an excellent choice for blankets, scarves, pillows, throws, and other cozy handmade projects.
The Alpine Stitch has a beautifully structured appearance that can almost resemble knitted fabric. It combines basic crochet stitches with front post double crochet (FPDC) to create raised sections that stand out against the surrounding stitches. The finished fabric is warm, substantial, and wonderfully textured.
One of the best things about the Alpine Stitch is that it looks more complicated than it actually is. Once you understand how the rows alternate and become comfortable working FPDC, the pattern becomes easy to recognize and repeat. It’s a great option for crocheters who want an impressive finished texture without using an overly complicated stitch combination.
Skill Level
Intermediate
This pattern is best suited to crocheters who are already comfortable with basic crochet stitches and have some experience working front post double crochet (FPDC).
If FPDC is new to you, don’t worry. We’ve included instructions for the stitch below, and practicing it on a small swatch before beginning your project can make the pattern much easier to follow.
Helpful note: Always check your yarn label for the recommended crochet hook size. You may also adjust your hook size depending on whether you want a softer, drapier fabric or a denser texture.
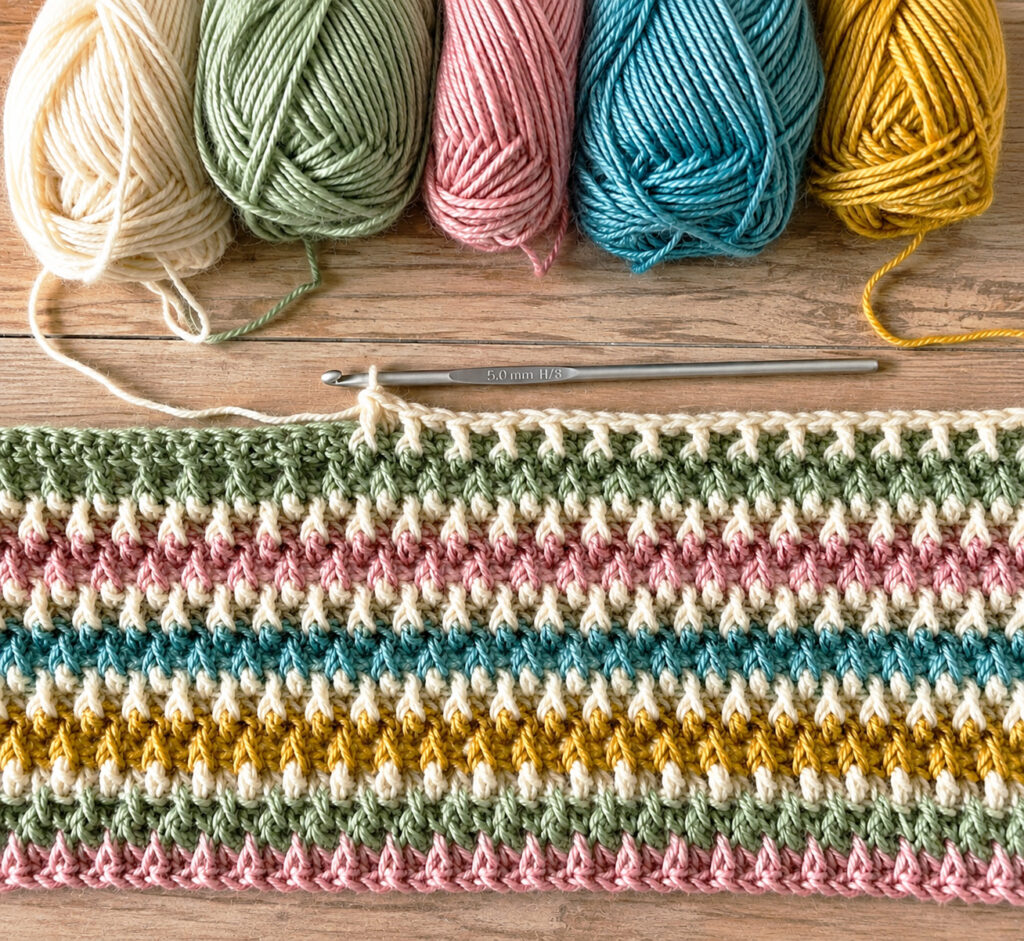
Alpine Stitch Pattern Multiple
The Alpine Stitch is worked over a multiple of 2 stitches plus 3.
For our sample swatch, begin with:
Chain 17
Alpine Stitch Crochet Instructions
Foundation Chain
Ch 17
Row 1
Dc in the 3rd chain from the hook. The skipped chains do not count as a stitch.
Continue working dc in each chain across. Turn.
Row 2
Ch 1.
Sc in each stitch across.
Turn.
Row 3
Ch 1.
Sc in the first stitch.
Work an fpdc around the post of the next corresponding stitch two rows below, working into Row 1. Pull the FPDC up to the height of the current row.
Dc in the next stitch of the current row.
Continue repeating this sequence across the row until you reach the final stitches.
Work an FPDC around the corresponding stitch two rows below, then finish with sc in the final stitch.
Turn.
Row 4
Ch 1.
Sc in each stitch across.
Turn.
Row 5
Ch 1.
Sc in each of the first 2 stitches.
Work an FPDC around the post of the next corresponding stitch two rows below, working into Row 3. Pull the stitch upward so that it reaches the height of the current row.
Dc in the next stitch.
Continue alternating the raised FPDC and dc stitches across the row.
Finish with sc in each of the final 2 stitches.
Turn.
Continue the Pattern
Repeat Rows 2–5 until your project reaches the desired length.
As you continue, you’ll begin to see the characteristic raised texture of the Alpine Stitch develop across the fabric.
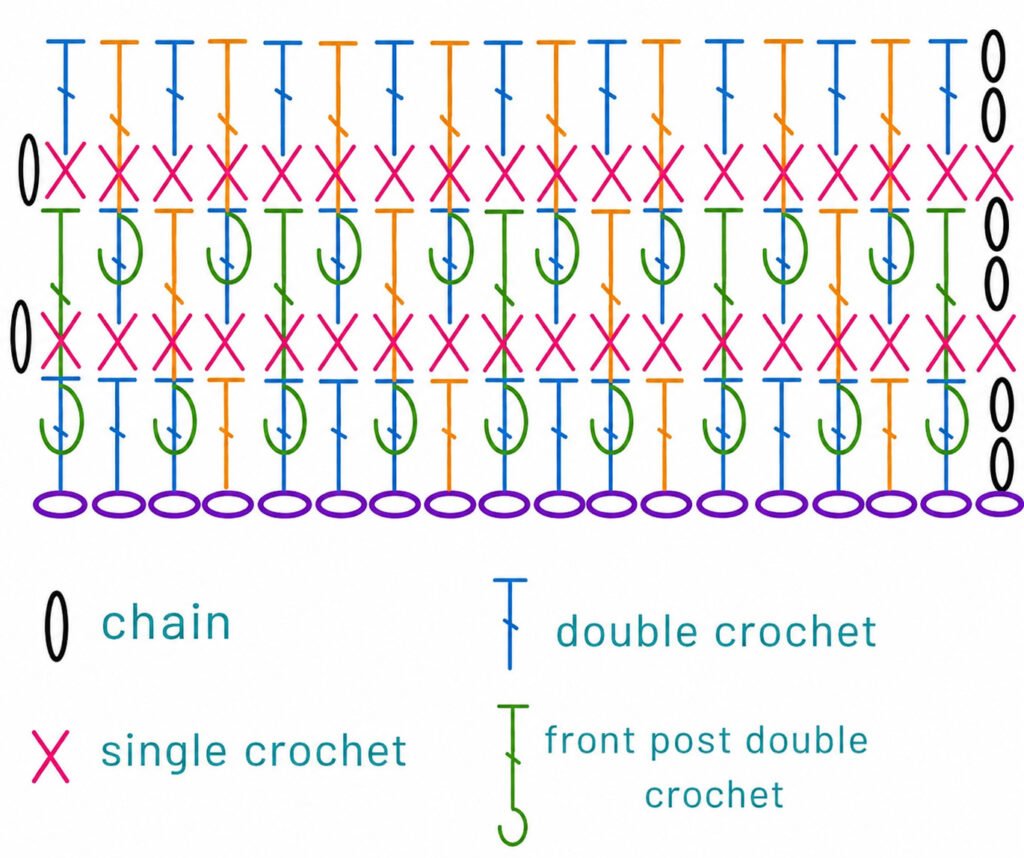
Alpine Stitch Pattern
Special Stitch: Front Post Double Crochet (FPDC)
The front post double crochet is the key stitch that gives the Alpine Stitch its distinctive raised texture.
To make an FPDC:
- Yarn over.
- Insert your hook from front to back around the post of the indicated stitch.
- Bring the hook back toward the front, passing around the post.
- Yarn over and pull the yarn underneath the post.
- You should now have three loops on your hook.
- Yarn over and pull through two loops.
- Yarn over again and pull through the remaining two loops.
The finished stitch should sit raised toward the front of your work.
Tips for Crocheting the Alpine Stitch
Keep Your Tension Consistent
Even tension is especially helpful with textured crochet patterns. Try to keep your FPDC stitches approximately the same height so the raised design looks neat and balanced.
Pay Attention to the Rows Below
The Alpine Stitch requires you to work some FPDC stitches around posts from previous rows. Take your time identifying the correct stitch before inserting your hook.
Use Stitch Markers
If you find it difficult to keep track of the beginning or end of each row, stitch markers can be extremely useful. They can also help you identify important stitches while learning the pattern.
Practice FPDC First
If you’re unfamiliar with front post double crochet, make a small practice swatch before beginning your main project. Once you become comfortable working around the stitch post, the Alpine Stitch will feel much easier.
Check Your Texture as You Work
After completing a few rows, pause and look at your fabric. The raised stitches should form a consistent repeating pattern. Checking your work early can help you catch mistakes before they continue across multiple rows.
What Can You Make With the Alpine Stitch?
The Alpine Stitch is wonderfully versatile and works particularly well for projects where texture is the main feature.
Consider using it for:
- Cozy crochet blankets
- Throw blankets
- Scarves
- Cowls
- Crochet pillows
- Baby blankets
- Lapghans
- Winter accessories
- Home décor
- Sweaters and cardigans
- Textured bags
For blankets and larger home projects, the stitch creates a thick and cozy fabric that feels especially comfortable in soft yarn.
Alpine Stitch Color Ideas
Although the Alpine Stitch looks beautiful in a single color, changing colors can make the raised texture even more noticeable.
Try experimenting with:
- Cream and beige for a soft neutral look
- Sage green and ivory for a natural palette
- Dusty pink and cream for a delicate project
- Navy and white for strong contrast
- Mustard and charcoal for a modern look
- Several coordinating shades for a colorful blanket
A solid color is a great choice when you want to highlight the three-dimensional texture, while contrasting colors can emphasize the repeating stitch pattern.
Why We Love the Alpine Stitch
The Alpine Stitch is one of those crochet patterns that gives you a beautiful finished result while relying on stitches that are relatively easy to learn.
Its combination of simple rows and raised FPDC stitches creates a fabric with plenty of visual interest. Once the pattern becomes familiar, you can work through the repeating rows without constantly referring back to the instructions.
It’s also a great stitch for crocheters who enjoy making projects that feel substantial and cozy. The texture adds warmth and character, making it particularly suitable for blankets, scarves, pillows, and winter accessories.
Alpine Stitch Video Tutorial
If you prefer learning through video, watching the stitch being worked row by row can be extremely helpful. We recommend checking out the Alpine Stitch tutorial from Claudetta Crochet for a visual demonstration of the technique.
A video tutorial can be especially useful when learning where to insert your hook for the FPDC stitches and how to work around the posts from the previous rows.
Final Thoughts
The Alpine Stitch is a beautiful crochet technique that combines texture, dimension, and a classic handmade appearance. Its raised stitches give projects a sophisticated finish, while the repeating structure makes it easier to work once you become familiar with the pattern.
Whether you’re planning a warm blanket, a stylish scarf, a decorative pillow, or another cozy crochet project, the Alpine Stitch is definitely worth adding to your collection.
Take your time with the first few rows, pay close attention to the stitches two rows below, and remember that consistent tension will help create an even, polished texture.
We hope you enjoy trying this stitch as much as we do!
Happy crocheting from Soofha Crochet! Don’t forget to share your Alpine Stitch creations with us—we’d love to see what you make.

