

 soofha
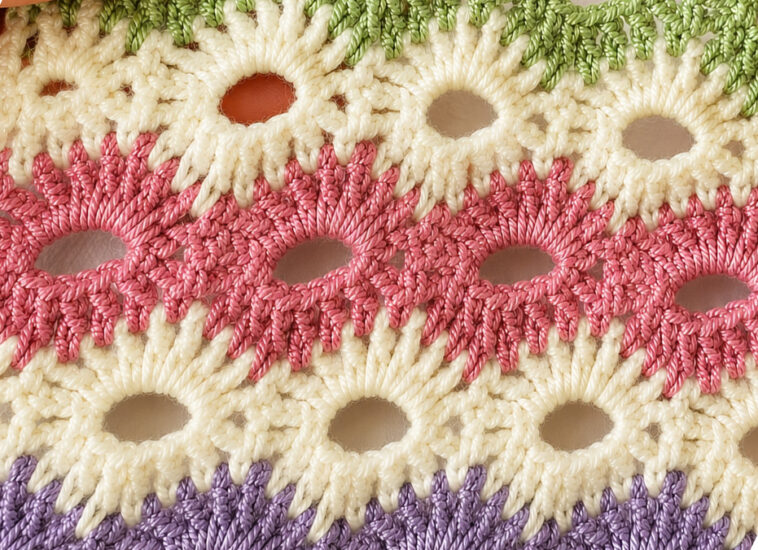
If you love crochet stitches with beautiful texture, delicate details, and a floral-inspired look, the Crochet Petal Stitch Pattern is a wonderful technique to add to your collection. This eye-catching stitch creates dimensional, flower-like motifs that appear to blossom across your work.
The pattern is a lovely choice for baby blankets, cozy throws, scarves, wraps, cushions, table runners, and other decorative projects. Its soft, layered texture looks especially pretty when worked in gentle pastel shades or a combination of coordinating colors.
Although the finished stitch may appear complicated at first glance, it is created from familiar crochet stitches and clusters. Once you understand how the petals are formed, the repeating rows become enjoyable and easy to follow.
Let’s take a closer look at the stitches and instructions needed to create this charming floral design.
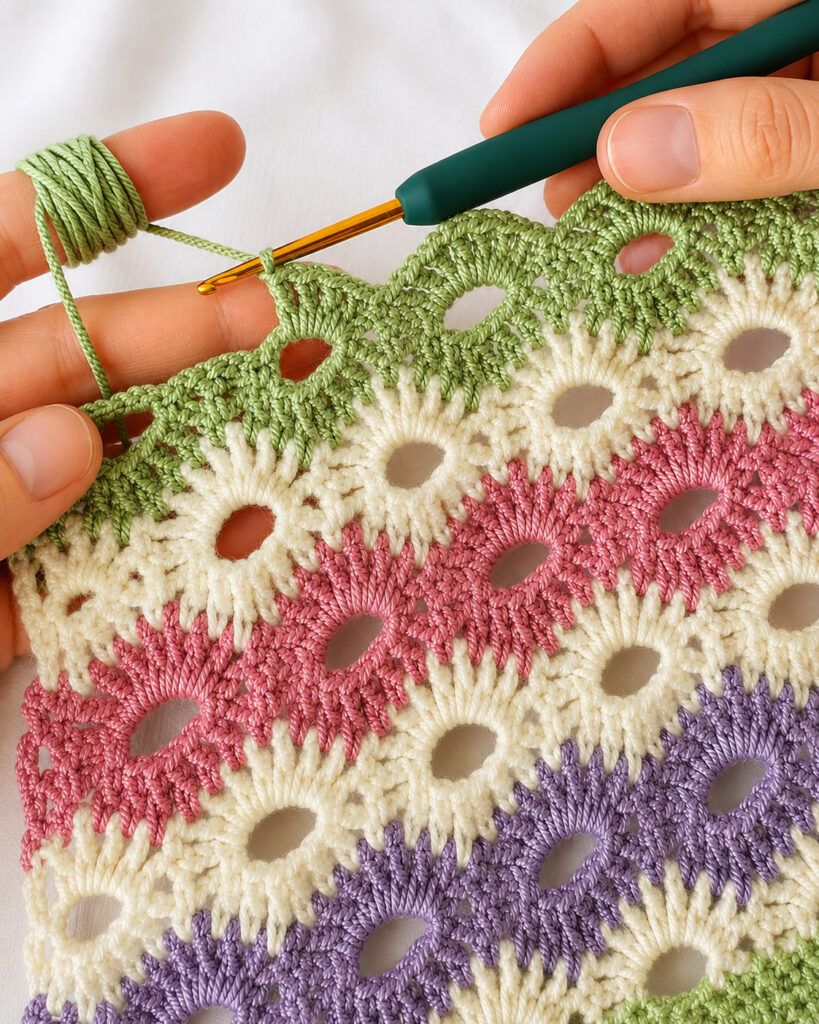
Stitches Used
Before beginning, make sure you are comfortable with the following stitches and techniques.
Single Crochet (SC)
Insert your hook into the indicated stitch, yarn over, and pull up a loop. Yarn over once more and pull through both loops on your hook.
Double Crochet (DC)
Yarn over, insert the hook into the specified stitch, yarn over, and pull up a loop. Yarn over and pull through two loops, then yarn over again and pull through the final two loops.
Double Crochet 2 Together Cluster (CL)
Yarn over and insert your hook into the designated stitch. Yarn over and pull up a loop, then yarn over and pull through two loops. Repeat the same process in the same stitch. You will have several loops remaining on your hook. Yarn over and pull through all remaining loops to complete the cluster.
Crochet Petal Stitch Pattern Instructions
Foundation Chain
Begin with 146 chains.
The stitch pattern is worked over a multiple of 11 stitches plus 3, so you can adjust the starting chain count if you would like to make your project wider or narrower.
Row 1
Work into the second chain from the hook.
Begin with:
- 1 SC
- CH 1
- Skip the next chain
- SC into the following chain
Then work:
- CH 3, skip the next 3 chains, SC into the next chain
- CH 3, skip the next 3 chains, SC into the next chain
- CH 2, skip the next 2 chains, SC into the next chain
Continue repeating the established sequence until 10 chains remain.
To finish the row, work:
- CH 3, skip 3 chains, SC into the next chain
- CH 3, skip 3 chains, SC into the next chain
- CH 1, skip 1 chain, SC into the final chain
Row 2
CH 3 and turn.
In the first chain space, work:
CL, CH 2, CL
Then CH 1, skip the SC and the CH-3 spaces, and work an SC into the next SC.
CH 1, skip over the next CH-3 spaces and SC. In the following CH-2 space, work:
(CL, CH 2, CL) 3 times
Continue the pattern by working CH 1, skipping the CH-3 spaces, and placing an SC into the next SC.
Repeat the sequence across the row until 7 spaces remain.
In the final CH-1 space, work:
(CL, CH 2, CL)
Finish with 1 DC in the last SC, changing to Peach Blossom as you pull through the final loops.
Row 3
CH 1 and turn.
SC into the first DC.
CH 3, then work a CL into the tops of the next four clusters.
CH 3, then SC into the next CH-2 space.
Repeat this sequence across the row.
Finish by working an SC into the top of the turning chain.
Row 4
CH 1 and turn.
SC into the first SC.
CH 3, SC into the top of the next CL, CH 2, skip the next 2 CLs, and SC into the top of the following CL.
CH 3, then SC into the next SC.
Continue repeating this sequence across the row until you reach the end.
Row 5
CH 1 and turn.
SC into the first SC.
CH 1, skip the next 3 chains, then work the following stitches into the CH-2 space:
(CL, CH 2, CL) 3 times
CH 1, skip the next 3 chains, and SC into the following SC.
Repeat the pattern across the row.
At the end of the row, change to Baby Gray while completing the final stitch.
Row 6
CH 3 and turn.
Work a CL into each of the next 2 CLs.
CH 3, SC into the CH-2 space, then CH 3.
Next, work a CL into each of the following 4 CLs, followed by CH 3, SC into the next CH-2 space, and CH 3.
Repeat the established sequence across the row.
When you reach the final 2 CLs, work 1 CL into each.
Finish with a DC in the final SC.
Row 7
CH 1 and turn.
SC into the first DC.
CH 1, skip 1 CL, then SC into the next CL.
CH 3, SC into the next SC, then CH 3.
Continue with:
SC into the next CL, CH 2, skip the next 2 CLs, SC into the following CL, CH 3, SC into the next SC, and CH 3.
Repeat this sequence across the row.
At the final section, work an SC into the next CL, CH 1, skip 1 CL, and finish with an SC into the turning chain.
Diagram
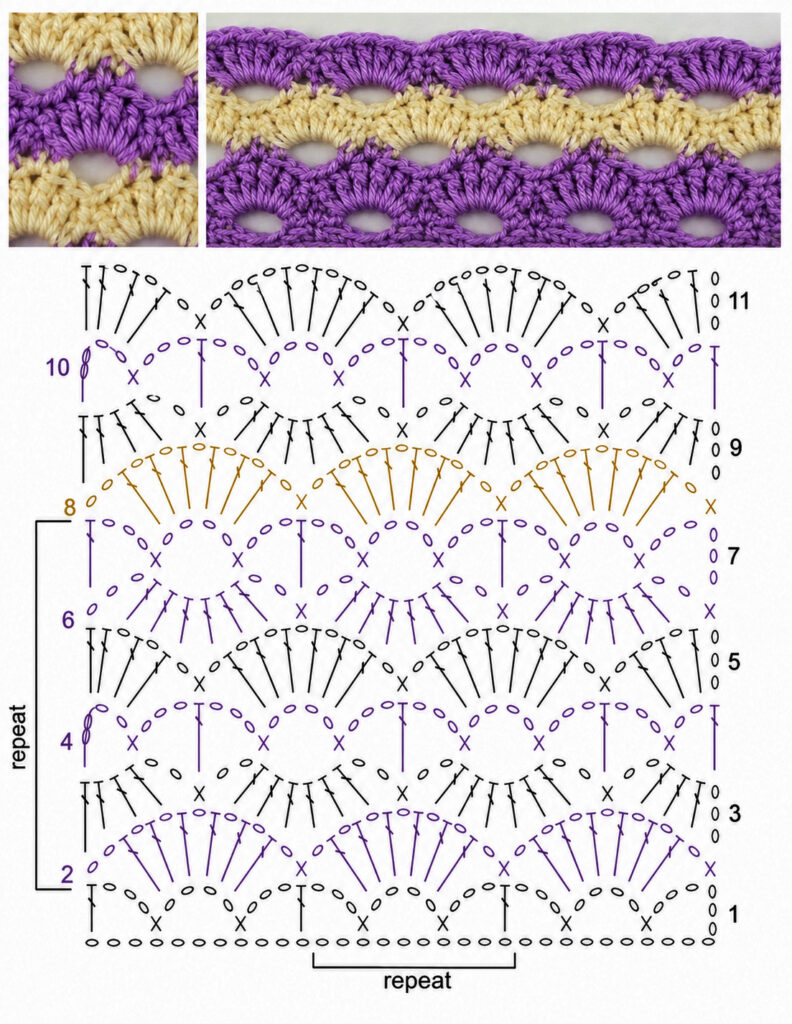
diagram
Color Change Sequence
Changing colors at strategic points helps emphasize the flower-like petals and gives the finished fabric a soft, dimensional appearance.
Follow this color sequence:
- After Row 2: Change from White to Peach Blossom.
- After Row 5: Change to Baby Gray.
- Continue repeating Rows 2–7 according to the color plan.
For the suggested color arrangement, work:
- 6 rows in Peach Blossom
- 5 rows in White
- 10 rows in Baby Gray
Continue the pattern until you finish with Row 7, leaving the flower motif partially formed.
Place a stitch marker in your final stitch. Do not fasten off or cut the yarn yet. This marked location will be useful as the starting point when you begin working the border.
Tips for Crocheting the Petal Stitch
The Petal Stitch becomes much easier to recognize after a few repeats. Keep the following tips in mind as you work:
Keep Your Cluster Stitches Consistent
Try to maintain a similar tension for each cluster. Consistent loops will help the petals appear even and well-defined.
Use Stitch Markers
Because the pattern includes several chain spaces, clusters, and skipped stitches, a stitch marker can help you identify the beginning and ending points of each section.
Choose Soft, Coordinating Colors
Pastels such as peach, cream, gray, blush, lavender, and soft blue can beautifully highlight the floral texture. You can also use a single color if you want the raised petals to create the visual interest.
Count Your Stitches Regularly
The Petal Stitch relies on repeating sections, so checking your work at the end of each row can help you catch mistakes before they become difficult to correct.
Final Thoughts
The Crochet Petal Stitch is a beautiful way to introduce floral texture and dimension into your crochet projects. Its layered clusters create an attractive petal effect, while the repeating structure makes the pattern enjoyable once you become familiar with the sequence.
Whether you’re crocheting a baby blanket, decorative pillow, elegant wrap, or another handmade project, this stitch can give your finished piece a soft and romantic character.
Experiment with different yarn colors and combinations to create your own unique floral effect. With a little practice, you’ll be able to turn this pretty stitch into a wide variety of handmade projects.
Happy crocheting, and let your creativity bloom!

