

 soofha
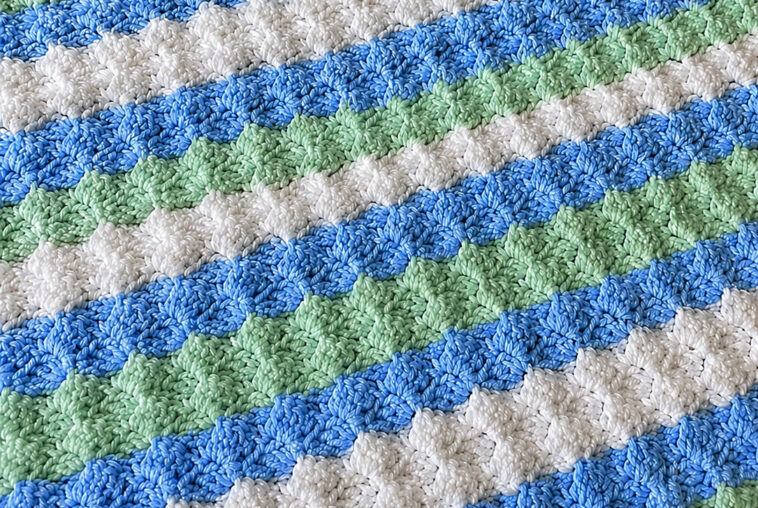
Crochet is a wonderful craft filled with endless possibilities, and the Corner-to-Corner (C2C) technique is one of the most versatile methods to learn. With its diagonal construction and beautiful textured appearance, C2C crochet can be used to create everything from cozy blankets and baby accessories to scarves, pillows, wall hangings, and colorful graphgan designs.
Whether you are completely new to C2C crochet or simply want to refresh your skills, this easy-to-follow tutorial will walk you through the basic technique step by step.
What Is C2C Crochet?
C2C stands for Corner-to-Corner crochet. Rather than crocheting traditional horizontal rows, you build the fabric diagonally, beginning at one corner and gradually increasing the number of crochet blocks until you reach the desired width.
Once the project reaches its widest point, the rows are gradually decreased until you arrive at the opposite corner.
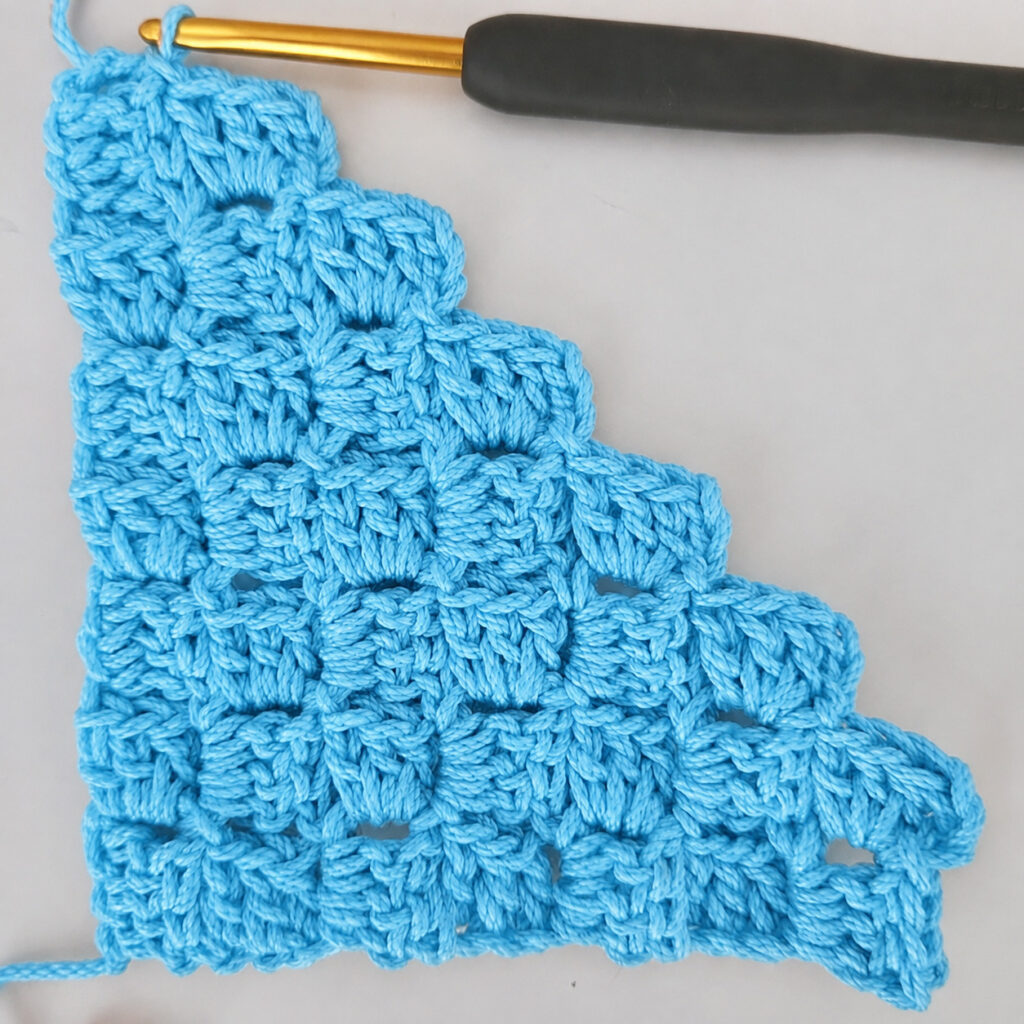
One of the most popular versions of C2C crochet is the boxed C2C stitch. This technique is made from small groups, or “tiles,” that are connected together to form a diagonal grid. Each tile generally consists of a chain-3 space and three double crochet stitches.
The finished fabric has a distinctive geometric texture and is particularly useful for blankets and graph-based crochet designs.
Materials You’ll Need
Before beginning your project, gather the following supplies:
- Yarn in your preferred color or colors
- A crochet hook suitable for your yarn weight
- Scissors
- Tapestry needle for weaving in ends
You can use a single shade for a simple textured project or combine several colors to create stripes, pictures, initials, or other C2C designs.
Abbreviations – US Crochet Terms
- ch – chain
- dc – double crochet
- sl st – slip stitch
- sp – space
C2C Crochet Tutorial
The pattern begins by creating your first C2C tile. From there, additional tiles are added diagonally until the project reaches the desired size.
Creating the First Tile
Chain 6.
Work 1 dc into the fourth chain from the hook, then work 1 dc into each of the next 2 chains.
You have now created your first C2C tile.
Turn your work.
Row 2
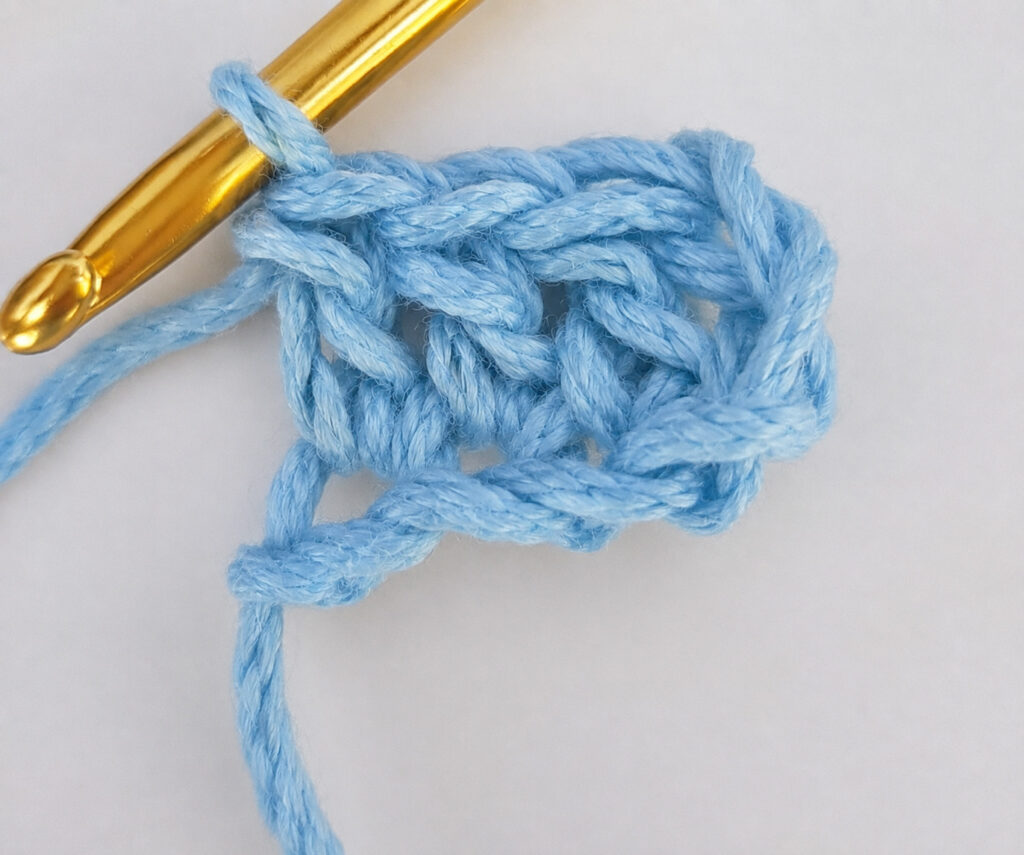
Chain 6.
With the yarn tail pointing downward, work 1 dc into the fourth chain from the hook, followed by 1 dc into each of the next 2 chains.
Slip stitch into the ch-3 space of the first tile.
Chain 3, then work 3 dc into the same ch-3 space.
Turn your work.
You have now created two connected tiles.
Row 3
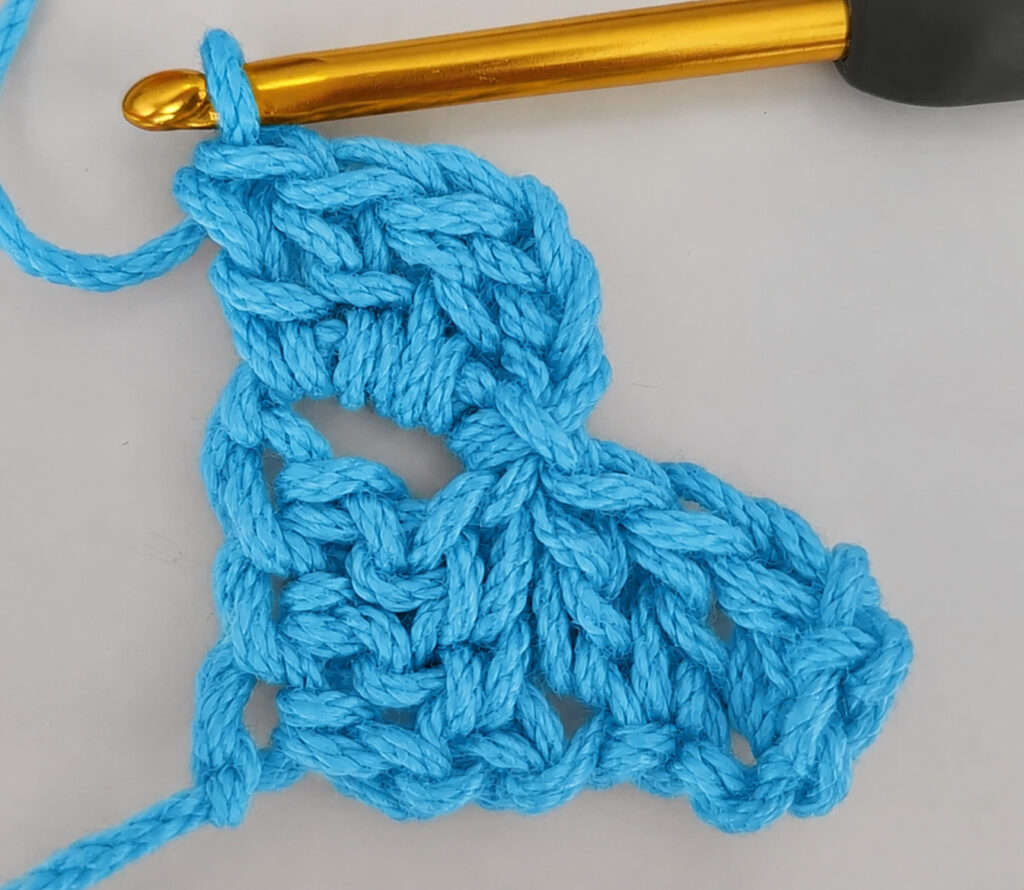
Chain 6.
Work 1 dc into the fourth chain from the hook, followed by 1 dc into each of the next 2 chains.
Slip stitch into the ch-3 space from the previous row.
Chain 3 and work 3 dc into that same space.
Continue working the same sequence across the row:
Slip stitch into the next ch-3 space, ch 3, 3 dc in the same space.
Repeat until you reach the end of the row.
Turn your work.
Row 4
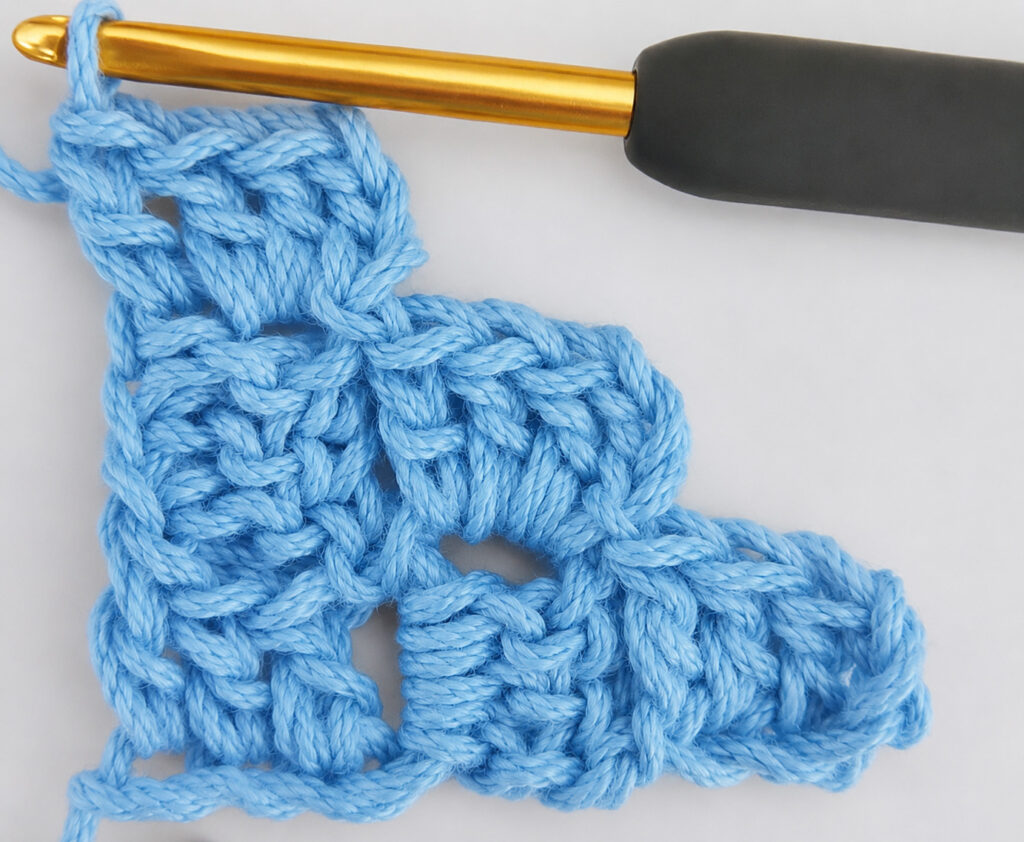
Instead of beginning with a new chain-6 tile, slip stitch across the 3 dc stitches you just made and into the adjacent ch-3 space.
Then work:
Ch 3, 3 dc in the same ch-3 space, slip stitch into the next ch-3 space.
Continue repeating this sequence across the row.
When you reach the final ch-3 space, do not add another tile there.
Turn your work.
Continuing the C2C Pattern
Continue building your project by repeating the tile-building process.
As you add more tiles, the piece will gradually grow diagonally, creating the characteristic C2C appearance.
For a square project, continue increasing until you reach your desired size. You can then begin decreasing the number of tiles in each row to create the second half of the square.
For a rectangular project, you can continue increasing along one side while maintaining the desired width before beginning the decrease section.
Tips for Successful C2C Crochet
Keep Your Tension Consistent
Even tension is especially important when working C2C crochet. If your stitches become too loose or too tight, the individual tiles may vary in size and your finished project may not have straight edges.
Count Your Tiles
Instead of counting individual stitches, it can be easier to count the number of C2C tiles in each diagonal row. This makes it much easier to identify mistakes early.
Experiment With Color
C2C crochet is excellent for colorwork. You can use different shades to create stripes, geometric patterns, names, letters, animals, flowers, or other pictures.
When changing colors, keep your yarn changes organized to prevent unnecessary tangling.
Start With a Small Project
If this is your first time using the C2C technique, consider practicing with a small square, dishcloth, coaster, or baby accessory before starting a large blanket.
Once you become comfortable with increasing, joining tiles, and decreasing, larger projects will become much easier.
Check Your Edges Regularly
Every few rows, take a moment to look at the shape of your project. If the edges begin to look uneven, check your tile count and make sure each tile has been joined correctly.
Why Crochet the C2C Stitch?
The C2C method has become a favorite among crocheters because it is both decorative and adaptable. The diagonal construction creates a beautiful texture while also making the technique perfect for graph patterns.
You can use this method to make:
- Baby blankets
- Adult blankets
- Scarves
- Pillows
- Afghans
- Wall decorations
- Table runners
- Washcloths
- Personalized graphgans
- Seasonal crochet decorations
Its versatility means that the same basic technique can be adapted to projects of many different sizes.
Video Tutorial
If you are a visual learner, watching a video can make the C2C technique much easier to understand. A video tutorial allows you to see exactly where the hook should be inserted, how the tiles are connected, and how each diagonal row is constructed.
For additional visual guidance, you can also explore the C2C crochet tutorial created by The Purple Poncho.
Another helpful resource is the C2C tutorial available from Petals to Picots, which provides additional guidance for learning the technique.
Final Thoughts
The C2C crochet stitch is a fun and creative technique that opens the door to countless crochet projects. Although the diagonal construction may seem unfamiliar at first, the process becomes much easier once you understand how each small tile connects to the next.
Start slowly, pay attention to your tile count, and practice maintaining consistent tension. Before long, you will be able to create beautiful C2C blankets, graphgans, accessories, and personalized designs with confidence.
So grab your favorite yarn and crochet hook, create your first tile, and enjoy discovering the possibilities of Corner-to-Corner crochet. Happy crocheting!

