

 soofha
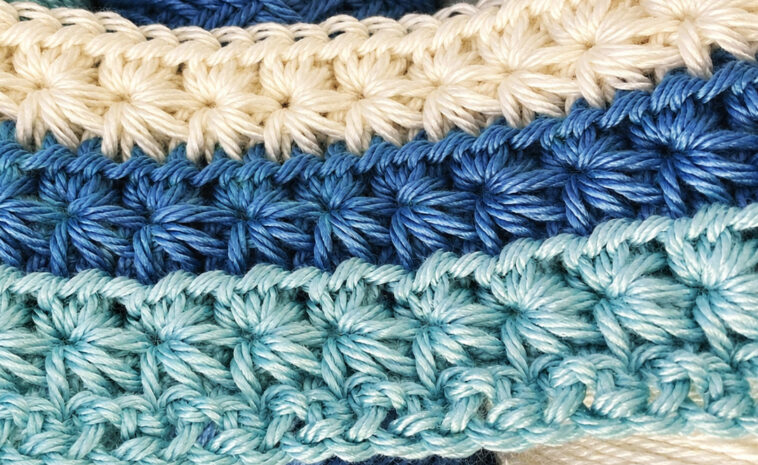
Hello, my crochet friends! It is always exciting to discover a new stitch that can transform a simple handmade project into something truly special. Today, I’m happy to share the beautiful Crochet Star Stitch, a textured design that adds an elegant and cozy touch to all kinds of crochet projects.
At first glance, the Star Stitch can look complicated, especially if you have never worked with it before. However, don’t let its intricate appearance discourage you. Once you understand where to place your hook and how the loops are worked together, the stitch becomes much easier and surprisingly enjoyable.
When I first came across this pattern, I honestly thought it would take a lot of time and patience to master. After reading through the instructions carefully and following a video tutorial, I decided to make a small sample. To my surprise, the technique quickly started to make sense. After a few repeats, I was able to work the stitch much more comfortably.
One of my favorite ways to learn a new crochet stitch is to make a small swatch before starting a larger project. Creating a few little squares allows you to practice the stitch, experiment with different yarn colors, and see how the texture looks before committing to an entire blanket or garment. You can even use small samples to test combinations with other crochet stitches.
Why You’ll Love the Crochet Star Stitch
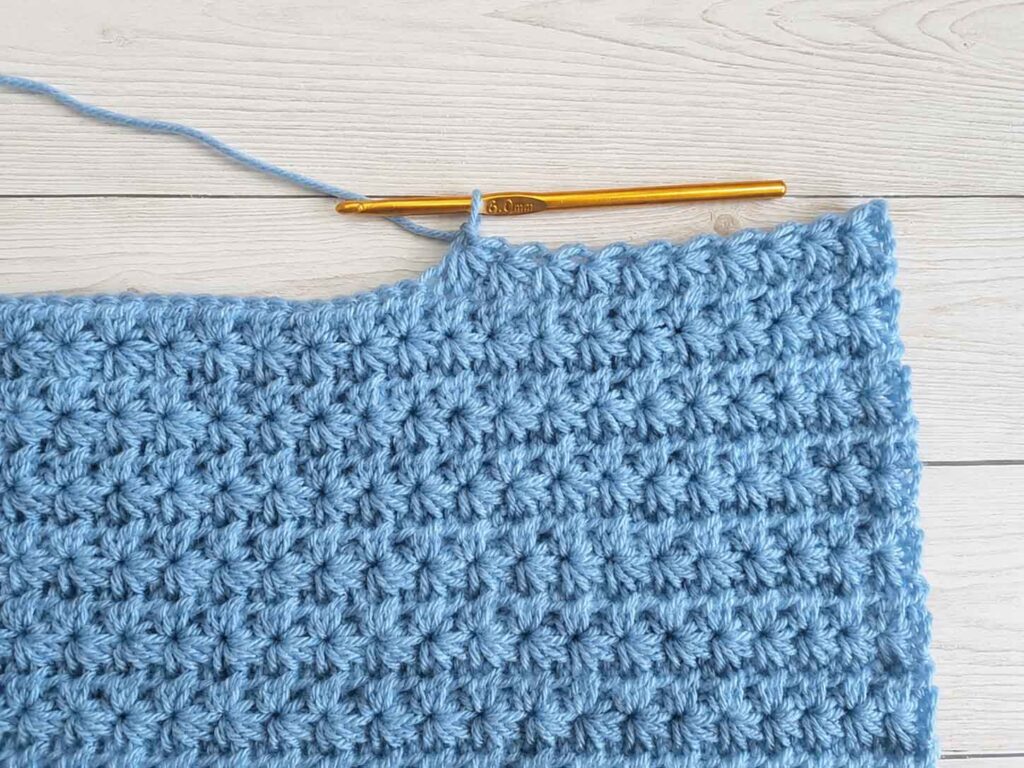
The Star Stitch, also commonly called the Daisy Stitch, creates a wonderfully textured fabric with small star-like shapes across the surface. The finished effect is decorative, soft-looking, and full of dimension.
This stitch works beautifully for many different crochet projects, including:
- Blankets and afghans
- Baby blankets
- Scarves
- Sweaters
- Cardigans
- Hats and caps
- Cowls
- Shawls
- Bags
- Pillow covers
- Dishcloths and decorative pieces
- Borders and accent sections
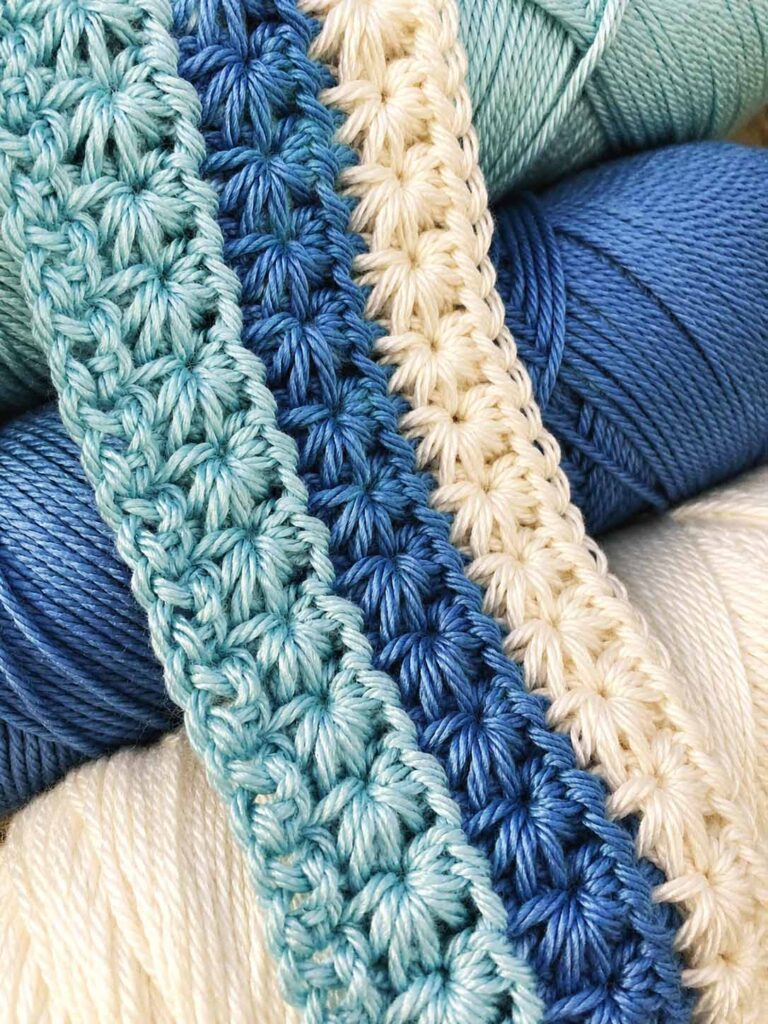
You can work the entire project in a single color for a classic and sophisticated appearance, or introduce multiple colors to make the star shapes stand out. Alternating colors between rows can create a completely different effect and is a wonderful way to personalize your project.
The thick texture also gives finished pieces a warm and comfortable appearance, making this stitch especially attractive for cozy blankets, winter accessories, and other handmade items.
Understanding the Star Stitch
The Star Stitch is created by drawing up several loops and then pulling the yarn through all of them at once. A chain stitch is then used to secure the group of loops and form the center or “eye” of the star.
The pattern uses a simple repeating structure, making it much easier to memorize after you have practiced the first few stars.
For this tutorial, follow the stitch instructions carefully and pay particular attention to the locations where the hook is inserted. The placement of the hook is the most important part of achieving the correct star shape.
Before You Begin
Note: Always use the crochet hook size recommended for the yarn you have chosen, unless you are intentionally adjusting the hook size to change the fabric’s texture or drape.
This stitch pattern is worked over a multiple of 2 stitches plus 7 stitches.
For a small practice swatch, begin with a chain of 19 stitches.
Crochet Star Stitch Step-by-Step
Row 1
Insert your hook into the second chain from the hook. Yarn over and pull up a loop, leaving the loop on your hook.
Insert your hook into the next chain, yarn over, and pull up another loop. Repeat this process four times so that you have 6 loops on your hook.
Yarn over and pull through all 6 loops at once. Then chain 1 to close the stitch.
This chain-1 space forms the center or eye of the Star Stitch.
Next, insert your hook into the chain-1 space you just created. Yarn over and pull up a loop.
Working along the side of the same star, insert your hook between the last post and the next-to-last post along the edge. Yarn over and pull up another loop.
Insert your hook into the chain at the base of the same star, yarn over, and pull up a loop.
Then insert your hook into the next chain twice, pulling up a loop each time.
You should once again have 6 loops on your hook.
Yarn over and pull through all 6 loops, then chain 1 to secure the stitch.
Continue repeating this star-stitch sequence across the row until you reach the final chain.
Work a half double crochet (hdc) into the last chain.
Turn your work.
Row 2
Chain 2.
Work 2 half double crochets (hdc) into the chain-1 eye of each Star Stitch across the row.
When you reach the end, work 1 hdc into the top of the ending post of the final Star Stitch.
Turn your work.
This row creates a smooth textured base and prepares the project for the next row of stars.
Row 3
Chain 3.
Insert your hook into the second chain from the hook, yarn over, and pull up a loop.
Insert your hook into the next chain, yarn over, and pull up another loop.
Next, insert your hook into the following stitch, yarn over, and pull up a loop. Repeat this step three times.
You should now have 6 loops on your hook.
Yarn over and pull through all 6 loops. Then chain 1 to secure the star.
Now insert your hook into the chain-1 eye of the Star Stitch you just made. Yarn over and pull up a loop.
Working down the side of the same star, insert your hook between the last post and the next-to-last post. Yarn over and pull up another loop.
Insert your hook into the stitch at the base of the same star, yarn over, and pull up a loop.
Then insert your hook into the next stitch twice, pulling up a loop each time.
You should again have 6 loops on your hook.
Yarn over and pull through all 6 loops, then chain 1 to close the star.
Continue repeating the Star Stitch across the row.
When you reach the ending chain-2, work 1 hdc into the top of the turning chain.
Turn your work.
Row 4
Repeat Row 2.
Work 2 hdc into the chain-1 eye of each Star Stitch across the row, then finish with the required hdc at the end of the row.
Turn your work.
Continue the Pattern
Once you have completed the first four rows, the rest of the pattern becomes repetitive.
Simply continue working:
Rows 3 and 4 repeatedly
Continue until your crochet piece reaches the desired length. To finish the Star Stitch pattern as written, end after completing Row 4.
Crochet Star Stitch
Tips for Perfect Star Stitches
If this is your first time making the Star Stitch, take your time during the first few rows. The stitch may feel unusual at first because several loops are kept on the hook before they are worked together.
Here are a few helpful tips:
1. Keep Your Loops Even
Try not to pull your loops too tightly. If the loops are too small, it can become difficult to insert your hook into the next spaces and pull the yarn through all six loops.
2. Pay Attention to the Star Eye
The chain-1 space created after each star is important. This small opening becomes the center of the next part of the pattern, so make sure it remains easy to identify.
3. Practice With a Small Swatch
Before beginning a large blanket, make a small sample. This gives you a chance to practice the technique without worrying about making mistakes in a larger project.
4. Experiment With Color
The Star Stitch looks lovely in one color, but changing colors can make the individual stars much more noticeable. Try contrasting shades, soft neutrals, pastel combinations, or an ombré palette.
5. Count Your Stitches
Because the pattern depends on a specific stitch multiple, checking your stitch count regularly can prevent problems later. It is much easier to correct a missed stitch early than several rows later.
Ideas for Using the Crochet Star Stitch
There are so many ways to incorporate this stitch into your crochet projects. A full Star Stitch blanket can create a beautifully textured and cozy fabric, while a few rows can be added between simpler stitch patterns for an interesting contrast.
You could also use the stitch as a decorative section on a scarf, add it to a baby blanket, or incorporate it into a handmade sweater or cardigan.
For smaller projects, the stitch can create lovely textured accessories and home décor pieces. Even a simple border or accent panel can benefit from the distinctive star-shaped texture.
If you are making a blanket, consider combining a neutral background with a contrasting color for the Star Stitch rows. For a softer appearance, choose colors from the same family, such as several shades of blue, pink, cream, or green.
Crochet Star Stitch Video Tutorial
If the written instructions still feel a little difficult to visualize, watching the stitch being worked can make a big difference. A video tutorial can help you see exactly where the hook enters each stitch and how the six loops are gathered together to form each star.
Take your time, pause the video whenever necessary, and practice each star individually until the movement becomes familiar.
Final Thoughts
The Crochet Star Stitch is one of those patterns that looks much more complicated than it actually is. Once you understand the construction of the first few stars and become comfortable with the hook placement, the stitch becomes much easier to work.
Its beautiful texture makes it an excellent choice for blankets, scarves, garments, accessories, and decorative crochet projects. Whether you choose a single shade or experiment with several colors, the finished fabric is sure to have plenty of character.
I hope this tutorial inspires you to pick up your hook and give the Star Stitch a try. Start with a small swatch, practice slowly, and don’t worry if your first few stars aren’t perfect. With a little repetition, your hands will naturally become more comfortable with the technique.
Have you tried the Crochet Star Stitch before? If you have, I’d love to hear about the projects you have made with it. And if this is your first time discovering the stitch, let me know what you think!
Happy crocheting, and enjoy every stitch!

