

 soofha
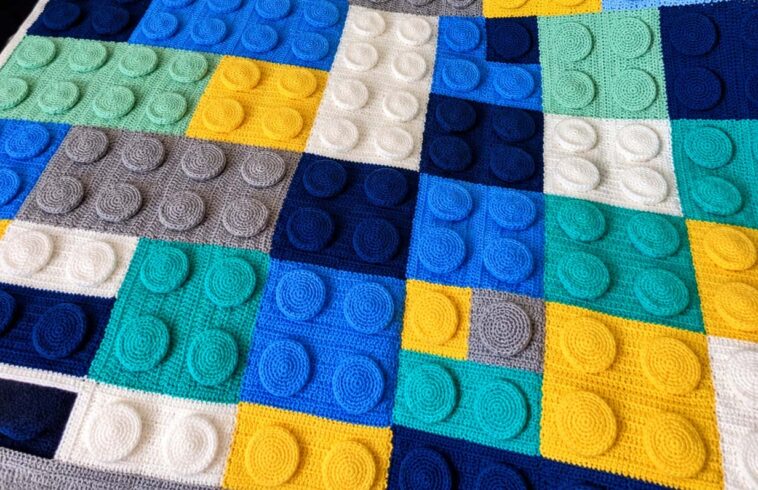
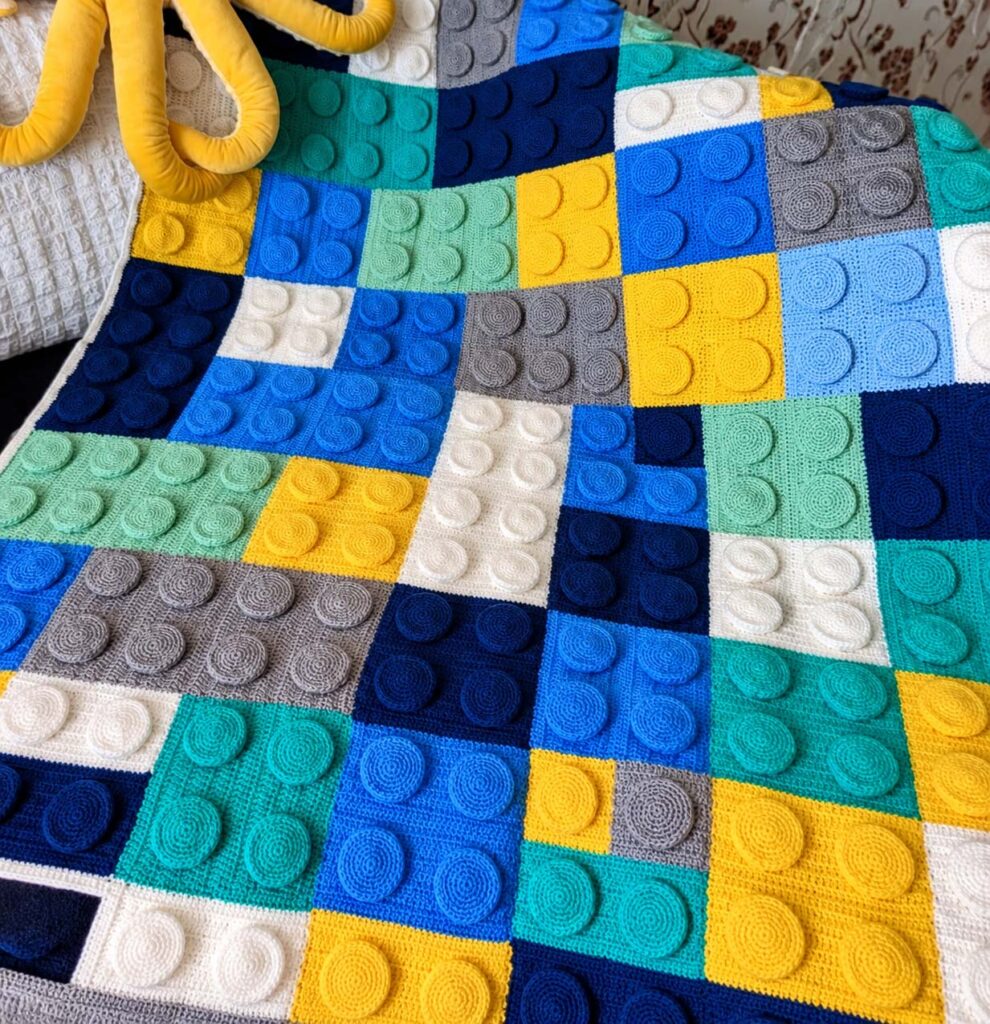
Bring a little color, creativity, and childhood nostalgia to your crochet projects with this fun Lego-inspired blanket pattern! Designed to resemble colorful building bricks, this playful blanket combines bright blocks with raised crocheted dots to create an unmistakable Lego-style look.
It’s a fantastic project for children’s bedrooms, playrooms, family rooms, or anyone who loves colorful and whimsical crochet designs. The individual squares and rectangles are worked separately, decorated with crocheted dots, and then joined together to create the finished blanket.
In this free crochet tutorial, you’ll learn how to make the different Lego-inspired pieces, create the raised dots, assemble the blocks, and finish everything with a colorful multi-round border.
The completed blanket measures approximately 44 inches wide × 51 inches long (112 × 129.5 cm), including the border.
🧵 Special Technique
Join with Single Crochet
Place a slip knot on your crochet hook. Insert the hook into the indicated stitch, yarn over, and pull up a loop. Yarn over once more and draw the yarn through both loops on the hook. One single crochet join is complete.
📌 Pattern Notes
- The blanket consists of 26 squares and 17 rectangles.
- Each individual piece is crocheted back and forth in rows.
- A round of single crochet is worked around each piece to give it a neat, defined edge.
- The Lego-style raised dots are crocheted separately in continuous spiral rounds.
- The dots are sewn securely onto the corresponding blocks.
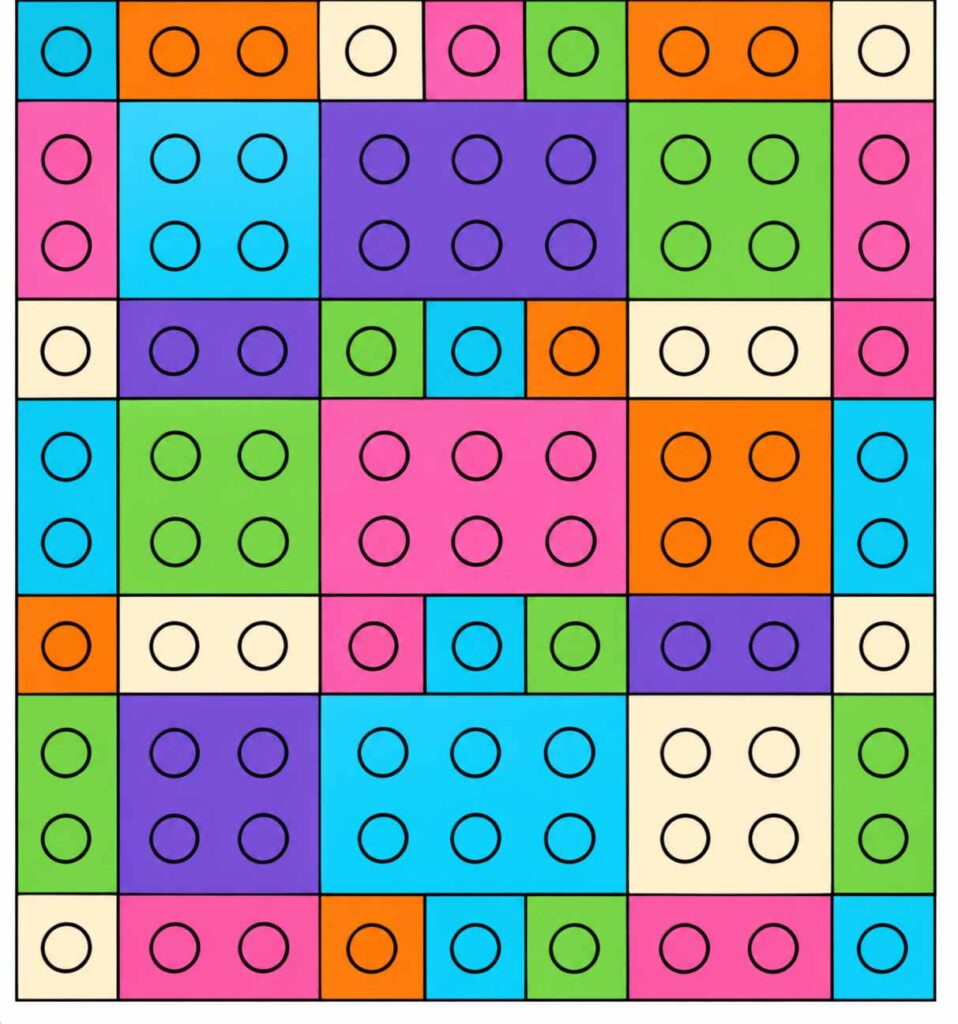
- Arrange the completed pieces according to the assembly layout before joining.
- The blocks are joined with single crochet seams.
- A colorful five-round border completes the blanket.
- For the most recognizable Lego-inspired appearance, use bright primary colors, although the palette can easily be customized.
🟨 1-Dot Squares
Make 20 total
Use:
- 4 in Color A
- 4 in Color B
- 6 in Color C
- 6 in Color D
Instructions
Ch 14.
Row 1: Sc in the 2nd ch from the hook and in each ch across. Turn.
13 sts
Row 2: Ch 1, hdc in each st across. Turn.
Row 3: Ch 1, sc in each st across. Turn.
Rows 4–13: Repeat Rows 2 and 3 five more times.
Round 14 – Right Side
Ch 1, work 3 sc in the first st, then sc across to the final st. Work 3 sc in the last st.
Continue by working 11 sc evenly along the first side.
Work 3 sc in the first ch along the bottom edge, then sc across to the final ch. Work 3 sc in the last ch.
Work 11 sc evenly along the remaining side.
Join with a slip stitch to the first sc.
56 sc
Fasten off.
🟧 2-Dot Rectangles
Make 14 total
Use:
- 4 in Color A
- 4 in Color B
- 4 in Color C
- 2 in Color D
Instructions
Ch 27.
Work the same pattern as the 1-Dot Square through Row 13.
Round 14 – Right Side
Work the edging in the same manner as the 1-Dot Square.
82 sc
Fasten off.
🟥 4-Dot Squares
Make 6 total
Use:
- 1 in Color A
- 1 in Color B
- 2 in Color C
- 2 in Color D
Instructions
Ch 27.
Work as for the 2-Dot Rectangle through Row 25, repeating Rows 2 and 3 eleven times.
Row 26: Repeat Row 2. Do not turn.
Round 27 – Right Side
Ch 1, work 3 sc in the first st, sc across to the last st, then work 3 sc in the final st.
Work 24 sc evenly along the first side.
Work 3 sc in the first ch along the bottom edge, sc across to the last ch, then work 3 sc in the last ch.
Work 24 sc evenly along the remaining side.
Join with a slip stitch.
108 sc
Fasten off.
🟦 6-Dot Rectangles
Make 3 total
Use:
- 1 in Color A
- 1 in Color B
- 1 in Color C
Instructions
Ch 40.
Row 1: Sc in the 2nd ch from the hook and in each ch across.
39 sts
Rows 2–26: Follow the same row pattern used for the 4-Dot Square.
Round 27 – Right Side
Work the same edging as Round 27 of the 4-Dot Square.
134 sc
Fasten off.
⚪ Crochet Dots
Make 90 total
Use:
- 22 in Color A
- 22 in Color B
- 28 in Color C
- 18 in Color D
These small circular pieces create the raised “studs” that give the blanket its signature Lego-inspired appearance.
Instructions
Ch 1.
Round 1 – Right Side
Work 6 sc into the chain.
Do not join.
6 sc
Place a marker to identify the beginning of the round.
Round 2
Work 2 sc in every stitch around.
12 sc
Round 3
Sc in the next stitch, 2 sc in the next stitch. Repeat around.
18 sc
Round 4
Working through the back loops only, sc in each stitch around.
Join with a slip stitch.
Fasten off.
Optional 3D Finish
For an extra raised effect, add a small amount of fiberfill inside each dot before sewing it onto the blanket. Avoid overstuffing—the dots should remain soft and slightly rounded.
🧷 Assembling the Lego Blanket
Once all of your squares, rectangles, and dots are finished, it’s time to put the blanket together.
Before joining anything, lay all of the pieces on a flat surface with the right side facing upward. Arrange them according to your desired layout or assembly diagram.
Take your time with this step because the placement of the different colors will determine the overall appearance of the finished blanket.
Attaching the Dots
Center the crocheted dots on their matching-color blocks.
Position the dots approximately:
- 5 rows from the top and bottom
- 3–4 stitches from each side
Try to keep the dots aligned horizontally and vertically so that the finished blanket has a neat, organized appearance.
Sew each dot securely in place using matching yarn or a yarn needle.
If you stuffed the dots, make sure they are attached firmly so they retain their rounded shape.
Joining the Blocks
After all the dots have been attached, begin joining the blanket pieces.
First, join the blocks vertically, followed by the horizontal seams.
Using the Join with Single Crochet technique, place the right sides of the pieces together. Insert your hook through both layers, yarn over, pull up a loop, yarn over, and draw through both loops.
Continue working single crochet stitches across the seam to connect the pieces.
Keep your tension consistent throughout the joining process to prevent the blanket from becoming too tight or puckered.
🧶 Finishing Border
The colorful border gives the blanket a polished finish while adding even more of the bright, playful character of the Lego-inspired design.
Round 1 – Color A
Work sc in every stitch around the blanket.
At each corner, work 3 sc in the center stitch of the existing 3-sc corner group.
Work 1 sc at each seam as needed.
Join with a slip stitch.
522 sc
Round 2 – Color B
Join with a slip stitch.
Ch 2, which counts as the first hdc.
Work hdc in each stitch around.
Work 3 hdc in each corner.
530 hdc
Fasten off.
Round 3 – Color C
Work sc in each stitch around.
Work 3 sc in every corner.
538 sc
Fasten off.
Round 4 – Color D
Repeat Round 2.
Work hdc around the blanket, placing 3 hdc in each corner.
546 hdc
Fasten off.
Round 5 – Color A
Work a slip stitch in every stitch around.
Join with a slip stitch and fasten off.
Carefully weave in all remaining yarn ends.
📏 Finished Blanket Size
The completed Lego-inspired crochet blanket measures approximately:
44 inches wide × 51 inches long
112 × 129.5 cm
The measurements include the finished border.
Keep in mind that the final dimensions can vary slightly depending on your yarn, hook size, and individual crochet tension.
🌈 Customize Your Lego Blanket
One of the best things about this pattern is how easily you can change the color scheme.
For a traditional Lego-inspired appearance, choose bright shades of red, yellow, blue, green, and other bold colors. You can also create a softer version using pastel shades for a nursery or child’s bedroom.
For a more modern look, try coordinating colors that match your home décor.
You could even make the individual blocks in a limited color palette for a more sophisticated throw while keeping the raised dots as the playful focal point.
🧸 A Fun Crochet Project for All Ages
This Lego Blanket is more than just a colorful crochet project—it’s a wonderful way to combine simple shapes, interesting construction techniques, and creative color placement.
The individual blocks are manageable pieces to work on, while the final assembly transforms them into a fun statement blanket. The raised dots add texture and dimension, giving the finished design the look of oversized building bricks.
It also makes a wonderful handmade gift for children, Lego enthusiasts, grandchildren, or anyone who enjoys bright and nostalgic designs.
Whether you make it as a cozy throw, a playful bedroom blanket, or a special handmade gift, this project is sure to bring a smile.
📥 Free Pattern PDF
Ready to start building your own colorful crochet masterpiece?
Download the free pattern PDF and gather your favorite yarn colors, crochet hook, yarn needle, and fiberfill if you want to create the optional 3D dots.
Have fun choosing your colors, assembling your blocks, and watching this playful Lego-inspired blanket come together one stitch at a time!

