

 soofha
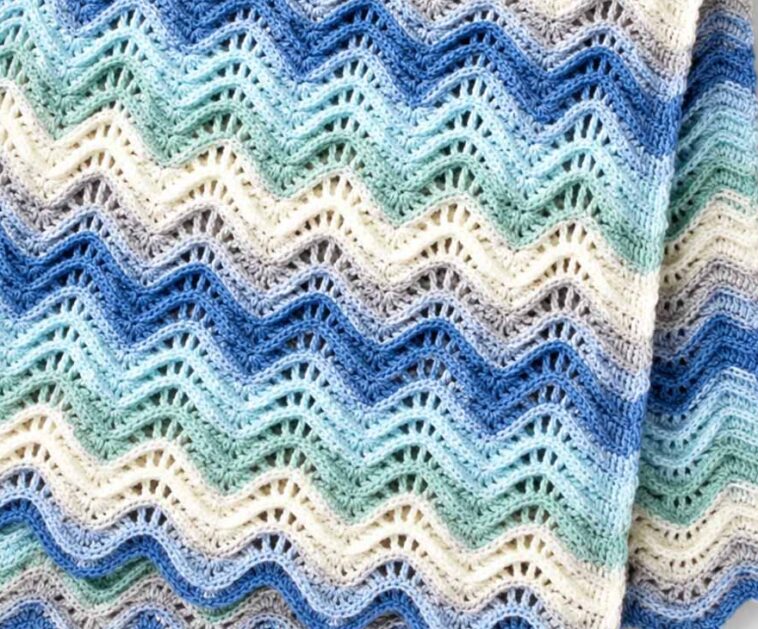
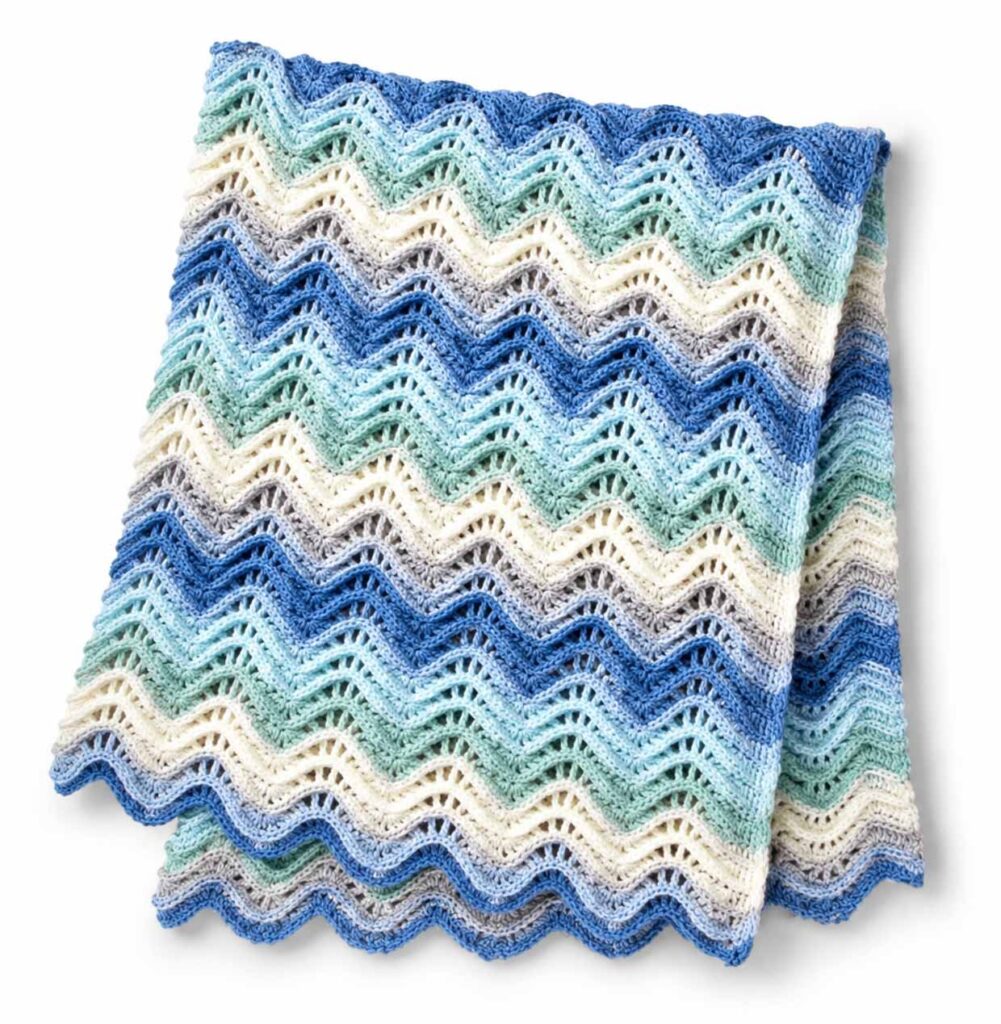
Hello, my dear crochet friends, and welcome back to our cozy little corner at Grandma’s Craft. Today, I’m delighted to share a beautiful Ripple Ridges Blanket pattern that combines flowing waves with wonderfully raised texture.
There is something so comforting about a ripple blanket. The gentle peaks and valleys bring to mind rolling ocean waves, peaceful hills, or the soft movement of a breeze across the countryside. This design is especially lovely because it combines familiar crochet stitches with textured post stitches, creating a blanket that looks intricate while remaining enjoyable to work.
Inspired by the original pattern, this blanket is a wonderful project for crocheters who enjoy repeating stitch sequences and relaxing, rhythmic patterns. Once you become familiar with the first few rows, the design begins to flow naturally through your hands.
What Makes the Ripple Ridges Blanket Special?
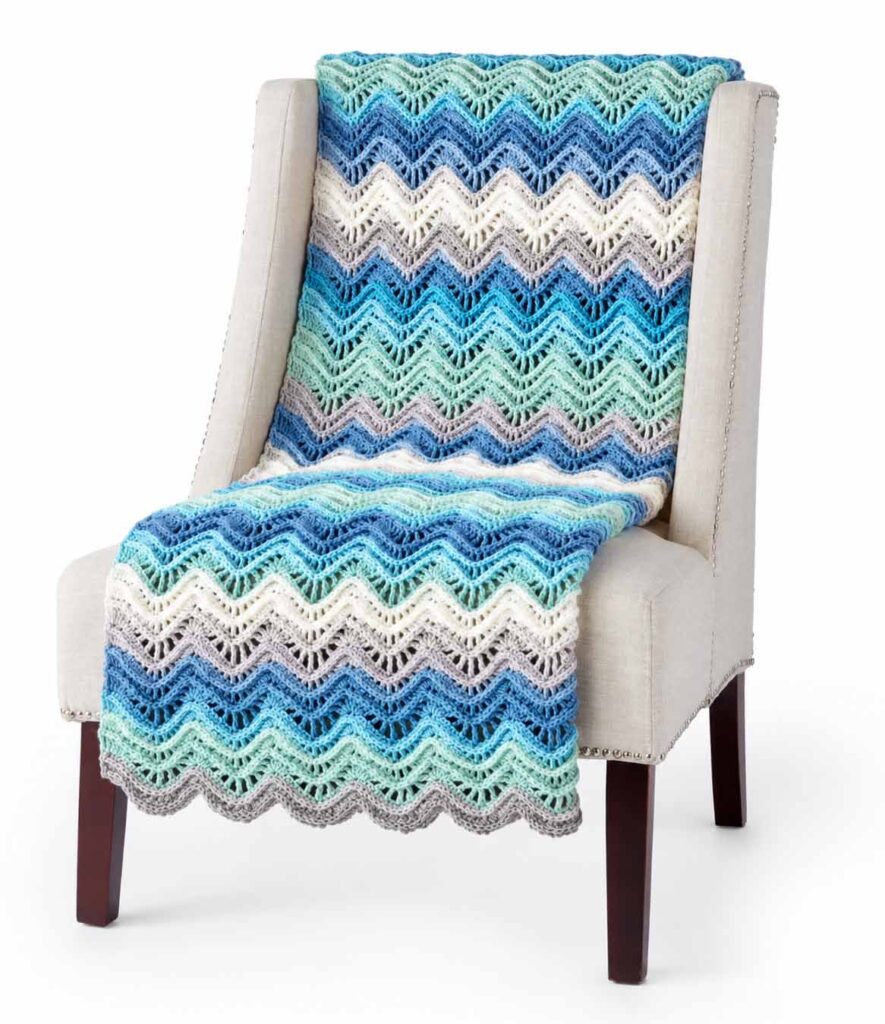
The beauty of this blanket comes from the combination of height, movement, and texture.
Rows of double crochet create the recognizable ripple shape, while rows of single crochet and front post single crochet add raised ridges to the surface. These ridges give the blanket a wonderfully tactile finish and make the fabric much more interesting than a simple flat crochet design.
Run your fingers across the finished fabric and you can feel each little ridge and wave. It is soft, dimensional, and wonderfully cozy.
The ripple effect is created by carefully combining increases and skipped stitches. Working several stitches into selected stitches creates the peaks, while skipping stitches produces the valleys. Repeating this sequence across the row creates the characteristic wave.
Ripple Ridges Blanket
A Relaxing Crochet Project
When you first look at a ripple pattern, the shaping may seem a little complicated. But please don’t worry, sweetheart. Once you have completed a few repeats, the rhythm becomes much easier to remember.
That is one of the things I love most about this type of blanket. After a little practice, your hands begin to anticipate the next stitch, allowing you to settle into a peaceful crochet rhythm.
It is the perfect project to work on while enjoying a cup of tea, listening to music, or relaxing at the end of a busy day.
So gather your yarn, pick up your hook, and let’s create something beautiful together.
Materials
For this cozy Ripple Ridges Blanket, you will need:
- Medium-weight yarn
- Ombré or color-changing yarn for a soft gradient effect
- US H/8 (5 mm) crochet hook
- Yarn needle
- Scissors
- Stitch markers, if desired
The finished blanket can be adjusted to your preferred size by modifying the foundation chain while maintaining the required stitch repeat.
Gauge
The pattern information includes the following gauge measurements:
- 12 single crochet × 13 rows = 4 inches
- Pattern gauge: 19 stitches × 8 rows = 4 inches
Always make a small gauge swatch if you want your finished blanket to closely match the intended dimensions.
Finished Size
The blanket can be made into a generous, cozy throw size. You can also make it smaller or larger depending on your needs.
A larger version would make a lovely bedspread, while a smaller version could be perfect for a baby, lap blanket, or decorative throw.
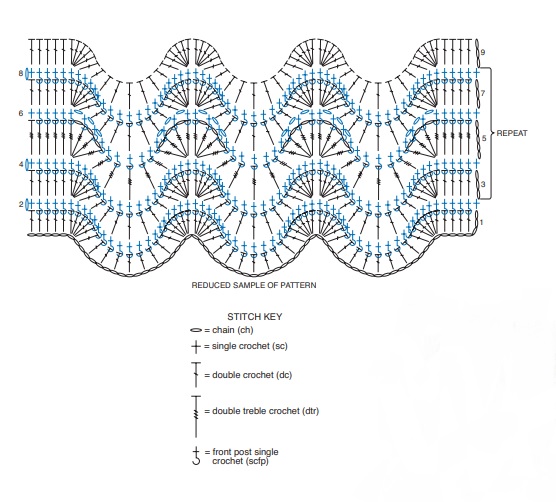
Crochet Abbreviations – US Terms
- ch – chain
- sc – single crochet
- dc – double crochet
- dtr – double treble crochet
- scfp – single crochet front post
The combination of tall stitches and post stitches is what gives this blanket its distinctive texture.
Foundation Chain
Begin with a foundation chain using a stitch count that fits the required pattern repeat.
If your chain is long, don’t rush. Count your stitches carefully, and consider placing stitch markers at regular intervals. This can make counting much easier, especially when working with a large blanket.
The foundation chain establishes the width of your blanket, so taking a little extra care at this stage will make the following rows much more enjoyable.
Row 1 – Creating the Ripple
Begin working double crochet stitches into the foundation chain.
Work the opening double crochet stitches as instructed by your chosen pattern repeat. As you move across the row, begin forming the ripple by combining increases and skipped stitches.
Work several double crochet stitches into designated stitches to create the raised peaks.
Then skip the required stitches to create the valleys.
Continue alternating the increases and skipped stitches across the row.
As the row develops, you will begin to see the first gentle waves taking shape.
Row 2 – Building the Ridges
Chain 1 and turn your work.
Work the required single crochet stitches across the row, incorporating front post single crochet stitches around the posts of selected stitches.
These post stitches pull sections of the fabric slightly forward, creating the raised ridges that give this blanket its wonderful texture.
Take your time with this row. The post stitches may feel unfamiliar at first, but after a few repetitions they become much easier.
Row 3 – Repeat the Ripple
Return to the taller stitches and continue the ripple formation.
Work double crochet stitches while repeating the established increase-and-skip sequence.
Remember:
- Increased stitches create the peaks.
- Skipped stitches create the valleys.
- Repeating the sequence produces the flowing wave effect.
Try to maintain consistent tension throughout the row so that the ripple remains even.
Row 4 – Textured Row
Repeat the textured stitch sequence from the previous ridge row.
Work single crochet and front post single crochet stitches according to the established pattern.
At this point, you should begin seeing the combination of waves and raised ridges developing across the blanket.
Row 5 – Adding Taller Stitches
Now we introduce the taller double treble crochet stitch.
Chain 5, or follow the turning-chain instructions for your pattern.
Work the required double treble crochet stitches across the row.
As before, work multiple stitches where increases are needed to form the peaks and skip the designated stitches to create the valleys.
The taller stitches add a little openness and elegance to the ripple design, giving the blanket additional visual movement.
Row 6 – Defining the Texture
Work another textured row using single crochet and front post single crochet stitches.
Follow the established stitch placement carefully.
Where the pattern calls for chain spaces, work them as instructed. This row helps bring the taller stitches together and strengthens the definition of the ripple ridges.
Row 7 – Continue the Waves
Return to the double crochet ripple sequence.
Continue forming your peaks and valleys using the same increase-and-skip technique.
By now, the stitch pattern should feel much more familiar.
Row 8 – Repeat the Ridge
Work the textured single crochet and front post single crochet sequence once again.
This completes the basic eight-row rhythm of the blanket.
Main Pattern Repeat
Now comes the relaxing part.
Once the foundation rows are established, repeat Rows 3–8 throughout the blanket.
Continue repeating the six-row sequence until your blanket reaches your desired length.
As you work, keep checking your stitch count at the end of each row. Ripple patterns depend on consistent increases and decreases, so catching a missing stitch early can save you from having to unravel several rows later.
Tips for a Beautiful Ripple Blanket
Keep Your Tension Consistent
Try to maintain an even tension throughout your project. If your tension changes dramatically between rows, the ripple may become uneven.
Count Your Peaks and Valleys
If you notice that the blanket is beginning to look crooked or the waves are no longer lining up, stop and check your stitch count.
Use Stitch Markers
Stitch markers can be especially helpful when working with a large foundation chain or when keeping track of the repeated ripple sections.
Let the Yarn Do the Work
Ombré and self-striping yarns can look especially beautiful with this pattern. The changing colors emphasize the movement of the waves without requiring you to change yarn manually at every color section.
Take Your Time
There is no need to rush. Crochet is meant to be enjoyable. If you make a mistake, simply undo the affected stitches and continue.
Finishing the Blanket
Continue working the pattern until the blanket reaches your preferred length.
For a neat and tidy ending, finish after completing a textured row if that is how the original pattern is structured.
Fasten off your yarn and leave a suitable tail.
Using a yarn needle, carefully weave the loose ends into the back of your work. Trim any excess yarn once the ends are securely hidden.
You may also wish to gently block the finished blanket to help even out the stitches and emphasize the ripple pattern.
Enjoy Your Finished Ripple Ridges Blanket
And there you have it — a beautiful Ripple Ridges Blanket filled with movement, texture, and cozy handmade charm.
The flowing waves make this blanket wonderfully decorative, while the raised ridges give it a soft, dimensional feel. Made with an ombré yarn, the colors can transition beautifully from one section to another, creating an especially eye-catching finished piece.
It would look lovely folded over the arm of a favorite chair, draped across the back of a sofa, placed at the end of a bed, or wrapped around your shoulders on a chilly evening.
It would also make a heartfelt handmade gift for someone special.
Why You’ll Love This Pattern
There is something deeply satisfying about watching a simple strand of yarn transform into a blanket filled with waves and texture.
At the beginning, you may concentrate carefully on every stitch. But after several repeats, the pattern begins to settle into a comfortable rhythm. Before long, you may find yourself crocheting almost automatically, enjoying the peaceful repetition.
And perhaps that is the real beauty of handmade crochet.
Every stitch represents a little bit of time, patience, and care.
When you finally reach the last row and hold the completed blanket in your hands, you are not simply looking at yarn. You are looking at hours of creativity and a handmade piece that can bring warmth and comfort for years to come.
Ripple Ridges Blanket PDF
If you prefer working from a printable pattern, a Ripple Ridges Blanket PDF can be especially convenient. A printed pattern allows you to keep the instructions beside you while crocheting and makes it easier to mark your progress as you complete each repeat.
Whether you follow the pattern from a screen or work from a printed copy, remember to enjoy the process and take your time.
Final Thoughts
As you finish those final stitches and weave in the last loose ends, pause for a moment and admire your work.
Look at those beautiful peaks and valleys.
Feel the raised ridges beneath your fingertips.
Think about all the quiet moments spent creating each section.
That is what makes crochet so special. The finished blanket is wonderful, but the journey of making it is just as meaningful.
Thank you so much for spending some cozy crochet time with me here at Grandma’s Craft. I hope this Ripple Ridges Blanket inspires you to pick up your hook, choose your favorite yarn, and create something that brings warmth and happiness into your home.
And if you enjoyed this pattern, be sure to explore our other crochet projects for more cozy blankets, beautiful stitch patterns, and handmade inspiration.
Happy crocheting, my dear friends! 💛🧶

