

 soofha
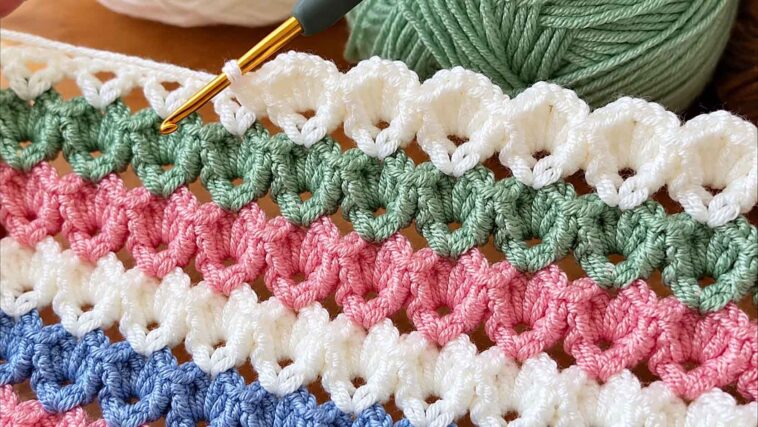
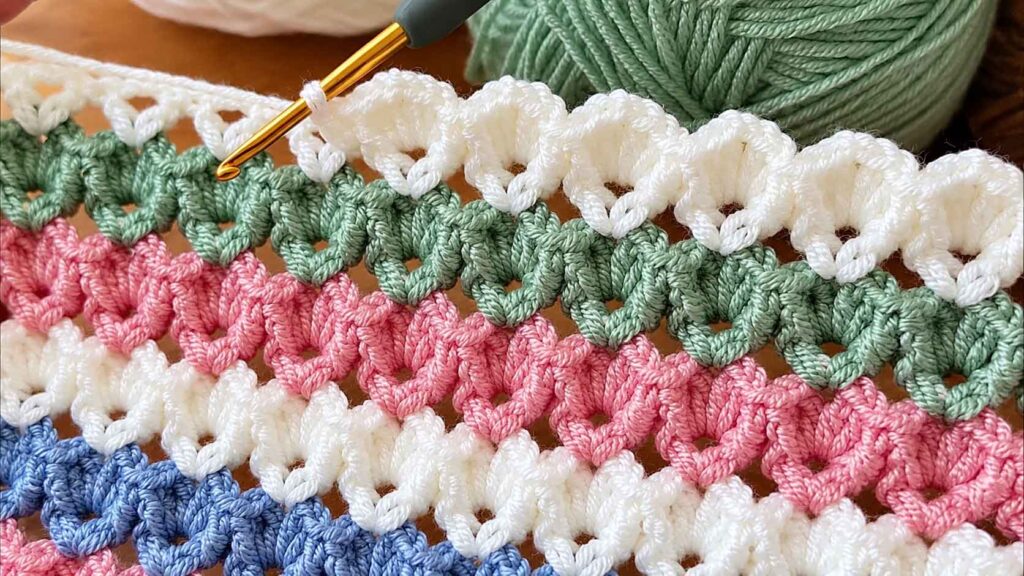
If you love crochet stitches with plenty of texture, the 3D Shell Stitch is definitely one to try. The raised shells give this stitch a beautiful layered effect, and the finished fabric has a lovely amount of depth without being overly complicated to work.
I especially like this stitch for projects where you want the pattern itself to stand out. It works beautifully for baby blankets, scarves, shawls, cushion covers, and cozy home décor pieces. You can also play around with different yarn colors to make the shells really pop.
The stitch may look intricate at first, but once you get through the first few rows, the pattern becomes much easier to follow. If you’re newer to crochet, I recommend making a small swatch first so you can get comfortable with the front post stitches before starting a larger project.
Crochet Terms Used in This Pattern
Here are the abbreviations used throughout the pattern:
- CH – Chain
- DC – Double Crochet
- RPT – Repeat
- SLST – Slip Stitch
- ST – Stitch
- FPDC – Front Post Double Crochet
- FPDC2TOG – Front Post Double Crochet Two Together
- SHELL – 3 DC, CH 1, 3 DC
- V-ST – DC, CH 2, DC
- PREV – Previous
Materials You’ll Need
You don’t need a long list of supplies for this project. Gather:
- Yarn of your choice
- A crochet hook suitable for your yarn
- Scissors
- Tapestry needle for weaving in the ends
For a more defined texture, medium or worsted-weight yarn works particularly well. A smooth cotton or acrylic yarn is also a good choice because the stitches are easy to see.
3D Shell Stitch Crochet Pattern
Foundation Chain
Begin with a foundation chain of 37 stitches, or any number that follows the pattern repeat of 4 + 1.
If you want to make your project wider or narrower, simply adjust the starting chain while keeping that stitch multiple in mind.
Row 1
Make a DC in the 6th CH from the hook.
Next, CH 2, then make another DC in the same chain. This creates your first V-stitch.
Now repeat the following across the row:
Skip the next 3 CHs, then make a V-ST (DC, CH 2, DC) in the next CH.
Continue working the V-stitches across the foundation chain.
When you reach the end, skip the next 2 chains and make a DC in the final CH.
CH 3 and turn.
Row 2
This is where the raised texture of the stitch begins.
Make an FPDC around the first DC of the V-ST from the previous row.
Then repeat the following sequence across the row:
In the next V-ST space, work a SHELL (3 DC, CH 1, 3 DC). Then make an FPDC2TOG around the last DC of the current V-ST and the first DC of the next V-ST.
Continue repeating this sequence across the row.
After working the final shell, make an FPDC around the last DC of the previous row’s V-ST.
Finish the row with a DC in the top of the turning chain.
CH 3 and turn.
Row 3
For the next row, the pattern becomes much simpler.
Repeat the following across the row:
Make a V-ST in the CH-1 space of each SHELL from the previous row.
Continue across until you reach the end.
Finish by making a DC in the turning chain.
CH 3 and turn.
How to Continue the 3D Shell Pattern
Once you’ve completed the first three rows, the main pattern is simply a matter of repeating Rows 2 and 3.
As you work, you’ll see the shells begin to build on top of one another, creating that raised, dimensional look that gives this stitch its name.
You can continue repeating these two rows until your project reaches your desired size.
For the final row, you have two options:
- Finish with Row 2 for a more scalloped and wavy edge.
- Finish with Row 3 if you’d rather have a straighter edge.
Access the Free Crochet Pattern Here
Tips for Getting Beautiful 3D Shells
Keep Your Tension Consistent
Try not to crochet too tightly while working the front post stitches. Consistent tension will help the shells maintain their shape and keep the finished fabric looking even.
If your first few shells look slightly different from one another, don’t worry. After a few repeats, your hands will naturally settle into the stitch pattern.
Choose Yarn With Good Stitch Definition
A smooth yarn is ideal for this stitch because it allows the raised shells to stand out clearly. Cotton and smooth acrylic yarns are both great options.
Very fuzzy or highly textured yarn can hide some of the details, especially when you’re first learning the pattern.
Make a Small Swatch First
Before starting a blanket or another large project, make a small sample. This gives you a chance to practice the FPDC and FPDC2TOG and also lets you see how your chosen yarn and hook work together.
It’s much easier to adjust your tension or hook size on a small swatch than halfway through a blanket!
Experiment With Color
This stitch is also fun to make in multiple colors. You could use two alternating shades for a simple look or choose several colors for a more playful blanket.
A solid color, on the other hand, really highlights the texture of the shells and gives the finished piece a classic appearance.
What Can You Make With the 3D Shell Stitch?
There are plenty of ways to use this stitch once you’ve got the hang of it.
Try it for:
- Baby blankets
- Throw blankets
- Scarves
- Shawls
- Pillow covers
- Baby accessories
- Crochet bags
- Home décor projects
The raised texture makes it particularly nice for cozy projects where you want the finished piece to have some extra dimension.
A Few Things to Keep in Mind
The foundation chain needs to follow the multiple of 4 + 1 rule. This is important if you’re changing the width of your project.
Also, remember that crochet tension can make a big difference in the finished size. Two people can use the same yarn and hook but end up with slightly different measurements because their tension isn’t exactly the same.
If your fabric feels too stiff, try loosening your tension or going up a hook size. If it feels too loose, a smaller hook may give you the definition you’re looking for.
Final Thoughts
The 3D Shell Stitch is one of those patterns that looks much more complicated than it actually is. Once you understand how the V-stitches and front post stitches work together, the pattern starts to fall into a comfortable rhythm.
I think it’s especially pretty when used for blankets, but don’t be afraid to experiment with it on smaller projects too. Try different yarn weights, color combinations, and finished edges to make the stitch your own.
If you’re trying this pattern for the first time, start with a small swatch and take your time with Row 2. That’s the row that creates most of the texture, so getting comfortable with those stitches will make the rest much easier.
And, of course, I’d love to see what you make! Share your finished project and let us know what colors you chose.
Happy crocheting! 🧶❤️
Video Tutorial
Prefer to watch the stitch being worked? A video tutorial can be especially helpful for this pattern because you can see exactly where the front post stitches are placed.
If you have any questions while working on the 3D Shell Stitch, leave a comment below. I’d be happy to hear how your project is coming along!

